Introduction
Imagine turning a digital design into a physical object in just a few hours. No molds. No tooling. No waiting weeks for a single part. That is what liquid-based rapid prototyping delivers. This technology uses liquid resins that harden under light, building highly detailed prototypes layer by layer. It has changed how products are developed across medical, aerospace, automotive, and consumer goods industries. This article explains how it works, why it matters, and how you can use it to move from idea to testable product faster than ever.
What Is Liquid-Based Rapid Prototyping?
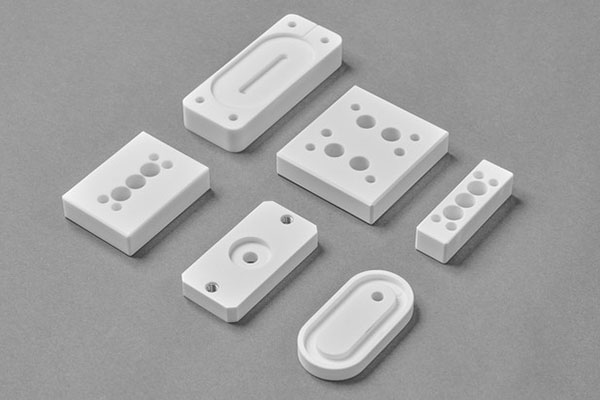
Liquid-based rapid prototyping is a manufacturing process that creates three-dimensional objects from liquid photopolymers. A digital model guides a light source—usually a projector—that solidifies the liquid resin in thin layers. The result is a highly accurate prototype with fine details and smooth surfaces.
Unlike traditional methods that cut away material from a solid block, this process builds objects additively. It adds material only where needed. This approach reduces waste and allows for shapes that would be impossible with machining or molding.
The core technology relies on photopolymerization. Certain liquid resins are formulated to harden when exposed to ultraviolet or visible light. By controlling where the light hits, the machine creates precise solid structures.
How Does the Process Work?
The process follows a clear sequence of steps. Each step requires precision, but modern machines handle most of it automatically.
Digital Model Preparation
The journey starts with a CAD file of your design. This file is imported into software that slices it into ultra-thin layers. Typical layer thickness ranges from 25 to 100 microns. Thinner layers produce smoother surfaces but take longer to print.
Machine Setup
The machine operator loads the appropriate resin into a vat. Resin type depends on the prototype’s intended use—standard for general models, high-strength for functional parts, or biocompatible for medical applications.
Machine parameters like exposure time and layer thickness are set based on the resin and design complexity.
Printing Process
A DLP (Digital Light Processing) machine projects light patterns onto the liquid resin. Each pattern corresponds to one layer of the model. The light cures the resin, turning it from liquid to solid.
After each layer, the build platform lowers slightly. Fresh resin flows over the cured layer, and the next pattern is projected. This repeats until the entire object is formed.
Post-Processing
Once printing finishes, the prototype requires finishing steps:
- Cleaning: Uncured resin is removed using alcohol or solvents
- Support removal: Temporary supports are detached carefully
- Polishing: Surfaces may be smoothed or coated
- Thermal treatment: Some resins are heat-cured to improve mechanical properties
What Are the Core Technologies?
Two main technologies drive liquid-based prototyping.
Digital Light Processing (DLP)
DLP machines use a digital micromirror device (DMD) containing millions of tiny mirrors. Each mirror controls a single pixel of light. The system projects entire layers at once, curing resin quickly.
Modern DLP machines include features that improve reliability:
- Real-time monitoring: Sensors verify each layer is forming correctly
- Automatic resin leveling: Keeps the liquid surface flat for consistent layers
- Integrated temperature control: Maintains optimal resin viscosity
Liquid Resins
The resin you choose determines the prototype’s properties. Options include:
| Resin Type | Key Properties | Common Applications |
|---|---|---|
| Standard | Good detail, general-purpose | Concept models, visual prototypes |
| High-Strength | Impact resistance, load-bearing | Functional testing, mechanical parts |
| Biocompatible | Safe for skin contact, sterilizable | Surgical guides, dental appliances |
| High-Temperature | Heat resistance up to 200°C+ | Automotive under-hood components |
| Flexible | Rubber-like elasticity | Gaskets, soft-touch surfaces |
What Advantages Does It Offer Over Traditional Methods?
The benefits go beyond just speed.
Time and Cost Efficiency
Traditional prototyping often requires mold-making, machining, or manual assembly. A single prototype can take weeks and cost thousands. Liquid-based prototyping delivers parts in hours without complex tooling.
A medical device startup needed a custom surgical guide. Traditional methods quoted $3,000 and three weeks. A DLP-printed prototype cost $200 and was ready in 36 hours. The team used the extra time to run three design iterations before finalizing.
Enhanced Precision and Detail
Layer thicknesses down to 25 microns capture fine details that other processes miss. Threads, textures, and small features reproduce accurately.
For a dental lab producing aligners, this precision matters. Each aligner must fit precisely against teeth. DLP printing achieves the accuracy needed for clinical use.
Greater Design Freedom
Machining and molding have geometric limits. You cannot machine a hollow internal channel easily. You cannot mold a part with interlocking components without complex tooling.
Liquid-based printing handles these challenges easily. Complex geometries, internal cavities, and organic shapes are standard. Designers are free to optimize for function, not manufacturing constraints.
Reduced Waste
Subtractive methods cut away material, often wasting 50–90% of the original block. Additive methods use only the material needed for the part. This reduces both cost and environmental impact.
Where Is This Technology Being Used?
Industries across the board have adopted liquid-based prototyping.
Medical and Dental
Surgical guides tailored to individual patients are a common application. A surgeon planning a complex procedure can have a custom guide printed within hours. The guide ensures accurate implant placement and reduces operating time.
Dental prosthetics like crowns, bridges, and aligners are now routinely produced using this technology. The precision ensures a comfortable fit, and the speed allows same-day service in some dental offices.
Aerospace
Aerospace engineers use liquid-based prototyping for lightweight components with optimized strength-to-weight ratios. Complex internal structures that reduce weight while maintaining strength are easy to produce.
One aerospace company printed a prototype for a ventilation duct with integrated mounting features. The single printed part replaced an assembly of five machined components, reducing weight by 30% and eliminating assembly labor.
Automotive
Automotive teams use the technology for functional parts that undergo vehicle testing. A prototype for a dashboard vent assembly can be printed, tested for fit and airflow, and redesigned—all within a week.
Luxury and performance vehicle makers also use it for custom designs. Low-volume or one-off parts become feasible without expensive tooling.
Consumer Goods
Wearables and electronics benefit from the smooth surface finishes and intricate details. A smartwatch prototype can include buttons, ports, and branding details that look and feel like the final product.
Jewelry and Fashion
Jewelry designers use liquid-based printing to create castable patterns. The printed model is used in a traditional lost-wax casting process to produce metal pieces. The level of detail allows for filigree work that would be extremely difficult to carve by hand.
How Does the Workflow Look in Practice?
Understanding the full workflow helps you plan your project.
1. Design and Preparation
Your designer creates a 3D model in CAD software. The file is converted into a format the printer can read and sliced into layers.
2. Machine Setup
Resin is poured into the vat. Parameters are set based on the resin type and desired layer thickness.
3. Printing
The machine runs unattended. Print times vary from 30 minutes to 10 hours depending on part size and layer thickness.
4. Post-Processing
Parts are cleaned, supports are removed, and any required finishing is applied. Some resins require a post-curing step in a UV oven to reach full strength.
What Are the Current Limitations?
No technology is perfect. Understanding the limitations helps you decide when to use it.
Material Range
The available materials are growing, but still narrower than CNC machining or injection molding. Not every engineering plastic or metal is available as a printable resin.
Surface Finish
While DLP produces smooth surfaces, some applications may still require polishing or coating. Layer lines are minimal with thin layers but may still be visible on curved surfaces.
Size Constraints
Build volumes are limited. Most desktop DLP machines can print objects up to about 200 x 200 x 200 mm. Larger parts require larger machines or assembly from multiple printed pieces.
How Is the Technology Evolving?
The field continues to advance rapidly.
New Materials
Researchers are developing composite resins with carbon fiber, glass, or ceramic additives. These materials offer enhanced strength, stiffness, or thermal properties while retaining printability.
Larger Build Volumes
Machine manufacturers are introducing larger systems with build volumes exceeding 500 x 500 x 500 mm. This expands the range of parts that can be printed in a single piece.
Hybrid Processes
Some companies combine liquid-based printing with CNC machining. The printer creates near-net shapes, and machining adds precision features or improves surface finish. This hybrid approach leverages the strengths of both methods.
How Does Yigu Technology Use Liquid-Based Prototyping?
At Yigu Technology, we integrate liquid-based rapid prototyping into our broader manufacturing capabilities. We use it where it makes sense—for complex geometries, quick-turn projects, and applications requiring fine detail.
We Match Process to Purpose
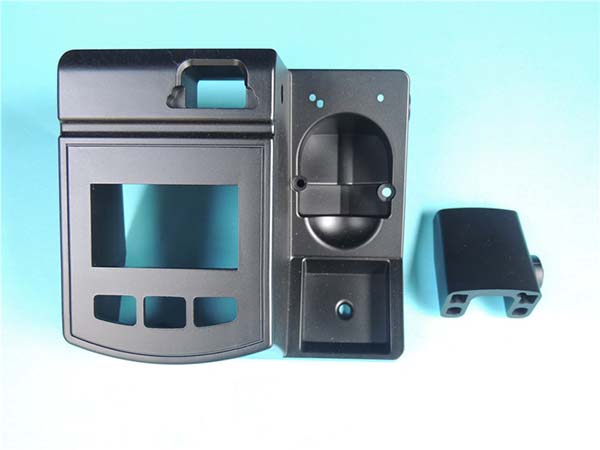
A client needed a prototype for a handheld diagnostic device. The design included internal channels for fluid flow and a textured grip surface. CNC machining would have required multiple setups and complex tooling. We used DLP printing to produce the complete assembly in one piece. The prototype was delivered in three days, and the client used it for both internal testing and investor presentations.
We Offer Post-Processing Expertise
We handle cleaning, support removal, and finishing in-house. Parts that require polishing, coating, or assembly leave our facility ready for testing or presentation.
We Guide Material Selection
Our engineers help clients choose the right resin for their application. A part that needs to withstand high temperatures gets a high-temperature resin. A part that will contact skin gets a biocompatible option.
Conclusion
Liquid-based rapid prototyping has fundamentally changed how products are developed. It compresses timelines from weeks to hours. It enables geometries that were previously impossible. It allows teams to iterate quickly and test more ideas.
For engineers and product developers, this means faster feedback, lower costs, and greater design freedom. The technology continues to evolve, with new materials and larger machines expanding its reach.
If you are developing a product with complex geometry, fine details, or tight timelines, liquid-based prototyping is worth serious consideration.
Frequently Asked Questions
How accurate is liquid-based rapid prototyping?
Typical accuracy ranges from ±0.05 mm to ±0.1 mm depending on the machine and part size. Layer thicknesses of 25–100 microns produce smooth surfaces and fine details suitable for most applications.
What materials can be used?
Common materials include standard resins, high-strength resins, biocompatible resins, high-temperature resins, and flexible resins. New formulations are introduced regularly, expanding the range of available properties.
How long does it take to get a prototype?
Print times vary by size and layer thickness. A small part may print in 30–60 minutes. Larger, detailed parts may take 6–10 hours. Including design preparation and post-processing, most projects deliver within 2–5 days.
Can liquid-based prototypes be used for functional testing?
Yes, with the right resin. High-strength resins are suitable for load-bearing tests. High-temperature resins can withstand automotive under-hood temperatures. Always confirm material properties with your prototyping partner.
What is the difference between DLP and SLA?
Both use light to cure liquid resin. DLP projects an entire layer at once using a digital micromirror device, which is generally faster for most parts. SLA uses a laser to trace each layer point by point. Both produce high-quality results.
Contact Yigu Technology for Custom Manufacturing
Ready to see how liquid-based rapid prototyping can accelerate your project? Yigu Technology offers DLP printing services with a range of resins to match your application. From concept models to functional prototypes, our team helps you select the right materials and processes for your needs. Contact us today to discuss your project.