Introduction
You grab a piece of sheet metal. You know what you want to build. But the moment you start cutting, things go sideways. The edge curls. The blade drifts. Your fingers are way too close to a spinning disc. Sound familiar?
You are not alone. Sheet metal cutting scares off more beginners than almost any other shop task. The tools look dangerous. The materials fight back. And one bad cut can ruin expensive material in seconds.
Here is the truth most tutorials skip: cutting sheet metal is a skill, not a talent. Anyone can do it. You just need the right tool, the right setup, and the right technique.
This guide covers everything. From choosing your first tool to finishing clean edges on stainless steel. Whether you are a DIY hobbyist or a small shop owner, you will walk away with a clear plan for your next project.
Why Cutting Sheet Metal Scares Beginners
Let us be honest. Sheet metal does not behave like wood or plastic. It springs back. It heats up fast. It throws sharp edges everywhere.
Most beginners pick up an angle grinder and go straight for the cut. That is how people end up with jagged edges, warped panels, and trips to the ER.
The good news? You do not need a $5,000 plasma table. You need the right tool for your thickness and a few simple rules. This guide gives you both.
The Real Cost of Bad Cuts
A bad cut is not just ugly. It costs you in three ways:
| Cost Type | What Happens | Real-World Example |
|---|---|---|
| Wasted Material | One wrong cut = scrap | A 4×8 steel sheet costs $80+. One bad line ruins it. |
| Damaged Tools | Wrong blade = burned-out motor | Using a wood blade on metal destroys it in 10 seconds. |
| Serious Injury | No PPE = cuts, burns, eye damage | OSHA reports 2,000+ metal-cutting injuries per year in the US alone. |
Clean cuts save money, time, and skin. Let us get into how.
1. Choosing the Right Tool for Your Project
This is the step that matters most. The wrong tool is the #1 reason for bad cuts. Match your tool to your metal thickness and cut type.
1.1 Hand Shears for Thin Gauges
Tin snips and hand shears are your best friends for metal under 1.2mm (18 gauge). They are cheap, safe, and dead accurate for straight lines.
- Aviation snips cut straight, left, or right curves.
- Cost: 15–40.
- Best for: HVAC ducts, flashing, thin steel panels.
Pro tip: Always cut so the waste piece falls away. This keeps the visible edge clean.
1.2 Nibblers for Power Without Distortion
An electric nibbler punches tiny overlapping holes to create a cut. No heat. No sparks. No warping.
| Feature | Nibbler | Angle Grinder |
|---|---|---|
| Heat generated | Almost zero | Very high |
| Edge quality | Clean, burr-free | Rough, heat-affected |
| Max thickness (mild steel) | 3.2mm (12 gauge) | 6mm+ |
| Noise level | Low | Very loud |
| Cost | 100–300 | 40–80 |
This is the tool I recommend most for beginners doing 1–3mm steel. It is forgiving and safe.
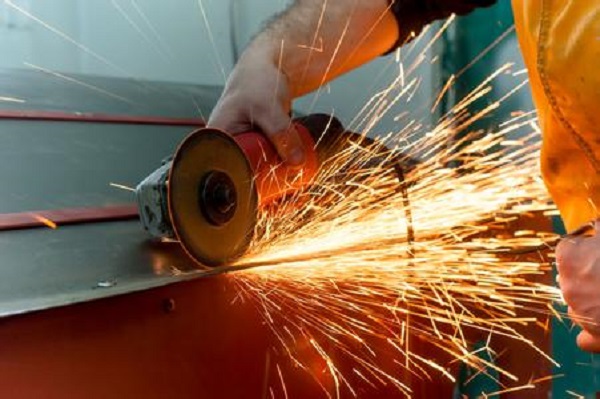
1.3 Angle Grinders for Thicker Stock
An angle grinder with a cutoff wheel is the speed king. It cuts fast through 3mm–12mm steel. But it generates serious heat and sparks.
- Use a thin cutoff wheel (1.0mm–1.6mm) for cleaner cuts.
- Always use a guard and face shield.
- Cut in short passes. Never force it.
Warning: Never use an angle grinder on aluminum without a dedicated non-ferrous wheel. Steel wheels will clog and grab.
1.4 Jigsaws for Long Straight Lines
Need a 3-foot straight cut? A jigsaw with a metal-cutting blade gives you more control than a grinder.
- Use a fine-tooth blade (18–24 TPI) for thin metal.
- Clamp a straight edge as a guide.
- Go slow. Let the blade do the work.
1.5 Plasma Cutters for Heavy Metal
Plasma cutters handle 6mm–50mm+ steel like butter. But they cost 500–3,000+. For most DIYers and small shops, this is overkill unless you cut thick steel often.
| Tool | Best Thickness Range | Skill Level | Starting Cost |
|---|---|---|---|
| Tin Snips | Up to 1.2mm | Beginner | $15 |
| Nibbler | Up to 3.2mm | Beginner | $150 |
| Jigsaw | Up to 6mm | Intermediate | $50 |
| Angle Grinder | Up to 12mm | Intermediate | $40 |
| Plasma Cutter | 6mm–50mm+ | Advanced | $500+ |
2. Preparing Your Workspace and Material
A clean cut starts before you turn on any tool. Skip this step and you will fight your material the whole time.
2.1 Securing the Sheet Properly
Loose metal = dangerous metal. If the sheet vibrates or moves, your cut line wanders.
- Use C-clamps every 15cm along the cut line.
- For large sheets, lay them flat on a sacrificial board (MDF or plywood).
- Never hold the sheet by hand while cutting. Ever.
2.2 Marking Your Cut Line
A bad mark leads to a bad cut. Use these methods:
- Sharpie marker — works on most metals. Wipe clean after cutting.
- Scribe line — use a center punch and straight edge for permanent marks.
- Tape guide — stick masking tape along your line. The blade follows the tape edge.
Expert trick: For curves, use a trammel point or trace around a template. Freehand curves on metal almost never come out clean.
2.3 Wearing the Right Protective Gear
| Gear | Why You Need It |
|---|---|
| Safety goggles | Metal shards fly at 100+ mph. One chip in your eye changes your life. |
| Cut-resistant gloves | Sheet metal edges are razor sharp. Leather or Kevlar gloves are a must. |
| Hearing protection | Angle grinders hit 100+ dB. Nibblers are loud too. |
| Face shield | Required with grinders and plasma. Sparks cause severe burns. |
No exceptions. I have seen too many "it was just a quick cut" injuries. Do not be that person.
3. Step-by-Step Cutting Techniques
Now let us cut. Each technique below targets a specific cut type.
3.1 Straight Cuts With Guide Rails
For factory-edge straight cuts, use a guide:
- Clamp a straight edge (aluminum or steel) along your cut line.
- Press your tool (nibbler, jigsaw, or grinder) against the guide.
- Move slowly and steadily. Do not rush.
- Cut all the way through before lifting the tool.
This method gives you ±0.5mm accuracy even without a CNC machine.
3.2 Curves and Circles With Nibblers
Nibblers excel at curves. Here is how:
- Start the nibbler at the edge of your marked line.
- Tilt it slightly in the direction of the cut.
- Move in small, controlled steps. Think of it like "drawing" the cut.
- For tight circles (under 50mm radius), a nibbler beats a jigsaw every time.
3.3 Internal Cutouts and Complex Shapes
Need to cut a hole inside the sheet, not from the edge? Use the drill-and-saw method:
- Drill a starter hole (6mm–10mm) inside the shape using a metal drill bit.
- Insert your jigsaw blade through the hole.
- Cut along your marked line.
- Smooth the edges with a file.
This is the only reliable way to cut internal shapes without expensive equipment.
3.4 Thick Metal Cutting Strategies
For metal over 6mm thick, one pass will not work. You have three options:
| Method | How It Works | Best For |
|---|---|---|
| Scoring + snapping | Score a deep line, then snap along it | Straight lines on 1–3mm steel |
| Multiple shallow passes | Cut 2–3mm deep per pass, flip and repeat | 6mm–12mm with angle grinder |
| Plasma or oxy-fuel | Melt through the metal | 12mm+ thick steel |
Key rule for thick metal: Let the tool cool between passes. Overheating ruins blades and warps metal.
4. Material-Specific Tips You Cannot Ignore
Not all metal cuts the same way. Using the wrong technique for your material is why cuts look terrible.
4.1 Mild Steel: The Forgiving Starter Metal
Mild steel (low carbon) is the easiest metal to cut. It is soft, cheap, and forgiving.
- Works with every tool on this list.
- Cut speed: fast. No special tricks needed.
- Burr: moderate. Easy to deburr with a file.
Start here if you are learning. A 2mm mild steel sheet costs under $20 and lets you practice without fear.
4.2 Aluminum: Avoiding Galling and Tear-Out
Aluminum is soft but tricky. It gums up blades and tears easily.
| Problem | Solution |
|---|---|
| Blade clogging | Use a non-ferrous blade or apply wax to the cut line |
| Tear-out on exit | Use masking tape on the exit side to support the edge |
| Galling (material sticking) | Cut at higher speed, lighter feed |
Never use the same blade on aluminum that you use on steel. It ruins both the blade and the cut.
4.3 Stainless Steel: Work-Hardening Risks
Stainless steel gets harder as you cut it. This is called work hardening. If you rub or drag the blade, the edge becomes almost impossible to cut.
- Use a dedicated stainless blade (high-speed steel or carbide).
- Cut at medium speed with firm, steady pressure.
- Never dwell in one spot. Keep moving.
- Let the piece cool between passes.
| Metal | Blade Type | Speed | Feed Rate |
|---|---|---|---|
| Mild Steel | Standard abrasive | Fast | Moderate |
| Aluminum | Non-ferrous / carbide | Fast | Light |
| Stainless | HSS or carbide | Medium | Firm, steady |
| Copper | Sharp carbide | Slow | Very light |
4.4 Copper and Brass: Sharp Tools Only
Copper and brass are soft but they smear. A dull blade will fold the metal instead of cutting it.
- Use a razor-sharp blade or fresh nibbler die.
- Cut slowly. Speed causes smearing.
- Deburr immediately. Copper burrs are stubborn.
5. Finishing the Cut: Deburring and Smoothing
The cut is done. But the edges are razor sharp and full of burrs. Skipping this step is why your assemblies never fit right.
5.1 Hand Files for Quick Cleanup
For small jobs, a flat file or deburring tool takes 2 minutes:
- Hold the file at a 45° angle.
- Stroke in one direction (toward the edge, not away).
- Works great on mild steel and aluminum.
5.2 Bench Grinders for Larger Jobs
For thick steel or high-volume work:
- Use a wire wheel on a bench grinder.
- Hold the edge lightly against the spinning wheel.
- Move constantly. Do not hold in one spot.
Safety note: Always wear a face shield with a bench grinder. Wire wheels can throw fragments at high speed.
5.3 Why This Step Matters
| Skipping Deburring | Doing It Right |
|---|---|
| Sharp edges cut you during assembly | Safe to handle bare-handed |
| Parts do not sit flat | Tight, flush joints |
| Paint and coatings peel off edges | Clean finish that lasts |
| Assembly takes 3× longer | Fast, snag-free fit-up |
6. Troubleshooting Common Cutting Problems
Even pros run into issues. Here is how to fix the most common ones.
6.1 Wandering Cut Lines
Symptom: Your cut line drifts off your mark.
| Cause | Fix |
|---|---|
| Loose material | Clamp tighter. Use more clamps. |
| Dull blade | Replace the blade. A sharp blade follows the line. |
| No guide | Use a straight edge or tape guide. |
| Going too fast | Slow down. Speed kills accuracy. |
6.2 Excessive Burr Formation
Symptom: Huge burr on one side of the cut.
- On mild steel with a grinder: The burr forms on the bottom side. Flip the sheet and cut from the other side.
- On nibblers: Burr forms on the entry side. This is normal. File it off.
- On jigsaws: Use a finer blade (24 TPI) and slow down.
6.3 Sheet Warping and Distortion
Symptom: The sheet bends or twists after cutting.
Cause: Heat. Angle grinders and plasma cutters dump heat into the metal.
| Fix | How It Works |
|---|---|
| Multiple shallow passes | Less heat per pass = less warp |
| Cut from both sides | Balances the heat on each face |
| Use a heat sink | Clamp a thick steel bar behind the cut line to absorb heat |
| Let it cool | Wait 30 seconds between passes on thick metal |
Conclusion
Cutting sheet metal cleanly is not magic. It is method. Pick the right tool for your thickness. Secure your material. Mark your line. Wear your gear. Cut slow. Deburr everything.
Here is your quick-start checklist:
- ✅ Under 1.2mm? Use tin snips.
- ✅ 1–3mm steel? Use an electric nibbler.
- ✅ 3–6mm? Use a jigsaw or angle grinder with a thin wheel.
- ✅ 6mm+? Use multiple passes or go plasma.
- ✅ Always wear goggles, gloves, and hearing protection.
- ✅ Always deburr before assembly.
You do not need a professional shop. You need the right knowledge and the right tool for the job. Now you have both.
FAQ
What is the easiest way to cut thin sheet metal at home?
Use tin snips or aviation snips for metal under 1.2mm. They are cheap, safe, and produce clean edges with zero heat.
Can I use an angle grinder to cut sheet metal?
Yes. But only with a thin metal cutoff wheel (1.0–1.6mm). Use a face shield, gloves, and cut in short passes. Never force it.
What tool cuts sheet metal without making it hot?
An electric nibbler generates almost zero heat. It is the best choice for thin to medium steel when you need clean, distortion-free cuts.
How do I cut a perfect circle in sheet metal?
Use a nibbler for circles under 100mm diameter. For larger circles, use a jigsaw with a trammel point guide or a hole saw attachment on a drill.
Do I need special blades for stainless steel?
Yes. Use HSS (high-speed steel) or carbide blades. Standard blades will work-harden the surface and make the cut nearly impossible.
Why does my sheet metal warp after cutting?
Heat is the culprit. Use multiple shallow passes, let the metal cool between cuts, and clamp a heat sink behind the cut line.
Is it safe to cut sheet metal with a jigsaw?
Yes, if you use a fine-tooth metal blade (18–24 TPI) and clamp a straight edge as a guide. Go slow and keep both hands on the tool.
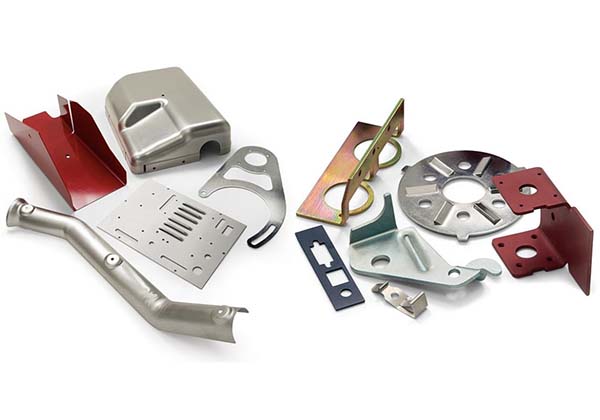
Contact Yigu Technology for Custom Manufacturing
Need precision sheet metal parts but do not have the tools or time? Yigu Technology specializes in custom sheet metal fabrication for prototypes, small batches, and production runs.
📞 Get a free quote today — we cut, bend, weld, and finish so you do not have to.
Your design. Our precision. Zero hassle.