Introduction
Imagine needing a replacement part for vintage machinery, and instead of searching scrapyards or waiting weeks for custom fabrication, you simply download a file and print it overnight. Or picture designing a unique piece of jewelry that perfectly matches your vision, then holding it in your hands the next day. This is the reality of custom 3D printed parts. Unlike mass-produced items that force you to accept standard sizes and shapes, custom 3D printing lets you create components designed exactly for your needs. From aerospace engineers printing titanium brackets to hobbyists crafting personalized phone cases, this technology delivers unlimited design freedom with rapid turnaround times. In this article, we'll explore everything you need to know about custom 3D printed parts—how they're made, what materials you can use, and how to get the best results for your projects.
What Exactly Are Custom 3D Printed Parts?
Defining Custom vs. Standard Parts
Custom 3D printed parts are components manufactured specifically for your unique requirements rather than pulled from a catalog of standard options. They start as digital designs tailored to your exact specifications—dimensions, geometry, material properties, and aesthetic preferences.
Think of the difference like this:
- Standard parts: You choose from what's available. Size small, medium, or large. Color black, white, or gray. Shape predetermined by someone else.
- Custom parts: You define everything. Size exactly 47.3mm. Color matching your brand guidelines. Shape optimized for your specific application.
How They're Created
The process flows from idea to physical object through several stages:
- Digital design using CAD software
- File preparation for printing
- Layer-by-layer fabrication
- Post-processing for final finish
Unlike traditional manufacturing, where custom parts require expensive molds or specialized tooling, 3D printing needs only a digital file. This means one-off parts cost nearly the same per piece as hundreds, making true customization economically viable.
Why Custom Matters
In a world of mass production, custom parts solve real problems:
- Legacy equipment: Machines built decades ago need parts no longer manufactured
- Medical devices: Every patient's anatomy differs—standard implants force compromise
- Ergonomics: Tools that fit your hand exactly reduce fatigue and injury
- Performance optimization: Parts designed for your specific loads last longer
- Aesthetic vision: Your design, not someone else's
What Materials Can You Use for Custom Parts?
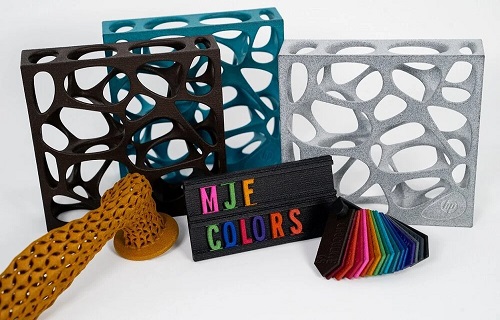
Plastics: The Versatile Workhorses
Plastics dominate custom 3D printing because they offer incredible variety at reasonable cost.
PLA (Polylactic Acid) is the most common plastic for custom parts. Made from renewable resources like corn starch, it's biodegradable and prints easily. PLA works great for:
- Consumer products like phone cases and toys
- Visual prototypes where strength isn't critical
- Decorative items and art pieces
- Educational projects
Properties: Tensile strength ~50 MPa, heat deflection ~60°C, prints at 180-220°C. Available in countless colors and even wood-filled or metal-filled varieties.
ABS (Acrylonitrile Butadiene Styrene) offers better strength and heat resistance than PLA. It's the same plastic used in Lego bricks and many automotive components. Use ABS for:
- Functional prototypes that need durability
- Automotive interior parts
- Electronic enclosures
- Parts that might see warm environments
Properties: Tensile strength ~40 MPa, heat deflection ~100°C, requires heated bed to prevent warping. Available in standard colors plus specialty formulations.
PETG (Polyethylene Terephthalate Glycol) combines the best of PLA and ABS—easy to print like PLA but strong and durable like ABS. It's also food-safe and chemically resistant. Perfect for:
- Food containers and kitchen tools
- Mechanical parts requiring toughness
- Outdoor applications (UV resistant)
- Transparent or translucent parts
Properties: Tensile strength ~50 MPa, heat deflection ~70°C, excellent layer adhesion, minimal warping.
Nylon brings engineering-grade performance to custom parts. Strong, flexible, and wear-resistant, nylon handles real mechanical loads. Ideal for:
- Functional mechanical parts like gears and hinges
- Snap-fit assemblies
- Living hinges that flex repeatedly
- High-wear applications
Properties: Tensile strength 40-60 MPa, heat deflection 150-180°C, absorbs moisture (requires drying before printing).
Engineering Plastics for Demanding Applications
Beyond common filaments, specialized plastics serve high-performance needs:
| Material | Key Properties | Typical Applications | Cost Level |
|---|---|---|---|
| Polycarbonate | Impact-resistant, transparent | Safety equipment, lenses | Medium |
| TPU (Flexible) | Rubber-like, stretchable | Seals, gaskets, soft grips | Medium |
| PEEK | High-temperature, strong | Aerospace, medical implants | Very High |
| PEKK | Fire-resistant, tough | Aerospace interiors | Very High |
| Ultem | Flame-retardant, chemical-resistant | Aerospace, automotive | High |
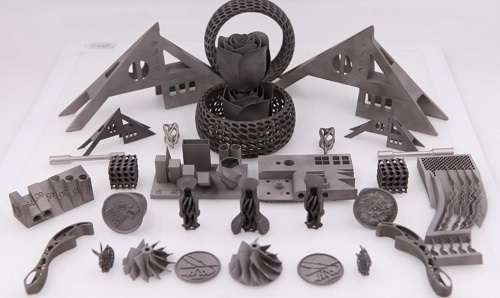
Metals: Industrial Strength Customization
Metal 3D printing creates production-grade parts for demanding applications.
Stainless Steel is the most common printed metal. Strong, corrosion-resistant, and relatively affordable. Use for:
- Functional prototypes needing metal properties
- Custom tools and fixtures
- Medical instruments
- Architectural hardware
Properties: Tensile strength 500-800 MPa (depending on alloy), excellent corrosion resistance, can be machined or welded after printing.
Titanium offers an unmatched strength-to-weight ratio plus biocompatibility. Ideal for:
- Aerospace components where every gram counts
- Medical implants that must work inside the body
- High-performance automotive parts
- Premium consumer goods
Properties: Tensile strength 900-1200 MPa, density 4.4 g/cm³ (40% lighter than steel), biocompatible, corrosion-resistant.
Aluminum provides lightweight strength with good thermal conductivity. Perfect for:
- Heat exchangers with complex internal channels
- Lightweight structural components
- Automotive engine parts
- Drone and robotics frames
Properties: Tensile strength 200-400 MPa (depending on alloy), excellent thermal conductivity, lower cost than titanium.
Other Metals: Cobalt-chrome (for wear applications), Inconel (extreme temperature), copper (thermal and electrical conductivity), and precious metals like gold and silver for jewelry.
Ceramics and Composites
Ceramics bring high-temperature resistance and hardness:
- Alumina for electrical insulators
- Zirconia for dental crowns
- Silicon carbide for extreme environments
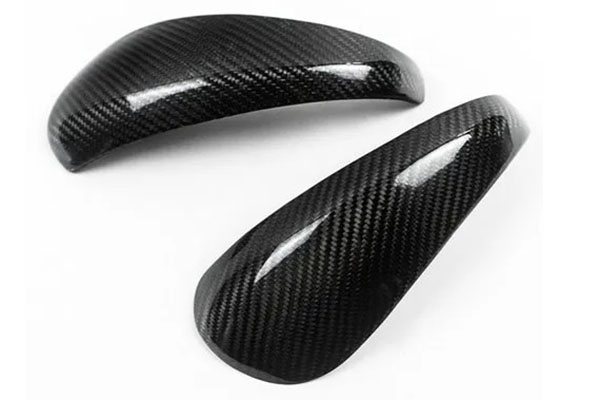
Composites combine materials for enhanced properties:
- Carbon fiber-filled nylon for maximum stiffness
- Glass-filled materials for improved strength
- Metal-filled filaments for metallic appearance and weight
Material Selection Guide
| Application | Recommended Material | Why |
|---|---|---|
| Decorative item | PLA | Easy print, colors, low cost |
| Functional prototype | PETG or ABS | Strength, durability |
| Outdoor use | PETG or ASA | UV resistance |
| Flexible part | TPU | Rubber-like properties |
| High-temperature | Polycarbonate or PEEK | Heat resistance |
| Medical implant | Titanium or PEEK | Biocompatibility |
| Structural metal | Stainless steel | Strength, cost balance |
| Lightweight strong | Aluminum or titanium | Strength-to-weight |
How Are Custom 3D Printed Parts Made?
Step 1: Design Your Part
Every custom part starts as a digital model. You have several options:
Design from scratch using CAD software:
- Fusion 360: Powerful, free for hobbyists, industry standard
- SolidWorks: Professional-grade, extensive features
- Tinkercad: Simple, browser-based, perfect for beginners
- Blender: Free, great for organic shapes and art
Modify existing designs from online libraries:
- Thousands of designs on Thingiverse, Cults3D, MyMiniFactory
- Download, modify, and print as your own
- Saves time while still achieving customization
3D scan physical objects:
- Handheld scanners capture existing parts
- Useful for reverse engineering legacy components
- Creates digital files from physical items
Design considerations for 3D printing:
- Minimum wall thickness: 0.8-1.0mm for plastics, 0.3-0.5mm for metal
- Overhangs beyond 45 degrees need supports
- Holes print slightly undersized (drill or ream for precision)
- Text needs minimum 0.5mm line width
Step 2: Prepare for Printing
Once your design is complete, it needs preparation:
Export as STL (Standard Tessellation Language) format. This universal file type represents your model as a mesh of triangles. Most CAD software exports STL directly.
Import into slicing software like Cura, PrusaSlicer, or Simplify3D. Here you'll set:
Layer height: Affects detail and speed
- 0.1mm: Smooth surface, slower print, for detailed parts
- 0.2mm: Good balance, most common
- 0.3mm: Fast prints, visible layers, for prototypes
Infill: Internal structure affecting strength and weight
- 10-20%: Lightweight, non-structural parts
- 30-50%: Moderate strength, general use
- 80-100%: Maximum strength, functional parts
Supports: Temporary structures for overhangs
- Auto-generated by software
- Added where features would otherwise collapse
- Removed after printing
Orientation: Part positioning affects strength and surface finish
- Flat surfaces print smoother
- Tall parts may wobble
- Layer orientation affects mechanical properties
Step 3: Print the Part
With your file prepared, printing begins. The technology used depends on your requirements:
| Technology | Best For | Resolution | Cost | Speed |
|---|---|---|---|---|
| FDM | Large parts, prototypes, low cost | 0.1-0.3mm | Low | Medium |
| SLA | Detailed parts, smooth finish | 0.025-0.1mm | Medium | Medium |
| SLS | Functional parts, complex geometry | 0.08-0.15mm | High | Slow |
| Metal | Production parts, strength | 0.02-0.1mm | Very High | Slow |
Printing time ranges from 30 minutes for small parts to several days for large, complex components.
Step 4: Post-Processing
Raw printed parts rarely ship immediately. Post-processing turns them into finished products:
Support removal: Snip or break away temporary structures. Flush cutters work best. Sand any remaining nubs.
Surface finishing:
- Sanding: Start coarse (200 grit), progress fine (1000+)
- Primer and paint: Fills layer lines, adds color
- Vapor smoothing: Chemical treatment melts surface layer
- Media blasting: Abrasive particles smooth texture
Assembly if your part consists of multiple printed components:
- Snap-fit connections
- Adhesive bonding
- Mechanical fasteners
- Welding for metal parts
Additional treatments:
- Heat treatment for metal parts (improves properties)
- Coating for protection or appearance
- Machining for critical tolerances
- Polishing for mirror finish
What Are the Key Benefits of Custom 3D Printed Parts?
Design Freedom Unmatched by Traditional Methods
Custom 3D printing liberates you from manufacturing constraints:
- Internal channels impossible to drill or mold
- Organic shapes following natural forms
- Optimized structures using minimal material
- Integrated features combining multiple components
- Complex geometries with no extra cost
Example: A hydraulic manifold with internal passages traditionally requires drilling straight holes and adding plugs. 3D printing creates curved passages that flow better, with no drilling and no plugs—just one printed part.
No Tooling Costs
Traditional custom parts require molds, dies, or fixtures. A simple injection mold costs $5,000-50,000 before producing a single part. 3D printing needs only a digital file. This changes the economics of customization:
| Production Volume | Traditional Cost per Part | 3D Printing Cost per Part |
|---|---|---|
| 1 part | $1,000-10,000 (tooling) | $50-500 |
| 10 parts | $100-1,000 | $40-400 |
| 100 parts | $20-200 | $30-300 |
| 1,000 parts | $5-50 | $20-200 |
The break-even point varies, but for low volumes, 3D printing wins every time.
Rapid Turnaround
Custom traditionally means slow. Machining a one-off metal part might take weeks. 3D printing delivers in days:
- Simple plastic part: 1-2 days from design to delivery
- Complex assembly: 3-5 days including design iterations
- Metal component: 5-10 days including post-processing
This speed enables rapid iteration—design, print, test, refine, repeat—all in the time traditional methods would take for the first sample.
On-Demand Production
No need to inventory custom parts. Store digital files, print when needed:
- Zero inventory costs
- No obsolescence (update designs anytime)
- Print anywhere (send files, print locally)
- Perfect for spare parts (print only when broken)
Complexity Is Free
In traditional manufacturing, complexity costs money. Curves require special tooling. Internal features add operations. With 3D printing, complexity costs nothing extra. A straight rod and a twisted lattice take the same time and material. This encourages:
- Optimized designs that use less material
- Better performance through geometric efficiency
- Aesthetic freedom without cost penalty
What Are Common Applications?
Industrial and Manufacturing
- Custom tooling: Jigs and fixtures designed for specific operations
- End-of-arm tooling: Robot grippers customized for unique parts
- Spare parts: Replacements for obsolete equipment
- Prototypes: Test form, fit, and function before production
Example: A factory needed custom grippers for handling irregular ceramic parts. Traditional fabrication would take weeks and cost thousands. Printed nylon grippers with soft TPU fingertips delivered in 3 days for $200, handling parts without breakage.
Medical and Dental
- Patient-specific implants: Hip replacements, cranial plates, spinal cages
- Surgical guides: Tools that fit patient anatomy exactly
- Prosthetics: Custom-fit limbs lighter and more comfortable
- Dental devices: Crowns, bridges, aligners, models
Example: A dental lab prints custom surgical guides for implant placement. Each guide fits the patient's mouth exactly, showing precisely where to drill. Procedure time drops 30%, accuracy improves, and patients recover faster.
Automotive
- Custom interior components: Trim pieces, bezels, handles
- Engine parts: Intake manifolds, brackets, covers
- Restoration parts: Components for classic vehicles
- Racing parts: Lightweight, optimized components
Example: A classic car owner needed a dashboard bezel no longer manufactured. They scanned an original, modified the design to include modern USB ports, and printed in UV-stable nylon. Perfect fit, modern functionality, original appearance.
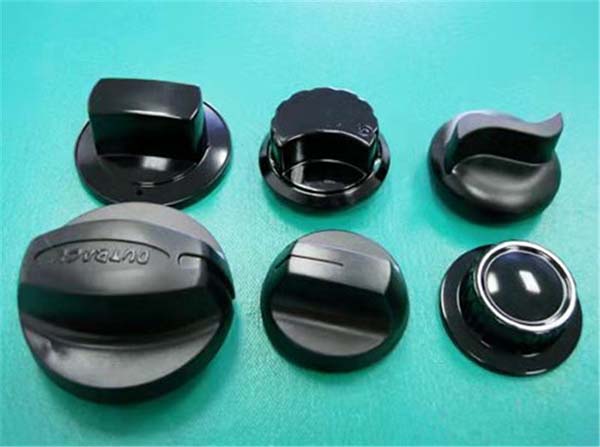
Consumer Products
- Custom jewelry: Unique designs sized perfectly
- Phone accessories: Cases, holders, mounts
- Home goods: Custom organizers, replacement parts
- Hobby items: Miniatures, cosplay props, models
Example: A photographer designed custom lens hoods for vintage cameras. Each hood matched the specific lens dimensions and included a built-in filter holder. Printed in matte black PLA, they looked original and worked perfectly.
Aerospace
- Lightweight brackets: Optimized for strength-to-weight
- Ducting: Complex air flow paths
- Tooling: Composite layup tools
- Prototypes: Test components before production
Example: A satellite manufacturer needed antenna brackets that survived launch vibration while minimizing weight. Printed titanium brackets achieved 40% weight savings over machined aluminum with equivalent strength.
What Challenges Should You Consider?
Design for Printing Isn't Intuitive
Designing for 3D printing requires different thinking than designing for machining or molding:
- Layer orientation affects strength
- Overhangs need support
- Thin walls may warp
- Holes print undersized
- Tolerances differ from traditional
Solution: Work with experienced providers like Yigu Technology. Our engineers optimize designs for successful printing.
Material Limitations
While material options expand constantly, 3D-printable materials don't match the full range of traditional options:
- Some engineering plastics unavailable
- High-temperature alloys limited
- Material properties vary by orientation
- Certification for critical applications requires testing
Solution: Match material selection to application requirements. Test critical properties before full production.
Size Constraints
Most 3D printers have build volumes under 300mm x 300mm x 400mm. Larger parts require:
- Splitting into multiple pieces
- Assembly after printing
- Industrial-scale printers (expensive)
Solution: Design for assembly when parts exceed printer capacity. Plan joining methods during design.
Surface Finish
Layer-by-layer construction leaves visible marks. While post-processing helps, printed surfaces differ from molded or machined ones:
- Visible layer lines (especially at 0.2mm+)
- Slightly rough texture (SLS)
- Support marks where structures attached
- Stepping on curved surfaces
Solution: Specify finish requirements upfront. We'll recommend appropriate technology and post-processing.
How Do You Choose a Service Provider?
Key Factors to Consider
| Factor | What to Look For | Why It Matters |
|---|---|---|
| Technology | Multiple options (FDM, SLA, SLS, metal) | Different parts need different processes |
| Materials | Wide selection, engineering grades | Match material to application |
| Expertise | Design assistance, DFAM knowledge | Avoid printing failures |
| Quality | ISO certification, quality processes | Consistent results |
| Speed | Fast turnaround, rush options | Meet your schedule |
| Price | Transparent pricing, volume discounts | Control costs |
Questions to Ask Potential Providers
- What technologies do you offer?
- What materials are available?
- Can you help optimize my design?
- What are your typical tolerances?
- How do you handle quality control?
- What post-processing options exist?
- What's your typical lead time?
- Do you offer rush service?
- How do you handle defects?
What Does the Future Hold?
Larger Printers
Industrial printers now exceed 1 meter in build volume. Eventually, size limits will disappear as printing becomes a construction method, not just a fabrication technique.
Faster Printing
Multi-laser systems and improved processes already cut print times by 50-80%. The gap between 3D printing and mass production narrows continuously.
More Materials
New materials emerge monthly. Expect engineering-grade options comparable to injection molding, plus exotic materials for specialized applications.
Automated Post-Processing
Robotic finishing systems will handle support removal, sanding, and coating. Custom parts will go from printer to finished product automatically.
Distributed Manufacturing
Local printing facilities worldwide will produce custom parts on demand. Shipping digital files replaces shipping physical parts.
Conclusion
Custom 3D printed parts transform how we think about manufacturing. They free us from the constraints of mass production, enabling designs tailored exactly to our needs. With materials ranging from basic plastics to aerospace metals, and processes delivering parts in days rather than weeks, custom 3D printing solves real problems across every industry. At Yigu Technology, we've helped countless clients turn their unique visions into physical reality. Whether you need one prototype or a thousand production parts, custom 3D printing delivers.
FAQs
How much do custom 3D printed parts cost?
Costs vary widely based on material, size, complexity, and quantity. A small plastic part might cost $10-50. A complex metal component could run $200-1,000+. For accurate pricing, send your design to providers like Yigu Technology for quotes.
How long does it take to get custom 3D printed parts?
Simple plastic parts can ship in 2-3 days. Complex metal parts may take 1-2 weeks including design review and post-processing. Rush options available for urgent needs.
Can I get a sample before ordering many parts?
Absolutely. Most providers offer single-part sampling to verify design, fit, and finish before committing to full production. This step prevents costly mistakes.
What file formats do I need?
STL is the universal standard for 3D printing. Some providers also accept STEP, IGES, or native CAD files for design assistance. Check with your provider for preferred formats.
What if my part doesn't fit or work correctly?
Reputable providers work with you to resolve issues. If the problem stems from printing, they'll reprint at no cost. If design modifications are needed, they'll help optimize for success.
Contact Yigu Technology for Custom Manufacturing
Ready to bring your custom part ideas to life? At Yigu Technology, we combine years of additive manufacturing expertise with state-of-the-art equipment. Our team helps you select the right materials, optimize designs for printing, and deliver quality parts on schedule. Whether you need prototypes, custom components, or production runs, we provide professional service and competitive pricing. Contact us today to discuss your requirements. We'll guide you through the possibilities and show you how custom 3D printed parts can solve your manufacturing challenges.