Introduction
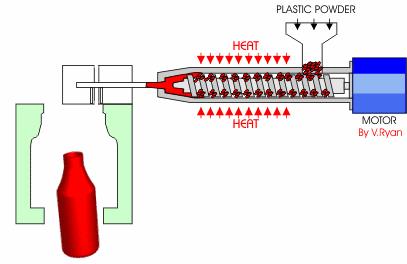
Hand injection moulding—also known as manual injection moulding—is a versatile manufacturing process that uses manual operation to inject molten plastic into a mold. Unlike automated injection molding machines that run millions of cycles, hand injection moulding relies on operator skill to control the injection process.
This method occupies an important niche in plastic manufacturing. It is ideal for prototyping, small-batch production, and custom parts where automation is not cost-effective. For small businesses, workshops, and product developers, hand injection moulding offers an accessible entry point to plastic part production.
This guide explains the hand injection moulding process from start to finish. You will learn about equipment, materials, step-by-step procedures, and how to achieve consistent quality. By the end, you will understand whether this process fits your production needs.
What Is Hand Injection Moulding?
Hand injection moulding is a manual process where an operator uses a hand-held injection device to force molten plastic into a mold cavity. The process follows the same basic principles as automated injection molding but with manual control over injection pressure and speed.
How Does It Differ from Automated Injection Molding?
| Factor | Hand Injection Moulding | Automated Injection Molding |
|---|---|---|
| Operation | Manual; operator controls injection | Automated; machine controls cycle |
| Production volume | Low (10–1,000 parts per day) | High (1,000–100,000+ parts per day) |
| Equipment cost | Low ($500–$5,000) | High ($20,000–$200,000+) |
| Mold cost | Lower (simpler molds) | Higher (complex, hardened molds) |
| Labor intensity | High | Low |
| Consistency | Operator-dependent | Machine-controlled; highly consistent |
| Best for | Prototypes; small batches; custom parts | Mass production; high volumes |
Why Choose Hand Injection Moulding?
Hand injection moulding is valuable when:
- Production volumes are too low to justify automated equipment
- Parts require frequent design changes
- You need functional prototypes that represent production materials
- The business is starting with limited capital investment
- Custom, one-off parts are needed
What Equipment Is Used in Hand Injection Moulding?
Hand injection moulding requires three main components: the injection device, the mold, and auxiliary equipment.
Manual Injection Guns
The manual injection gun is the primary tool. It consists of:
- Barrel – Holds the plastic material during heating
- Heating element – Melts the plastic to the required temperature
- Plunger – Applies pressure to inject the molten plastic
- Nozzle – Directs the plastic into the mold
| Feature | What to Consider |
|---|---|
| Shot capacity | Should match part size; typical range 10–200 grams |
| Temperature control | Adjustable to suit different materials |
| Ergonomics | Comfortable for extended use; weight and grip matter |
| Material compatibility | Must withstand temperatures and potential corrosion |
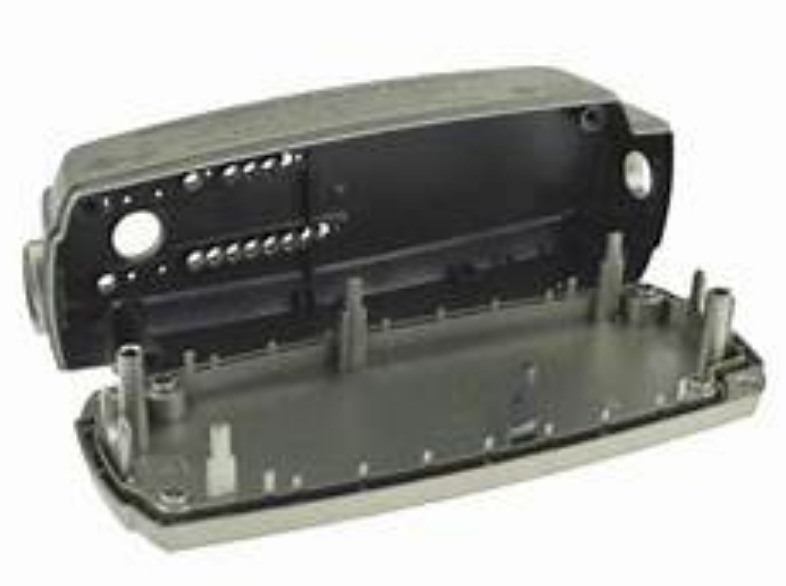
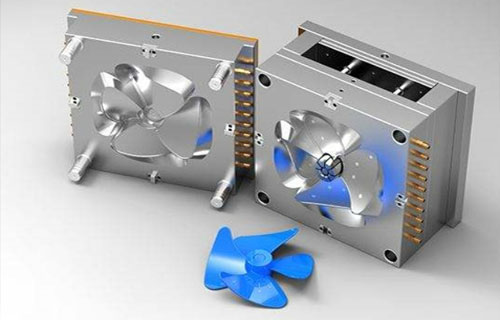
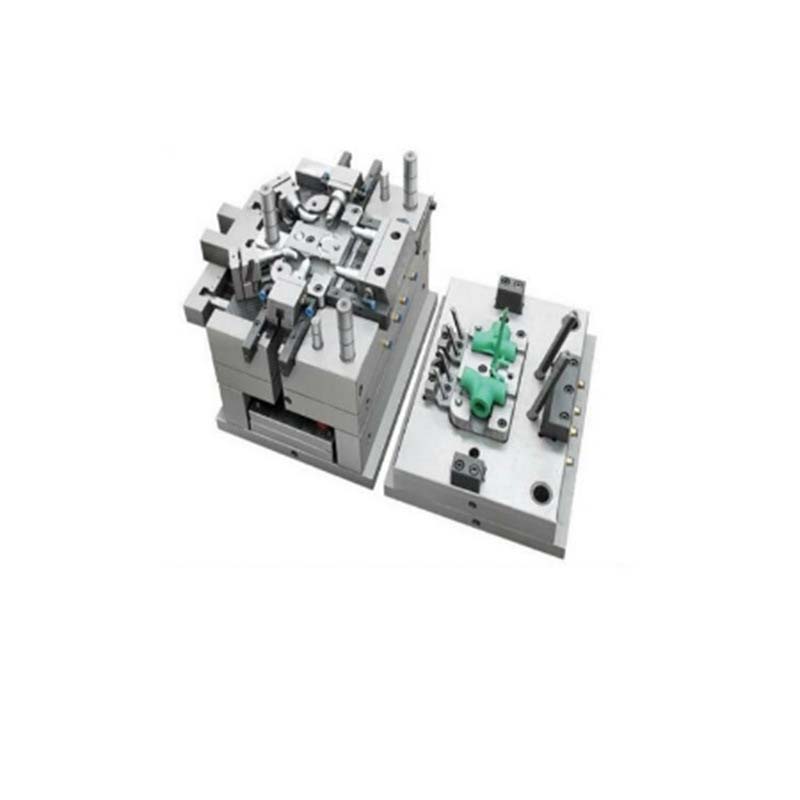
Molds for Hand Injection
Molds are the tools that shape the plastic. They can be made from various materials depending on production needs.
| Mold Material | Properties | Best For |
|---|---|---|
| Aluminum | Lightweight; excellent thermal conductivity; faster cooling | Prototypes; low-volume production (1–5,000 parts) |
| Steel (P20, H13) | Durable; wear-resistant; maintains precision | Medium-volume production; longer runs |
| Silicone rubber | Flexible; low cost; easy to make | Short runs; complex geometries; R&D prototypes |
Mold complexity:
- Single-cavity molds – Produce one part per cycle; simpler and less expensive
- Multi-cavity molds – Produce multiple parts per cycle; requires more precise alignment and higher injection pressure
Auxiliary Equipment
| Equipment | Purpose |
|---|---|
| Drying oven | Removes moisture from hygroscopic materials |
| Temperature controller | Maintains consistent mold temperature |
| Cooling system | Forced cooling to reduce cycle time |
| Hand tools | Trimming, finishing, and quality inspection |
What Materials Work with Hand Injection Moulding?
Hand injection moulding works with most thermoplastics. Material selection affects process parameters and final part properties.
Common Materials
| Material | Key Properties | Typical Applications |
|---|---|---|
| Polyethylene (PE) | Flexible; chemical-resistant; low cost | Containers; simple parts; prototypes |
| Polypropylene (PP) | Lightweight; heat-resistant; good strength-to-weight | Cutlery; hinges; automotive components |
| ABS | Impact-resistant; good surface finish; dimensional stability | Electronics housings; consumer products |
| Polystyrene (PS) | Rigid; low cost; easy to process | Disposable products; models |
| Nylon (PA) | Strong; wear-resistant; requires drying | Gears; mechanical parts |
| Polycarbonate (PC) | High strength; transparent; heat-resistant | Clear parts; durable housings |
Material Preparation
Many thermoplastics absorb moisture from the air. Nylon, ABS, and polycarbonate are hygroscopic. Moisture in the material causes:
- Voids and bubbles in the part
- Surface splay marks
- Reduced mechanical strength
Drying requirements:
- ABS – 80–90°C for 2–4 hours
- Nylon – 80–100°C for 4–6 hours
- Polycarbonate – 120°C for 3–4 hours
- Polypropylene – Minimal drying required (60–80°C for 1–2 hours if needed)
What Is the Step-by-Step Process?
Hand injection moulding follows a sequence of steps. Each step requires attention to detail for consistent results.
Step 1: Preparation
Mold preparation:
- Clean mold surfaces thoroughly with solvent and brushes
- Remove any residual plastic from previous runs
- Apply release agent if needed (for materials that tend to stick)
- Pre-heat mold to 50–80°C depending on material and mold material
- Check that ejector pins and moving components operate smoothly
Material preparation:
- Dry material according to specifications
- Load plastic pellets into the injection gun barrel
- Set heating temperature based on material:
- Polyethylene: 160–200°C
- Polypropylene: 170–210°C
- ABS: 200–250°C
- Nylon: 240–280°C
- Allow material to melt completely (typically 5–15 minutes depending on barrel size and material)
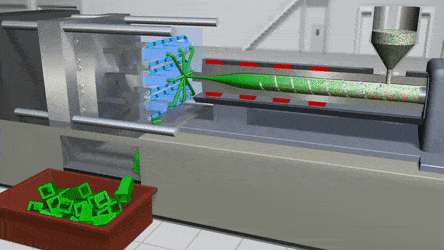
Step 2: Injection
This is the critical manual step. Operator skill directly affects part quality.
- Position the gun – Align the nozzle with the mold sprue bushing
- Seal the connection – Press firmly to prevent leakage
- Apply injection pressure – Push the plunger steadily
- Control injection speed –
- Too fast: air entrapment, flash, burns
- Too slow: premature cooling, short shots
- Maintain pressure – Hold until the cavity is completely filled
Typical injection pressure range: 5–15 MPa (700–2,200 psi)
Step 3: Cooling and Solidification
Once the mold cavity is filled, cooling begins. Proper cooling ensures dimensional accuracy and prevents warpage.
Cooling methods:
- Natural cooling – Air cooling; slower cycles; suitable for simple parts
- Forced cooling – Coolant (water) circulated through mold channels; faster cycles; better for production
Cooling time factors:
| Factor | Effect on Cooling Time |
|---|---|
| Mold material | Aluminum cools 2–3x faster than steel |
| Part thickness | Thicker parts require longer cooling |
| Material type | Crystalline plastics (PP, PE) require longer cooling than amorphous plastics (ABS, PS) |
| Mold temperature | Cooler mold = faster cooling (but risk of warpage) |
Typical cooling times:
- Thin parts (1–2 mm): 15–30 seconds
- Medium parts (3–5 mm): 45–90 seconds
- Thick parts (>5 mm): 90–180 seconds
Step 4: Ejection
After the part solidifies, it must be removed from the mold.
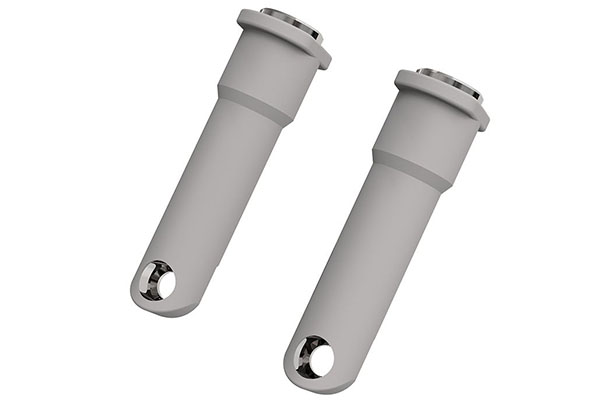
Ejection methods:
- Ejector pins – Small rods that push the part out; strategically placed to distribute force
- Stripper plates – Push large surfaces evenly; prevents distortion
- Air ejection – Uses compressed air; suitable for delicate parts
Precautions:
- Ensure ejection force is even to prevent part damage
- Check that part releases cleanly; sticking indicates insufficient draft or release agent
- Inspect for surface marks from ejector pins
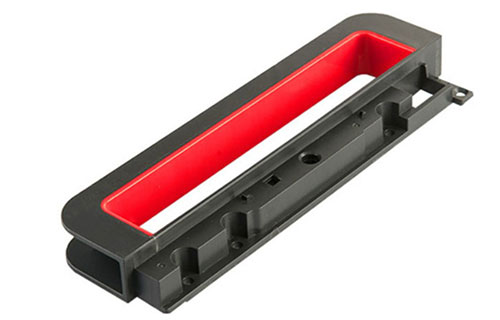
Step 5: Finishing
Most parts require some post-processing:
- Trimming – Remove flash or sprue using hand tools
- Surface cleaning – Remove any release agent residue
- Inspection – Check dimensions and surface quality
- Secondary operations – Assembly, painting, or bonding as needed
How Do You Achieve Consistent Quality?
Hand injection moulding depends on operator skill. Consistency comes from systematic practices.
Parameter Control
| Parameter | Control Method | Impact |
|---|---|---|
| Melt temperature | Digital controller; consistent warm-up time | Affects flow and material properties |
| Injection pressure | Operator feel; consistent plunger force | Affects fill and flash |
| Injection speed | Practice; consistent technique | Affects air entrapment and flow marks |
| Cooling time | Timer; consistent waiting period | Affects dimensional stability |
| Mold temperature | Pre-heating; monitoring | Affects surface finish and warpage |
Common Defects and Solutions
| Defect | Likely Cause | Solution |
|---|---|---|
| Short shot (incomplete part) | Low injection pressure; low melt temp; insufficient material | Increase pressure; raise temperature; ensure adequate melt |
| Flash | Excessive pressure; mold not fully closed; worn mold | Reduce pressure; check mold closure; repair mold |
| Voids/bubbles | Moisture in material; air entrapment | Dry material; slower injection; add vents |
| Surface splay | Moisture; contamination | Dry material; clean mold |
| Warpage | Uneven cooling; premature ejection | Balance cooling; extend cooling time |
| Sticking | Insufficient draft; no release agent | Increase draft; apply release agent |
| Weld lines | Low melt temperature; multiple flow paths | Increase temperature; optimize gate location |
Quality Inspection
For consistent results:
- Inspect first parts thoroughly before continuing production
- Check dimensions against specifications
- Document successful parameters for repeatability
- Maintain molds regularly (clean; check wear)
What Are the Advantages and Limitations?
Advantages
| Advantage | Explanation |
|---|---|
| Low capital investment | Equipment costs $500–$5,000 versus $20,000+ for automated machines |
| Fast setup | Molds can be made and tested quickly; changes are inexpensive |
| Design flexibility | Easy to modify molds; try different materials |
| Ideal for prototypes | Produces functional parts in production materials |
| Small batches | Economical for runs under 1,000 parts |
| Learning platform | Understands molding fundamentals without complex machinery |
Limitations
| Limitation | Explanation |
|---|---|
| Low output | A skilled operator may produce 20–100 parts per hour at best |
| Operator dependence | Consistency varies with operator skill and fatigue |
| Limited part size | Shot capacity typically under 200 grams |
| Injection pressure | Lower than automated machines; limits flow in complex molds |
| Labor cost per part | Higher than automated for large volumes |
| Not suitable for high volumes | Economically uncompetitive beyond 1,000–5,000 parts |
What Are the Applications?
Hand injection moulding serves specific niches where automation is impractical.
Prototyping
- Functional prototypes that simulate final material properties
- Design validation before committing to production tooling
- Iterative design changes without high mold costs
Example: A product designer developing a new handheld device used hand injection moulding to create 50 prototype housings in ABS. Each iteration cost $200 in materials and took one day. The final design was validated before investing $15,000 in production tooling.
Small-Batch Production
- Custom or specialized products with limited demand
- Replacement parts for legacy equipment
- Low-volume commercial products
Example: A manufacturer of vintage car restoration parts uses hand injection moulding to produce 200–500 units per year of discontinued trim components. The low volume does not justify automated tooling.
Research and Education
- University labs teaching manufacturing processes
- Material testing and development
- Process experimentation
Custom and Artisanal Products
- Small-scale manufacturing with unique designs
- Custom promotional items
- Art and design pieces
Conclusion
Hand injection moulding is a valuable process for low-volume production, prototyping, and custom parts. It offers a low-cost entry point to plastic manufacturing with the flexibility to produce parts in production-grade materials.
The process relies on operator skill. Success requires careful control of melt temperature, injection pressure, and cooling time. While output is limited compared to automated molding, hand injection moulding fills an important niche for small batches, prototypes, and custom work.
For businesses starting out or producing specialized products, hand injection moulding provides an accessible and effective manufacturing solution.
Frequently Asked Questions (FAQ)
What are the suitable materials for hand injection moulding?
Most thermoplastics work well. Polyethylene (PE) and polypropylene (PP) are common for general parts. ABS offers good impact resistance and surface finish. Nylon provides strength but requires careful drying. Polycarbonate (PC) offers transparency and impact strength. Material selection depends on part requirements—strength, flexibility, temperature resistance, and cost.
How do you reduce defects in hand injection moulding?
Start with proper material drying—moisture causes voids and splay. Control melt temperature within the material’s recommended range. Adjust injection pressure and speed based on part geometry—slow for intricate details, moderate for general parts. Pre-heat the mold to prevent premature cooling. Maintain clean molds and use release agent when needed. Document successful settings for repeatability.
Can hand injection moulding be used for large-scale production?
Generally no. Hand injection moulding is too slow and labor-intensive for large-scale production. An operator may produce 20–100 parts per hour at best, while automated machines produce hundreds or thousands per hour. Labor cost per part is also higher. For volumes above 1,000–5,000 parts, automated injection molding is more economical.
What is the typical mold life for hand injection moulding?
Mold life depends on material and mold material. Aluminum molds typically last 1,000–5,000 cycles before showing wear. Steel molds can last 10,000–50,000 cycles or more with proper care. Abrasive materials (glass-filled plastics) reduce mold life. Silicone rubber molds are suitable for 50–500 cycles for complex geometries.
How do I choose between aluminum and steel molds?
Choose aluminum for prototypes, low-volume production (under 1,000 parts), and when fast cooling is beneficial. Aluminum molds are less expensive and machine faster. Choose steel for medium-volume production (1,000–10,000 parts), when durability matters, and for materials that require high injection pressure. Steel molds cost more but last longer and maintain precision over extended runs.
Contact Yigu Technology for Custom Manufacturing
At Yigu Technology, we combine the flexibility of hand injection moulding with professional manufacturing expertise. Our team handles small-batch and custom plastic parts with the same attention to quality as large-scale production.
Our hand injection moulding services include:
- Material selection guidance – Matching material to your application
- Mold design and fabrication – Aluminum, steel, and prototype molds
- Process development – Optimized parameters for consistent results
- Quality inspection – Dimensional and visual checks
- Small-batch production – 10 to 5,000 parts
Whether you need functional prototypes, custom components, or low-volume production, we deliver quality parts with fast turnaround.
Contact us today to discuss your hand injection moulding project. Let our experience help you bring your designs to life.