Introduction
Injection molding is one of the most important manufacturing processes in the world. It produces the plastic housing of your smartphone, the dashboard in your car, the syringe at your doctor’s office, and countless other products you use daily.
The process is simple in concept but sophisticated in execution. Molten plastic is injected into a mold cavity under high pressure. It cools and solidifies, taking the shape of the cavity. The mold opens, and the finished part is ejected.
This guide covers everything you need to know about injection molding: the process steps, key parameters, applications across industries, and what makes it the backbone of modern manufacturing.
What Are the Process Steps in Injection Molding?
Step 1: Clamping
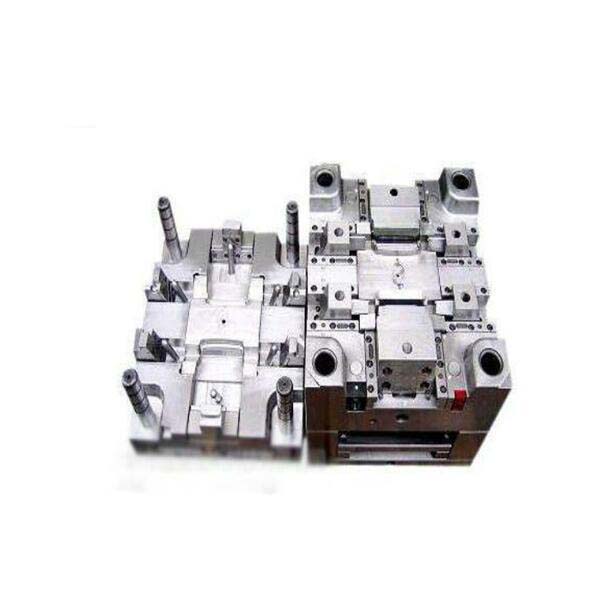
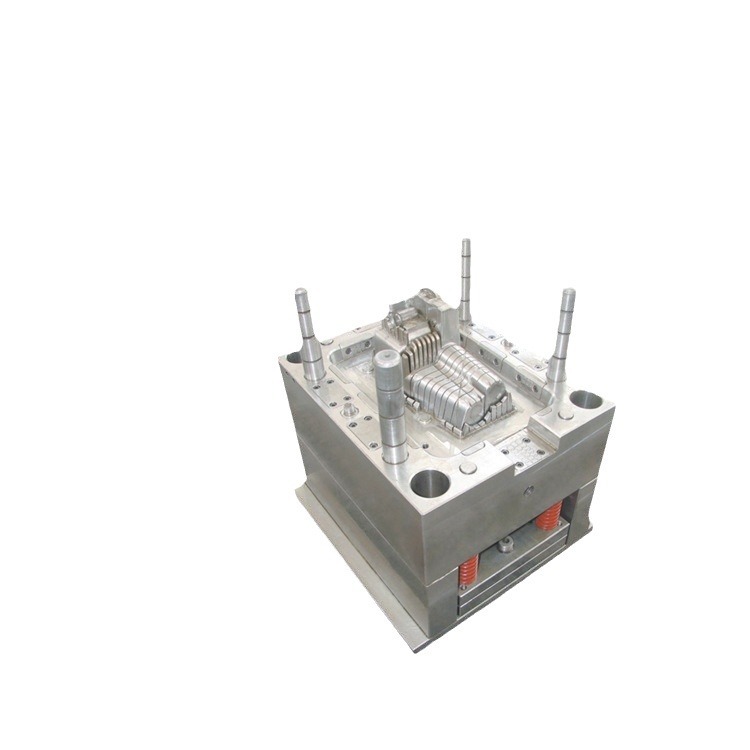
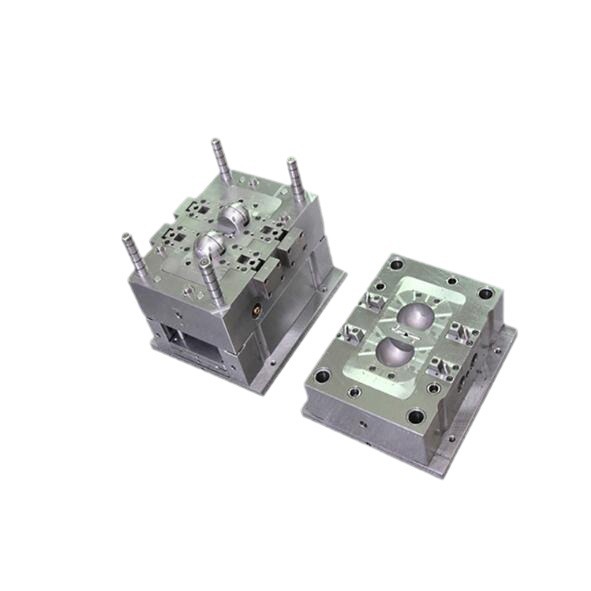
The mold consists of two halves—stationary and moving. The clamping unit closes the mold and holds it shut with high force.
Clamping force prevents the mold from opening during injection when high pressure forces molten plastic into the cavity. Forces range from 50 tons for small parts to over 3,000 tons for large automotive components.
Insufficient clamping causes flash —excess plastic seeping out between mold halves. This ruins appearance and functionality.
Step 2: Injection
Plastic pellets are fed into a heated barrel. Heat and mechanical shear melt them into a viscous, molten state. The screw acts as a piston, forcing the melt through the nozzle, runner system, and gates into the mold cavity.
Injection pressure: 50 to 200 MPa. Higher pressures fill complex, thin-walled parts. Small electronic components may need 150–200 MPa.
Injection speed: Affects filling quality. Faster speeds reduce cycle time but risk air entrapment and flow marks. Slower speeds ensure uniform filling for large, flat surfaces.
Step 3: Packing
After cavity filling, packing compensates for shrinkage as plastic cools. Most plastics contract volumetrically during solidification. Without packing, parts develop voids, sink marks, or dimensional inaccuracies.
Additional molten plastic is injected at lower pressure. Packing pressure and time vary by material and part design:
- Polyethylene (PE) parts: 30–50 MPa, 1–5 seconds
Proper packing ensures correct dimensions, smooth surface finish, and structural integrity.
Step 4: Cooling
Cooling solidifies the molten plastic into the final shape. Cooling time and temperature control affect both quality and efficiency.
Cooling time depends on:
| Factor | Impact |
|---|---|
| Part thickness | Thicker parts need longer cooling |
| Material type | Crystalline plastics cool slower |
| Cooling system design | Channel placement, coolant flow rate |
A thin-walled cup (1–2 mm) may cool in seconds. A thick automotive bumper (5–10 mm) may need 30–60 seconds.
Rapid cooling causes internal stresses—warping or cracking. Slow cooling increases cycle time and reduces output.
Step 5: Ejection
After solidification, the mold opens. Ejector pins, sleeves, or other mechanisms push the part out.
Ejector pins must be properly located and sized to distribute force evenly. Too small or poorly placed pins cause marks, dents, or breakage. Delicate parts—plastic figurines—require pins positioned in non-visible areas with carefully calibrated force.
What Are the Key Parameters?
| Parameter | Range | Effect |
|---|---|---|
| Clamping force | 50 – 3,000+ tons | Prevents flash; insufficient force causes plastic leakage |
| Injection pressure | 50 – 200 MPa | Fills cavity; too low causes short shots; too high causes flash, stress |
| Injection speed | Varies | Faster reduces cycle time; slower ensures uniform filling |
| Packing pressure | 30 – 50 MPa (typical) | Compensates shrinkage; insufficient causes sink marks, voids |
| Cooling time | Seconds to minutes | Too short causes warping; too long reduces efficiency |
What Materials Are Used?
| Material | Properties | Applications |
|---|---|---|
| ABS | Impact resistance, good surface finish | Electronic housings, automotive interiors |
| PP | Chemical resistance, fatigue resistance | Food containers, automotive parts |
| PE | Chemical resistance, flexibility (LDPE), strength (HDPE) | Pipes, bottles, plastic bags |
| PC | Impact strength, optical clarity, heat resistance | Safety goggles, headlight lenses |
| Medical-grade plastics | Biocompatibility, sterilizable | Syringes, device housings |
Where Is Injection Molding Used?
Automotive Industry
Interior components: Dashboards, door panels, seat trims. Injection molding creates complex shapes with accurate dimensions—integrating air vents, storage compartments, wiring channels into single parts.
Exterior components: Bumpers, body panels, spoilers. Polypropylene (PP) with rubber additives provides impact resistance. Bumpers are produced in large quantities with consistent quality.
Engine components: Plastic intake manifolds are lighter than metal, improving fuel efficiency. Injection molding creates complex internal channels for optimal air flow.
Consumer Goods
Electronics: Smartphone, tablet, and laptop housings. ABS or PC provide impact resistance, heat dissipation, sleek finishes.
Toys: Action figures, building blocks, toy cars. Injection molding enables intricate details, bright colors, high-volume production.
Home goods: Kitchen utensils, storage containers, furniture parts. Containers require precise tolerances for tight-sealing lids. Furniture parts offer lightweight alternatives to wood or metal.
Medical Field
Syringes: High-precision manufacturing ensures accurate dosing. Medical-grade plastics are biocompatible. Smooth inner walls facilitate fluid flow; sharp, accurate needle tips are formed.
Device housings: Ultrasound machines, blood glucose monitors. Housings protect sensitive internal components and provide user-friendly interfaces. Lightweight, durable, easy to clean.
Prosthetics: Sockets, joints. Injection molding produces custom-designed components with high-strength, lightweight plastics, improving functionality and comfort.
What Does a Real-World Example Look Like?
A medical device manufacturer needed 1 million syringe barrels with ±0.05 mm tolerances and zero surface defects. The injection molding process was optimized:
- Material: Medical-grade PP, dried to <0.05% moisture
- Mold: Multi-cavity (8 cavities) with polished surfaces
- Parameters: Melt temperature 220°C, injection pressure 120 MPa, cooling time 12 seconds
- Quality: In-process inspections, CMM verification
The result: consistent quality across 1 million units, defect rate under 0.5%, on-time delivery.
Conclusion
Injection molding is a versatile, high-efficiency manufacturing process. It transforms plastic pellets into finished parts through five key steps:
- Clamping: Mold held closed with force (50–3,000+ tons)
- Injection: Molten plastic forced into cavity (50–200 MPa)
- Packing: Compensates shrinkage (30–50 MPa typical)
- Cooling: Solidifies part (seconds to minutes)
- Ejection: Part removed with ejector pins
The process serves automotive, consumer goods, and medical industries—producing dashboards, smartphone housings, syringes, and prosthetics.
Key parameters—clamping force, injection pressure and speed, packing pressure, cooling time—must be precisely controlled to ensure quality. Material selection depends on application requirements: ABS for impact, PP for chemical resistance, PC for clarity and strength.
Injection molding’s ability to produce complex, high-precision parts at scale makes it indispensable to modern manufacturing.
FAQ
What is the difference between injection molding and other plastic forming processes?
Injection molding injects molten plastic into a closed mold under high pressure. It is suited for complex, high-precision, high-volume parts. Blow molding creates hollow parts (bottles) by inflating a plastic tube. Extrusion produces continuous profiles (pipes, sheets) by forcing melt through a die. Compression molding shapes thermosets by compressing material in a heated mold.
What causes flash in injection molding?
Flash is excess plastic seeping out between mold halves. It is caused by insufficient clamping force, excessive injection pressure, or mold wear. Solutions include increasing clamping force, reducing injection pressure, and inspecting/repairing mold components.
How do I choose the right material for injection molding?
Consider application requirements: impact resistance (ABS), chemical resistance (PP), flexibility (LDPE), strength (HDPE), optical clarity (PC), or biocompatibility (medical-grade plastics). Evaluate mechanical, thermal, and chemical properties against operating conditions. Consult material data sheets and suppliers.
What is the typical cycle time for injection molding?
Cycle time varies by part size, thickness, and material. Thin-walled parts (1–2 mm) may cycle in 10–20 seconds. Thick-walled parts (5–10 mm) may take 30–60 seconds or more. Cooling time dominates the cycle. Optimizing cooling channels reduces cycle time.
Why is packing pressure important?
Packing compensates for plastic shrinkage during cooling. Without adequate packing, parts develop sink marks (visible depressions) in thick sections or internal voids that weaken structure. Proper packing pressure and time ensure correct dimensions, smooth surfaces, and structural integrity.
Contact Yigu Technology for Custom Manufacturing
At Yigu Technology , we specialize in injection molding for custom plastic and metal parts. Our engineers optimize mold design, process parameters, and material selection for your application.
We serve automotive, consumer goods, and medical industries. Our quality control includes in-process inspections, CMM verification, and SPC monitoring.
From prototypes to high-volume production, we deliver precision parts on time.
Contact Yigu Technology today to discuss your injection molding project.