Introduction
Injection molding is one of the most widely used manufacturing processes in the world. It produces everything from tiny medical components to large automotive parts. The process is efficient, repeatable, and capable of creating complex shapes with high precision.
But mastering injection molding takes more than owning a machine. It requires understanding how materials behave, how molds are designed, and how process parameters interact. A small change in temperature or pressure can mean the difference between perfect parts and costly scrap.
This guide walks you through the fundamentals of injection molding. You will learn the steps of the process, the factors that affect quality, and practical tips to improve your results. Whether you are new to molding or looking to refine your skills, this guide provides the knowledge you need.
What Is Injection Molding?
Injection molding is a manufacturing process that forces molten material into a mold cavity. The material cools and solidifies, taking the shape of the cavity.
While the process works with metals, ceramics, and rubber, plastic injection molding is the most common form. In everyday conversation, "injection molding" usually refers to plastic injection molding.
How Does the Basic Cycle Work?
The process follows a repeating cycle:
- Material feeds into a heated barrel
- Melting occurs as the material moves through the barrel
- Injection pushes the melt into the mold under high pressure
- Cooling solidifies the material inside the mold
- Ejection removes the finished part
- Cycle repeats for the next part
A simple part might cycle in 15–30 seconds. Larger or more complex parts can take 2–5 minutes or longer.
What Are the Steps in Injection Molding?
Each step in the cycle affects the final product. Understanding them helps you control quality.
Step 1: Material Preparation
Plastic comes in pellet or granule form. Before processing, materials must be handled correctly.
Drying – Many plastics absorb moisture from the air. Nylon, polycarbonate, and ABS are hygroscopic. If processed wet, moisture turns to steam in the barrel, causing:
- Silver streaks on the surface
- Internal voids
- Reduced strength
A typical drying setup might be 80–120°C for 2–4 hours in a desiccant dryer.
Material inspection – Check for contaminants, correct color, and consistent pellet size. Impurities can cause black spots or weak points in finished parts.
Step 2: Heating and Melting
Plastic moves from the hopper into a heated barrel. A rotating screw pushes it forward.
The barrel has multiple heating zones. Temperatures increase gradually from the feed zone to the nozzle. For ABS, a typical profile might be:
- Rear zone: 200°C
- Middle: 220°C
- Front: 230°C
- Nozzle: 225°C
Why temperature control matters:
- Too cold → incomplete melting, short shots, poor flow
- Too hot → material degradation, discoloration, loss of mechanical properties
Step 3: Injection
Once the melt is ready, the screw moves forward like a plunger. It forces the plastic through the nozzle and into the mold cavity.
Injection pressure typically ranges from 10,000 to 30,000 psi. Higher pressure fills complex cavities but increases risk of flash (plastic leaking between mold halves).
Injection speed also matters:
- Too slow → plastic freezes before filling; short shots
- Too fast → air traps, turbulence, surface defects
Step 4: Cooling and Solidification
After the cavity fills, cooling begins. Heat transfers from the plastic to the mold, then to coolant circulating through channels.
Cooling accounts for 50–80% of the total cycle time. Efficient cooling is essential for productivity.
Cooling rate affects properties:
- Too slow → warpage, longer cycles, higher cost
- Too fast → internal stress, brittle parts
Uniform cooling prevents uneven shrinkage. Cooling channels should be placed close to the cavity and balanced across the mold.
Step 5: Mold Opening and Part Removal
When the part has solidified enough, the mold opens. Ejector pins push the part out.
Ejection must be gentle:
- Uneven force can deform or break parts
- Poor pin placement leaves visible marks
For delicate parts, stripper plates or air ejection may replace pin ejection.
Step 6: Post-Processing
Many parts need secondary operations before they are ready for use.
| Operation | Purpose |
|---|---|
| Degating | Remove the runner from the part |
| Deflashing | Remove thin excess plastic |
| Surface finishing | Painting, texturing, polishing |
| Assembly | Ultrasonic welding, adhesive bonding, snap-fit assembly |
| Annealing | Relieve internal stress for critical parts |
How Do You Master Material Selection?
The material you choose sets the foundation for everything that follows.
What Mechanical Properties Matter?
| Property | When It Matters | Material Examples |
|---|---|---|
| Tensile strength | Load-bearing parts, structural components | PC, Nylon, PEEK |
| Impact resistance | Parts that may be dropped or struck | ABS, PC, TPU |
| Flexibility | Seals, living hinges, grips | PP, TPE, LDPE |
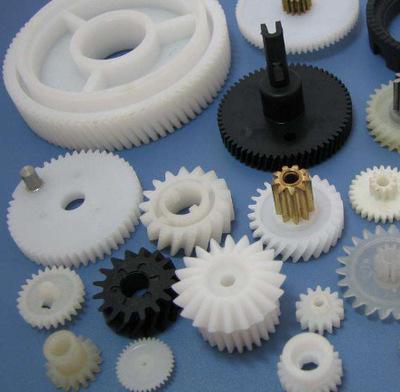
| Wear resistance | Gears, moving parts | Nylon, Acetal (POM) |
What Thermal Properties Matter?
| Property | When It Matters | Material Examples |
|---|---|---|
| Heat deflection temperature | Parts near hot surfaces or under load | PEEK, PPS, PC |
| Low-temperature toughness | Outdoor or cold-storage applications | PE, PP, flexible PVC |
| Thermal conductivity | Heat sinks, thermal management | Thermally conductive grades |
How Do You Choose?
- Define the application – What environment will the part face? What loads must it carry?
- Identify critical properties – Strength? Chemical resistance? Clarity?
- Check regulations – Medical (ISO 10993), food contact (FDA), automotive (IATF)
- Consider processing – Some materials are harder to mold than others
- Balance cost – Commodity resins like PP cost less than engineering plastics
A case example: A manufacturer needed a part that could withstand repeated autoclave sterilization at 121°C. They initially specified polycarbonate. After testing, PC failed due to hydrolysis. Switching to PPSU (polyphenylsulfone) solved the problem, though material cost tripled. The part worked reliably for 500 sterilization cycles.
How Do You Optimize Mold Design?
The mold is the most expensive part of the process. A well-designed mold produces quality parts efficiently.
What Makes a Good Mold Structure?
The mold must withstand high pressures without deflecting. For high-volume production, hardened steel (P20, H13) is standard. For prototypes or low volumes, aluminum reduces cost and lead time.
Multi-cavity molds produce multiple parts per cycle. A 4-cavity mold makes four parts each cycle. This lowers per-part cost but increases mold complexity and cost.
How Do You Design an Efficient Cooling System?
Cooling channels should be placed as close to the cavity as mold strength allows. Conformal cooling—channels that follow the shape of the part—provides the most uniform cooling.
Impact of good cooling:
- 20–40% shorter cycle times
- Reduced warpage
- More consistent part dimensions
A real example: A mold for a automotive dashboard component used conventional straight cooling channels. Cycle time was 65 seconds. After adding conformal cooling channels, cycle time dropped to 48 seconds—a 26% improvement.
What Is the Right Gate Design?
The gate is where plastic enters the cavity. Gate type and location affect:
- Flow pattern and weld lines
- Surface finish (gate vestige)
- Packing efficiency
| Gate Type | Best For | Trade-off |
|---|---|---|
| Edge gate | Flat parts, general use | Visible mark; needs trimming |
| Pin gate | Cosmetic surfaces | Requires three-plate mold |
| Submarine gate | Automatic degating | Higher mold complexity |
| Fan gate | Large, thin parts | Spreads flow but leaves mark |
How Do You Control Process Parameters?
Process control separates consistent production from guesswork.
What Temperatures Must You Control?
Melt temperature – Controls viscosity. Too low = poor flow. Too high = degradation. Monitor with thermocouples in the barrel and nozzle.
Mold temperature – Controls cooling rate and surface finish. Warmer molds produce glossier surfaces and reduce stress. Cooler molds shorten cycle time but may cause warpage.
What Pressures Matter?
Injection pressure – The force that fills the cavity. Higher pressure fills thin sections but increases flash risk.
Holding pressure – Applied after filling to compensate for shrinkage. Too low = sink marks. Too high = overpacking and stress.
Back pressure – Resistance on the screw during melting. Higher back pressure improves mixing but increases melt temperature.
What Speeds Are Critical?
Injection speed – Faster speeds fill thin walls but can cause jetting. Slower speeds reduce stress but risk premature freezing.
Screw rotation speed – Affects mixing and melt quality. Too fast = excessive shear heating.
How Do You Set Parameters?
Start with manufacturer-recommended settings for your material. Then adjust based on part quality. Change one variable at a time to understand its effect.
A systematic approach:
- Set mold temperature near material recommendations
- Adjust melt temperature for proper flow
- Set injection speed to fill cavity in 90–95% of the fill time
- Adjust holding pressure to eliminate sink marks
- Fine-tune cooling time for dimensional stability
How Do You Implement Quality Control?
Quality control catches problems early, when they are cheap to fix.
What Should You Inspect?
| Stage | What to Check | How |
|---|---|---|
| Raw material | Purity, moisture content, melt flow | Spectrometer, moisture analyzer, melt flow index tester |
| In-process | Temperature, pressure, cycle time | Machine sensors, data logging |
| Finished parts | Dimensions, surface defects, strength | CMM, calipers, visual inspection, mechanical testing |
What Are Common Defects and Solutions?
| Defect | Appearance | Likely Cause | Solution |
|---|---|---|---|
| Flash | Thin plastic at parting line | Low clamp force; worn mold | Increase clamp; repair mold |
| Sink marks | Depressions on thick sections | Insufficient holding pressure | Increase holding pressure or time |
| Short shot | Incomplete part | Low injection pressure or temperature | Increase pressure or temperature |
| Warpage | Twisted or bowed part | Uneven cooling | Balance cooling channels |
| Burn marks | Black streaks at flow end | Trapped air heating | Add or enlarge vents |
| Weld lines | Visible lines where flows meet | Low melt temperature; poor gate location | Increase temperature; move gate |
What Advanced Techniques Can Improve Results?
Beyond the basics, several techniques can elevate your molding capabilities.
Multi-Shot Molding
Two or more materials are injected into the same mold. A common application is a tool handle with a hard plastic core and a soft-touch TPE grip.
Benefit: Eliminates assembly; creates features impossible with single-shot molding.
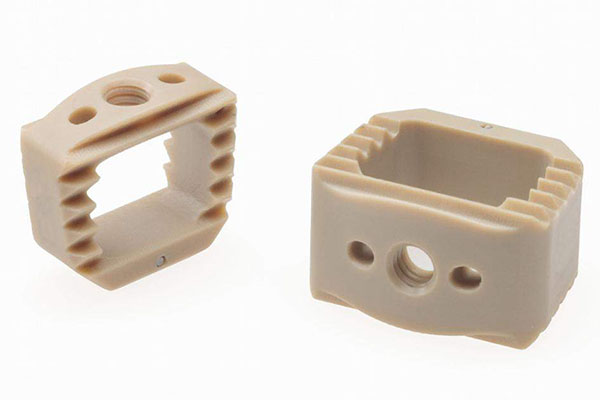
Insert Molding
Metal components are placed in the mold before injection. Plastic molds around them, creating a single assembly.
Applications: Threaded inserts, electrical connectors, medical devices.
Gas-Assist Molding
Nitrogen gas is injected into the melt to create hollow sections. Reduces weight and eliminates sink marks in thick areas.
Applications: Large handles, structural parts.
Micro Molding
Produces parts weighing milligrams with features measured in microns.
Applications: Medical implants, micro-connectors, watch components.
Conclusion
Mastering injection molding requires understanding the interplay of material properties, mold design, and process parameters. Success comes from controlling each variable systematically.
Start with the right material for your application. Design the mold with proper cooling, gating, and venting. Set process parameters based on material recommendations, then fine-tune based on part quality. Implement quality checks at every stage.
When these elements come together, injection molding delivers consistent, high-quality parts at competitive costs. Whether you are molding a simple clip or a complex medical component, the fundamentals remain the same.
Frequently Asked Questions (FAQ)
What is the difference between injection molding and injection casting?
Injection molding uses high pressure to inject molten thermoplastic into a closed mold. The material solidifies by cooling. Injection casting (reaction injection molding, RIM) mixes reactive liquid components that cure chemically inside the mold. RIM uses lower pressure and is often used for polyurethane parts. Injection molding offers higher precision and faster cycles; RIM can produce larger parts with unique material properties.
How do I choose the right injection molding machine?
Consider three factors. Clamping force – Calculate projected area × cavity pressure × safety factor (1.2–1.5). A 100 cm² part with 50 MPa cavity pressure needs about 6,500 kN clamp. Injection volume – The machine should inject 1.3–1.5 times the combined volume of part and runner. Plasticizing capacity – Must melt enough material within the cycle time for your production rate.
What are common injection molding defects and how do I fix them?
Flash – Increase clamp force; reduce injection pressure; repair worn mold. Sink marks – Increase holding pressure or time; improve cooling near thick sections. Air bubbles – Improve venting; slow injection speed; dry material properly. Warpage – Balance cooling channels; adjust mold temperature; modify part design for uniform wall thickness.
What is the most important factor for consistent part quality?
Process repeatability is the foundation of consistent quality. When melt temperature, injection pressure, holding pressure, and cooling time remain the same from cycle to cycle, parts remain consistent. Cavity pressure sensors provide real-time feedback to detect and correct deviations before they create defective parts. Without repeatable process control, even the best mold will produce inconsistent results.
Contact Yigu Technology for Custom Manufacturing
At Yigu Technology, we help clients master injection molding through experience, precision, and attention to detail. Our team provides comprehensive support from material selection through production.
Our capabilities include:
- Design for manufacturability (DFM) reviews to optimize part designs
- In-house mold manufacturing with CNC and EDM capabilities
- Process development using scientific molding principles
- Quality systems including ISO 9001 and full inspection documentation
- Production scaling from prototypes to high-volume runs
We understand that every project is unique. Our engineers work closely with you to ensure your parts meet specifications, your molds run efficiently, and your production stays on schedule.
Contact us today to discuss your injection molding project. Let our expertise help you bring your products to market with quality and confidence.