3D printing with flexible resin lets you create rubber-like parts that bend, stretch, and bounce back—while maintaining the fine detail of resin printing. This guide shows you how to master the settings, avoid common failures, and get reliable results every time.
Introduction: Why Flexible Resin Changes the Game
You've loaded flexible resin into your printer, eager to create parts that bend, stretch, and bounce back—perfect for grips, gaskets, or soft robotics. But your prints disappoint. The material feels stiff instead of rubbery. It cracks when stretched. It loses shape after a few uses. The surface stays sticky, or supports tear the flexible part during removal. Worse, your "elastic" prototype stretches once and never returns to its original form.
Sound familiar?
Flexible resin, with its rubber-like properties, truly is a game-changer for parts that need to bend, compress, or absorb impacts. But its unique material characteristics—from elasticity to curing behavior—demand a different approach than standard or tough resin. Success requires understanding how its formulation delivers flexibility, mastering printing techniques to avoid brittleness, and knowing how to test performance under real-world stress.
In this guide, we'll demystify 3D printing flexible resin, helping you create parts that are both precise and genuinely elastic.
What Makes Flexible Resin Different From Standard Resin?
How does its chemistry deliver elasticity?
Flexible resin stands out from other photopolymers thanks to specialized material characteristics that mimic rubber's stretch and recovery while retaining resin's high detail.
Elasticity and strength: At its core, flexible resin delivers elasticity—the ability to stretch and return to shape—with elongation at break ranging from 100-500% depending on the grade. This far exceeds tough resin (20-50%) and even some thermoplastic elastomers like TPU. Its tensile strength is moderate (20-40 MPa), but tear resistance is critical—resisting rips when stretched, a must for parts like gaskets or grips.
Shore hardness varies widely, from 30A (very soft, like a stress ball) to 80A (firmer, like a shoe sole), allowing customization for specific applications.
Durability traits: Flexible resin offers flexural modulus (stiffness) as low as 10 MPa for soft grades, ensuring it bends easily without permanent deformation. Thermal stability suits most applications, with continuous use temperatures of 40-60°C—avoid prolonged exposure above 80°C to prevent hardening. Chemical resistance is limited—strong solvents can swell or degrade it, but it resists water, oils, and mild detergents, making it suitable for consumer grips or automotive interiors.
Formulation details: Flexible resin's material formulation includes rubber-based oligomers (like polyether urethanes) and plasticizers that enable its stretchy behavior. Viscosity ranges from 1000-3000 cP—higher than standard resin, requiring careful handling to avoid air bubbles. Its curing mechanism is similar—polymerizing under 385-405 nm UV light—but it's more sensitive to over-exposure, which can reduce elasticity.
What Printer Settings Deliver Genuine Flexibility?
How do exposure times affect elasticity?
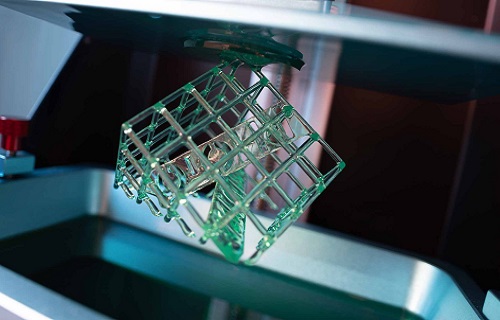
Flexible resin works with SLA, DLP, and material jetting printers, but printing techniques must be adjusted to preserve flexibility.
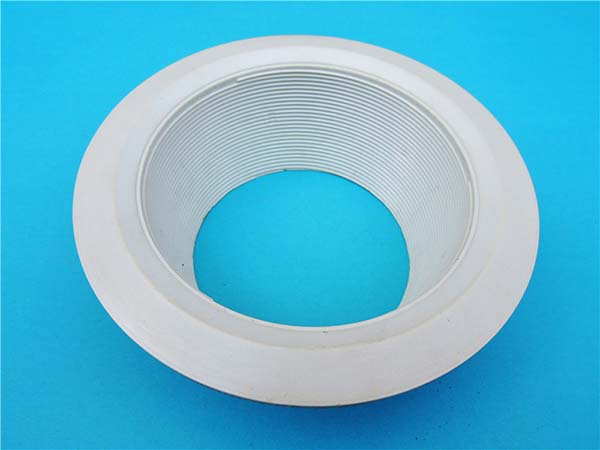
Layer thickness: Start with 0.05-0.15 mm. Thicker layers (0.1-0.15 mm) improve interlayer bonding, reducing tearing when stretched. Thinner layers capture more detail but may create weaker bonds between layers.
Exposure time: This is critical. Aim for 10-25 seconds per layer—longer than standard resin but shorter than tough resin. Over-exposure (too long or too intense UV) cross-links molecules excessively, making the resin stiff and brittle. Under-exposure leaves parts weak and gummy.
UV wavelength: Match the resin's specs—typically 405 nm—to ensure uniform curing without over-hardening.
How do you handle platform adhesion and supports?
Build platform: The platform must be clean but not overly adhesive. Flexible resin can bond too strongly, causing parts to tear when removed. Use a release agent (like PVA spray) or reduce bed adhesion settings if available.
Support structures: Supports need to be flexible themselves. Use thin, cone-shaped supports with small tips (0.1-0.2 mm) to minimize damage during removal. Avoid dense support networks, which can compress the flexible part and leave permanent marks.
Support placement: Position supports strategically—avoid placing them on surfaces that will experience frequent stretching or bending. Consider printing the part at an angle to reduce support contact with critical areas.
What slicing and orientation strategies work best?
Slicing software: Most options (Chitubox, Lychee Slicer) work well, but enable "flexible resin" profiles to adjust layer curing and support density. These profiles typically reduce exposure times and use lighter supports.
Print orientation: This matters enormously. Align the part's primary stretch direction with the layer lines. For example, print a wristband horizontally so layers run along the band's length. This maximizes elastic recovery. Printing vertically would create layer lines across the stretch direction, increasing failure risk.
Surface finish: Consider disabling anti-aliasing. Over-smoothing can create a rigid outer layer that limits flexibility. A slightly textured surface often performs better for elastic parts.
What Can You Create With Flexible Resin?
Soft robotics and wearables
Soft robotics relies on flexible resin for grippers, actuators, and hinges that interact safely with humans or delicate objects. Its ability to bend and recover makes it ideal for robot fingers that pick up fragile items without crushing them.
Wearable technology—from fitness tracker bands to custom braces—benefits from its comfort and skin-friendly properties (in medical grades). Parts conform to the body without irritation, providing all-day wearability impossible with rigid materials.
Medical and prosthetic applications
In healthcare, flexible resin creates prosthetic liners that cushion limbs, medical devices like tourniquets or pressure sensors, and surgical training models that mimic tissue elasticity.
Biocompatibility in specialized grades ensures safety for skin contact. Impact absorption protects sensitive areas. Customized footwear insoles, tailored to a user's foot shape, provide targeted support and cushioning that rigid materials cannot match.
Consumer and industrial parts
Seals and gaskets printed in flexible resin create tight, durable seals for containers or machinery, outperforming rigid plastics that cannot conform to irregular surfaces.
Consumer product grips—tool handles, remote controls, toothbrush handles—gain improved ergonomics and slip resistance. Users appreciate the comfortable, non-slip feel.
Automotive interiors benefit from dashboard padding, door seals, and cup holder liners that absorb vibrations and prevent rattling. The parts improve vehicle feel and reduce noise.
Toys and sports equipment like custom mouthguards leverage its shock-absorbing properties for safety and comfort.
How Do You Test if Your Flexible Parts Perform Correctly?
Mechanical testing methods
Beyond visual inspection, verify performance with simple tests:
Elastic recovery test: Stretch a sample to 100% of its length, hold for 10 seconds, then release. Good flexible resin should return to within 5-10% of its original length. More permanent deformation indicates problems.
Compression resistance test: Squeeze a part (like a gasket) and check for permanent deformation. Less than 5% after 24 hours is ideal. Higher deformation means the part won't seal properly over time.
Impact absorption test: Drop a weighted object onto the part and verify it doesn't crack or tear. Surface should absorb energy without damage.
Tear resistance test: Create a small notch in a test sample and stretch it. The tear should not propagate easily—if it does, your resin or settings need adjustment.
Environmental stability testing
Dimensional stability under stress is critical for functional parts. Seals and gaskets must maintain shape to function properly.
Thermal expansion test: Heat samples to 60°C and check for warping. Minimal change (±0.5%) ensures parts fit in assemblies across temperature ranges.
Chemical exposure test: Test with common substances (water, soap, oil). The material should show no swelling or hardening. Prolonged UV exposure can cause gradual stiffening—use UV-stabilized grades for outdoor parts.
Long-term durability testing
Life-cycle performance: Cycle parts through repeated use—stretch a grip 1000 times or compress a gasket daily. Watch for signs of fatigue: reduced elasticity, cracking, or permanent deformation.
Surface durability: Flexible resin can pick up dirt. A light coating (like silicone spray) can improve resistance to staining and wear. Test surface durability by rubbing with abrasives or exposing to common contaminants.
What Post-Processing Preserves Elasticity?
Support removal and cleaning
Remove supports gently with tweezers or a craft knife. Aggressive cutting can tear the flexible material. Take your time—rushing damages parts.
Sand support nubs with 400-600 grit sandpaper using light pressure. Heavy pressure compresses the resin rather than sanding it smoothly. Wet sanding can help prevent heat buildup.
Clean parts in IPA for 5-10 minutes—shorter than standard resin. Prolonged soaking can swell the resin, affecting elasticity. Use fresh IPA and agitate gently. For very soft grades, consider using a lower-concentration IPA or specialized cleaning solutions.
Post-curing: The make-or-break step
UV post-curing is critical but must be precise. Over-curing hardens flexible resin, reducing elasticity permanently.
Cure for 5-15 minutes—about half the time of tough resin. Use a 40-50°C curing station (lower temperature than other resins). Higher temperatures accelerate hardening.
Test a small sample first. If it feels stiffer than expected, reduce curing time by 2-3 minutes. Some grades benefit from air-drying for 24 hours after curing to stabilize properties.
Rotate parts during curing to ensure even exposure. Uneven curing creates inconsistent flexibility across the part.
Finishing touches
Painting: Possible but requires flexible paints like acrylic latex to avoid cracking when stretched. Avoid rigid primers or enamels—they will peel and crack. Test paint flexibility on a sample before committing to final parts.
Coating: Clear silicone spray can improve environmental resistance and reduce stickiness (common in very soft grades). Apply thin, even coats and allow full curing between applications.
Assembly with adhesives: Use flexible glues like cyanoacrylate with rubber additives that bond without stiffening the joint. Test adhesive compatibility—some solvents can degrade flexible resin.
Yigu Technology's Perspective: Flexibility With Precision
At Yigu Technology, flexible resin is our go-to for parts that need to bend, stretch, or cushion. We've found it transformative for soft robotics and wearable technology, where precision and elasticity are equally critical.
Our team optimizes print parameters for every project. We adjust exposure times, use flexible supports, and test Shore hardness and elongation at break for every batch. Whether it's a custom prosthetic liner or a durable seal, we ensure the final part matches the design's flexibility requirements.
Flexible resin isn't just about being soft—it's about controlled elasticity. Our expertise ensures every print delivers on that promise, combining the detail of resin printing with the performance of engineered elastomers.
Conclusion
3D printing with flexible resin opens possibilities impossible with rigid materials. From soft robotics grippers that handle fragile objects to custom medical devices that conform to patient anatomy, the applications are vast and growing.
Key takeaways for success:
- Understand the material's chemistry—rubber-based oligomers and plasticizers enable elasticity
- Adjust printer settings—shorter exposure times, appropriate layer heights, and flexible supports
- Orient parts correctly—align stretch direction with layer lines
- Test thoroughly—verify elastic recovery, compression resistance, and durability
- Post-process carefully—gentle support removal, precise curing, and flexible finishes
With the right approach, you can create parts that are both precisely detailed and genuinely elastic—unlocking the full potential of this remarkable material.
FAQ
Q1: Why is my flexible resin print too stiff or brittle?
A: Over-curing is the most common cause. Reduce UV post-curing time by 5-10 minutes or lower curing station temperature to 40°C. If the print is stiff right out of the printer, shorten layer exposure time by 10-20% (e.g., from 15s to 12s). Using a resin with lower Shore hardness (30A-50A) instead of 70A-80A will also increase flexibility.
Q2: How does flexible resin compare to TPU in elasticity?
A: Flexible resin offers finer detail than FDM-printed TPU but slightly lower elongation at break (max 500% vs. TPU's 600%). It cures faster and doesn't require heated chambers, but it's less resistant to high temperatures (TPU handles 80-100°C vs. flexible resin's 40-60°C). For small, detailed parts like jewelry clasps, flexible resin is better; for large, heat-exposed parts like engine gaskets, TPU may be more suitable.
Q3: Can flexible resin be used for parts that need repeated compression?
A: Yes, but choose a grade with high compression resistance—look for "high-rebound" in specifications. Test by compressing the part to 50% thickness, releasing, and repeating 100 times. Good flexible resin should show less than 10% permanent deformation. Avoid very soft grades (30A-40A) for heavy compression; opt for 50A-70A, which balance elasticity and durability.
Q4: How do I prevent supports from tearing my flexible prints?
A: Use thin, cone-shaped supports with small tips (0.1-0.2mm). Reduce support density—use fewer supports placed strategically. Consider printing at an angle to minimize support contact with critical surfaces. Remove supports gently with tweezers, taking your time rather than pulling aggressively.
Q5: My flexible prints come out sticky. What's wrong?
A: Sticky surfaces usually indicate under-curing. Increase wash time in IPA to remove all uncured resin. Ensure post-curing is adequate but not excessive—try adding 2-3 minutes to curing time. Some soft grades naturally feel slightly tacky; a light coating of silicone spray can reduce this without affecting flexibility.
Q6: Can I paint flexible resin parts?
A: Yes, but use flexible paints like acrylic latex. Avoid rigid paints, primers, or enamels—they will crack when the part stretches. Test paint flexibility on a sample first. For best results, apply thin coats and allow full drying between applications.
Q7: What's the shelf life of flexible resin?
A: Most flexible resins last 12-18 months when stored properly. Keep containers sealed, store in a cool, dark place (20-25°C), and avoid temperature extremes. Shake or stir thoroughly before use, as components can separate over time.
Contact Yigu Technology for Custom Manufacturing
Ready to master 3D printing with flexible resin for your next project? At Yigu Technology, we combine deep expertise in additive manufacturing with specialized knowledge of elastic materials. Whether you need soft robotics components, custom medical devices, or consumer product prototypes, our team delivers precision parts with the exact flexibility your application requires. Contact us today for a consultation—let's create parts that bend without breaking, stretch without tearing, and perform exactly as designed.