Introduction
Walk into any modern design studio, engineering lab, or even a high school classroom today, and you will likely find an FDM 3D printer humming away. FDM—short for Fused Deposition Modeling—has become the most accessible and widely used 3D printing technology in the world. But how does it actually work? What makes it so popular? And more importantly, what can it do for you? This article takes you through the complete picture: from the basic principles to real-world applications, materials, and practical tips. Whether you are a beginner exploring your first printer or an engineer evaluating production options, understanding FDM helps you make better decisions.
What Exactly Is FDM 3D Printing?
Definition and Basic Principle
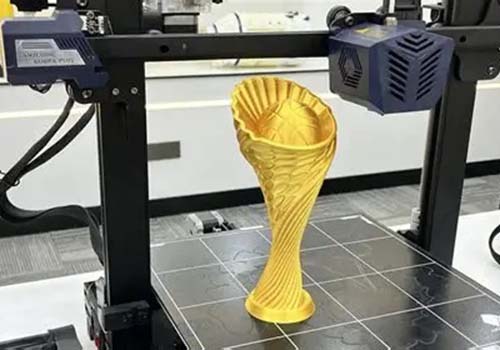
FDM 3D printing builds three-dimensional objects by melting and depositing thermoplastic material layer by layer. Think of it as a highly precise hot glue gun controlled by a computer. The printer follows instructions from a digital 3D model, placing material exactly where needed. Layer upon layer, a solid object emerges.
The process starts with a digital 3D model created in CAD software or captured by a 3D scanner. Specialized slicing software cuts this model into hundreds or thousands of thin horizontal layers. Each layer becomes a set of instructions—called G-code—that tells the printer exactly where to move and how much material to deposit.
A typical consumer printer uses layer thicknesses of 0.1 to 0.3 mm. Industrial machines can go as thin as 0.05 mm for ultra-fine details. Thinner layers mean smoother surfaces but longer print times. The choice depends on what you are making.
The Printing Process Step by Step
Step 1: Load the Filament
A spool of thermoplastic filament feeds into the printer. Common diameters are 1.75 mm or 2.85 mm, with 1.75 mm being most popular for precise control.
Step 2: Heat the Nozzle
The printer heats its nozzle to the temperature required for your chosen material. PLA prints around 180–220°C. ABS needs 220–250°C. The right temperature ensures proper melting and layer bonding.
Step 3: Build the First Layer
The nozzle moves in the X and Y axes, depositing melted filament onto the build platform. This first layer must stick well. A heated bed—typically 40–60°C for PLA, 80–110°C for ABS—helps prevent warping.
Step 4: Add Layers
After completing one layer, the build platform lowers (or the nozzle raises) by exactly one layer thickness. The next layer deposits on top, bonding to the previous one as it cools.
Step 5: Finish and Remove
When all layers complete, the print cools. Remove it from the platform. Remove any support structures. Your object is ready.
How Does FDM Actually Work?
Material Feeding Process
The feeding system starts with a filament spool mounted on the printer. A stepper motor drives a gear that grips the filament. When the motor turns, it pushes filament toward the hot end.
The filament travels through a guide tube—often made of PTFE (Teflon) for its low friction and heat resistance. This tube keeps the filament path smooth and prevents tangles.
At the hot end, the filament enters a heated chamber. A temperature sensor monitors conditions. When the filament reaches its melting point, it becomes a semi-liquid ready for extrusion.
Layer-by-Layer Deposition
The extruder assembly moves on a three-axis system:
- X axis: Left to right
- Y axis: Front to back
- Z axis: Up and down
Stepper motors control movement with incredible precision—often to within 0.01 mm. The G-code tells each motor exactly when and how far to move.
As the nozzle traces each layer's pattern, it extrudes a continuous bead of melted plastic. The width of this bead—called line width—typically ranges from 0.2 to 0.6 mm. Narrower lines give smoother surfaces but take longer. Wider lines build faster but may show more visible layer lines.
A cooling fan mounted near the nozzle blows air onto the freshly deposited plastic. This accelerates solidification, helping each layer hold its shape before the next layer adds on top.
Support Structure Design
Not all shapes print easily. Parts with overhangs—features that stick out without anything underneath—need temporary support.
When do you need supports?
Generally, if an overhang angle exceeds 45–50 degrees from vertical, supports become necessary. Without them, the extruded plastic would sag or fall.
Two types of supports exist:
Break-away supports use the same material as your print. They attach through small contact points. After printing, you snap them off manually. This works well but may leave small marks where supports touched.
Soluble supports use a different material—often PVA (Polyvinyl Alcohol) for PLA printers. After printing, you soak the part in water. The PVA dissolves completely, leaving clean surfaces even in hard-to-reach areas. This requires a printer with dual extruders—one for model material, one for support.
Support design involves trade-offs:
- Denser supports hold better but use more material and take longer to remove
- Sparser supports save time and material but may not hold complex overhangs reliably
- Support interface—the layer where support meets model—affects how easily supports remove and how clean the surface remains
What Materials Can You Use in FDM Printing?
FDM works with a wide range of thermoplastics. Each offers different properties:
| Material | Melting Point (°C) | Strength | Flexibility | Heat Resistance | Best For |
|---|---|---|---|---|---|
| PLA | 180–220 | Moderate | Low | Low (softens at 60–80°C) | Prototypes, decorative items, beginners |
| ABS | 220–250 | High | Low-Moderate | Moderate (90–100°C) | Functional parts, automotive, electronics housings |
| Nylon | 215–260 | High | Moderate-High | Moderate-High | Gears, bearings, mechanical components |
| PC (Polycarbonate) | 260–300 | Very High | Low | High (130–140°C) | Protective gear, industrial parts |
| TPU | 180–220 | Moderate | Very High | Low-Moderate | Flexible parts, phone cases, gaskets |
| PETG | 220–250 | High | Moderate | Moderate | Food containers, mechanical parts |
| PEEK | 360–400 | Very High | Low | Very High (250°C+) | Aerospace, medical implants |
PLA: The Beginner's Friend
PLA (Polylactic Acid) comes from renewable resources like corn starch or sugarcane. It is biodegradable under industrial composting conditions.
Why choose PLA?
- Easy to print—low temperature, minimal warping
- No unpleasant odors during printing
- Wide color and finish options
- Affordable
Limitations: Low heat resistance. Parts left in a hot car will soften and deform. Not suitable for outdoor use in direct sun.
Best applications: Prototypes, toys, decorative objects, educational models.
ABS: The Workhorse
ABS (Acrylonitrile Butadiene Styrene) combines strength, toughness, and impact resistance. It is the same material used in LEGO bricks and many consumer products.
Why choose ABS?
- Strong and durable
- Withstands higher temperatures than PLA
- Can be sanded and painted easily
- Good for functional parts
Challenges: Requires heated bed to prevent warping. Emits fumes during printing—good ventilation needed. More difficult for beginners.
Best applications: Functional prototypes, automotive parts, electronic enclosures, tools.
Nylon: Strong and Flexible
Nylon (polyamide) offers excellent strength, abrasion resistance, and some flexibility. It handles repeated stress well.
Why choose nylon?
- Very durable—resists wear and impact
- Some flexibility without breaking
- Good chemical resistance
- Low friction—ideal for moving parts
Challenges: Absorbs moisture from air—must store dry or dry before printing. High temperature requirements. Can be tricky to print consistently.
Best applications: Gears, bearings, living hinges, mechanical components.
TPU: The Flexible Choice
TPU (Thermoplastic Polyurethane) is a flexible filament that stretches and bends. Think rubber-like parts.
Why choose TPU?
- Elastic—returns to shape after bending
- Good shock absorption
- Abrasion resistant
- Grippy surface feel
Challenges: Flexible filaments can jam in standard extruders. May require slower printing speeds and specialized hardware.
Best applications: Phone cases, shoe soles, gaskets, soft-touch grips, flexible joints.
PC: Engineering Grade
Polycarbonate (PC) delivers high strength and heat resistance. It is used in demanding engineering applications.
Why choose PC?
- Very high impact strength
- Withstands temperatures up to 130–140°C
- Dimensionally stable
- Transparent options available
Challenges: Requires high nozzle temperatures (260–300°C). Needs enclosed printer to maintain stable environment. Absorbs moisture readily.
Best applications: Protective gear, high-temperature enclosures, automotive under-hood parts.
What Can You Make with FDM 3D Printing?
Manufacturing Industry Applications
Prototyping
FDM has transformed product development. A car manufacturer designing a new dashboard console can print a prototype in days instead of weeks. Traditional methods require expensive molds taking months to create. FDM prototypes cost a fraction and allow rapid design iterations.
A study by an automotive research firm found that FDM prototyping reduced development time by an average of 60% . Companies bring products to market faster while testing more design variations.
Aerospace engineers print prototype engine brackets in carbon-fiber-reinforced nylon. They test fit and function, make adjustments, and iterate quickly before committing to expensive production tooling.
Custom Tooling and Jigs
Factories need custom tools, jigs, and fixtures for assembly lines. Traditional outsourcing takes weeks and costs thousands. FDM prints them overnight.
An electronics manufacturer needed a specialized jig to hold circuit boards during soldering. They designed it in CAD and printed it in ABS. Cost: under $50. Time: next day. Traditional fabrication: $800 and two weeks.
A case study of a medium electronics manufacturer showed 40% reduction in tooling costs and 25% improvement in production efficiency after adopting FDM-printed jigs.
Small-Batch Production
Some products don't need mass production. Limited editions, custom items, and specialized equipment benefit from FDM's low setup costs.
A high-end bicycle manufacturer produces limited runs of custom bike frames. Each frame prints in carbon-fiber-filled PLA, customized to each customer's measurements and preferences. Traditional manufacturing would be cost-prohibitive for 50 frames. FDM makes it economically viable.
Education Sector Applications
STEM Education
Students learn better when they can touch and hold what they study. FDM printers bring abstract concepts into physical form.
Physics classes print DNA double helices and Foucault pendulums. Engineering students design and print gears and simple machines. Medical students examine printed anatomy models.
A study in an educational research journal found that students using 3D printing in STEM courses showed 25% higher understanding of subject matter compared to those who did not.
Art and Design Education
Art students explore new creative possibilities. Sculpture classes print complex forms impossible to carve by hand. Jewelry design students iterate quickly, printing multiple design variations overnight.
A survey of art and design students found that 90% reported enhanced creativity after using 3D printing. The ability to rapidly prototype ideas encouraged experimentation and risk-taking.
Interdisciplinary Learning
History classes print replicas of artifacts for hands-on study. Archaeology students recreate ancient tools to understand how they were used. Literature classes print settings from novels to visualize scenes.
This cross-disciplinary approach builds deeper understanding and connections between subjects.
What Are the Limitations of FDM?
Print Speed
FDM is not fast. A small object might take hours. A large, detailed print can run for days. Each layer requires time to deposit. Thinner layers—which give better quality—multiply the number of layers and extend print time.
For production volumes, injection molding remains faster once tooling exists. But for prototypes and small batches, FDM's speed advantage comes from zero setup time, not from how fast each part prints.
Surface Finish
Layer lines are visible on FDM prints. The technology builds in discrete steps, and those steps show. Thinner layers reduce but don't eliminate this effect.
Post-processing can improve surfaces:
- Sanding smooths away layer lines
- Primer and paint fill small gaps
- Chemical smoothing (acetone for ABS) melts surface layers for glossy finish
- Vapor polishing achieves near-injection-molded appearance
But post-processing adds time and labor. If your application demands perfect surfaces straight off the printer, other technologies like SLA resin printing may serve better.
Precision Limitations
FDM achieves good but not exceptional precision. Typical tolerances range from ±0.1 to ±0.5 mm, depending on printer quality and calibration. For many applications, this is fine. But for parts requiring tight fits or precise dimensions, secondary machining or other technologies may be necessary.
Factors affecting precision:
- Printer calibration: Well-tuned machines perform better
- Material shrinkage: Some materials shrink more as they cool
- Design geometry: Large flat areas may warp
- Layer alignment: Slight shifts can accumulate
Support Removal Challenges
Removing supports can be tedious. Break-away supports may leave marks. Soluble supports require dual-extruder printers and post-print soaking. Complex internal cavities may be impossible to clear of supports entirely.
Designing parts to minimize supports helps. Orienting models to reduce overhangs is a key skill in FDM printing.
How Does Yigu Technology Use FDM?
As a non-standard plastic and metal products custom supplier, Yigu Technology leverages FDM for specific applications where its strengths shine.
Our Experience in Action
A robotics startup needed iterative prototypes of a new gripper design. Each design change would require weeks using traditional machining. We printed prototypes in nylon overnight. The client tested, refined, and iterated through five design versions in two weeks. Final production parts used different processes, but FDM got them to market faster.
An architectural firm wanted scale models of a new building complex. CNC machining would be expensive and limited in geometry. We printed multiple models in PLA with intricate details, including internal spaces visible through cutaway sections. The client presented them at a planning meeting, securing approval faster.
Matching Process to Need
Our engineers evaluate each project against multiple factors:
- Required precision: Does FDM's tolerance range work for you?
- Material properties: Do you need strength, flexibility, or heat resistance?
- Quantity: Prototypes, small batches, or production volumes?
- Timeline: How fast do you need parts?
- Budget: Balancing quality with cost
If FDM fits, we use it. If another process serves better, we recommend it. This honesty builds trust and ensures clients get the right parts.
Quality Commitment
We maintain strict protocols:
- Filament storage: Dry cabinets prevent moisture absorption
- Printer calibration: Regular checks ensure accuracy
- Process monitoring: First-layer adhesion verified before full prints
- Final inspection: Every part examined before shipping
Documentation available for clients needing quality records.
Conclusion
FDM 3D printing has earned its place as the most accessible and versatile additive manufacturing technology. It works by melting and depositing thermoplastic filament layer by layer, building objects from the bottom up.
The technology's strengths—affordability, material variety, ease of use—make it ideal for prototyping, custom tooling, small-batch production, and education. Materials range from easy-to-print PLA to engineering-grade polycarbonate and flexible TPU.
Limitations include slower speeds, visible layer lines, and moderate precision. But for countless applications, these trade-offs are acceptable given the benefits.
Understanding FDM helps you make informed decisions. Whether you need a single prototype, custom manufacturing aids, or small production runs, FDM offers a practical path from digital design to physical object.
Frequently Asked Questions
Q1: What is the best material for strong FDM parts?
Nylon and polycarbonate (PC) offer the highest strength. Nylon provides good abrasion resistance and some flexibility. PC delivers high impact strength and heat resistance. For most strong parts, these are top choices.
Q2: How can I improve surface quality on FDM prints?
Several methods help:
- Use thinner layer heights (0.1 mm or less)
- Calibrate extrusion for consistent flow
- Sand and fill after printing
- Try chemical smoothing for compatible materials (ABS with acetone)
- Apply primer and paint
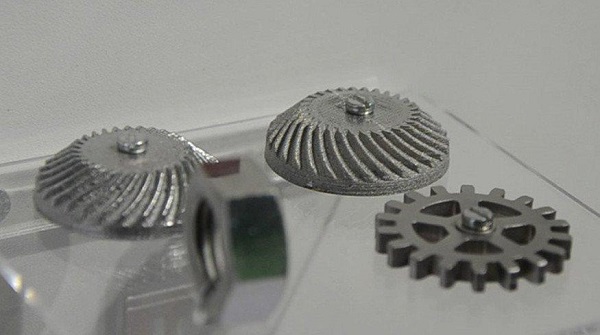
Q3: Can FDM printers use metal materials?
Pure metal FDM doesn't exist. However, metal-filled filaments mix metal powder with plastic binder. These print on standard FDM printers, then undergo sintering to remove plastic and fuse metal. The result is metal parts, though the process requires specialized equipment for sintering.
Q4: How long do FDM prints take?
Print time depends on size, layer height, and complexity. Small parts: 30 minutes to a few hours. Medium parts: several hours to overnight. Large, detailed parts: days. Your slicing software provides time estimates before printing.
Q5: Do I need a heated bed for FDM printing?
For PLA, a heated bed helps but isn't always required. For ABS, nylon, and PC, a heated bed is essential to prevent warping. Most modern FDM printers include heated beds as standard.
Q6: What causes failed FDM prints?
Common issues include:
- Poor first-layer adhesion
- Incorrect nozzle temperature
- Clogged nozzle
- Filament tangles
- Insufficient cooling
- Warping from temperature changes
Most are preventable with proper setup and maintenance.
Q7: Is FDM suitable for production?
For low volumes (tens to hundreds of parts), yes. For high volumes, injection molding becomes more economical once tooling exists. Many companies use FDM for bridge production—making parts while waiting for tooling.
Contact Yigu Technology for Custom Manufacturing
Ready to explore FDM 3D printing for your project? At Yigu Technology, we combine printing expertise with broader manufacturing capabilities. Our team helps you select the right materials, optimize designs for printability, and deliver quality parts on schedule.
Visit our website to see our capabilities. Contact us today for a free consultation and quote. Let's build your future, layer by layer.