3D printing has revolutionized how products move from idea to reality. This guide explores how additive manufacturing speeds up prototyping, cuts costs, and enables designs that traditional methods simply can't achieve.
Introduction
Every great product starts as an idea. But turning that idea into something you can hold, test, and refine has historically been slow and expensive. 3D printing changed that.
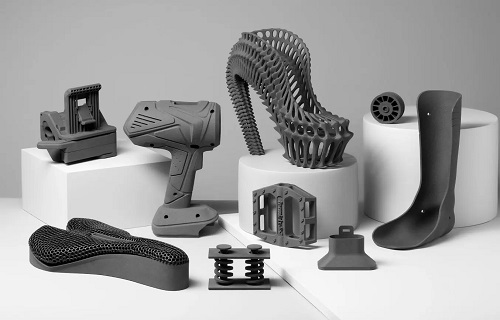
Also called additive manufacturing, this technology builds objects layer by layer from digital files. Unlike traditional methods that cut away material from solid blocks, 3D printing adds material only where needed. The difference isn't just technical—it's transformational for anyone developing new products.
I've spent over 15 years at Yigu Technology helping clients prototype everything from medical devices to automotive components. I've watched 3D printing evolve from a niche tool for early adopters to an essential part of every product developer's toolkit.
In this guide, I'll walk you through exactly how 3D printing transforms prototyping—the speed, the cost savings, the design freedom, and the real-world applications that matter.
How Do Traditional and 3D Printed Prototyping Compare?
Understanding the transformation requires seeing what came before.
Traditional Prototyping Methods
Before 3D printing, getting a physical prototype meant choosing between imperfect options:
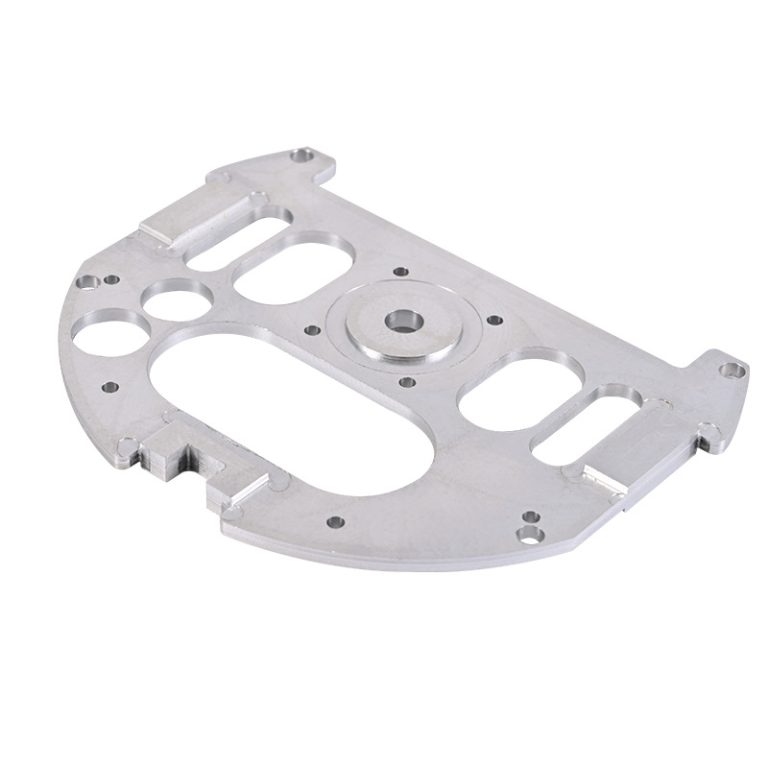
CNC Machining cuts parts from solid blocks of material. It's precise and uses real engineering materials. But it's also:
- Slow – Complex parts take days or weeks to program and machine
- Wasteful – Up to 80% of the material ends up as chips
- Limited – Internal features and complex curves are difficult or impossible
Injection Molding creates parts by injecting molten material into molds. It's great for mass production but terrible for prototyping:
- High upfront cost – Molds cost thousands to tens of thousands of dollars
- Long lead times – Weeks or months to design and cut molds
- No flexibility – Change the design, and you need a new mold
Handcrafting builds parts manually. Skilled model makers can create almost anything, but:
- Labor intensive – Days of skilled work for complex parts
- Inconsistent – Each prototype differs slightly
- Not functional – Handmade parts rarely replicate production materials or properties
The 3D Printing Alternative
3D printing flips every one of these limitations:
| Aspect | Traditional Prototyping | 3D Printed Prototyping |
|---|---|---|
| Lead Time | Weeks to months | Hours to days |
| Tooling Cost | Thousands to tens of thousands | Zero |
| Design Changes | Expensive, slow | Free, instant |
| Complexity | Limited by tool access | Unlimited |
| Material Waste | High (subtractive) | Low (additive) |
| Skill Required | Specialized machinists | CAD software |
Real example: A medical device company needed a prototype of a new surgical instrument. Traditional machining would cost $8,000 and take 3 weeks. They printed it overnight for $40 in material. The first version revealed ergonomic issues, so they revised the design and printed a second version the next day. Two iterations in 48 hours instead of six weeks.
What Are the Key Advantages of 3D Printing for Prototyping?
Let's dig into exactly why 3D printing transforms prototyping.
Speed That Changes Everything
Time is the hidden cost in product development. Every week spent waiting for prototypes is a week your product isn't in the market.
3D printing compresses timelines dramatically:
- A part that takes 2-3 weeks to machine prints in 10-20 hours
- Multiple design iterations happen in days instead of months
- Overnight printing means you test ideas tomorrow instead of next month
A client in consumer electronics cut their development cycle from 18 months to 9 months by switching to 3D printed prototypes. They launched a full year ahead of competitors who stuck with traditional methods.
Why speed matters:
- More design iterations mean better products
- Faster time to market captures more revenue
- Quick feedback catches problems early when they're cheap to fix
Cost Savings That Democratize Prototyping
Before 3D printing, prototyping was expensive—often prohibitively so for small companies and individuals.
The cost structure changes completely:
- No tooling – Every prototype can be different at no extra cost
- Minimal material waste – Use only what the part requires
- No specialized labor – Design in CAD, hit print, come back to a finished part
- Low entry barrier – Desktop printers start under $500
A startup with $50,000 in funding couldn't afford $20,000 in tooling for injection molded prototypes. With 3D printing, they prototyped for $500 in materials and invested the rest in development.
Cost comparison example:
| Part | Machined Prototype | 3D Printed Prototype |
|---|---|---|
| Small bracket | $300-500, 1 week | $5-10, 4 hours |
| Complex housing | $2,000-5,000, 3 weeks | $30-50, 24 hours |
| Multi-part assembly | $10,000+, 6 weeks | $100-200, 3 days |
Design Freedom That Sparks Innovation
This might be the biggest transformation. Traditional manufacturing constrains design. 3D printing liberates it.
What becomes possible:
- Internal channels – Cooling passages, lattice structures, conformal channels
- Organic shapes – Ergonomics optimized for human hands, not machine tools
- Complex assemblies – Multiple parts combined into one printed piece
- Customization – Every prototype can be different at no extra cost
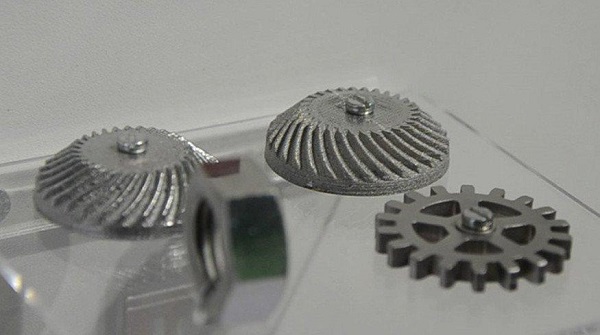
An aerospace client needed a bracket with internal cooling channels. Machining was impossible—you can't cut curved channels inside solid metal. They printed it as one piece, with perfect internal passages, in titanium. The part weighed 40% less and cooled better than the original design.
Design freedom means:
- Test ideas you couldn't even attempt before
- Optimize for performance, not manufacturability
- Create prototypes that actually represent the final design
Functional Testing That Reveals Real Problems
Aesthetic prototypes only show you what something looks like. Functional prototypes show you how it works.
3D printing delivers functional parts:
- Use engineering materials that mimic production properties
- Test fit, assembly, and mechanical performance
- Identify issues before committing to production tooling
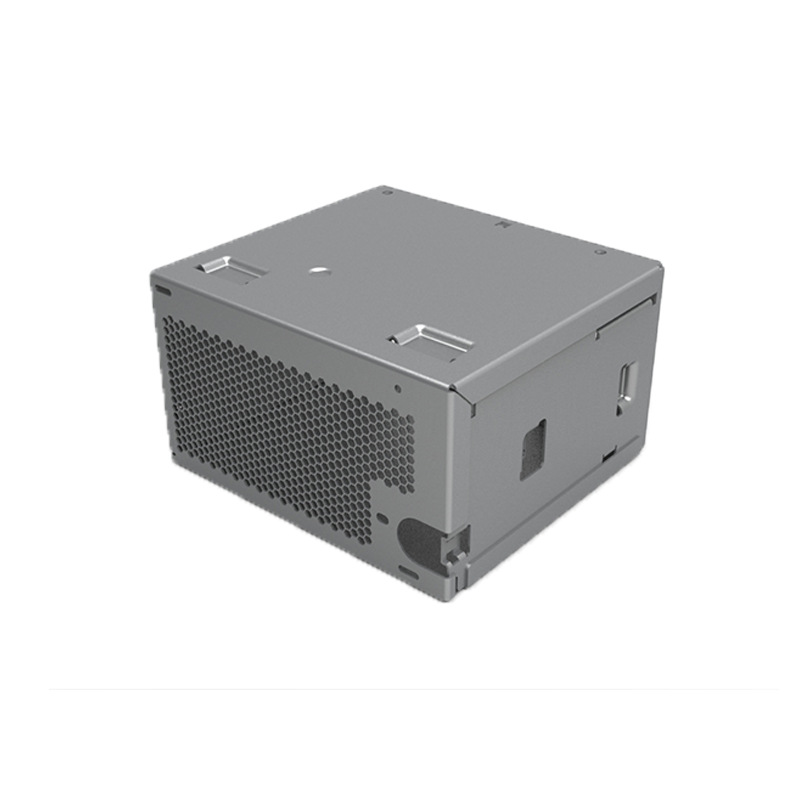
A power tool company printed prototypes of a new housing in nylon. Assembly testing revealed that battery insertion required more force than expected. They modified the design, printed again, and validated the fix—all before cutting expensive injection molds.
The result: They avoided a $50,000 mold modification that would have been needed if the problem was discovered later.
Where Is 3D Printing Used for Prototyping?
Every industry benefits, but some applications stand out.
Aerospace: Lightweight and Complex
Aerospace companies prototype components that must be both light and strong. Weight savings in prototypes predict weight savings in production—critical for fuel efficiency.
Applications include:
- Ducting and manifolds with complex internal paths
- Brackets optimized for minimal weight
- Housing for electronics and sensors
- Tooling for composite layup
Impact: Boeing reports that 3D printing reduces prototyping time for some components by 60-80% compared to traditional methods.
Automotive: Faster Development, Better Parts
Car manufacturers use 3D printing for prototypes at every stage:
- Concept models to evaluate styling
- Functional prototypes for testing
- Fit-check parts before production
- Custom components for specialty vehicles
Real example: Ford prototyped an intake manifold for a new engine. Traditional methods would take 4-6 months and cost $500,000 for tooling. They printed it in 4 days for $3,000. The design went through 15 iterations in the time one traditional prototype would have taken.
Medical: Patient-Specific Solutions
Medicine might be the most impactful application. Every patient is different, and 3D printing handles that variation perfectly.
Prototyping applications:
- Surgical models printed from patient CT scans
- Custom implants designed to match individual anatomy
- Surgical guides that make procedures more accurate
- Medical devices tested on anatomical models
A surgical team preparing for a complex spine surgery printed a model of the patient's vertebrae. They practiced the procedure, planned screw placement, and reduced operating time by 30%. The patient recovered faster with fewer complications.
Consumer Goods: Faster to Market
Consumer products live and die by speed to market. 3D printing accelerates every step:
- Concept prototypes test market appeal
- Ergonomic models refine feel and usability
- Packaging prototypes evaluate shelf impact
- Functional samples verify performance
A consumer electronics startup used 3D printing to prototype a new wearable device. They went through 20 design iterations in 2 months—a process that would have taken a year with traditional methods. They launched at CES and won "Best of Show."
What Does the Prototyping Workflow Look Like?
Understanding the process helps you apply it effectively.
Step 1: Design in CAD
Every prototype starts as a digital model. Modern CAD software handles the complexity 3D printing enables—organic shapes, internal features, and multi-part assemblies.
Best practices:
- Design for the printing process (orientation, support, tolerance)
- Include features you want to test
- Consider multiple design variations
Step 2: Prepare for Printing
Slicing software converts your CAD model into instructions for the printer:
- Choose orientation (affects strength, surface finish, print time)
- Add supports if needed (FDM and SLA; SLS doesn't need them)
- Set layer height (finer layers = smoother surface = longer time)
- Generate toolpaths
Step 3: Print
This is the hands-off part. Print times range from minutes for small parts to days for large assemblies.
During printing:
- Monitor first layers for adhesion
- Check for issues (jams, warping, failures)
- Let the printer run
Step 4: Post-Process
Most prints need some finishing:
- Remove supports (FDM, SLA)
- Clean excess powder (SLS)
- Sand, paint, or coat as needed
- Assemble multi-part prototypes
Step 5: Test and Evaluate
This is why you prototyped:
- Check fit with other components
- Test mechanical performance
- Gather user feedback
- Identify improvements
Step 6: Iterate
The real power of 3D printing: go back to Step 1 with what you learned. Modify the design, print again, test again. Repeat until it's right.
What Challenges Still Exist?
3D printing isn't magic. Know the limitations.
Material Properties
Printed parts don't always match production materials:
- Layer lines create weak points
- Surface finish differs from molded parts
- Material options, while growing, still lag behind traditional manufacturing
Workaround: Choose printing technologies that best match your needs. SLS for strength, SLA for detail, FDM for size and cost.
Post-Processing Requirements
Many prints need additional work:
- Support removal (FDM, SLA)
- Sanding for smooth surfaces
- Painting or coating for appearance
- Curing (SLA) or heat treatment (metal)
Impact: Factor post-processing time into your prototyping schedule.
Size Limitations
Most 3D printers have build volumes under 300mm in each dimension. Large prototypes must be printed in sections and assembled.
Solutions:
- Large-format printers exist but cost more
- Design parts to be printed in sections
- Consider hybrid approaches for very large parts
Cost at Scale
3D printing excels at one-off prototypes. For hundreds of parts, traditional methods often become more economical.
Rule of thumb:
- 1-10 parts: 3D printing usually wins
- 10-100 parts: Depends on complexity
- 100+ parts: Traditional methods often cheaper
What's the Future of Prototyping with 3D Printing?
The technology keeps improving.
Better Materials
New materials appear constantly:
- Engineering-grade polymers with better properties
- Composites with carbon fiber or other reinforcements
- Metals with improved strength and printability
- Multi-material printing in a single part
Faster Printers
Speed increases every year:
- Multi-laser systems cut build times
- Better motion systems move faster without losing quality
- New technologies (like binder jetting) print whole layers at once
AI Integration
Artificial intelligence will enhance prototyping:
- Generative design creates optimized geometries
- AI predicts print success before you start
- Machine learning improves print parameters automatically
Larger Formats
Printer sizes keep growing. Machines that print parts over a meter in size are now available, opening new applications.
Conclusion
3D printing has transformed prototyping from a bottleneck into a competitive advantage. What once took months and cost thousands now happens in days for dollars. Designs that were impossible to prototype are now routine.
The key takeaways:
- Speed compresses development cycles from months to days
- Cost drops by orders of magnitude, democratizing prototyping
- Design freedom enables geometries traditional methods can't touch
- Functional testing catches problems early when they're cheap to fix
- Iteration becomes the norm, not the exception
At Yigu Technology, we've seen 3D printing transform how our clients develop products. Startups bring ideas to market that would have been impossible 20 years ago. Established companies iterate faster than ever. Medical devices save lives because they're tested on patient-specific models.
If you're not using 3D printing for prototyping, you're leaving speed, cost, and innovation on the table. The technology is mature, accessible, and essential for modern product development.
Frequently Asked Questions
How much faster is 3D printing compared to traditional prototyping?
Most parts print in hours to days instead of weeks to months. A part that takes 2-3 weeks to machine can often print overnight. Multiple design iterations happen in the time one traditional prototype would take.
Is 3D printing cost-effective for one-off prototypes?
Absolutely. With no tooling costs and minimal material waste, 3D printing is almost always cheaper than machining or molding for quantities under 10-20 parts. A prototype that might cost $2,000 machined often costs $20-50 printed.
What materials can I prototype with?
Common materials include PLA and ABS for basic prototypes, nylon for functional parts, resins for detailed models, and even metals like titanium and stainless steel for high-performance applications. Material options continue to expand.
Do 3D printed prototypes accurately represent final products?
For form and fit, yes—often perfectly. For function, it depends on material choice. Engineering-grade materials like nylon or carbon-fiber composites can closely mimic production parts. Always consider the specific properties you need to test.
What's the best 3D printing technology for prototyping?
It depends on your needs:
- FDM: Fast, cheap, good for large parts
- SLA: High detail, smooth surfaces
- SLS: Strong parts, no supports, engineering materials
- Metal printing: Production-like metal prototypes
Can I prototype moving assemblies in one print?
Yes, with certain technologies. SLS can print assembled parts with moving joints in a single print—the unsintered powder clears from gaps after printing. FDM and SLA typically need assembly.
How many design iterations should I plan for?
As many as you need. That's the beauty of 3D printing. Some clients iterate 5-10 times refining a design. Others need 20+ versions to get it right. Each iteration costs a fraction of traditional methods.
Do I need special skills to use 3D printing for prototyping?
You need CAD skills to design parts. Printer operation can be learned quickly, or you can use service bureaus. The design-for-additive skills take time but are worth developing as the technology becomes central to product development.
Contact Yigu Technology for Custom Manufacturing
Ready to accelerate your prototyping with 3D printing? At Yigu Technology, we combine years of manufacturing experience with advanced additive capabilities. Whether you need help optimizing designs for printing, producing functional prototypes, or moving from prototype to production, our team delivers professional results. [Contact us today] to discuss your project—we'll help you choose the right approach and get your prototypes made fast.