Introduction
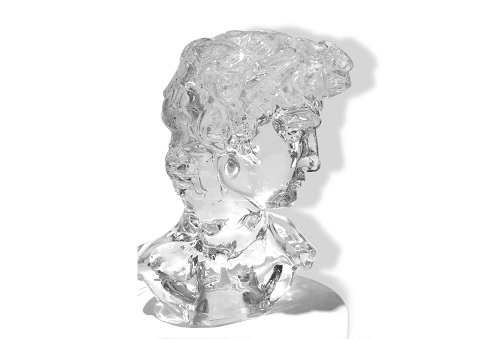
You've explored every corner of Teyvat, collected every character, and mastered every elemental reaction. Now you want to bring your favorite Genshin Impact characters into the real world. 3D printing Genshin models lets you hold Lumine, Venti, or Zhongli in your hands—figurines, keychains, even life-sized replicas. But capturing the intricate details of a character's flowing robes, delicate weapons, and expressive faces requires more than just downloading a file and hitting "print." This guide walks you through everything you need to succeed—from model selection and material choice to printing parameters and post-processing. Whether you're a beginner wanting a simple Paimon charm or an advanced maker attempting a detailed Raiden Shogun statue, these steps will help you achieve stunning results.
Why Are Genshin Impact 3D Prints So Popular?
The Global Phenomenon
Since its release, Genshin Impact has amassed a global fan base in the tens of millions. Players spend countless hours exploring the world of Teyvat, bonding with characters, and collecting every detail. This passion naturally extends to physical collectibles.
The market for video game-related merchandise, including 3D prints, has been growing at an annual rate of about 15% . Genshin 3D prints allow fans to:
- Own a piece of Teyvat: Hold your favorite character in your hands
- Display your fandom: Show off detailed figurines on desks, shelves, or in display cases
- Create unique gifts: Surprise fellow fans with personalized items
- Customize your collection: Print at any scale, from keychain to life-size
What Makes Genshin Models Challenging to Print?
Genshin Impact's art style is beautiful but complex:
- Intricate clothing: Flowing robes, layered fabrics, detailed patterns
- Delicate accessories: Weapons, jewelry, elemental effects
- Expressive faces: Subtle features that require high resolution
- Organic poses: Dynamic stances with overhangs and thin parts
These details make Genshin models rewarding to print but also demanding of your skills and equipment.
How Do You Choose and Prepare a Genshin Model?
Model Selection
Not all models are created equal. When choosing a model for 3D printing, consider:
Complexity:
- Characters with large, flowing robes (like Jean) require more support structures
- Simpler designs (like Paimon) print more straightforwardly
- Highly detailed characters (like Zhongli with his intricate clothing) capture fans' hearts but challenge printers
File quality:
- Look for models from reputable sources
- Check for user comments and photos of successful prints
- Ensure the model is "watertight" (no holes or gaps)
Size considerations:
- Small prints (keychain-sized): Fast, low cost, good for testing
- Medium prints (desktop figurines): Detailed, impressive, 4–8 hours print time
- Large prints (statues): High impact, 24+ hours, require more material and supports
3D Modeling Preparation
Before printing, you must prepare the digital model:
Check for defects:
- Look for non-manifold geometry, holes, or overlapping surfaces
- Use software like Meshmixer or Blender to repair issues
- A flawed model will fail during printing
Scale appropriately:
- Resize based on your needs and printer limitations
- Consider material costs—larger prints use more filament
- Ensure thin parts (swords, fingers) are thick enough to print
Orient for success:
- Position the model to minimize supports on visible surfaces
- Angle the model to reduce overhangs
- Consider how layer lines will affect appearance
Add supports if needed:
- Overhangs greater than 45 degrees typically need supports
- Tree-like supports use less material and are easier to remove
- Place supports strategically to avoid damaging delicate features
What Materials Work Best for Genshin 3D Prints?
The material you choose dramatically affects the final result.
| Material | Cost per kg | Texture | Strength | Color Options | Ease of Printing | Best For |
|---|---|---|---|---|---|---|
| PLA | $20–$30 | Smooth, matte-like | Moderate | Many, including translucent | High—beginner friendly | Most figurines, test prints, general use |
| ABS | $30–$40 | Slightly glossy | Stronger than PLA | Good range | Medium—requires heated bed | Larger prints, parts needing durability |
| Resin (SLA) | $50–$100 | High-detail, smooth | Brittle | Limited without painting | Low—needs ventilation, post-curing | Detailed faces, weapons, fine features |
| PETG | $25–$35 | Slightly flexible | Good | Moderate | Medium | Functional parts, durability |
| TPU | $40–$60 | Flexible, rubbery | Low | Limited | Low | Flexible accessories, soft parts |
PLA: The Beginner's Choice
PLA (Polylactic Acid) is the most popular material for Genshin prints:
- Affordable: $20–$30 per kg
- Easy to print: Low temperature, minimal warping
- Good detail: Captures most features well
- Many colors: Match character palettes
Limitations:
- Can be brittle—delicate parts may snap
- Low heat resistance—don't leave in hot cars
- May not capture ultra-fine details
Best for: Most Genshin figurines, test prints, beginner projects
ABS for Durability
ABS (Acrylonitrile Butadiene Styrene) offers more strength:
- Stronger than PLA: Better for larger prints
- Slightly glossy finish: Can look more like plastic toys
- Heat resistant: Won't deform in warm environments
Challenges:
- Requires heated bed to prevent warping
- Emits fumes—good ventilation needed
- More difficult for beginners
Best for: Larger statues, parts that need durability
Resin for Ultimate Detail
Resin printing (SLA/DLP) captures details that FDM cannot:
- Extremely fine details: Layer heights down to 0.025 mm
- Smooth surfaces: No visible layer lines
- Perfect for faces: Captures subtle expressions
Trade-offs:
- Higher cost ($50–$100 per kg)
- Brittle—delicate parts can snap
- Requires post-processing (cleaning, curing)
- Ventilation and safety gear needed
Best for: Detailed character faces, intricate weapons, small high-detail figures
What Printing Parameters Matter Most?
Layer Height
Layer height affects detail and print time:
| Layer Height | Detail | Print Time | Best For |
|---|---|---|---|
| 0.05 mm | Excellent | Very long | Small, highly detailed figures |
| 0.1 mm | Good | Moderate | Most Genshin figurines |
| 0.2 mm | Moderate | Fast | Large statues, test prints |
| 0.3 mm | Poor | Very fast | Quick prototypes, not for display |
For Genshin models, 0.1 mm offers the best balance of detail and speed. For faces and fine details, consider 0.05 mm on critical parts.
Nozzle Temperature
Temperature varies by material:
- PLA: 180–220°C
- ABS: 220–250°C
- PETG: 220–250°C
- TPU: 210–230°C
Too hot: Stringing, oozing, burned plastic
Too cold: Poor layer adhesion, under-extrusion
Print Speed
Slower speeds generally yield better quality:
- 50–60 mm/s: Good balance for most prints
- 30–40 mm/s: For detailed areas, first layers
- 80+ mm/s: Risk of quality loss, ringing artifacts
Supports
Supports are essential for overhangs but leave marks:
- Tree supports: Use less material, easier to remove
- Grid supports: Stronger, but harder to remove
- Support density: Lower density (10–15%) for easy removal
- Support interface: Enables cleaner separation
Placement matters: Position supports where marks won't show—under robes, on backs, hidden areas.
How Do You Post-Process Genshin Prints?
Support Removal
Carefully remove supports to avoid damaging delicate parts:
- Use flush cutters for small supports
- Needle-nose pliers for larger structures
- Sand any remaining nubs smooth
Sanding
Smoothing rough areas enhances the final look:
- Start with coarse grit (200–400) for major flaws
- Progress to fine grit (800–2000) for smooth finish
- Focus on visible surfaces—faces, hands, weapons
Wet sanding reduces dust and gives finer finish.
Priming
Primer prepares the surface for painting:
- Fills small layer lines
- Provides uniform base color
- Helps paint adhere
Use gray primer—it reveals imperfections you might miss.
Painting
Bring your Genshin character to life with color:
- Acrylic paints: Water-based, easy to use, good for details
- Airbrushing: Professional finish, smooth gradients
- Brush painting: More control for small areas
Techniques:
- Thin your paints—multiple thin coats better than one thick coat
- Use small brushes for details (eyes, jewelry)
- Mask areas for clean color separation
Character accuracy: Reference official art for exact colors—Venti's greens, Zhongli's golds, Raiden's purples.
Sealing
Protect your work with clear coat:
- Matte finish: Reduces shine, looks natural
- Gloss finish: Shiny, for eyes and gemstones
- Satin finish: In-between
Apply in thin, even coats to avoid drips.
What Common Problems Ruin Genshin Prints and How Do You Fix Them?
Problem: Failed Prints (Warping, Detachment)
Causes:
- Poor bed adhesion
- First layer issues
- Temperature fluctuations
Solutions:
- Level bed properly
- Use adhesion aids (glue stick, hairspray, brim)
- Ensure first layer squishes slightly
- Enclose printer to maintain temperature
Problem: Visible Layer Lines
Causes:
- Too thick layer height
- Printer mechanical issues
- Vibration
Solutions:
- Use thinner layers (0.1 mm or less)
- Check belts are tight
- Place printer on stable surface
- Consider resin printing for smooth surfaces
Problem: Missing Details
Causes:
- Model too small for details to print
- Under-extrusion
- Incorrect temperature
Solutions:
- Scale up model
- Calibrate extruder
- Adjust temperature
- Use smaller nozzle (0.2 mm for fine details)
Problem: Stringing and Oozing
Causes:
- Too high temperature
- Retraction settings incorrect
- Moist filament
Solutions:
- Lower temperature
- Adjust retraction distance and speed
- Dry filament before use
Problem: Weak or Brittle Parts
Causes:
- Low infill
- Poor layer adhesion
- Wrong material choice
Solutions:
- Increase infill (20–40% for figurines)
- Check temperature for proper bonding
- Use stronger material (ABS instead of PLA for thin parts)
Problem: Paint Doesn't Stick
Causes:
- No primer
- Greasy surface
- Wrong paint type
Solutions:
- Always use primer first
- Wash parts with soap and water
- Use acrylic paints formulated for plastics
What Are the Legal Considerations for Genshin 3D Prints?
Personal Use
Printing Genshin Impact models for personal use is generally acceptable:
- Display in your home
- Gifts for friends (not sold)
- Personal collection
Commercial Use
Selling 3D-printed Genshin items is legally problematic:
- Genshin Impact is protected by copyright
- Characters and designs are intellectual property of HoYoverse
- Selling without permission infringes copyright
Exceptions:
- Some creators offer licensed merchandise
- Check official policies
- When in doubt, don't sell
Sharing Files
Sharing 3D model files online:
- Many fan-created models exist
- Original creations inspired by Genshin may be acceptable
- Direct copies of in-game assets likely violate terms
Always respect intellectual property and support official merchandise when possible.
How Does Yigu Technology Support Genshin 3D Printing?
As a non-standard plastic and metal products custom supplier, Yigu Technology recognizes the importance of material selection and process control in creating high-quality Genshin 3D prints.
Material Expertise
The right material brings out the best features:
- High-resolution resin: Captures every fold and texture in a character's clothing
- Durable materials: For weapons and accessories that might be handled
- Color options: Match character palettes
Process Control
Consistent quality requires precision:
- Parameter optimization: Tailored settings for different models
- Quality control: Prevents warping, layer delamination, and other issues
- Experienced engineers: Optimize printing for best results
Supporting Creators
Yigu Technology helps bring Genshin models to life:
- Material selection guidance
- Printing parameter recommendations
- Quality assurance for critical details
Whether you're a hobbyist printing at home or a creator producing small batches, the right materials and processes make all the difference.
Conclusion
3D printing Genshin Impact models is a rewarding way to bring your favorite characters into the physical world. Success requires attention to every step:
- Model selection: Choose high-quality files with appropriate complexity
- Preparation: Repair defects, scale appropriately, orient for success
- Material choice: PLA for beginners, resin for ultimate detail, ABS for durability
- Printing parameters: Layer height 0.1 mm for balance, proper temperatures, strategic supports
- Post-processing: Careful support removal, sanding, priming, painting, sealing
- Problem-solving: Address common issues systematically
The results are worth the effort—a stunning Venti with his lyre, a fierce Raiden Shogun with her sword, a cute Paimon floating beside your monitor. Each print is a tangible connection to the world of Teyvat.
Remember the legal considerations: personal use is fine, but selling requires permission. Support official merchandise when you can.
Whether you're printing a small keychain or a life-sized statue, the joy of holding your favorite character in your hands is unmatched. Happy printing, Traveler.
Frequently Asked Questions
Q1: What materials are best for Genshin 3D prints?
PLA ($20–$30/kg) is great for beginners—affordable, easy to print, good detail. Resin ($50–$100/kg) captures fine details perfectly but requires more skill. ABS ($30–$40/kg) is stronger for larger prints. Choose based on your experience and desired quality.
Q2: How can I ensure the details of Genshin models are well-preserved during printing?
Start with a high-quality model. Use thinner layers (0.1 mm or less) for detail. Position the model to minimize supports on visible surfaces. Use proper support structures. After printing, careful post-processing—sanding, priming, painting—enhances details.
Q3: Is it legal to 3D print Genshin-related items?
Printing for personal use (display, gifts not sold) is generally acceptable. Selling printed items infringes copyright—Genshin Impact characters and designs are intellectual property of HoYoverse. Always check official policies and respect intellectual property.
Q4: What printer settings work best for Genshin figurines?
- Layer height: 0.1 mm for good balance
- Temperature: Follow material guidelines (180–220°C for PLA)
- Speed: 50–60 mm/s
- Infill: 15–20% for most figurines
- Supports: Tree supports for easy removal, placed strategically
Q5: How long does it take to print a Genshin figure?
Small keychain-sized: 1–3 hours. Medium desktop figurine: 4–8 hours. Large detailed statue: 24+ hours. Time varies by size, layer height, and printer speed.
Q6: What's the best way to paint 3D printed Genshin models?
- Prime with gray primer to reveal imperfections
- Sand smooth (if needed)
- Paint with acrylics—thin coats, multiple layers
- Detail with small brushes for faces and accessories
- Seal with clear coat to protect
Q7: Where can I find good Genshin 3D model files?
Look on sites like Thingiverse, MyMiniFactory, or Cults3D. Search for "Genshin Impact" and check user comments and photos of successful prints. Ensure files are watertight and have good reviews before printing.
Contact Yigu Technology for Custom Manufacturing
Ready to create stunning Genshin Impact 3D prints but need help with materials or advanced printing? At Yigu Technology, we combine material science expertise with precision manufacturing. Our team can advise on the best materials for your project and help you achieve professional-quality results.
Visit our website to see our capabilities. Contact us today for a free consultation. Let's bring Teyvat to life together.