Introduction
Creating a new plastic or metal part is rarely straightforward. You start with a concept, but turning that concept into something you can hold, test, and manufacture takes careful planning. Prototype development is the bridge between your idea and a production-ready product. Done well, it saves time, prevents costly mistakes, and gives you confidence before scaling up. This guide walks you through the essential stages, common pitfalls, and practical strategies to help you optimize your process—whether you are designing a simple bracket or a complex medical device.
What Is Prototype Development?
Prototype development is the process of creating a preliminary version of a product to test its design, function, and feasibility. For plastic and metal parts, this means building models that closely represent the final product’s shape, performance, and durability.
The goal is not perfection on the first attempt. Instead, prototypes help you ask the right questions: Does this part fit with other components? Can it withstand normal use? Is it manufacturable at a reasonable cost?
Industry data shows that approximately 95% of new products fail due to poor design or inadequate testing. Investing in proper prototyping dramatically improves your odds.
Why Is Prototype Development Critical?
Skipping or rushing through prototyping may seem efficient, but it often leads to bigger problems later. Here is why this phase matters.
It Validates Your Design
A prototype reveals what a drawing or screen cannot. You test form, fit, and function with physical parts. Dimensional errors become obvious. Weak points in the structure show up under stress.
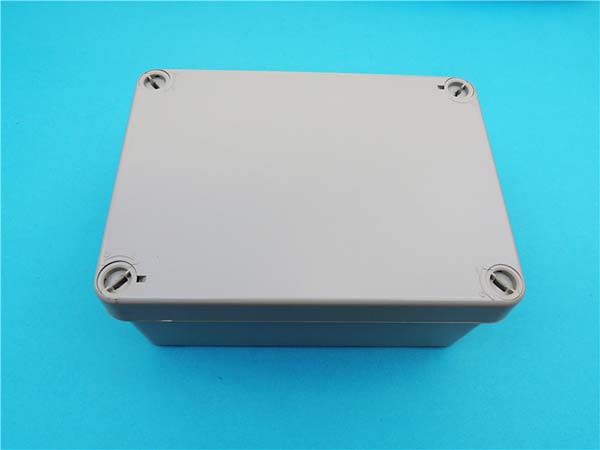
A consumer electronics company once designed a plastic enclosure that looked perfect in CAD. The first prototype revealed that the snap-fit features were too stiff. Users could not open the case without tools. The design was revised before any molds were cut, saving $15,000 in tooling changes.
It Reduces Overall Costs
Finding a flaw during prototyping is inexpensive. Finding the same flaw during mass production is not.
| Stage of Discovery | Typical Cost to Fix |
|---|---|
| Concept / Prototype | $10 – $100 |
| Tooling Stage | $1,000 – $10,000 |
| Mass Production | $10,000 – $100,000+ |
A simple change to a wall thickness might cost a few hours of engineering time in the prototype phase. The same change after production starts could require new molds, scrapped inventory, and delayed shipments.
It Improves Manufacturing Readiness
A well-developed prototype serves as a roadmap for production. It helps manufacturers understand assembly sequences, surface finish requirements, and critical tolerances. This clarity reduces misunderstandings and ensures smoother scale-up.
What Are the Key Stages?
Prototype development follows a structured path. Each stage builds on the previous one.
1. Concept and Requirements
Start by defining what the prototype must achieve. Is it for internal testing? Investor presentations? User feedback? Each purpose may require different levels of fidelity.
Document key requirements:
- Dimensions and tolerances
- Material properties (strength, heat resistance, etc.)
- Operating environment
- Expected production volume
2. Feasibility Analysis
Before building anything, assess whether the design is technically and economically viable. This includes evaluating material choices, manufacturing methods, and potential risks.
For example, a design that requires thin-walled metal features might be possible with CNC machining but impossible with traditional casting. Identifying this early avoids wasted effort.
3. Prototype Creation
This is where physical parts are made. The method depends on your goals, timeline, and budget.
4. Testing and Validation
Put the prototype through its intended use. Test for strength, fit, thermal performance, or any other relevant criteria. Document everything. A failed test is valuable data, not a setback.
5. Iteration and Refinement
Use test results to improve the design. Create a new prototype and test again. This cycle continues until the design meets all requirements.
6. Final Approval and Production Handoff
Once the prototype performs as intended, it becomes the reference for production. Detailed documentation—including final CAD files, material specs, and assembly instructions—is passed to the manufacturing team.
What Techniques Are Available?
Choosing the right prototyping method affects cost, speed, and part quality. Here is a comparison of common techniques.
| Technique | Description | Best For | Limitations |
|---|---|---|---|
| 3D Printing | Builds parts layer by layer from digital files | Quick concept models, complex geometries | Lower strength, limited material options |
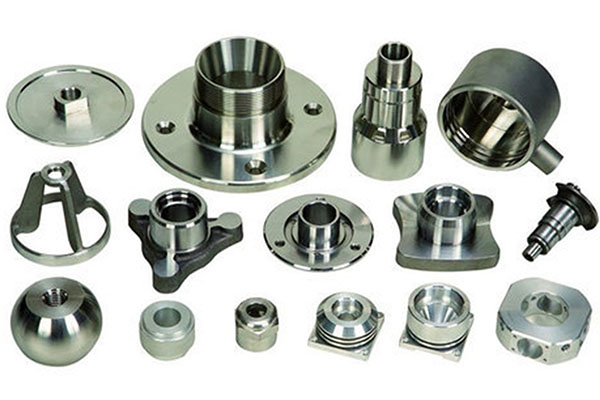
| CNC Machining | Removes material from solid blocks using computer-controlled tools | Functional metal and plastic parts with tight tolerances | Higher cost for complex shapes, material waste |
| Injection Molding | Injects molten material into a steel or aluminum mold | Production-intent parts for high-volume validation | High upfront mold cost, longer lead time |
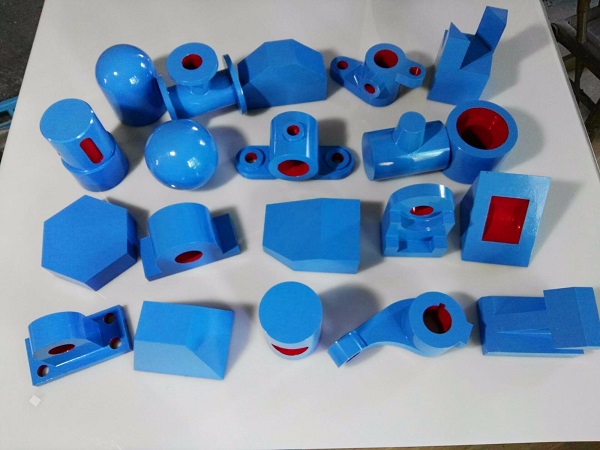
| Vacuum Casting | Creates polyurethane replicas from a silicone mold | Small batches of 5–20 parts with near-production properties | Limited to plastics and flexible materials |
| Laser Cutting | Cuts sheet materials with precision | Flat parts like brackets, panels, and enclosures | Limited to 2D shapes |
How Do You Choose the Right Method?
Selecting a technique requires balancing several factors. No single method is best for every situation.
Consider Complexity
Parts with complex internal geometries, undercuts, or organic shapes are often best suited for 3D printing or vacuum casting. Simpler shapes with tight tolerances may lean toward CNC machining.
Match Materials to Purpose
If your final part will be injection-molded ABS, a prototype made from the same material through CNC machining or vacuum casting will give accurate performance data. A 3D-printed part in standard resin may behave differently under stress.
Align with Timeline and Budget
- Need a part in 2–3 days? 3D printing or laser cutting is your answer.
- Need functional metal parts in 1–2 weeks? CNC machining fits.
- Preparing for production and need 20 samples? Vacuum casting offers a balance of speed and material accuracy.
What Challenges Should You Expect?
Even with a solid plan, prototype development comes with hurdles. Anticipating them helps you respond quickly.
Material Selection
Choosing the wrong material can lead to misleading test results. For example, a 3D-printed resin part may snap under a load that a production-grade polycarbonate part would handle easily. Work with experienced engineers who understand material properties.
Design Iterations
Some teams view multiple iterations as a sign of failure. In reality, iteration is how good designs become great ones. Budget time and resources for at least two or three rounds of prototyping.
Cost Creep
Prototyping costs can climb if the scope keeps expanding. Define what you need to learn from each prototype before starting. Avoid adding “nice-to-have” features that delay the project.
Manufacturing Constraints
A design that looks perfect on screen may be impossible to produce. Features like sharp internal corners, inconsistent wall thicknesses, or unrealistic tolerances cause problems later. Involve manufacturing experts early.
How Does Yigu Technology Approach Prototyping?
At Yigu Technology, we treat prototyping as a collaborative problem-solving process. Our goal is to help you learn quickly and move forward with confidence.
We Start by Listening
Before suggesting any technique, we ask about your product’s end use, expected volumes, timeline, and budget. This understanding shapes every recommendation.
A recent client came to us with a design for a handheld medical device. They originally planned to 3D print all prototypes. After discussing their need for sterilization testing, we recommended CNC-machined prototypes from a medical-grade plastic. The parts survived the sterilization process, while 3D-printed samples would not have. The client avoided a costly redesign later.
We Match Technique to Purpose
Our team uses a range of capabilities:
- 3D printing for quick form and fit checks
- CNC machining for functional metal and plastic parts
- Vacuum casting for small batches with production-like materials
- Injection molding for pilot runs and production validation
We do not push one method. We recommend what fits your stage of development.
We Build Quality Into Every Step
Quality is not just an inspection at the end. It starts with material sourcing and continues through in-process checks. We use 3D scanners and coordinate measuring machines to verify dimensions against your CAD files.
Conclusion
Optimizing prototype development for plastic and metal parts comes down to planning, choosing the right techniques, and embracing iteration. A well-executed prototype phase does more than validate a design—it saves money, reduces risk, and builds confidence for production.
Start with clear goals. Select methods that match your needs. Work with partners who bring both technical skill and practical experience. By doing so, you turn a complex process into a manageable path from idea to market.
Frequently Asked Questions
What is the typical cost of prototype development for plastic and metal parts?
Costs vary widely based on part size, complexity, material, and method. A simple 3D-printed part may cost $50–$200. A complex CNC-machined metal part can range from $500 to $3,000. At Yigu Technology, we provide detailed quotes based on your specific requirements.
How long does it take to develop a prototype?
Simple 3D-printed parts often take 2–5 days. CNC-machined parts typically require 5–10 days. Vacuum casting or injection-molded pilot runs may take 2–4 weeks. We offer expedited options when timelines are tight.
Can I make changes to the design after the prototype is developed?
Yes. In fact, we expect and encourage iterations. Prototyping is designed to uncover improvements. We work with you through multiple rounds until the design meets your goals.
What is the difference between a prototype and a production-intent sample?
A prototype focuses on learning—testing form, fit, or function. A production-intent sample is made using the same materials and processes planned for mass production. It is used for final validation before tooling begins.
How do I know which prototyping method is right for my project?
Consider what you need to learn. If you are testing fit and appearance, 3D printing works well. If you need functional testing with production materials, CNC machining or vacuum casting is better. Our engineers help you evaluate based on your timeline, budget, and performance requirements.
Contact Yigu Technology for Custom Manufacturing
Ready to move your plastic or metal part from concept to reality? Yigu Technology offers end-to-end prototype development services tailored to your project. From design refinement to final validation, our team provides the technical expertise and hands-on support you need. Contact us today to discuss your requirements and get started.