Introduction
Traditional injection molding is straightforward. Melt plastic, inject into a closed mold cavity, cool, and eject. It works for countless applications. But some parts—those with complex internal channels, intricate hollow structures, or embedded features—push traditional methods to their limits. They require complex core-pulling mechanisms, multi-piece molds, or secondary assembly.
Reverse injection molding offers a different approach. Instead of injecting plastic into an empty cavity, the mold is first filled with a liquid or semi-liquid medium. Then, molten plastic is injected into this medium. As the plastic cools and solidifies, it takes shape through its interaction with the medium.
This process can create geometries that are difficult—or impossible—with traditional methods. Internal channels form naturally. Hollow structures emerge without complex tooling.
This guide covers the basics of reverse injection molding: the working process, materials, and key considerations for beginners.
How Does Reverse Injection Molding Differ from Traditional Molding?
| Aspect | Traditional Injection Molding | Reverse Injection Molding |
|---|---|---|
| Mold filling sequence | Molten material first into closed mold cavity | Liquid/semi-liquid medium fills mold first, then molten material injected |
| Cooling process | Material cools in static mold cavity | Material cools while interacting with pre-filled medium |
| Complexity of part geometry | Well-suited for complex geometries with proper mold design | Can create unique geometries difficult with traditional methods |
Imagine a part with internal channels or complex hollow structures. Traditional molding might require intricate core-pulling mechanisms or multi-piece molds. Reverse molding uses the liquid medium to naturally create these features. The plastic solidifies around the medium, forming internal structures without complex tooling.
How Does the Reverse Injection Molding Process Work?
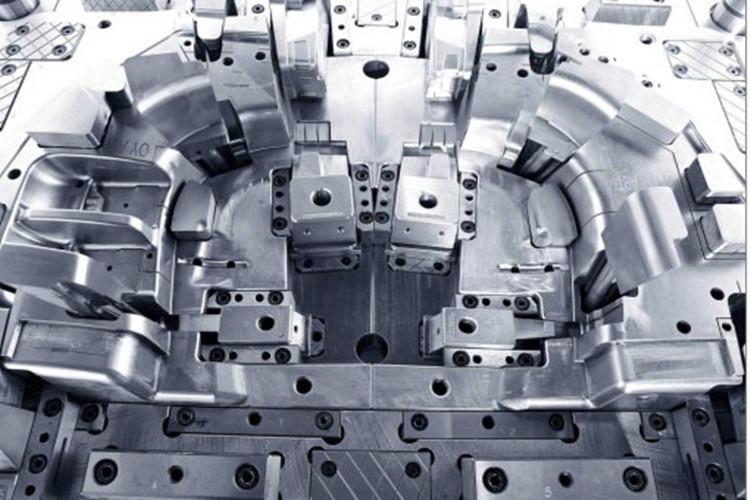
Step 1: Mold Preparation
Inspection and cleaning: The mold is inspected for wear, damage, or residue. Any defect can cause inconsistent part quality or production failure. Cleaning agents and tools—mild detergent, soft-bristled brush—remove dirt, grease, and solid particles without scratching surfaces.
Coating application (optional): A release agent or special coating may be applied to the mold surface. This aids part removal after molding. Apply evenly—too little causes sticking; too much affects surface finish.
Step 2: Medium Filling
Selecting the right medium: The liquid or semi-liquid medium must have appropriate viscosity, density, and chemical compatibility with the molten plastic. For parts with specific internal structures, the medium must flow and displace predictably. Common media include water-based solutions, certain gels, or low-viscosity polymers.
Filling operation: A precise filling system introduces the medium into the mold cavity. Filling speed and pressure are controlled:
- Too fast: air bubbles trapped in the medium, affecting final part quality
- Too slow: uneven filling of the mold
Pressure is adjusted based on mold size, medium viscosity, and cavity complexity.
Step 3: Material Injection
Melting and preparing the plastic: Plastic material is heated to its melting point in an injection unit. Temperature is carefully monitored and controlled:
| Material | Melting Range |
|---|---|
| Polyethylene (PE) | 110 – 130°C |
| Polypropylene (PP) | 160 – 170°C |
| Polycarbonate (PC) | 220 – 260°C |
Wrong temperature causes poor flowability, degradation, or inconsistent part quality.
Injecting into the medium: Molten plastic is injected into the pre-filled mold. Injection pressure and speed are key:
- High pressure ensures effective penetration and displacement of the medium
- Excessive pressure causes mold stress
Injection speed must coordinate with plastic viscosity and medium behavior. More viscous media may require higher injection speed for proper displacement.
Step 4: Cooling and Solidification
Cooling system activation: Cooling channels circulate coolant—water or special fluid—through the mold. Coolant temperature and flow rate control the cooling rate:
- Too rapid: internal stresses, warping, cracking
- Too slow: increased cycle time
Monitoring solidification: Temperature sensors or pressure changes indicate solidification progress. Cooling time depends on:
| Factor | Impact |
|---|---|
| Plastic type | Different thermal properties |
| Part thickness | Thicker parts need longer cooling |
| Cooling conditions | Flow rate, coolant temperature |
A 5 mm thick part may require 30 to 60 seconds cooling. A 1 mm part may cool in 10 to 20 seconds .
What Materials Are Used?
Suitable Plastics
Polypropylene (PP): Low cost, good chemical resistance, high heat resistance. Melting point: 160–165°C for homopolymer. Ideal for chemical storage containers with complex internal structures.
Polycarbonate (PC): Excellent impact resistance, high-temperature resistance (-40°C to 130°C), good dimensional stability, transparency. Used for automotive headlight lenses with complex internal light-diffusing structures.
ABS: Good impact resistance, dimensional stability, ease of processing. Wide processing temperature range. Used for consumer electronics, automotive interiors, toys—including internal structural components of smartphone cases.
Metals for Metal-Plastic Composites
Aluminum: Lightweight, good strength-to-weight ratio. Adds strength and rigidity to metal-plastic composites. Used for automotive and aerospace components where aluminum provides mechanical strength and plastic offers corrosion resistance and complex shaping.
Copper: Excellent electrical and thermal conductivity. Used for electronic components and heat sinks. Copper core conducts heat efficiently; plastic molded around it provides insulation and form factor. Copper is heavier than aluminum—consider weight requirements.
How to Choose the Right Materials?
Compatibility with the Medium
The material must not react chemically with the medium. A water-based medium requires plastic that is not water-soluble and does not react with water. Chemical reactions cause discoloration, brittleness, or reduced mechanical properties.
Mechanical Properties Requirements
Match material properties to part function:
| Requirement | Material Options |
|---|---|
| High mechanical stress | PC, high-strength PP grades |
| Flexibility | Modified base materials, elastomers |
Cost-Effectiveness
High-performance materials like PC may be ideal but expensive. For cost-sensitive products, consider PP or ABS if they meet minimum performance requirements.
What Are the Advantages and Challenges?
Advantages
Complex internal structures: Channels and hollow features form naturally through interaction with the medium. Reduces need for complex core-pulling mechanisms.
Stronger bonding in composites: Precise control over plastic-metal interaction creates stronger bonds in metal-plastic composites.
Simplified mold design: For certain parts, reverse molding reduces mold complexity compared to traditional methods with multi-piece molds.
Potential cost savings: Simplified production can reduce post-processing operations and shorten cycles.
Challenges
Medium selection: Finding the right medium—compatible, controllable, and cost-effective—requires expertise.
Process control: More parameters than traditional molding: medium filling, material injection into medium, interaction dynamics.
Limited material options: Not all plastics work well with all media. Compatibility must be verified.
What Does a Real-World Example Look Like?
A manufacturer needed to produce a plastic component with intricate internal cooling channels. Traditional injection molding required a complex mold with slides and cores. The mold would be expensive and prone to wear.
Reverse injection molding provided a simpler solution. A water-based gel was used as the medium, filling the mold cavity first. Molten PP was injected into the gel. The gel displaced in a controlled pattern, creating cooling channels as the plastic solidified.
The result: a part with precisely formed internal channels. Mold complexity was reduced by 40%. Tooling cost dropped significantly. The cooling channels met all performance specifications.
Conclusion
Reverse injection molding is a specialized process that inverts the traditional approach. Instead of injecting plastic into an empty cavity, a liquid or semi-liquid medium fills the mold first. Molten plastic is then injected into the medium. As it cools, the plastic takes shape through its interaction with the medium.
The process offers unique advantages for parts with complex internal channels, hollow structures, or metal-plastic composites. It can simplify mold design and reduce the need for complex core-pulling mechanisms.
Key considerations include medium selection, process control, and material compatibility. Suitable plastics include PP, PC, and ABS. Metals like aluminum and copper can be combined with plastics for composite parts.
For applications where traditional molding reaches its limits, reverse injection molding offers an alternative path to complex, high-performance parts.
FAQ
What are the main differences between reverse injection molding and traditional injection molding?
In traditional injection molding, molten material is injected into a closed mold cavity. Cooling occurs in a static cavity. In reverse injection molding, a liquid or semi-liquid medium fills the mold first, then molten material is injected. Cooling occurs while the material interacts with the pre-filled medium. Reverse molding can create unique geometries—internal channels, complex hollow structures—that are difficult or impossible with traditional methods.
How to choose the right materials for reverse injection molding?
Consider compatibility with the medium first. Material should not react chemically with the medium. Consider mechanical property requirements—PC or high-strength PP for high-stress applications. Consider cost-effectiveness; PP or ABS may be suitable for less demanding applications at lower cost.
What should be paid attention to during operation of reverse injection molding equipment?
Safety is paramount. Wear safety glasses and heat-resistant gloves. Control heating unit temperature to ensure proper melting. Monitor and adjust injection pressure and speed based on material and mold design. Set coolant temperature and flow rate for even cooling without internal stresses. Maintain equipment regularly—check for wear and damage to prevent production failures.
What types of parts are best suited for reverse injection molding?
Parts with complex internal channels or hollow structures. Metal-plastic composites requiring strong bonding between materials. Parts that would otherwise need complex core-pulling mechanisms or multi-piece molds in traditional processes.
Can reverse injection molding be used for high-volume production?
Yes, but with considerations. Process parameters require careful control to maintain consistency. Medium selection and handling must be repeatable. For applications where the unique capabilities of reverse molding are needed, it can be scaled for high-volume production with proper automation and process monitoring.
Contact Yigu Technology for Custom Manufacturing
At Yigu Technology , we specialize in advanced injection molding processes, including reverse injection molding. Our engineers understand the nuances of medium selection, process control, and material compatibility.
We serve industries requiring complex internal geometries and metal-plastic composites—aerospace, automotive, high-end electronics. From prototypes to production, we deliver high-quality parts that meet demanding specifications.
Contact Yigu Technology today to discuss your reverse injection molding project.