The best 3D prototype maker depends on your project's size, material needs, budget, and detail requirements—from affordable FDM printers for functional parts to high-precision resin systems for detailed models and industrial SLM machines for metal components.
Introduction
If you're wondering which 3D prototype maker to choose, the short answer is: it depends. A hobbyist making small plastic parts might opt for an affordable FDM printer. A product designer needing high-precision resin models would lean toward a resin-based system. For industrial-grade metal prototypes, professional SLA or SLM machines are better fits.
The wrong choice wastes time and money. The right choice accelerates development, improves designs, and gets products to market faster.
This guide breaks down everything you need to know to pick the right tool—and use it effectively. We'll compare technologies, explore key factors, and provide step-by-step guidance for successful prototyping.
What Are the Key Types of 3D Prototype Makers?
Not all 3D prototype makers are the same. Each technology has unique strengths. Let's compare the four most common types with real-world examples.
| Technology | Core Mechanism | Best For | Typical Cost | Pros | Cons |
|---|---|---|---|---|---|
| FDM (Fused Deposition Modeling) | Melts plastic filament and extrudes layer by layer | Functional prototypes, large parts, low-cost testing | $200–$5,000 | Affordable, easy to use, wide material options (PLA, ABS, PETG) | Lower precision (0.1-0.3mm layers), visible layer lines |
| Resin (SLA/DLP) | Uses UV light to cure liquid resin into solid layers | High-detail prototypes (jewelry, miniatures, dental parts) | $300–$8,000 | Exceptional precision (0.025-0.1mm), smooth surfaces | Resin toxic (requires safety gear), parts brittle, small build volume |
| SLA (Stereolithography) | Laser-based resin curing (higher accuracy than DLP) | Engineering prototypes, medical models | $5,000–$50,000+ | Industrial-grade precision, durable resin options | Slow print speed, expensive materials |
| SLM (Selective Laser Melting) | Melts metal powder into solid parts | Metal prototypes (aerospace, automotive components) | $50,000–$500,000+ | Fully functional metal parts, high strength | Very high cost, requires specialized training |
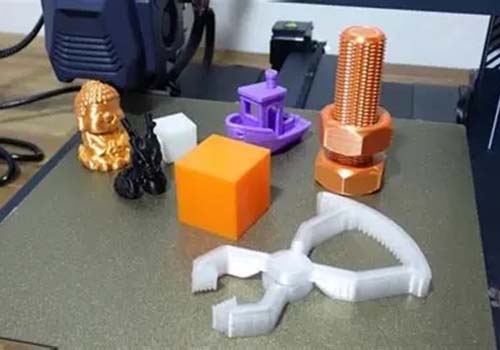
Real-world example: FDM vs. Resin
A startup developing a new smartphone case might start with an FDM printer (like the Creality Ender 3 V3 SE, ~$250) to test basic fit and grip. The FDM prototype costs $0.50 in PLA filament—cheap enough to print multiple iterations.
Once the design is finalized, they'd switch to a resin printer (like the Elegoo Mars 4 Ultra, ~$500) to create a smooth, detailed prototype for investor presentations. The resin version costs $3 in material—more expensive, but it looks production-ready with smooth surfaces and crisp details.
The FDM model tests function. The resin model sells the vision.
What Critical Factors Should Guide Your Choice?
Don't buy a 3D prototype maker based on brand or price alone. Use these five factors to match the tool to your project.
1. Prototype size and build volume
The build volume (maximum part size) determines if you can print your prototype in one piece.
- A small resin printer (e.g., Anycubic Photon Mono X 2) offers 210x120x200mm—great for small parts like watch components or dental models.
- A large FDM printer (e.g., Prusa XL) offers 360x360x360mm—ideal for prototypes like furniture legs, laptop stands, or helmet shells.
Pro Tip: If your prototype exceeds build volume, print it in pieces and assemble. PLA parts bond well with cyanoacrylate glue (superglue). Design alignment features (pins, keys) to help pieces fit accurately.
2. Material compatibility
Different projects need different materials. Match material to use case:
PLA (Polylactic Acid) : $20–30/kg. Biodegradable, easy to print. Best for non-functional prototypes—concept models, form studies, visual aids. 72% of hobbyists use PLA for prototypes (2024 3D Hubs survey).
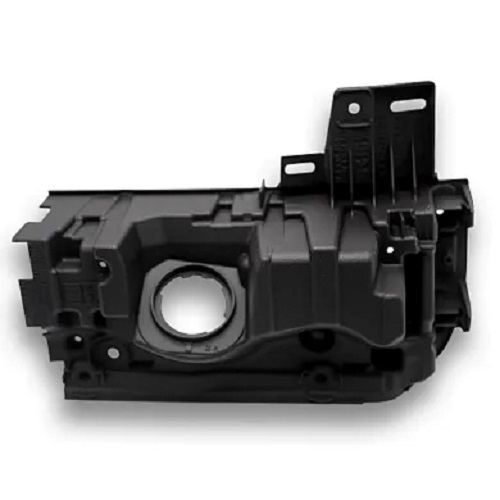
ABS (Acrylonitrile Butadiene Styrene) : Heat-resistant and durable. Good for functional prototypes—phone case hinges, tool handles, parts needing some strength.
PETG: Combines PLA's ease with ABS's strength. Excellent for functional parts needing durability and some flexibility.
Resin (Photopolymer) : Available in flexible, tough, high-temperature variants. Perfect for detailed parts—dental aligners, jewelry patterns, miniatures. 68% of engineers use resin for precision prototypes.
Metal (Stainless Steel, Titanium) : Used in SLM printers for industrial prototypes—aircraft engine parts, medical implants, automotive components.
3. Precision and detail requirements
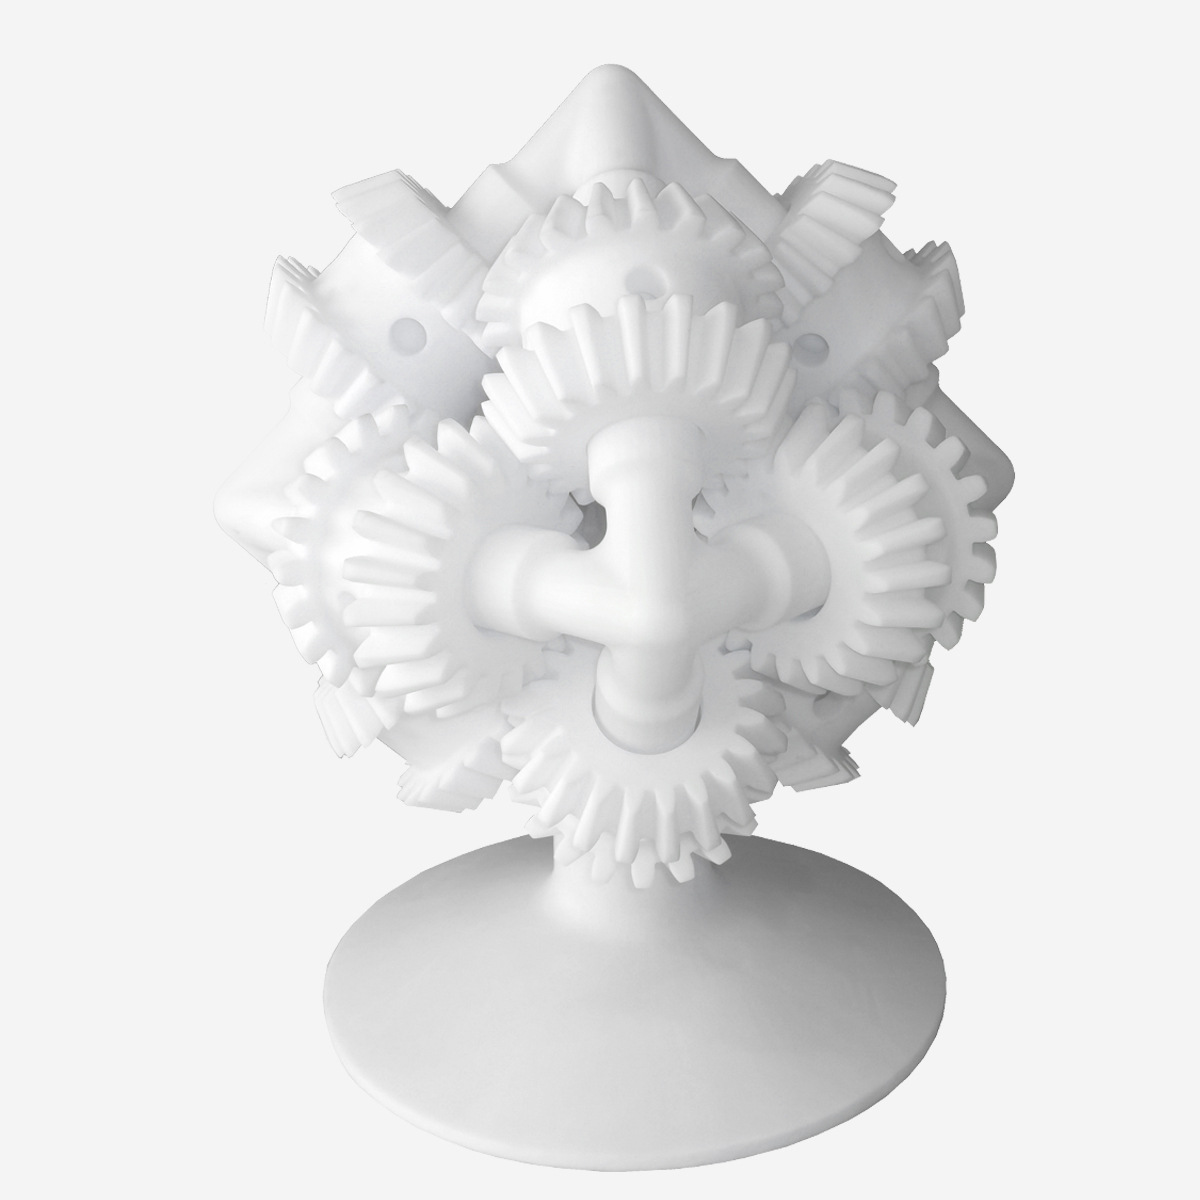
If your prototype needs fine details—a gear with tiny teeth, a medical model of blood vessels, intricate surface textures—precision matters.
FDM printers: Minimum layer height typically 0.1mm. Visible layers are okay for rough tests but not for presentations. Features below 0.5mm may not print cleanly.
Resin printers: Layer heights as low as 0.025mm—layers nearly invisible. Can capture details down to 0.1-0.2mm. Ideal for high-detail work.
Example: A jewelry designer creating a necklace pendant prototype would use resin to capture intricate engravings. A mechanic testing a replacement plastic gear might use FDM—the gear's function (not appearance) is the priority.
4. Budget
Your budget narrows options quickly:
Hobbyist/Startup ($200–$2,000) : FDM printers (Creality, Prusa) or entry-level resin printers (Elegoo, Anycubic). Material cost: $0.05–$0.10 per gram.
Professional ($2,000–$10,000) : Mid-range resin printers (Formlabs Form 3+) or industrial FDM (Ultimaker S5). Material cost: $0.10–$0.50 per gram.
Industrial ($10,000+) : SLA or SLM printers (3D Systems, EOS). Metal materials: $5–$50 per gram.
Reality check: Most businesses don't need to buy industrial equipment. For metal prototypes, partnering with a 3D printing service is often more cost-effective than purchasing a $500,000 SLM machine.
5. Ease of use
If you're new to 3D printing, avoid complex machines:
Entry-level FDM: Printers like Creality Ender 3 V3 SE come pre-assembled with user-friendly software (Cura). Learn basics in 1-2 hours via online tutorials.
Resin printers: Require more setup—calibrating build plate, handling toxic resin. Still manageable with proper safety gear (gloves, goggles, ventilation).
Industrial machines (SLM) : Need trained operators. Most small businesses outsource rather than buy.
Step-by-Step Guide to Making a Prototype
Once you've chosen a printer, follow these steps for high-quality results. We'll use an FDM printer (most common for beginners) as an example.
Step 1: Design your prototype (or find a ready-made file)
Design from scratch: Use free software like Tinkercad (beginner-friendly) or Fusion 360 (professional). Export as STL—the standard 3D printing format.
Use existing files: Sites like Thingiverse or MyMiniFactory have millions of free STL files for common prototypes—phone stands, brackets, toy parts.
Step 2: Prepare the file for printing (slicing)
Slicing converts your 3D model into instructions (G-code) the printer reads. Use free software like Cura:
- Import your STL file
- Select your printer model (Cura has presets for most)
- Adjust settings:
- Layer height: 0.2mm balances speed and detail
- Infill: 20-50% (higher = stronger, more material)
- Supports: Add if model has overhangs (e.g., a hook)
- Slice the file and save to USB drive
Step 3: Set up the printer
- Load filament into extruder
- Level build plate (auto-leveling on newer models)
- Preheat:
- PLA: Bed 50-60°C, extruder 190-220°C
- ABS: Bed 90-110°C, extruder 230-250°C
Step 4: Print and post-process
- Insert USB and start print. Small part (keychain): 1-2 hours. Larger part (phone stand): 8-12 hours.
- Let cool 5-10 minutes, then remove from bed
- Post-process as needed:
- FDM: Sand with 200-400 grit sandpaper to smooth layer lines. Paint with acrylic for finished look.
- Resin: Wash with isopropyl alcohol (90%+) to remove uncured resin. Cure with UV light 5-10 minutes.
Case study: Iterative prototyping
A small electronics company used this process to test a wireless charger prototype. They printed 5 versions with different infill levels (20%, 30%, 40%) to find optimal strength-to-weight balance.
- 20% infill: Too weak—phone caused flexing
- 30% infill: Strong enough, used 15% less material than 40%
- 40% infill: Strong but heavier and more expensive
The 30% version saved $2 per prototype while maintaining function. Over 50 iterations, that's $100 saved—and a better final product.
What Common Mistakes Should You Avoid?
Even experienced users make mistakes. Here are top pitfalls and fixes:
Parts sticking to extruder (FDM)
Cause: Extruder too hot or filament wet (absorbed moisture).
Fix: Lower extruder temperature 5-10°C. Dry filament in dehydrator (PLA absorbs moisture from air—drying improves print quality).
Rough surfaces (resin)
Cause: Old resin or weak UV light.
Fix: Use fresh resin. Replace printer's UV bulb every 6-12 months. Check expiration dates on resin bottles.
Cracking parts (ABS)
Cause: ABS shrinks as it cools, causing cracks.
Fix: Enclose printer to maintain stable temperature. Use heated build plate. Consider PETG as alternative—easier to print, similar properties.
Wasting material
Mistake: Printing full-size prototype when smaller test would work.
Fix: Print 50% scale model first to check fit and basic function. Saves time and material—especially for large prototypes.
Poor bed adhesion
Cause: Bed not level, wrong temperature, or dirty surface.
Fix: Level bed carefully. Clean with isopropyl alcohol. Use adhesive aids (glue stick, hairspray) for tricky materials.
Ignoring safety (resin)
Cause: Underestimating resin toxicity.
Fix: Always wear nitrile gloves. Work in well-ventilated area. Dispose of uncured resin properly—never down drains.
Yigu Technology's Perspective
At Yigu Technology, we believe 3D prototype makers are game-changers for innovation—especially for small businesses and startups. Too often, teams delay testing because traditional prototyping (CNC machining, injection molding) is expensive and slow.
With affordable FDM or resin printers, you can iterate 5-10 times faster, catching design flaws early when they're cheap to fix.
Our recommendations:
- Start small: Invest in an entry-level FDM printer ($200-500) to test basic concepts. Learn the workflow without big investment.
- Add resin as needed: As your design matures and detail matters, add a resin printer ($300-800) for presentation-quality prototypes.
- Outsource metal: For industrial metal prototypes, partner with a 3D printing service instead of buying SLM equipment. It's more cost-effective for most businesses.
The key is iteration speed—the faster you can print, test, and adjust, the sooner you'll have a market-ready product.
Conclusion
Choosing the right 3D prototype maker depends on your specific needs:
- FDM for functional prototypes, large parts, and budget-conscious testing
- Resin (SLA/DLP) for high-detail models, smooth surfaces, and presentation pieces
- Industrial SLA for engineering-grade precision and durable materials
- SLM for metal prototypes requiring full strength and functionality
Key factors to evaluate:
- Prototype size and build volume
- Material requirements and compatibility
- Precision and detail needs
- Budget—both equipment and operating costs
- Ease of use and your experience level
Remember: The best prototype maker isn't necessarily the most expensive or feature-rich. It's the one that matches your project's requirements and helps you iterate quickly toward a better final product.
FAQ
Q1: Can I use a 3D prototype maker to create functional parts (not just models)?
A: Yes! FDM printers with ABS or PETG can make functional parts—replacement hinges, tool handles, brackets. Resin printers with tough resin can create small functional parts like gears. For heavy-duty metal parts, use SLM or outsource to a metal 3D printing service.
Q2: How long does it take to print a prototype?
A: Small part (2x2x2cm keychain): 1-2 hours with FDM. Larger part (10x10x10cm phone stand): 8-12 hours. Resin printers are faster for small, detailed parts—some print 3x3x3cm models in 30 minutes.
Q3: Is 3D printing cheaper than traditional prototyping (CNC machining)?
A: For small batches (1-10 prototypes), yes. 3D printed PLA part: $0.50-$5. CNC-machined part: $20-$100. For large batches (100+), CNC becomes cheaper. 3D printing has no setup fees, ideal for quick iterations.
Q4: Do I need special skills to use a 3D prototype maker?
A: No—entry-level printers are designed for beginners. Most come pre-assembled with user-friendly software. Learn basics (slicing, printing) with free online tutorials in 1-2 hours. Industrial machines (SLM) require training, but most users outsource these prints.
Q5: What's the most affordable 3D prototype maker for beginners?
A: Creality Ender 3 V3 SE ($249) is a top FDM choice—easy setup, auto-leveling, prints high-quality PLA. For resin beginners, Elegoo Mars 4 Mini ($299) is compact, fast, and includes safety gear (gloves, goggles).
Q6: How do I choose between FDM and resin?
A: Choose FDM for functional parts, larger sizes, lower cost, and ease of use. Choose resin for high detail, smooth surfaces, and presentation-quality models. Many users start with FDM and add resin as needs evolve.
Q7: Can I print metal prototypes at home?
A: Not practically. Metal 3D printers (SLM) cost $50,000-$500,000+ and require specialized training. For metal prototypes, use a 3D printing service—upload your design, they print and ship the part.
Q8: What software do I need for 3D prototyping?
A: For design: Tinkercad (free, beginner), Fusion 360 (free for hobbyists, professional), or SolidWorks (professional). For slicing: Cura (free, most FDM printers) or PrusaSlicer (free, Prusa printers). Most printers include or recommend software.
Contact Yigu Technology for Custom Manufacturing
Ready to bring your prototypes to life but not sure where to start? At Yigu Technology, we combine deep expertise with state-of-the-art 3D printing capabilities. Whether you need FDM functional prototypes, high-detail resin models, or industrial metal parts, our team delivers precision results tailored to your project. Contact us today for a consultation—let's turn your ideas into prototypes that impress.