Introduction
FDM 3D printing—Fused Deposition Modeling—is the technology that put 3D printing on the map. It's what most people imagine when they think of a 3D printer: a nozzle moving back and forth, laying down layers of melted plastic, building objects from the bottom up.
From hobbyists creating figurines to engineers prototyping functional parts, FDM is the most accessible and widely used 3D printing technology. It's affordable, versatile, and constantly improving.
But how exactly does it work? What happens inside that nozzle? Why do some prints succeed while others fail?
At Yigu technology, we've used FDM for thousands of projects. This guide explains the process, components, and techniques—giving you a complete understanding of this foundational technology.
What Is FDM 3D Printing?
Definition and Basic Principle
FDM 3D printing builds objects by melting thermoplastic filament and extruding it layer by layer. Think of a hot glue gun controlled by a robot—but much, much more precise.
The process is simple in concept:
- A spool of thermoplastic filament feeds into a heated nozzle
- The nozzle melts the filament (typically 180-260°C, depending on material)
- The nozzle moves in a precise pattern, depositing melted plastic
- Each layer bonds to the previous one as it cools
- The object builds from the bottom up
For a part 50 mm tall with 0.2 mm layers, the printer creates 250 layers to complete the object.
Key Components of an FDM 3D Printer
Extruder Nozzle
The nozzle is where the magic happens. It melts the filament and precisely deposits the molten plastic.
- Common diameters: 0.4mm, 0.6mm, 0.8mm
- Smaller nozzles (0.4mm): Finer details, slower extrusion
- Larger nozzles (0.8mm): Faster printing, less detail
Heating Element
Installed in the extruder, it heats the filament to its melting point. Accurate temperature control is essential:
- Too cold: Filament doesn't melt properly, under-extrusion
- Too hot: Material degrades, stringing, oozing
Filament Feeding Mechanism
Gears grip the filament and feed it into the extruder at a controlled rate.
- Too loose: Filament slips, pauses in extrusion
- Too tight: Damages filament, jams
Printing Platform
The base where the object builds. Often heated to:
- Improve first-layer adhesion
- Prevent warping (especially for ABS)
Platform flatness and temperature uniformity are critical. A warped platform causes uneven first layers and failed prints.
How Does the FDM 3D Printing Process Work?
Step 1: Design Creation
Everything starts with a digital 3D model created in CAD software. Designers define every dimension, curve, and feature.
For a custom phone case, the model includes:
- Precise shape and dimensions
- Cut-outs for buttons and ports
- Personalized patterns or textures
Design considerations for FDM:
- Wall thickness: At least 1-2mm for structural integrity
- No self-intersecting surfaces: Causes print errors
- Overhangs: May need support structures
Alternatively, 3D scanning can create a digital model of an existing object—useful for reproduction or modification. High-quality scanners capture geometry down to a few millimeters.
Step 2: Slicing the Model
The digital model is sliced into thin horizontal layers—typically 0.1mm to 0.3mm thick.
Slicing software:
- Divides the model into layers
- Generates toolpaths for the printer
- Allows adjustment of critical parameters
Key parameters:
| Parameter | Typical Range | Effect |
|---|---|---|
| Layer height | 0.1-0.3 mm | Thinner = smoother surface, longer print time |
| Infill density | 10-100% | Higher = stronger, more material, longer print |
| Print speed | 30-80 mm/s | Faster = less detail, potential quality issues |
| Extrusion width | ~ nozzle diameter | Affects layer bonding |
| Support structures | As needed | Required for overhangs >45° |
Infill patterns affect strength and weight:
- Grid: Fast, good general purpose
- Honeycomb: Excellent strength-to-weight
- Gyroid: Strong in all directions
Step 3: Printing Execution
With the sliced model ready, printing begins:
- Filament loads into the extruder
- Nozzle heats to appropriate temperature
- First layer deposits onto the build platform
- Platform lowers by one layer height
- Next layer deposits, bonding to the previous
- Process repeats until complete
Precision: Stepper motors control nozzle movement with accuracy as high as 0.01mm in high-end printers. This enables complex shapes—lattice structures, curved surfaces, intricate details.
Step 4: Post-Processing
After printing, parts often need finishing:
Support removal: Break or cut away temporary structures that supported overhangs.
Sanding: Smooths visible layer lines. Start with coarse grit, progress to fine.
Polishing: For shiny, smooth surfaces.
Painting: Adds color and enhances appearance.
Post-processing transforms good prints into great products—improving both aesthetics and functionality.
What Materials Are Used in FDM 3D Printing?
Common Materials
| Material | Melting Point | Properties | Best For |
|---|---|---|---|
| PLA | 180-220°C | Biodegradable, easy to print, smooth finish | Decorative items, prototypes, educational models |
| ABS | 220-260°C | Durable, heat-resistant, tough | Functional parts, automotive, mechanical |
| PETG | 220-250°C | Strong, flexible, chemical-resistant | Mechanical parts, containers, water-related devices |
| Nylon | 240-260°C | Very strong, wear-resistant | Gears, functional parts, industrial |
| TPU | 210-230°C | Flexible, rubber-like | Gaskets, seals, flexible parts |
Material Selection Guide
Choose based on:
- Strength needed: Nylon or ABS for high strength
- Flexibility: TPU for flexible parts
- Temperature exposure: ABS for heat resistance
- Ease of printing: PLA for beginners
- Cost: PLA cheapest, engineering materials cost more
Why Does FDM 3D Printing Matter?
Accessibility
FDM is the most accessible 3D printing technology:
- Printers start under $200
- Materials as cheap as $15-30 per kilogram
- Huge community support, endless tutorials
Cost-Effectiveness
For small batches and prototypes, FDM is hard to beat:
- No tooling costs: Print directly from digital files
- Minimal waste: Only material that becomes the part gets used
- Rapid iteration: Changes are free and fast
Design Freedom
FDM enables geometries impossible with traditional methods:
- Internal channels for cooling or fluid flow
- Lattice structures for lightweight strength
- Organic shapes optimized for function
Customization
Each part can be different at no extra cost. Perfect for:
- Custom consumer products
- Patient-specific medical devices
- Tailored industrial components
Rapid Prototyping
From design to physical part in hours:
- Test concepts quickly
- Identify issues early
- Iterate based on feedback
- Accelerate development cycles
What Are the Limitations?
Surface Finish
FDM parts have visible layer lines. For many applications, this is fine. For aesthetic parts, post-processing (sanding, painting) is needed.
Strength Anisotropy
Parts are strongest along layer lines, weaker across them. Design must account for this—orient parts to put stress along layers, not across.
Speed
FDM is fast for one part, slow for a thousand. For high-volume production, other methods are faster.
Material Limitations
While material options are wide, some engineering materials require high temperatures and specialized printers.
Size Constraints
Most desktop printers have build volumes under 300 x 300 x 300 mm. Large parts must be printed in sections and joined.
Yigu Technology's Perspective
At Yigu technology, FDM 3D printing is one of our most versatile tools. Here's what we've learned:
It's the workhorse of prototyping. Quick, affordable, and reliable. For testing designs before committing to production, nothing beats it.
Material selection drives success. Choose based on what the part needs to do—not just what's easiest to print.
Design for the process. Orientation, wall thickness, and support placement affect strength and cost. Design with manufacturing in mind.
Post-processing transforms results. Sanding, painting, and finishing turn good prints into great products.
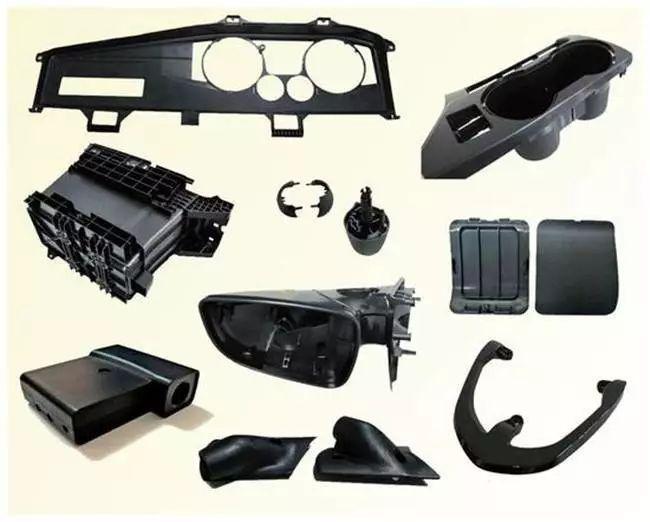
Applications we serve:
- Prototypes for product development
- Custom parts for niche applications
- Tooling for manufacturing
- Educational models for schools and universities
- Functional parts where strength matters
FDM isn't the answer for everything. But for the right applications, it's indispensable.
Conclusion
FDM 3D printing works by:
- Melting thermoplastic filament in a heated nozzle
- Depositing layer by layer according to digital instructions
- Bonding each new layer to the previous one
- Building complex 3D objects from the bottom up
Key components:
- Extruder nozzle: Melts and deposits material
- Heating element: Maintains precise temperature
- Filament feeding mechanism: Controls material flow
- Printing platform: Provides stable base
The process:
- Design a 3D model in CAD
- Slice into thin layers with optimized parameters
- Print layer by layer
- Post-process as needed
Materials range from easy-to-print PLA to engineering-grade ABS, PETG, nylon, and TPU.
Advantages:
- Accessible: Low-cost printers and materials
- Cost-effective: No tooling, minimal waste
- Design freedom: Complex geometries possible
- Customizable: Each part can be unique
- Fast prototyping: From design to part in hours
Limitations:
- Surface finish: Visible layer lines
- Anisotropic strength: Weaker across layers
- Speed: Slow for high volumes
- Size constraints: Limited build volume
FDM 3D printing matters because it democratizes manufacturing. It puts the power to create physical objects in the hands of anyone with a design and a printer.
FAQ
What materials are commonly used in FDM 3D printing?
Common materials include:
- PLA: Biodegradable, easy to print, smooth finish—for decorative items, prototypes, educational models
- ABS: Durable, heat-resistant, tough—for functional parts, automotive, mechanical
- PETG: Strong, flexible, chemical-resistant—for mechanical parts, containers, water-related devices
- Nylon: Very strong, wear-resistant—for gears, functional parts, industrial
- TPU: Flexible, rubber-like—for gaskets, seals, flexible parts
Choose based on your application requirements.
How can I improve the surface quality of FDM 3D printed objects?
Two approaches:
Optimize print parameters:
- Reduce layer height (e.g., 0.1mm instead of 0.2mm)
- Adjust printing speed—slower allows better bonding
- Use smaller nozzle for finer details
Post-process:
- Sanding: Start coarse, progress to fine
- Polishing: Use compounds and soft cloths
- Painting: Primer + paint for smooth finish
Is FDM 3D printing suitable for large-scale production?
For certain applications, yes. FDM is excellent for:
- Small to medium batches (10-100 parts)
- Highly complex parts that can't be made traditionally
- Customized parts where each is different
- Rapid prototyping and iteration
For high-volume production of simple parts, traditional methods like injection molding remain faster and cheaper. The sweet spot is complexity, customization, and moderate volume.
How accurate are FDM printed parts?
Typical accuracy ranges ±0.1-0.5 mm depending on printer quality and settings. Factors affecting accuracy:
- Printer calibration: Well-calibrated printers are more accurate
- Layer height: Thinner layers improve detail
- Material shrinkage: Some materials shrink more than others
- Part design: Large flat areas may warp
High-end industrial FDM printers achieve tighter tolerances.
What's the best material for beginners?
PLA is by far the best choice for beginners. It:
- Prints at lower temperatures (180-220°C)
- Doesn't require a heated bed (though it helps)
- Sticks well to common surfaces
- Is forgiving of mistakes
- Produces decent results even with basic settings
Start with PLA to learn the basics, then explore other materials.
Do FDM prints need post-processing?
It depends on application. Many functional parts work fine as-printed. For aesthetic parts, post-processing is often desired:
- Support removal: Always needed if supports were used
- Sanding: Smooths visible layer lines
- Painting: Adds color and hides imperfections
- Sealing: Protects the surface
Contact Yigu Technology for Custom Manufacturing
Ready to use FDM 3D printing for your project? Yigu technology specializes in custom manufacturing with all major 3D printing technologies.
We offer:
- Free quotes within 24 hours—just send your CAD file
- Material expertise—choosing the right option
- Printing—on industrial equipment with strict quality control
- Post-processing—finishing to your specifications
- Production runs—from prototypes to small batches
Contact us to discuss your project. Tell us what you're making and what it needs to do. We'll help bring your design to life.