Introduction
Thermoforming and injection molding are two of the most common plastic manufacturing processes. Both produce high-quality parts, but they serve different applications, volumes, and budgets. Choosing the right process can significantly impact your product’s cost, quality, and time to market.
Thermoforming starts with a plastic sheet that is heated and formed over a mold. Injection molding injects molten plastic into a closed mold cavity. The processes differ in equipment, tooling, cycle time, and the types of parts they produce.
This guide compares thermoforming and injection molding across all critical dimensions. You will learn how each process works, where they excel, and how to select the right method for your project. By the end, you will have a clear framework for making an informed decision.
How Does Thermoforming Work?
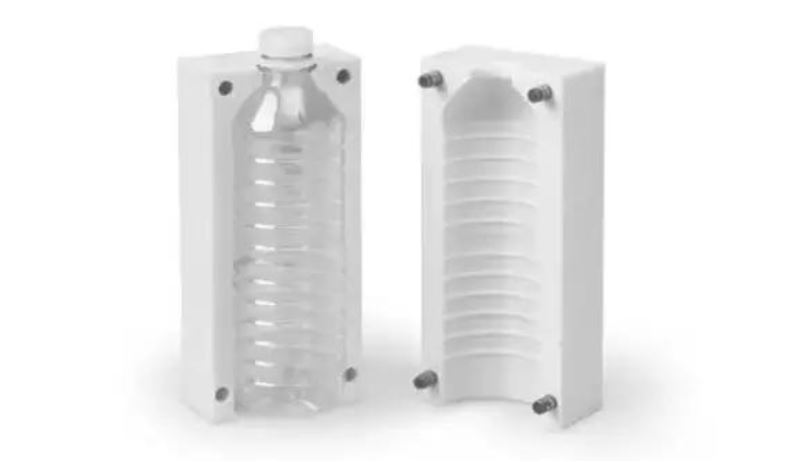
Thermoforming is a process that shapes heated plastic sheets into finished parts using molds and vacuum or pressure.
The Thermoforming Process Step by Step
Step 1: Sheet Loading
A flat plastic sheet—typically 0.5–6 mm thick—is loaded into the thermoforming machine. Sheets can be made from various thermoplastics including ABS, polystyrene, PET, and polypropylene.
Step 2: Heating
The sheet is heated until it becomes pliable. Infrared heaters raise the temperature to the material’s softening point—typically 150–250°C depending on the plastic.
Critical: Uniform heating is essential. Uneven heating causes thickness variations, weak spots, and surface defects. A food packaging tray with thin spots may crack during handling.
Step 3: Forming
The heated sheet is moved over or into a mold. There are two primary forming methods:
| Method | How It Works | Best For |
|---|---|---|
| Vacuum forming | Vacuum pulls the sheet onto the mold surface | Simple shapes; large parts; cost-sensitive applications |
| Pressure forming | Compressed air forces the sheet onto the mold | More detailed features; sharper corners; better surface finish |
Molds can be male (positive) —the sheet forms over a raised shape—or female (negative) —the sheet forms into a cavity.
Step 4: Cooling
The formed part cools rapidly to set the shape. Cooling channels in the mold circulate water or other coolants to speed the process.
Step 5: Trimming
The formed part is removed from the mold. Excess material—called trim—is cut away, leaving the finished part.
Typical cycle time: 10–60 seconds, depending on part size and thickness.
How Does Injection Molding Work?
Injection molding produces parts by injecting molten plastic into a closed mold cavity under high pressure.
The Injection Molding Process Step by Step
Step 1: Material Feeding
Plastic granules (pellets) are fed from a hopper into a heated barrel. Materials include ABS, polycarbonate, nylon, polypropylene, and hundreds of other thermoplastics.
Step 2: Melting
A reciprocating screw rotates, conveying the pellets forward while barrel heaters raise the temperature. The plastic melts through a combination of external heat and internal friction (shear).
Melt temperatures: Typically 180–300°C for commodity plastics; up to 380°C for engineering grades.
Step 3: Injection
The screw moves forward like a plunger, forcing the molten plastic through a nozzle and into the mold cavity. Injection pressure typically ranges from 1,000–30,000 psi (7–200 MPa).
Step 4: Packing and Holding
After filling, the screw maintains pressure (packing) to compensate for shrinkage as the plastic cools. This phase continues until the gate freezes.
Step 5: Cooling
The plastic solidifies inside the mold. Cooling channels circulate coolant to remove heat efficiently. Cooling accounts for 50–80% of the cycle time.
Step 6: Ejection
The mold opens, and ejector pins push the finished part out. The cycle repeats.
Typical cycle time: 15–120 seconds, depending on part size, wall thickness, and material.
How Do Thermoforming and Injection Molding Compare?
Understanding the differences helps you choose the right process.
Cost Comparison
| Cost Factor | Thermoforming | Injection Molding |
|---|---|---|
| Equipment cost | Lower ($50,000–$150,000) | Higher ($100,000–$1,000,000+) |
| Mold cost | Lower ($2,000–$20,000) | Higher ($10,000–$100,000+) |
| Material cost | Sheet stock; moderate | Granules; comparable base cost |
| Per-part cost | Lower for simple, large parts | Lower for complex, high-volume parts |
| Tooling lead time | 2–6 weeks | 6–12 weeks |
Why mold costs differ:
- Thermoforming molds can use aluminum or even wood for prototypes
- Injection molds require hardened steel to withstand high pressure and millions of cycles
- Thermoforming molds are typically single-sided; injection molds require two halves with precision alignment
Production Volume Suitability
| Volume | Thermoforming | Injection Molding |
|---|---|---|
| Prototype (1–100) | Excellent; low-cost molds | Expensive; rarely economical |
| Low (100–5,000) | Good; quick mold turnaround | Marginal; tooling cost dominates |
| Medium (5,000–50,000) | Good; economical for simple parts | Starting to become cost-effective |
| High (50,000–500,000+) | Limited; cycle time advantage for simple parts | Optimal; tooling amortized over high volume |
Part Geometry and Complexity
| Feature | Thermoforming | Injection Molding |
|---|---|---|
| Complexity | Low to moderate | High |
| Undercuts | Difficult; requires complex molds | Possible with slides and lifters |
| Thin walls | Good; down to 0.5 mm | Excellent; down to 0.2 mm |
| Thick walls | Limited; uniform thickness preferred | Excellent; variable thickness possible |
| Holes | Post-forming trimming required | Molded-in |
| Text and logos | Limited detail; post-processing often needed | High detail molded in |
| Threads | Not possible | Molded-in or post-inserted |
Precision and Tolerances
| Aspect | Thermoforming | Injection Molding |
|---|---|---|
| Typical tolerance | ±0.5–1.0 mm | ±0.05–0.1 mm |
| Precision capability | Moderate | High |
| Shrinkage control | Variable; sheet-dependent | Predictable; mold compensation |
| Wall thickness uniformity | Variable; thinner at drawn areas | Uniform throughout |
Surface Finish and Aesthetics
| Aspect | Thermoforming | Injection Molding |
|---|---|---|
| Surface finish | Good; may show forming lines | Excellent; mirror finish possible |
| Texture | Limited to one side (mold side) | Both sides; uniform |
| Color consistency | Good; pre-colored sheet | Excellent; uniform throughout |
| Post-processing | Trimming required; secondary finishing possible | Minimal; often ready to use |
Product Strength
| Aspect | Thermoforming | Injection Molding |
|---|---|---|
| Strength uniformity | Variable; thinner at corners | Uniform throughout |
| Impact resistance | Good for thin sections | Excellent; material properties optimized |
| Rib reinforcement | Difficult to mold in | Easily incorporated |
| Material properties | Limited by sheet availability | Wide range of engineering grades |
What Are the Best Applications for Each Process?
Thermoforming Applications
Thermoforming excels for large, relatively simple parts where tooling cost is a key constraint.
Packaging:
- Clamshell packaging for electronics
- Blister packs for pharmaceuticals
- Food trays and containers
- Disposable cups and lids
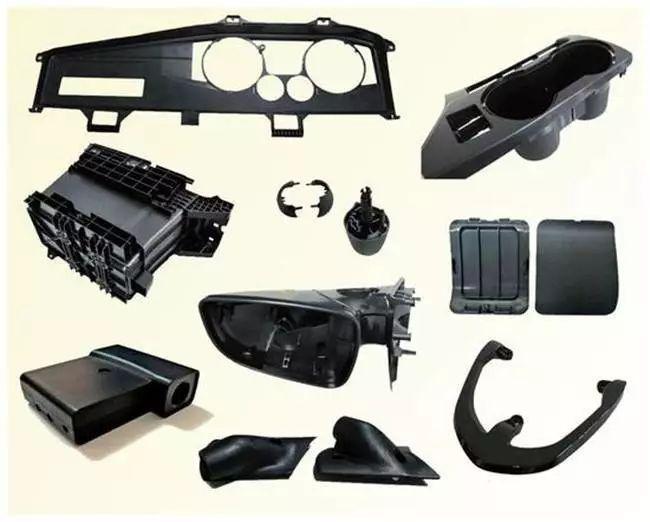
Automotive:
- Interior door panels
- Underbody shields
- Trunk liners
- Dashboard components (simple)
Medical:
- Sterile trays for instruments
- Bed pans and patient care products
- Equipment enclosures (simple)
Consumer Goods:
- Large displays and signage
- Bathtubs and shower bases
- Refrigerator liners
- Outdoor play equipment
Real-world example: A consumer electronics company needed protective packaging for a new headphone model. Injection molding would cost $15,000 per tool for two parts (top and bottom). Thermoforming delivered the same protective function with a $3,000 mold, produced in 2 weeks instead of 8.
Injection Molding Applications
Injection molding excels for complex, high-precision parts produced in medium to high volumes.
Automotive:
- Engine components (intake manifolds, covers)
- Precision interior parts (buttons, bezels)
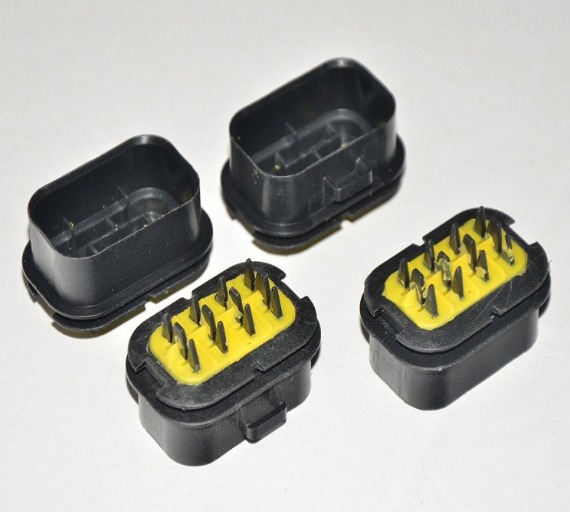
- Connectors and sensors
- Underhood components
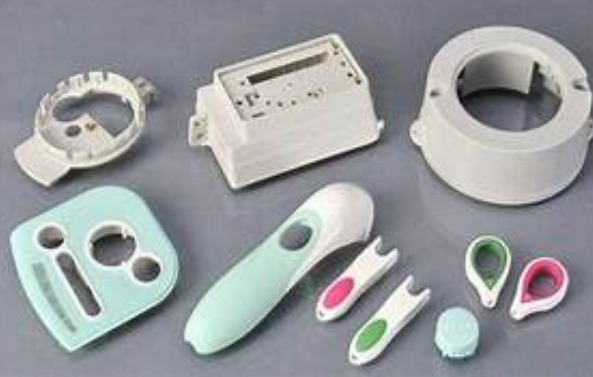
Medical:
- Syringe barrels and plungers
- Surgical instrument handles
- Diagnostic device housings
- Implantable components
Consumer Electronics:
- Smartphone cases
- Laptop housings
- Connectors and plugs
- Small mechanical components
Industrial:
- Gears and bearings
- Pump components
- Valve bodies
- Electrical enclosures
Real-world example: A medical device company needed a complex surgical instrument with internal channels and snap features. The part required tolerances of ±0.05 mm. Thermoforming could not achieve the geometry or precision. Injection molding delivered the part at $0.85 per unit in volumes of 100,000 annually, with tooling amortized over the production run.
What Are the Material Considerations?
Thermoforming Materials
| Material | Key Properties | Applications |
|---|---|---|
| ABS | Impact resistance; good surface finish | Automotive parts; housings |
| Polystyrene (PS) | Rigid; low cost; easy to form | Disposable packaging; cups |
| Polypropylene (PP) | Flexible; chemical resistant | Food containers; automotive parts |
| PET | Clear; strong; recyclable | Clamshells; beverage containers |
| PVC | Rigid; flame retardant | Medical trays; signage |
Material form: Sheets typically 0.5–6 mm thick; available in various colors, textures, and finishes.
Injection Molding Materials
| Material | Key Properties | Applications |
|---|---|---|
| ABS | Impact resistance; good finish | Housings; consumer goods |
| Polypropylene (PP) | Chemical resistance; flexible | Containers; living hinges |
| Polycarbonate (PC) | High strength; clarity | Lenses; medical devices |
| Nylon (PA) | Strong; wear resistant | Gears; structural parts |
| Acetal (POM) | Low friction; dimensional stability | Precision components |
| PEEK | High temperature; chemical resistance | Aerospace; medical implants |
Material form: Granules (pellets); available in hundreds of grades with additives for specific properties.
How Do You Choose the Right Process?
Use this decision framework to guide your selection.
Decision Factors
| Question | If Yes → | If No → |
|---|---|---|
| Is the part very large (>1 m)? | Consider thermoforming | Continue |
| Is production volume under 10,000 units? | Consider thermoforming | Continue |
| Does the part require tight tolerances (<0.1 mm)? | Consider injection molding | Continue |
| Does the part have complex geometry (undercuts, internal features)? | Consider injection molding | Continue |
| Is tooling budget under $10,000? | Consider thermoforming | Continue |
| Does the part need high strength or engineering material properties? | Consider injection molding | Continue |
Selection Matrix
| Criteria | Thermoforming | Injection Molding |
|---|---|---|
| Volume | Low to medium (100–50,000) | Medium to high (5,000–millions) |
| Part size | Large (up to several meters) | Small to medium (up to 0.5 m typical) |
| Complexity | Simple; 2D to moderate 3D | Complex; intricate 3D |
| Tolerances | ±0.5–1.0 mm | ±0.05–0.1 mm |
| Tooling cost | $2,000–$20,000 | $10,000–$100,000+ |
| Lead time | 2–6 weeks | 6–12 weeks |
| Wall thickness | 0.5–6 mm; variable | 0.2–10 mm; uniform |
| Materials | Sheet thermoplastics | Wide range; engineering grades |
What Are the Advantages and Limitations?
Thermoforming
Advantages:
- Lower tooling cost
- Faster tooling lead time
- Economical for large parts
- Good for low to medium volumes
- Simple process; easier to troubleshoot
Limitations:
- Limited geometric complexity
- Variable wall thickness
- Lower precision
- Trim waste (10–30% of sheet)
- Detail only on one side
Injection Molding
Advantages:
- Complex geometries possible
- High precision and repeatability
- Uniform wall thickness
- Wide material selection
- Excellent surface finish
- Minimal post-processing
Limitations:
- Higher tooling cost
- Longer tooling lead time
- Requires high volumes for economy
- Higher equipment cost
- More complex process control
Conclusion
Thermoforming and injection molding serve different manufacturing needs. Thermoforming excels for large, simple parts at low to medium volumes with limited tooling budgets. Injection molding is the choice for complex, high-precision parts where volumes justify the tooling investment.
Key decision factors:
- Volume – Thermoforming for under 10,000 units; injection molding for over 50,000
- Complexity – Thermoforming for simple shapes; injection molding for complex geometries
- Precision – Injection molding for tight tolerances
- Tooling budget – Thermoforming for limited upfront investment
- Part size – Thermoforming for large parts; injection molding for smaller components
Many manufacturers use both processes—thermoforming for large enclosures and trim, injection molding for precision components. Understanding the strengths of each enables you to select the optimal process for your application.
Frequently Asked Questions (FAQ)
What are the main differences between thermoforming and injection molding?
Thermoforming starts with a plastic sheet that is heated and formed over a mold using vacuum or pressure. Injection molding melts plastic granules and injects them under high pressure into a closed mold cavity. Thermoforming has lower tooling costs and is better for large, simple parts at low volumes. Injection molding has higher tooling costs but delivers complex geometries, tighter tolerances, and is economical at high volumes.
Which materials are most suitable for thermoforming and injection molding?
Thermoforming works with sheet materials including ABS, polystyrene, polypropylene, PET, and PVC. Injection molding uses granules of ABS, polycarbonate, nylon, polypropylene, acetal, PEEK, and hundreds of other thermoplastics. Injection molding offers a much wider range of engineering materials with specialized properties like high heat resistance, biocompatibility, and chemical resistance.
How do I improve product quality in thermoforming?
Ensure uniform heating of the sheet to prevent thickness variations. Optimize mold design with proper draft angles and smooth surfaces. Control cooling rate to prevent warpage. Use pressure forming instead of vacuum forming for better detail. Post-process with trimming and finishing as needed.
How do I improve product quality in injection molding?
Control temperature, pressure, and injection speed precisely. Use high-quality molds with proper venting to prevent air traps. Maintain consistent material drying for hygroscopic materials. Implement process monitoring to detect deviations. Conduct regular mold maintenance to preserve tolerances.
Which process is more cost-effective for prototyping?
Thermoforming is generally more cost-effective for prototypes, especially for large parts. A simple thermoforming mold can cost $1,000–$5,000 and be ready in 2–3 weeks. Injection molding tooling for prototypes still requires significant investment—typically $5,000–$15,000—with 6–8 week lead times. For functional prototypes requiring production materials and properties, injection molding may still be necessary.
Contact Yigu Technology for Custom Manufacturing
At Yigu Technology, we offer both thermoforming and injection molding capabilities, allowing us to recommend and execute the optimal process for your project. Our team evaluates your part design, volume requirements, and budget to identify the most cost-effective manufacturing approach.
Our capabilities include:
- Thermoforming – Large parts; low to medium volumes; aluminum and composite molds
- Injection molding – Complex geometries; high volumes; precision steel molds
- Material selection guidance – Matching material properties to application requirements
- Design for manufacturability (DFM) – Optimizing designs for the chosen process
- In-house tooling – Faster lead times; quality control
We serve automotive, medical, consumer goods, and industrial sectors with custom manufacturing solutions. Whether you need large thermoformed enclosures or precision injection-molded components, we deliver quality parts on time.
Contact us today to discuss your project. Let our expertise help you choose the right process for your application.