Introduction
Injection molding is the backbone of modern manufacturing. It produces the plastic parts that surround us—from smartphone cases to automotive components. But for years, this technology seemed out of reach for hobbyists and small-scale creators. Industrial machines are large, expensive, and require dedicated facilities.
That is changing. Tabletop injection molding machines now bring this powerful manufacturing process into home workshops and garages. With the right tools—small injection machines, 3D-printed molds, and basic cooling systems—you can produce custom plastic parts at a fraction of the cost of professional services.
This guide covers everything you need to start DIY injection molding: the materials, essential tools, step-by-step process, and common challenges.
What Is Injection Molding?
Injection molding is a manufacturing process where molten material—usually plastic—is injected under pressure into a mold cavity. The material cools and solidifies, taking the shape of the mold. The mold opens, and the finished part is ejected.
This process produces complex, precise parts efficiently. In industrial settings, machines cost tens of thousands of dollars and run continuously. In a backyard setup, you work on a smaller scale, but the fundamental principles are the same.
What Materials Can You Use?
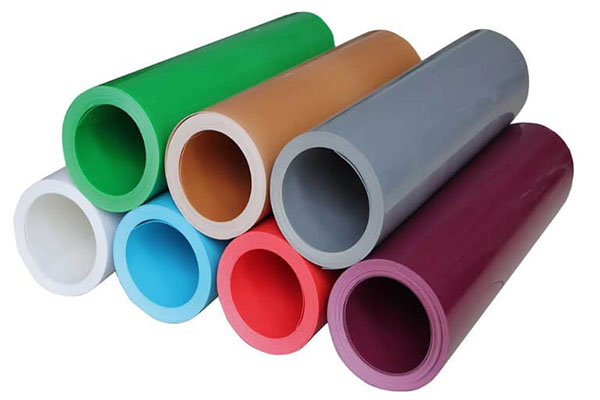
Plastics
The most common materials for DIY injection molding are thermoplastics.
| Material | Properties | Common Applications |
|---|---|---|
| ABS | Impact resistance, strength | Consumer electronics, automotive parts, toys |
| PP | Chemical resistance, lightweight | Food containers, medical devices, automotive interior |
| PLA | Biodegradable, easy to process | Small decorations, non-durable items |
ABS is a good starting point. It offers strength and impact resistance. PP is ideal for food-related products. PLA is environmentally friendly and easy to work with.
Metals and Rubber
Metal injection molding (MIM) uses metal powders mixed with a binder. It produces small, complex metal parts—stainless steel, titanium, nickel alloys—for aerospace, medical, and electronics applications. However, MIM requires specialized equipment and is generally not suitable for backyard setups.
Rubber injection molding produces seals, gaskets, and flexible parts. It uses natural or synthetic rubber—silicone, nitrile—and requires specific processing conditions.
For beginners, thermoplastics are the most accessible.
What Tabletop Tools Do You Need?
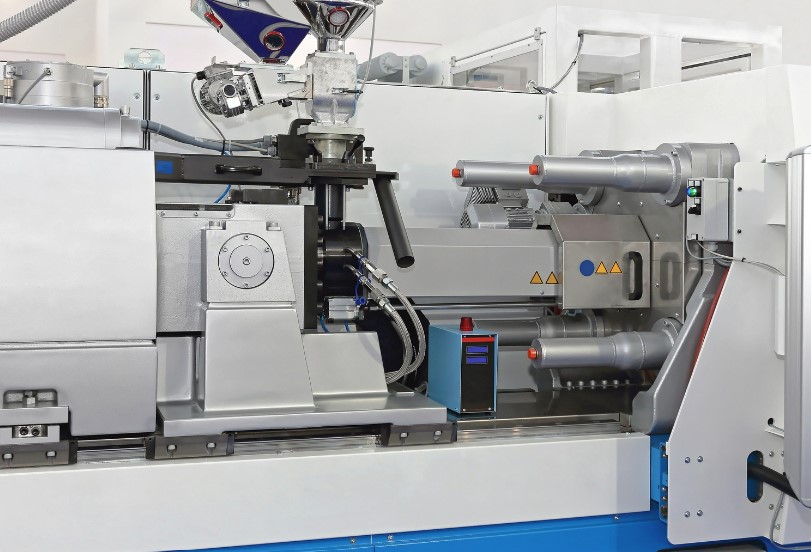
Small-Scale Injection Molding Machines
The machine is the core of your setup. Several models are suitable for DIY use.
Mini-Jet Injection Molding Machine
- Injection volume: 5 – 10 cm³
- Injection pressure: 10 – 15 MPa
- Price: $500 – $800
- Best for: Small parts (buttons, figurine components)
This compact machine is affordable and great for beginners. Its small injection volume limits part size, but it is perfect for learning the process.
LAB Injection Molding Machine (PLC Type)
- Injection capacity: 22 cm³
- Injection pressure: 14 MPa
- Temperature range: Room temperature to 300°C (±1°C accuracy)
- Price: $1,500 – $2,000
- Best for: More complex small-scale production, electronic component prototypes
This machine offers PLC-controlled precision with a touch-screen interface. It handles a wider range of materials and provides better process control.
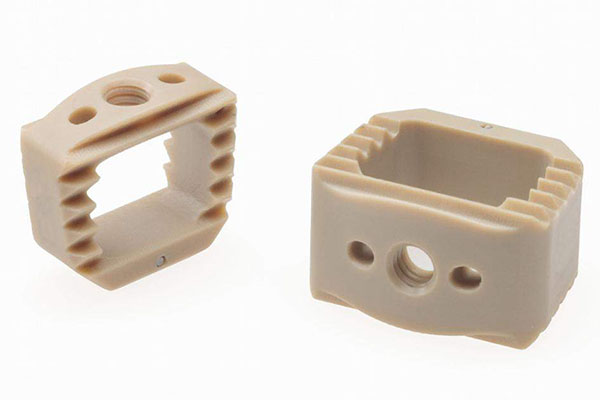
Molds
3D Printed Molds
Advantages: Highly customizable. Design a mold in 3D modeling software and print it at home. Material cost for a small mold can be just a few dollars in filament.
Disadvantages: Limited durability. 3D-printed molds may not withstand high-pressure injection for long. Surface finish may be rougher than machined molds.
Silicone Molds
Advantages: Flexible, easy demolding for complex shapes. Capture intricate details well. Easy to make at home using mold-making kits.
Disadvantages: Not suitable for high-temperature materials. Deforms under high injection pressure. Best for low-pressure injection or casting.
Heating Equipment
A heating rod inside the barrel melts the raw material. Choose a rod with appropriate power and temperature range.
- Power: 1 – 3 kW for small-scale machines
- Temperature range: Must reach melting point of your materials (ABS: 200–250°C)
Cooling Equipment
A water-cooling system circulates water around the mold to solidify the injected material.
- Flow rate: 5 – 10 liters per minute for small molds
- Heat exchangers: Beneficial for continuous production
How Do You Set Up Your Workspace?
Step 1: Prepare Your Materials
Select your plastic raw material. For beginners, ABS, PP, or PLA are good choices.
Drying: Moisture causes defects—bubbles, voids, weakened structure. Dry plastic pellets before use.
- Use a household oven at 60°C to 80°C (140°F to 176°F)
- Spread pellets on a baking sheet lined with parchment paper
- Dry for 2 to 4 hours (depending on material)
Do not over-dry—this can degrade the plastic.
Step 2: Set Up Your Tools
Assemble the injection molding machine: Follow manufacturer instructions. Check all connections—electrical wires, heating and cooling system tubing—are secure.
Install the mold: Ensure proper alignment. Misalignment causes uneven injection and defective parts. 3D-printed molds are more fragile than metal or silicone; handle carefully.
Adjust machine settings: Set heating barrel temperature based on your material.
- ABS: 220°C – 240°C (428°F – 464°F)
- PP: 200°C – 250°C
- PLA: 180°C – 210°C
Start with low-to-medium injection pressure—5 to 10 MPa —and moderate speed. Adjust based on test runs.
How Do You Run the Injection Molding Process?
Step 3: Heat and Melt the Plastic
Pour dried pellets into the hopper. They enter the heated barrel. The rotating screw conveys and melts them. Friction from the screw contributes to melting.
Monitor barrel temperature closely. Too low: plastic does not flow properly, causing incomplete filling. Too high: plastic degrades, affecting quality.
Step 4: Inject into the Mold
The screw pushes molten plastic forward through the nozzle into the mold cavity.
Injection pressure: Must fill the cavity quickly and evenly. Too high causes flash (plastic leaking out along parting lines) or excessive mold stress.
Injection speed: Too slow causes non-uniform flow. Too fast traps air bubbles.
Step 5: Cool and Solidify
Cooling allows the plastic to solidify. If using a water-cooling system, ensure water circulates properly.
Cooling time depends on part thickness and material:
- Thin-walled PLA part: 10 – 20 seconds
- Thicker ABS part: 30 – 60 seconds or more
Step 6: Open Mold and Eject Part
Open the mold. Ejector pins push the finished part out. If the part is stuck, do not force it. Check for obstructions or improper cooling.
What Post-Processing Is Required?
Remove Flash
Flash is excess plastic that seeps out along parting lines. Use a sharp knife or trimming shears to remove it carefully. For delicate parts, use a hobby knife.
Trim and Finish
Smooth rough edges with sandpaper or a file. Start with coarse grit, then finer grit for a smooth finish. Clean holes and recesses.
Paint and Coat
For enhanced appearance or protection:
- Clean the surface (free of dust and debris)
- Apply primer for better adhesion
- Apply paint in thin, even layers
- Let each layer dry completely
Options: spray paint, acrylic paint, epoxy coatings. Epoxy is good for moisture protection.
What Challenges Will You Face?
Material Quality
Consumer-grade plastics may have inconsistent properties. Impurities cause defects. Use high-quality raw materials from reputable suppliers.
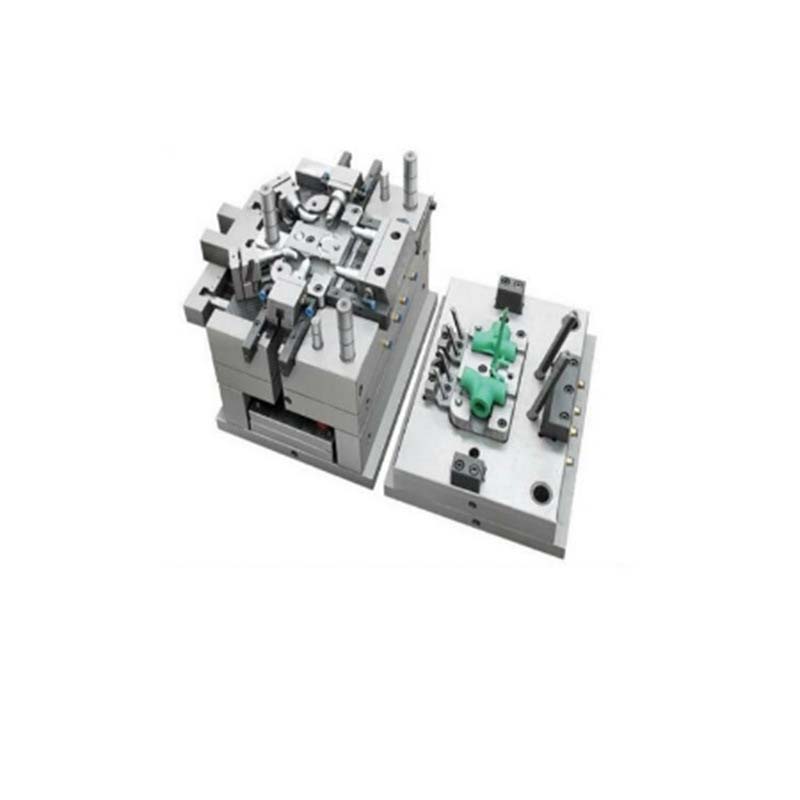
Mold Precision
3D-printed molds have limited durability and surface finish. For better results, consider machined aluminum molds for repeated use.
Process Control
Temperature, pressure, and timing must be precise. Small variations cause defects. Start with test runs and adjust settings based on results.
Safety
Molten plastic is hot. Injection pressure can cause splashing. Wear safety glasses and heat-resistant gloves. Work in a well-ventilated area.
What Does a Real-World Example Look Like?
A hobbyist wanted to produce custom keychains for a local craft fair. He used a Mini-Jet injection molding machine ($600), a 3D-printed mold he designed in Fusion 360, and ABS pellets.
After drying the ABS at 70°C for 3 hours, he set the machine temperature to 230°C. Test runs showed incomplete filling at 8 MPa pressure. He increased to 10 MPa and adjusted injection speed. Cooling time was set to 20 seconds.
The result: consistent keychains with smooth surfaces. Flash was minimal. He produced 200 units in two days. Material cost per keychain was under $0.20. The machine paid for itself within three craft fairs.
Conclusion
DIY backyard injection molding with tabletop tools is achievable. The core equipment includes a small-scale injection molding machine, molds (3D-printed or silicone), heating rods, and a water-cooling system.
The process involves material preparation (drying pellets), machine setup, heating and melting, injection, cooling, demolding, and post-processing (flash removal, trimming, finishing).
Challenges include material quality, mold precision, process control, and safety. With careful preparation and test runs, you can produce custom plastic parts at home.
For beginners, start with ABS or PLA, use a Mini-Jet or LAB machine, and iterate based on test results.
FAQ
What are the best materials for DIY injection molding?
ABS offers good strength and impact resistance—suitable for small electronic enclosures and model parts. PP provides chemical resistance for food-related products. PLA is biodegradable and easy to process, good for simple decorations. Start with these thermoplastics. Avoid high-temperature engineering plastics that require specialized equipment.
How do I dry plastic pellets without professional equipment?
Use a household oven. Set temperature to 60°C to 80°C (140°F to 176°F) . Spread pellets on a baking sheet lined with parchment paper. Dry for 2 to 4 hours. Do not over-dry. Store dried pellets in sealed containers with desiccants until use.
What injection pressure do I need for small parts?
Start with 5 to 10 MPa for small parts. Adjust based on test runs. If parts are incomplete, increase pressure. If flash appears, reduce pressure. Injection pressure must fill the cavity completely without forcing plastic out along parting lines.
Can I use 3D-printed molds for injection molding?
Yes, for low-volume production. 3D-printed molds are customizable and inexpensive—material cost is a few dollars. However, they have limited durability and may not withstand high-pressure injection for long cycles. Surface finish may be rougher than machined molds. For repeated use, consider machined aluminum molds.
What safety precautions should I take?
Work in a well-ventilated area. Wear safety glasses to protect against splashing. Use heat-resistant gloves when handling hot molds or parts. Keep flammable materials away from heating elements. Monitor temperatures to avoid plastic degradation and fume release. Have a fire extinguisher nearby.
Contact Yigu Technology for Custom Manufacturing
At Yigu Technology , we support creators at every stage. If your backyard projects scale beyond what tabletop tools can handle, we offer professional injection molding services.
We work with ABS, PP, PLA, and engineering-grade materials. Our precision molds and industrial machines deliver consistent quality for prototypes and production runs.
Whether you need design advice, mold manufacturing, or high-volume production, we are here to help.
Contact Yigu Technology today to discuss your injection molding needs—from backyard beginnings to full-scale manufacturing.