You have seen 3D printers in action. A plastic filament feeds into a nozzle. The nozzle moves back and forth. Layer by layer, an object appears. This is Fused Deposition Modeling (FDM) —the most common 3D printing technology in the world. It is accessible, affordable, and capable of creating everything from simple prototypes to functional end-use parts. But how does it actually work? What happens inside the machine? This guide explains the process, materials, and key considerations to help you master FDM printing.
What Is Fused Deposition Modeling?
Fused Deposition Modeling (FDM) , also known as Fused Filament Fabrication (FFF) , is an additive manufacturing process that builds objects by extruding molten thermoplastic through a nozzle. The material is deposited layer by layer, following paths defined by a digital model.
FDM is the most widely used 3D printing technology. It balances cost, ease of use, and material variety, making it suitable for hobbyists, engineers, and industrial manufacturers alike.
How Does the FDM Process Work?
The process follows a straightforward sequence. Each step contributes to the final quality.
Step 1: Design and Slicing
Every FDM print starts with a 3D digital model. This is typically created in CAD software like SolidWorks, Fusion 360, or Blender.
The model is then imported into slicing software (Cura, PrusaSlicer, Simplify3D). The slicer divides the model into thin horizontal layers—typically 0.1 mm to 0.4 mm thick. It also generates toolpaths (G-code) that tell the printer where to move, how fast to go, and how much material to extrude.
Step 2: Material Preparation
FDM uses thermoplastic filament wound on spools. Common materials include:
| Material | Characteristics | Typical Applications |
|---|---|---|
| PLA | Easy to print, biodegradable, low warping | Prototypes, decorative parts |
| ABS | Durable, heat-resistant, requires enclosure | Functional parts, automotive |
| PETG | Strong, flexible, chemical-resistant | Enclosures, mechanical parts |
| TPU | Flexible, rubber-like | Seals, grips, wearable items |
| Nylon | Tough, wear-resistant | Gears, structural components |
The filament is fed into the printer’s extruder, where it is gripped by a gear and pushed toward the heated nozzle.
Step 3: Melting and Extrusion
The nozzle (typically 0.2–1.0 mm diameter) contains a heating element. It melts the filament to a semi-liquid state.
- PLA: 180–220°C
- ABS: 220–250°C
- PETG: 230–250°C
The extruder motor pushes filament at a controlled rate—typically 5–50 mm³ per second. The molten material is deposited onto the build platform or the previous layer.
Step 4: Layer-by-Layer Deposition
The print head moves in the X and Y axes while the build platform lowers (or the head rises) in the Z axis. Each layer bonds to the one below through thermal fusion.
- Layer thickness: 0.1 mm for fine detail; 0.3 mm for faster prints
- Infill: Interior structure (10–100% density) balances strength and material use
- Supports: Temporary structures for overhangs >45°
Step 5: Cooling and Solidification
As the material exits the nozzle, it cools rapidly. Part cooling fans direct air onto the freshly deposited material to ensure solidification before the next layer.
The process repeats until the object is complete. A 10 cm tall part with 0.2 mm layers requires 500 layers—hours of printing, depending on size and complexity.
What Are the Key Components of an FDM Printer?
Understanding the hardware helps you troubleshoot and optimize.
| Component | Function | Critical Factors |
|---|---|---|
| Extruder | Feeds filament to nozzle | Direct drive vs. Bowden; grip tension |
| Hot End | Melts filament | Temperature stability; nozzle material |
| Nozzle | Deposits molten material | Diameter (0.2–1.0 mm); material (brass, hardened steel) |
| Build Platform | Surface for first layer | Leveling; adhesion; temperature (heated vs. unheated) |
| Motion System | Moves head and platform | Precision; speed; rigidity |
| Control Board | Reads G-code, controls motors | Firmware; communication protocol |
Real example: A user experienced constant first-layer failures. The issue was a warped build platform. Switching to a glass bed with manual leveling solved the problem, improving adhesion and print success rate from 60% to 95%.
What Are the Advantages of FDM?
FDM’s popularity comes from a set of clear strengths.
Low Cost
FDM printers range from $200 for hobbyist models to $10,000 for industrial machines. Filament costs $20–$100 per kg, making FDM the most affordable 3D printing technology.
Material Variety
A wide range of thermoplastics—from basic PLA to engineering-grade nylon and carbon fiber composites—are available.
Ease of Use
FDM requires minimal training. Many printers come pre-assembled with auto-bed leveling and simple interfaces.
No Toxic Chemicals
Unlike resin printers, FDM uses solid filament. No liquid chemicals. No special ventilation required (though ABS fumes benefit from enclosure).
Large Build Volumes
Industrial FDM printers reach 1 meter or more in build volume, enabling large parts without assembly.
What Are the Limitations?
FDM has constraints that matter for certain applications.
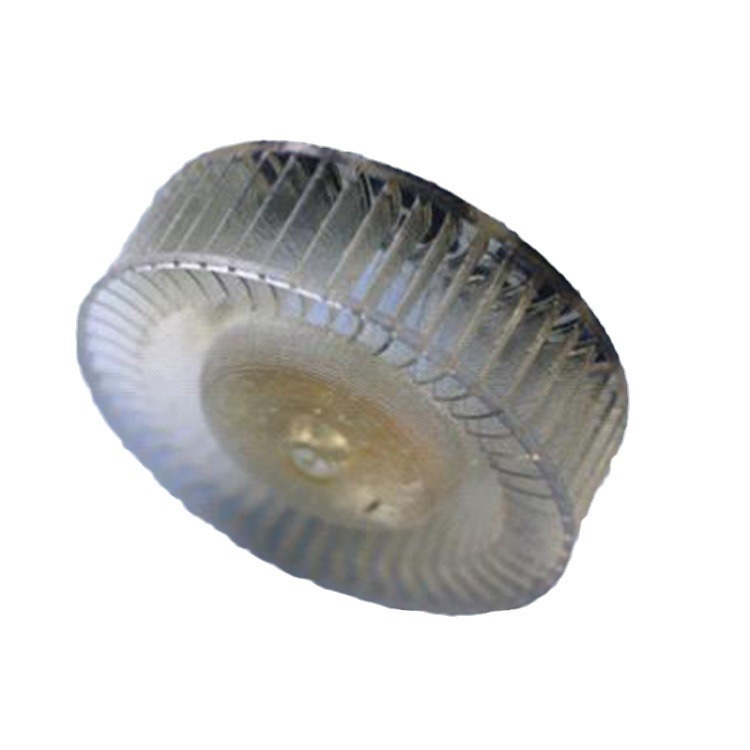
Visible Layer Lines
FDM parts show layer lines. While sanding and painting can smooth surfaces, FDM cannot match the surface finish of SLA or injection molding.
Anisotropic Strength
Parts are strongest along the layer direction. Z-axis strength (between layers) is typically 50–70% of X-Y strength. Design orientation matters.
Limited Detail
Nozzle size limits fine features. A 0.4 mm nozzle cannot print details smaller than 0.4 mm. Smaller nozzles (0.2 mm) improve detail but increase print time.
Warping
Materials like ABS and nylon shrink during cooling, causing warping. Heated beds and enclosures help, but not all printers have them.
How Do You Optimize FDM Prints?
Success comes from dialing in the right parameters.
Temperature Settings
| Parameter | PLA | ABS | PETG |
|---|---|---|---|
| Nozzle Temp | 190–220°C | 220–250°C | 230–250°C |
| Bed Temp | 40–60°C | 90–110°C | 70–80°C |
| Enclosure | Optional | Recommended | Optional |
Layer Height
- 0.1 mm: High detail, smooth surface, slow
- 0.2 mm: Balance of quality and speed
- 0.3 mm: Fast, functional parts
Infill
- 10–20%: Decorative parts
- 30–50%: Functional parts
- 80–100%: Load-bearing parts
Supports
- Overhangs >45° typically need supports
- Support density: 10–20% balances stability and easy removal
- Support interface: Solid layers for cleaner surfaces
Cooling
- PLA: 100% fan after first layer
- PETG: 20–50% fan
- ABS: Minimal or no fan
What Are Common Problems and How Do You Fix Them?
Even experienced users encounter issues. Here are common ones and solutions.
| Problem | Likely Cause | Solution |
|---|---|---|
| Warping | Cooling too fast, bed too cold | Increase bed temp; use enclosure; add brim |
| Stringing | Retraction too low, temp too high | Increase retraction (2–5 mm); lower nozzle temp |
| Poor adhesion | Bed not level, dirty surface | Level bed; clean with isopropyl alcohol; use adhesive |
| Under-extrusion | Clogged nozzle, filament tension | Clean nozzle; check extruder gear; increase flow |
| Layer shifting | Loose belts, excessive acceleration | Tighten belts; reduce print speed |
Real example: A user printing large PETG parts experienced consistent warping. Adding a 10 mm brim and increasing bed temperature from 70°C to 80°C eliminated the issue. The brim added minimal material but kept corners flat.
What Post-Processing Improves FDM Parts?
Raw FDM parts rarely look finished. Post-processing bridges the gap.
Support Removal
- Breakaway supports: Snap off with pliers or flush cutters
- Soluble supports: PVA (polyvinyl alcohol) dissolves in water
Sanding
- Start with 120–200 grit to remove layer lines
- Move to 400–600 grit for smoothing
- Finish with 800–1000 grit for near-polished surface
- Wet sanding reduces dust and heat buildup
Painting
- Apply filler primer to fill micro-gaps
- Sand lightly between coats
- Use acrylic paints for final color
- Seal with clear coat for durability
Chemical Smoothing
- ABS: Acetone vapor smooths surface
- PLA: Not effectively smoothed by common solvents
Yigu Technology’s Perspective
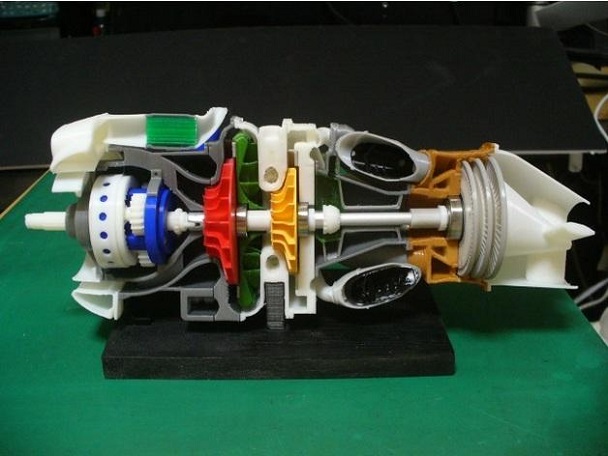
As a custom manufacturer, Yigu Technology uses FDM extensively for prototyping, tooling, and low-volume production. The technology’s accessibility allows us to quickly iterate designs and deliver functional parts to clients.
We apply FDM for:
- Rapid prototypes: Days instead of weeks
- Custom tooling: Jigs, fixtures, assembly aids
- Low-volume production: 10–500 units of functional parts
- Material testing: Validating designs before metal tooling
FDM is not the only technology we use. For high-detail parts, we use SLA. For metal components, we use DMLS. But for the majority of plastic prototypes and low-volume production, FDM offers the best balance of cost, speed, and capability.
Conclusion
Fused Deposition Modeling is the most accessible and widely used 3D printing technology. It builds parts by extruding molten thermoplastic layer by layer. The process is straightforward: design, slice, print, finish. FDM offers low cost, material variety, and ease of use—making it ideal for prototyping, tooling, and low-volume production.
It has limitations: visible layer lines, anisotropic strength, and warping with certain materials. But with proper settings, orientation, and post-processing, FDM produces functional parts that serve real-world applications.
FAQ
What materials can be used in FDM 3D printing?
Common materials include PLA (easy, biodegradable), ABS (durable, heat-resistant), PETG (strong, chemical-resistant), TPU (flexible), and nylon (tough, wear-resistant). Specialty filaments include carbon fiber-filled, wood-filled, and metal-filled composites.
How to improve the surface quality of FDM printed parts?
Use smaller layer heights (0.1 mm). Reduce nozzle temperature to minimize stringing. Enable cooling fans for PLA. Post-process with sanding, filler primer, and painting. For ABS, acetone vapor smoothing creates a glossy finish.
What are the common problems in FDM printing and how to solve them?
Warping: Increase bed temperature, use enclosure, add brim. Stringing: Increase retraction, lower nozzle temp. Poor adhesion: Level bed, clean surface, use adhesive. Under-extrusion: Clean nozzle, check filament tension, increase flow. Layer shifting: Tighten belts, reduce speed.
Is FDM suitable for functional parts?
Yes. With proper material selection (ABS, PETG, nylon, carbon fiber) and settings, FDM produces functional parts that withstand mechanical stress. However, parts are anisotropic—strongest along layer direction. Design orientation matters.
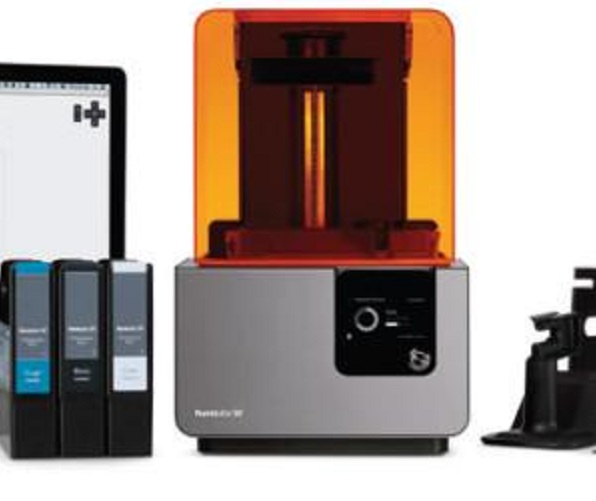
How does FDM compare to SLA?
FDM is lower cost, uses safer materials, and offers larger build volumes. SLA produces higher detail and smoother surfaces but uses toxic resins and requires more post-processing. FDM for durability; SLA for detail.
Contact Yigu Technology for Custom Manufacturing
Yigu Technology specializes in non-standard plastic and metal custom manufacturing using FDM and other additive technologies. Whether you need rapid prototypes, custom tooling, or low-volume production parts, our engineering team delivers quality and precision. Contact us today to discuss your FDM printing project.