Introduction
Time is money. In product development, every extra week spent on prototyping delays revenue, consumes budget, and lets competitors move ahead. Yet rushing without a plan leads to wasted effort, flawed parts, and repeated cycles. The key is not to work faster—it is to work smarter. An optimized prototyping process balances speed, cost, and quality. It delivers the information you need without building more than necessary. At Yigu Technology, we have helped hundreds of clients streamline their prototyping workflows. This guide walks you through the steps, common pitfalls, and practical strategies to make your prototyping process as efficient as possible.
What Does an Efficient Prototyping Process Look Like?
An efficient prototyping process is not about cutting corners. It is about clarity, focus, and iteration.
It starts with a clear understanding of what you need to learn. It continues with disciplined execution that builds only what is necessary to answer those questions. It ends with actionable insights that move your project forward.
Inefficiency often comes from vague goals, overbuilding, or testing the wrong things. Efficiency comes from knowing exactly what you are trying to achieve at each stage.
What Are the Key Steps?
The prototyping process follows a logical flow. Each step builds on the previous one.
1. Define the Vision
Start with a clear statement of the problem your product solves.
A team developing a new fitness tracker might define the problem as: "Busy professionals need a simple way to track daily activity without spending time on manual data entry."
This definition guides every decision that follows. Without it, you risk building a prototype that looks interesting but answers no real questions.
Ask yourself:
- What specific problem does this product solve?
- Who is the user?
- What is the most critical function to prove?
2. Focus on Key Features
Resist the urge to build everything at once. Pick one or two core features that define your product.
For an e-commerce platform prototype, the key feature might be the checkout process. For a new power tool, it might be the motor and trigger mechanism.
A startup developing a new smart lock focused their first prototype solely on the Bluetooth pairing and motor actuation. They ignored the app interface, the finish, and the packaging. That focus allowed them to validate the core mechanism in three weeks instead of three months.
Why this matters: Building fewer features reduces cost and speeds iteration. You learn faster when you test one thing at a time.
3. Choose the Right Production Method
Different prototyping methods serve different purposes. Selecting the wrong one wastes time and money.
| Method | Best For | Speed | Cost (Low Volume) | Key Trade-off |
|---|---|---|---|---|
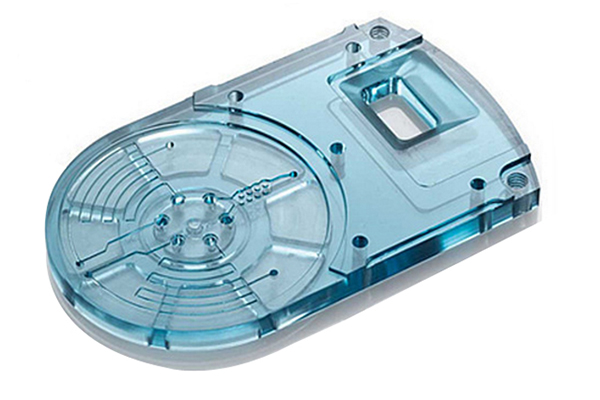
| 3D Printing (FDM) | Concept models, form testing | Fast | Low | Lower strength, visible layers |
| 3D Printing (SLA/SLS) | Functional testing, complex shapes | Moderate | Moderate | Better detail, higher cost than FDM |
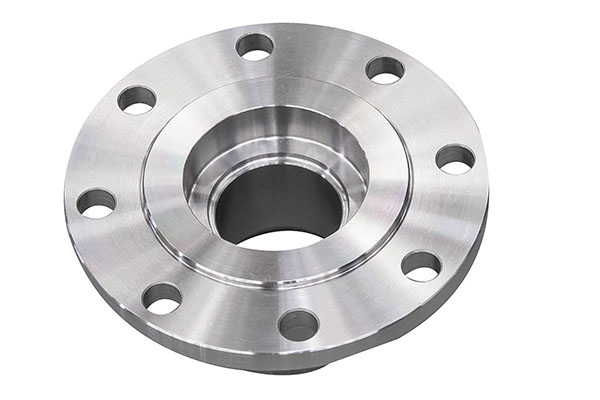
| CNC Machining | Precision metal/plastic parts | Slow | Moderate-high | High accuracy, longer lead time |
| Injection Molding | Larger quantities | Slow setup, fast per part | High setup, low per part | Not cost-effective for 1–10 units |
| Sheet Metal Fabrication | Brackets, enclosures | Moderate | Moderate | Good for thin-wall parts |
A medical device company needed five functional prototypes for a new surgical instrument. They chose CNC machining for the metal components and SLA for the plastic handle. The combination gave them accurate test data without the cost of production tooling.
4. Test and Refine
Testing is where prototypes deliver value. Without testing, a prototype is just a model.
User testing is essential. Put the prototype in front of real users. Watch how they interact with it. Do not defend the design. Listen to what they say—and what they do not say.
A software company testing a new mobile app prototype watched users struggle to find the settings menu. The team had assumed the icon was obvious. Users disagreed. The fix took two days. Discovering this after launch would have cost thousands in updates and negative reviews.
Technical testing matters too. Test for:
- Functionality: Does it perform as designed?
- Durability: How long does it last under use?
- Fit: Do mating parts align correctly?
- Environment: How does it handle heat, cold, or moisture?
A hardware startup tested their drone prototype in a wind tunnel. The results showed instability in crosswinds. They redesigned the propeller guards and added a stabilization algorithm. The final product passed all certification tests on the first attempt.
5. Present and Approve
The final step is presenting your findings to stakeholders. This includes investors, executives, or clients.
Show the prototype. Show test results. Show what you learned and what changed. A clear presentation builds confidence and secures approval for the next phase.
What Are the Biggest Challenges?
Even with a solid process, challenges arise. Recognizing them early helps you respond effectively.
Requirements Instability
Requirements often change during prototyping. New market data, customer feedback, or technical discoveries can shift priorities.
Example: A team developing a smart home device discovered during user testing that customers valued voice control far more than the app interface they had prioritized. They shifted focus mid-project.
Solution: Build flexibility into your schedule. Expect changes. Use rapid prototyping methods that allow quick iteration. Do not lock in final specifications until you have test data.
Choosing the Wrong Technology
Selecting a prototyping method that does not match your goals leads to wasted time and misleading results.
A consumer electronics company used FDM to prototype a wearable device. The layer lines made the part look rough, and stakeholders rejected the design. The design was fine—the prototype simply looked unfinished. Switching to SLA for the next round produced smooth parts that accurately represented the final product.
Solution: Match the method to the learning objective. Use FDM for form and fit. Use SLA or SLS when surface finish or mechanical properties matter. Use CNC when you need production-grade materials and tolerances.
Overbuilding
Building too much too early is a common trap. A full-feature prototype takes longer, costs more, and makes iteration harder.
Solution: Start with a minimum viable prototype. Build only what you need to answer your most critical questions. Add features in later iterations.
How Do You Measure Efficiency?
Efficiency is not just about speed. It is about learning per unit of time and cost.
| Metric | What It Measures | How to Improve |
|---|---|---|
| Cycle time | Time from design start to test results | Use faster prototyping methods; reduce decision delays |
| Iteration cost | Cost per prototype version | Build only what you need; use cost-effective methods early |
| Learning value | How many questions each prototype answers | Define learning objectives before building |
| Rework rate | How often you redo work due to errors | Invest in design review before manufacturing |
A furniture company tracked their prototyping cycle time. They reduced it from six weeks to two weeks by switching from CNC to SLA for early iterations and by establishing clear decision deadlines. Each iteration cost 70% less than their previous method.
What Are Practical Optimization Strategies?
Start with Low-Fidelity
Before building physical parts, use sketches, foam models, or cardboard mockups. These cost almost nothing and reveal basic ergonomic or spatial issues.
A medical device team built a foam model of a new handheld tool in one hour. They discovered the grip was too small for large hands. They adjusted the design before any CAD work—saving weeks of rework.
Use Design for Manufacturing (DFM) Early
Consider how your design will be produced before you build the first prototype. This prevents features that look good on screen but cannot be made economically.
A startup designed a part with a sharp internal corner. In CAD, it looked fine. In manufacturing, that corner required special tooling and added cost. A DFM review before prototyping identified the issue, and they changed the design to a radiused corner. The final part cost 40% less to produce.
Parallelize Work
Do not wait for one prototype to finish before starting the next iteration. Overlap design, manufacturing, and testing where possible.
While one prototype is being tested, the design team can prepare the next iteration. While parts are being printed, the test team can set up fixtures.
Document Everything
Keep a log of each prototype version, what changed, what tests were run, and what was learned. This prevents repeating the same mistakes and helps communicate progress to stakeholders.
Case Study: How One Team Cut Their Prototyping Time in Half
A consumer electronics startup was developing a new wireless earbud. Their initial prototyping approach took 14 weeks per iteration:
- 3 weeks for design
- 4 weeks for CNC machining of the housing
- 2 weeks for assembly
- 3 weeks for user testing
- 2 weeks for redesign
We helped them optimize:
| Change | Impact |
|---|---|
| Switched from CNC to SLA for early iterations | Reduced manufacturing time from 4 weeks to 3 days |
| Focused first three iterations on fit only | Reduced complexity; each iteration cost 60% less |
| Ran parallel testing and design | Overlapped activities; saved 2 weeks per cycle |
| Established clear decision deadlines | Prevented review delays; cut 1 week per cycle |
The result: each iteration dropped from 14 weeks to 4 weeks. They completed four iterations in the time previously needed for one. The final product launched five months ahead of the original schedule.
Conclusion
Optimizing your prototyping process is about making every hour and every dollar count. Start with a clear vision. Focus on key features. Choose the right manufacturing method for each stage. Test rigorously. And most importantly, build only what you need to learn.
Efficiency does not mean rushing. It means being intentional. It means knowing what you want to discover before you build. And it means using the right tools at the right time.
When you optimize your prototyping process, you do not just save time and money. You build better products. You reduce risk. And you bring your ideas to market faster.
Frequently Asked Questions
What are the most cost-effective prototyping methods for small-scale projects?
For very early concepts, sketches and foam models cost almost nothing. For functional prototypes, FDM 3D printing offers low cost per part. SLA 3D printing costs more but delivers better surface finish. For small quantities (1–10 units), 3D printing is typically more cost-effective than CNC machining or injection molding.
How can we ensure the prototype closely mimics the final product's functionality?
Use materials that match final production materials in mechanical properties. For plastics, SLA resins like ABS-like or polypropylene-like mimic injection-molded parts. For metals, CNC machining provides production-grade properties. Test under conditions that match real-world use. If your final product will be injection-molded, validate with CNC or SLS parts made from equivalent materials before committing to tooling.
How many prototype iterations are typically needed?
There is no fixed number. Simple products may require 2–3 iterations. Complex products with tight tolerances or regulatory requirements may need 5–10. The key is to plan for iteration. Budget time and resources for at least two cycles beyond your initial estimate.
What is the biggest mistake companies make in prototyping?
Overbuilding the first version. Many teams try to make the first prototype look and function like the final product. This takes too long, costs too much, and makes iteration difficult. Start with a focused prototype that answers your most critical question. Add complexity in later iterations.
How do I know when to stop prototyping and move to production?
Move to production when your prototype has answered all critical questions and you have validated: form (does it fit?), fit (do parts assemble correctly?), function (does it perform as needed?), and manufacturability (can it be made reliably at target cost?). If you are still discovering major design changes, you are not ready.
Contact Yigu Technology for Custom Manufacturing
At Yigu Technology, we specialize in helping clients optimize their prototyping and manufacturing processes. Our capabilities include CNC machining, SLA and SLS 3D printing, and sheet metal fabrication. We work with startups, medical device companies, automotive suppliers, and aerospace firms to deliver precision parts with fast lead times.
Whether you need a single concept model or a batch of functional test units, our engineering team can help you select the right approach for your goals. Contact us to discuss your project. Let us help you build better products—faster.