You have a model that is too big for your printer. Or it has overhangs that need supports in awkward places. Or you want to print it in different colors. Splitting 3D models solves these problems. Instead of printing one large part, you print several smaller ones and assemble them later. This guide walks you through why splitting matters, what tools to use, and how to do it correctly—so your parts fit together perfectly.
Why Split 3D Models for Printing?
Even the best 3D printers have size limits. The Prusa MK4 has a build volume of 250 x 210 x 220 mm. The Ender 3 V2 maxes out at 220 x 220 x 250 mm. If your model exceeds these dimensions, splitting is not optional—it is necessary.
But size is not the only reason.
Reduce Warping
Large, solid models are prone to warping—edges lift from the build plate as plastic cools unevenly. Splitting into thinner sections reduces the amount of material cooling at once, minimizing this risk.
Real example: A 30 cm tall robot model printed as a single piece warped so badly that the legs cracked. Splitting it into torso, arms, and legs produced a perfect print with no warping.
Improve Reliability
If one section fails mid-print, you only reprint that section—not the entire model. This saves time, material, and frustration, especially with expensive filaments or resins.
Enable Multi-Material or Multi-Color Printing
Split models allow different sections to print in different materials or colors. A handle in flexible TPU. A base in rigid PLA. Sections in different colors without a multi-material printer.
Simplify Post-Processing
Smaller parts are easier to sand, paint, and finish than one large model. You can reach interior surfaces that would be inaccessible after assembly.
What Tools Can You Use to Split Models?
Different tools suit different skill levels and needs.
| Tool | Best For | Price | Key Features | Learning Curve |
|---|---|---|---|---|
| Meshmixer | Beginners, resin & FDM | Free | Automatic splitting, alignment pins, mesh repair | Low |
| 3D Builder | Quick splits, Windows users | Free (built-in) | Simple interface, basic cuts | Very low |
| Blender | Advanced users, custom splits | Free | Full 3D modeling tools, precise cut controls | High |
| Fusion 360 | Functional parts, engineering | Free (hobbyist) | Parametric CAD, strength testing | Medium-high |
| Meshlab | Mesh analysis, technical users | Free | Powerful mesh editing, complex models | Medium |
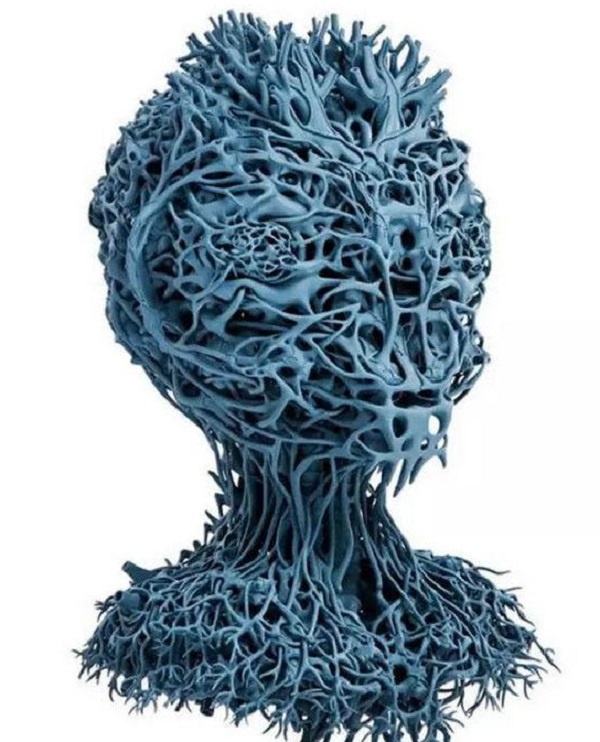
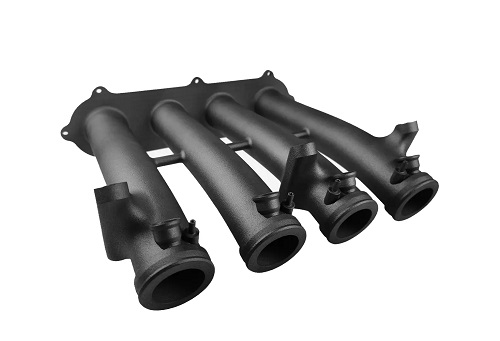
Real example: For a large automotive bracket, Fusion 360 allowed parametric splits with alignment tabs and stress testing. For a character bust, Meshmixer was faster—it automatically split at natural seams (neck, shoulders) and added alignment pins.
How Do You Split a Model in Meshmixer?
Meshmixer is ideal for beginners. It is free, user-friendly, and designed for 3D printing workflows.
Step 1: Prepare the Model
Open your model (STL or OBJ). Check for mesh errors before splitting.
- Go to Analysis > Inspector
- Click Auto-Repair to fix small errors (holes, non-manifold edges)
- For larger gaps, use Edit > Fill Hole manually
Pro tip: If your model has thin walls (under 2 mm), thicken them using Edit > Offset (0.5–1 mm). Thin sections may break during assembly.
Step 2: Choose the Split Method
Meshmixer offers two main cuts.
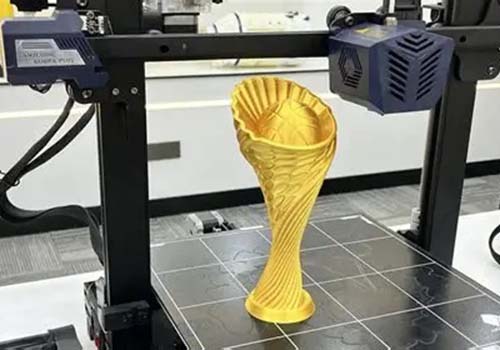
Plane Cut: For straight, simple splits—like cutting a vase into top and bottom halves.
Curve Cut: For complex shapes—like following a figurine’s waistline.
For a vase, use Plane Cut:
- Edit > Plane Cut
- A blue plane appears. Drag it to the desired split point.
- Use rotation handles to adjust the angle.
Step 3: Split and Separate
- Click Cut to split the model.
- Go to Edit > Separate Shells. This turns each section into a separate object.
- Use the Move tool (W key) to pull parts apart and inspect the cut edges.
Step 4: Add Alignment Features
This is the most important step. Without alignment pins, parts may shift during assembly.
- Select one part (e.g., the bottom of the vase). Go to Edit > Add Pin.
- Drag pins to the cut surface. Add 2–3 pins for stability.
- Select the mating part. Go to Edit > Add Hole.
- Align each hole with a pin. Adjust diameter (2–3 mm works for most PLA prints).
Step 5: Export
Select each part. Go to File > Export. Save as separate STL files (e.g., “vase_bottom.stl”, “vase_top.stl”).
Check each file in your slicer to ensure it fits the build volume.
How Do You Split Complex Models?
For intricate models—characters, mechanical parts, organic shapes—simple plane cuts may not work. Use these advanced techniques.
Split Along Natural Seams
Complex models often have natural separation lines: joints (elbows, knees), body parts (head, torso), or assembly points. Splitting here makes seams less visible.
In Blender:
- Enter Edit Mode
- Use Edge Select to highlight edges that follow the model’s shape
- Go to Mesh > Split > Split Edges to create a clean seam
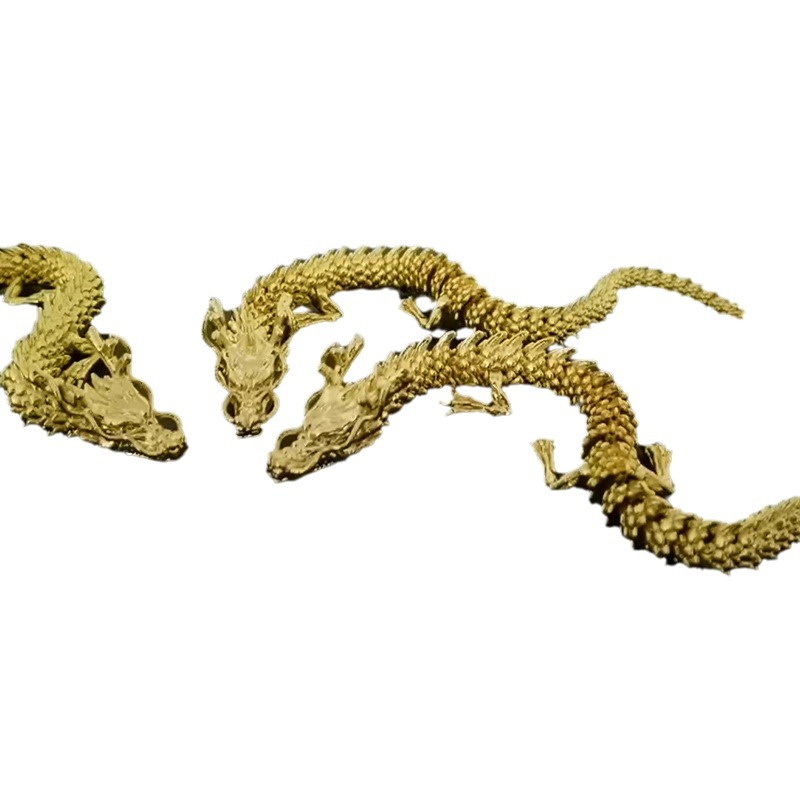
Real example: A 40 cm dragon model for cosplay was split at natural seams: neck (between head and body), torso (chest to belly), and tail (three segments). Assembly was easier, and seams were nearly invisible after painting.
Splitting for Resin vs. FDM
Different printers require different splitting strategies.
| Aspect | Resin (SLA/DLP) | FDM |
|---|---|---|
| Part size | Smaller—fit resin tank (150–200 mm height typical) | Larger—build volume up to 300+ mm |
| Wall thickness | Avoid splits under 1 mm (resin leaks) | 1.5–3 mm minimum for strength |
| Alignment | Pins and holes (2–3 mm) | Reinforcement tabs, keyed edges |
| Supports | Use support blockers near split edges | Minimize supports by splitting orientation |
What Are Common Mistakes to Avoid?
Even with the right tools, small errors can ruin a print.
Ignoring Build Volume Limits
Always measure your printer’s build volume before splitting. A 25 cm part will not fit on a printer with a 22 cm height limit. Split vertically into smaller sections if needed.
Poor Seam Placement
Splitting across a detailed area—like a character’s face—ruins the final look. Place seams on less visible areas: backs of figurines, bottoms of functional parts, or along natural edges.
Pro tip: In Meshmixer, use the View > Hide tool to preview how the seam will look from different angles.
Forgetting Alignment Features
Without pins or holes, parts shift during assembly. Even a 1 mm misalignment can make a model unusable. Always add at least two alignment features per split—more for large parts.
Over-Splitting
Splitting into too many sections (10+) increases assembly time and alignment risk. Aim for the fewest splits possible—usually 2–4 parts for most models.
Weak Split Edges
Thin edges break during assembly. Ensure split edges have sufficient thickness (2–3 mm minimum for FDM, 1–1.5 mm for resin). Add reinforcement tabs if needed.
How Do You Assemble Split Parts?
After printing, assembly requires care to achieve strong, clean results.
Surface Preparation
Split edges often have burrs or rough spots. Sand with fine-grit paper (200–400 grit) to create smooth mating surfaces. For resin parts, use a file to trim excess material before sanding.
Alignment Check
Dry-fit parts before gluing. Pins should insert smoothly. If too tight, sand pins slightly. If too loose, apply a thin layer of glue to build up material.
Adhesive Selection
| Material | Recommended Adhesive | Notes |
|---|---|---|
| PLA, PETG, ABS | Cyanoacrylate (super glue) + activator | Baking soda speeds drying; adds strength |
| Resin | Epoxy glue | Stronger; bonds well to smooth resin |
| Nylon | Specialty adhesives or mechanical fasteners | Cyanoacrylate may fail |
| Large parts | Epoxy or mechanical fasteners (screws, dowels) | Adds structural strength |
Clamping
Use clamps, rubber bands, or tape to hold parts together while glue cures. For complex assemblies, design temporary alignment fixtures to hold parts in position.
What About Post-Processing Seams?
Even with careful splitting, seams may be visible. Several techniques hide them.
Sanding and Filling
- Sand seam edges before gluing (200–400 grit)
- After gluing, apply filler primer to the seam
- Sand again with 400–600 grit
- Repeat until smooth
Chemical Smoothing
- ABS: Acetone vapor smooths seams into the surface
- PLA: Limited; use filler and sanding
- Resin: Sand and polish; use UV-curable filler for gaps
Painting
Primer and paint cover minor seams. For invisible seams, use body filler or modeling putty before priming.
Yigu Technology’s Perspective
As a custom manufacturer, Yigu Technology splits models daily. We help clients with:
- Large models: Breaking them into printer-friendly sections
- Functional parts: Adding alignment features and reinforcement
- Multi-material designs: Splitting to combine materials (e.g., rigid base + flexible grip)
- Post-processing: Guidance on assembly and finishing
In our experience, the most common mistake is skipping alignment features. A few minutes adding pins and holes saves hours of frustration during assembly.
We recommend beginners start with Meshmixer for simple splits. For engineering parts, Fusion 360 provides parametric control and strength testing. The goal is always the same: parts that fit together perfectly and look seamless.
Conclusion
Splitting 3D models is an essential skill for printing large, complex, or multi-material parts. It enables you to work within your printer’s build volume, reduce warping, and recover from failures without reprinting entire models.
The process is straightforward: choose the right tool, split along natural seams or planes, add alignment features, and export separate files. With careful seam placement and proper assembly techniques, split parts can be as strong and visually seamless as a single print.
FAQ
Can I split a model directly in my slicer (like Cura)?
Most slicers have basic splitting tools, but they are limited. Slicers can split along planes but do not offer alignment features (pins/holes) or complex curves. For detailed models, use dedicated software like Meshmixer, Blender, or Fusion 360.
How do I know where to split a model for strength?
Avoid splitting across areas that bear weight or stress. Split along natural seams or low-stress regions. For functional parts, use simulation tools (Fusion 360’s “Simulation” module) to test where splits will be strongest. A shelf should split vertically (left/right) rather than horizontally (top/bottom)—vertical splits distribute weight better.
Do I need to sand the split edges before assembly?
Yes. Split edges often have burrs or rough spots from printing. Sand with 200–400 grit paper to create smooth mating surfaces. For resin parts, use a file to trim excess material before sanding. This ensures tight fit and strong glue bond.
What glue should I use to assemble split 3D parts?
For PLA, PETG, and ABS: cyanoacrylate (super glue) with baking soda activator—fast and strong. For resin parts: epoxy glue—stronger and bonds well to smooth surfaces. For nylon or large structural parts: mechanical fasteners (screws, dowels) or specialty adhesives.
Can I split a model that has already been sliced?
No. Splitting must be done on the original STL, OBJ, or 3MF file before slicing. Sliced files (G-code) are toolpaths optimized for printing and cannot be edited to split parts. Always split first, then slice each part separately.
Contact Yigu Technology for Custom Manufacturing
Yigu Technology specializes in non-standard plastic and metal custom manufacturing. We help clients split complex models, add alignment features, and produce multi-part assemblies. Whether you need large prints broken into sections or functional parts designed for assembly, our engineering team delivers. Contact us today to discuss your 3D printing project.