You have a physical object. You need a digital model. You want to print it. How do you get from the real thing to a printable file? 3D scanning is the answer. It captures the shape, dimensions, and details of physical objects, converting them into digital models that 3D printers can understand. This process bridges the gap between the real and virtual worlds, enabling applications from reverse engineering to custom prosthetics. This guide explains how 3D scanning works, how it connects to 3D printing, and where this combination delivers value.
What Is 3D Scanning?
3D scanning, also called 3D digitizing, is the process of capturing the shape and appearance of a real-world object or environment. A scanner records x, y, and z coordinates of points on the object’s surface, creating a digital representation.
The output is typically a point cloud—millions of individual points in 3D space. This data is then processed into a polygon mesh (usually triangles) that forms a digital 3D model.
What Are the Main 3D Scanning Technologies?
Different technologies suit different applications. Each has strengths and limitations.
Laser Scanning
Laser scanners project laser beams onto the object and measure the time it takes for the light to return. By triangulating measurements from multiple angles, they create detailed point clouds.
| Aspect | Details |
|---|---|
| Accuracy | Up to ±0.05 mm for short-range; ±2 mm for long-range (100+ meters) |
| Speed | Fast—millions of points per second |
| Best for | Large objects (buildings, vehicles), industrial parts, reverse engineering |
| Limitations | Can struggle with reflective or transparent surfaces |
Example: A FARO Focus S350 laser scanner captures a building facade at 100 meters with 2 mm accuracy—ideal for architectural preservation.
Structured Light Scanning
Structured light scanners project patterns of light (stripes, grids) onto the object. Cameras capture how the pattern deforms, calculating the 3D shape.
| Aspect | Details |
|---|---|
| Accuracy | Up to ±0.02–0.05 mm |
| Speed | Moderate—captures in seconds to minutes |
| Best for | Small to medium objects, industrial quality control, automotive parts |
| Limitations | Sensitive to ambient light; requires matte surfaces or spray coating |
Example: An automotive manufacturer uses a structured light scanner to inspect engine components for defects. Resolution down to 0.05 mm catches manufacturing errors before assembly.
Photogrammetry
Photogrammetry uses multiple photographs taken from different angles. Software analyzes overlapping areas to triangulate point positions and generate a 3D model.
| Aspect | Details |
|---|---|
| Accuracy | Varies with camera quality and number of photos; 0.1–1 mm typical |
| Speed | Slow—requires many photos and processing time |
| Best for | Large objects, cultural heritage, archaeology, organic shapes |
| Limitations | Requires good lighting; texture-dependent; processing intensive |
Example: Archaeologists photograph an ancient statue from 200 angles. Software creates a detailed 3D model for research and preservation—without touching the artifact.
How Do 3D Scanning and Printing Connect?
The combination creates a seamless workflow from physical object to printed replica.
Step 1: Capture the Object
A 3D scanner captures the physical object. The result is a point cloud—a dense collection of surface points.
Step 2: Process the Data
Software cleans the point cloud:
- Noise removal: Eliminates stray points from reflections or errors
- Alignment: Merges scans from multiple angles
- Mesh generation: Converts points into a polygon mesh (typically triangles)
- Mesh optimization: Reduces polygon count, fills holes, smooths surfaces
Step 3: Prepare for Printing
The digital model is exported in a 3D printable format (STL, OBJ, 3MF). It may require:
- Scaling: Adjusting size
- Orientation: Positioning for optimal printing
- Supports: Adding temporary structures for overhangs
Step 4: Print
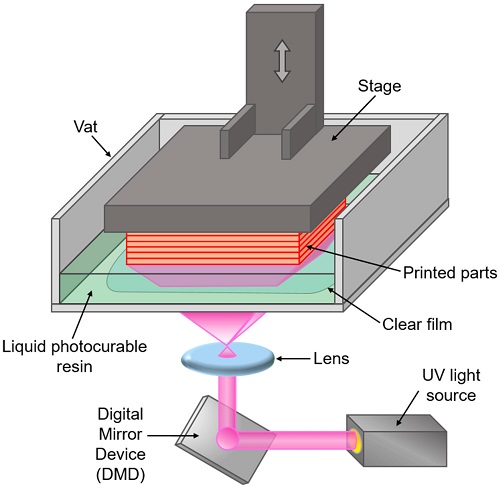
The 3D printer builds the object layer by layer. Technologies include:
- FDM for large, durable parts
- SLA for high detail, smooth surfaces
- SLS for complex geometries without supports
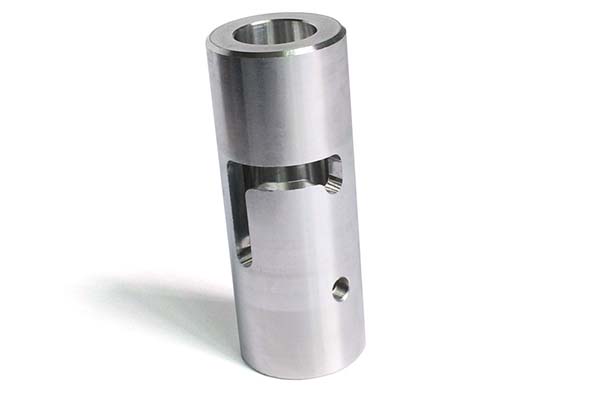
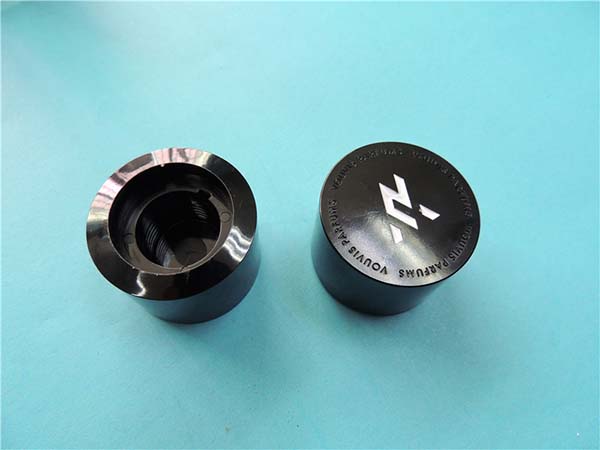
Real example: A classic car restoration shop needed replacement parts for a 1960s vehicle. Original molds no longer existed. They 3D scanned a donor part, cleaned the mesh, and printed a replica in durable nylon. The printed part matched the original exactly.
What Are the Key Applications?
The scanning-to-printing workflow serves industries where physical objects must be replicated, customized, or preserved.
Manufacturing: Reverse Engineering and Mold Making
| Application | Process | Benefit |
|---|---|---|
| Reverse engineering | Scan existing part, create CAD model, modify or replicate | Recreate obsolete parts; improve designs |
| Mold manufacturing | Scan mold cavity, print replacement | 50% faster mold production |
| Quality control | Scan manufactured part, compare to CAD | Detect defects; ensure tolerances |
Example: An aerospace company scanned a damaged turbine blade, created a digital model, and printed a replacement. Repair time dropped from 12 weeks to 3 weeks; cost reduced by 40%.
Healthcare: Custom Prosthetics and Surgical Planning
| Application | Process | Benefit |
|---|---|---|
| Prosthetics | Scan residual limb, design custom socket, print | Perfect fit; faster delivery |
| Surgical guides | Scan patient anatomy, print guide for surgery | Reduced operation time; improved outcomes |
| Orthotics | Scan foot or spine, print custom brace | Patient-specific support |
Example: A patient with a complex jaw deformity received a custom surgical guide printed from a CT scan. The guide fit perfectly, reducing surgery time by 40 minutes and improving accuracy.
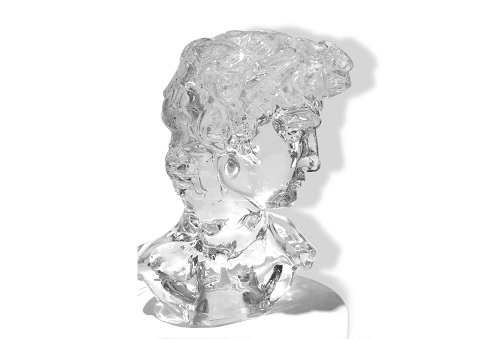
Art and Design: Preservation and Creation
| Application | Process | Benefit |
|---|---|---|
| Cultural heritage | Scan artifacts, print replicas | Preservation; research; museum displays |
| Custom products | Scan body or object, design unique piece | Personalized jewelry, fashion, accessories |
| Architectural models | Scan site, print scale model | Design validation; client communication |
Example: The British Museum scanned ancient Egyptian sculptures and printed replicas for exhibition. The originals remained preserved while visitors interacted with accurate copies.
Consumer and Custom Manufacturing
| Application | Process | Benefit |
|---|---|---|
| Custom fit products | Scan body, print custom-fit items | Helmets, shoes, ergonomic grips |
| Spare parts | Scan broken part, print replacement | On-demand; no inventory |
| Personalized gifts | Scan object or person, print keepsake | Unique, meaningful presents |
What Are the Challenges?
The scanning-to-printing workflow has limitations. Understanding them ensures realistic expectations.
Data Processing Complexity
Raw scan data requires significant processing:
- Cleaning: Removing noise and artifacts
- Mesh repair: Filling holes, fixing topology
- Simplification: Reducing polygon count for manageable file sizes
This processing requires skilled operators and specialized software.
Accuracy Limitations
Scan accuracy varies by technology. For high-precision applications (medical implants, aerospace components), ensure the scanner meets required tolerances.
Material Limitations
Scanners struggle with:
- Reflective surfaces: Metal, glass, polished plastic (may require spray coating)
- Transparent surfaces: Glass, clear plastic
- Dark surfaces: Absorb light, reduce data capture
Equipment Cost
Professional 3D scanners range from $5,000 to $100,000+. Service bureaus offer scanning services for those without equipment.
File Size and Complexity
High-resolution scans generate massive files (gigabytes). Processing requires powerful computers and storage.
How Do You Choose the Right Scanning Approach?
The choice depends on object size, required accuracy, and application.
| Application | Recommended Technology | Accuracy | Notes |
|---|---|---|---|
| Small parts (under 30 cm) | Structured light | ±0.02–0.05 mm | Best for detailed objects |
| Medium parts (30–200 cm) | Laser scanning (short-range) | ±0.05–1 mm | Good balance of speed and accuracy |
| Large objects (buildings, vehicles) | Laser scanning (long-range) | ±2 mm at 100 m | Fast capture of large areas |
| Organic shapes, soft objects | Photogrammetry | 0.1–1 mm | Works without contact; texture-based |
| Complex interiors | Laser scanning with multiple setups | ±1–2 mm | Merged scans from multiple positions |
Yigu Technology’s Perspective
As a custom manufacturer, Yigu Technology uses 3D scanning to serve clients who need to:
- Reverse engineer obsolete parts without CAD files
- Create custom-fit products for medical or consumer applications
- Verify quality of manufactured components against design
- Digitize physical assets for digital inventory
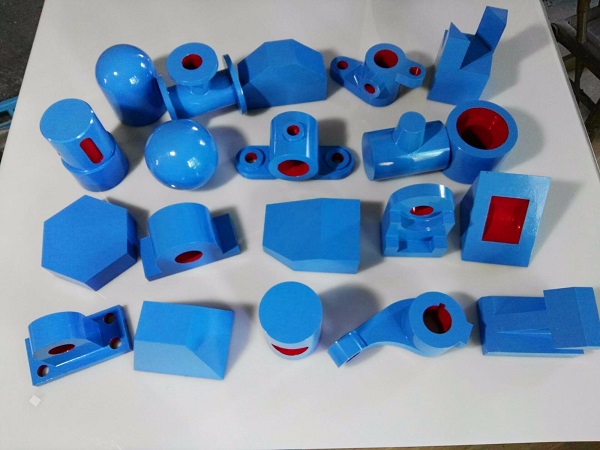
We combine scanning with 3D printing to deliver complete solutions. A client brings a broken part. We scan, repair the mesh, and print a replacement—all within days.
In our experience, the scanning-to-printing workflow succeeds when:
- The part geometry is captured with appropriate resolution
- Data processing is thorough (clean meshes, no holes)
- The printing technology matches the application (SLA for detail, FDM for durability)
Conclusion
3D scanning bridges the real and virtual worlds for 3D printing. It captures physical objects with high precision, converting them into digital models that printers can understand. This workflow enables reverse engineering, custom medical devices, cultural heritage preservation, and personalized consumer products.
The combination is not without challenges—data processing is complex, equipment is costly, and certain materials are difficult to scan. But for applications where accuracy and customization matter, scanning-to-printing delivers capabilities that traditional methods cannot match.
FAQ
What are the most common 3D scanning technologies?
The three most common are laser scanning (fast, accurate for large objects), structured light scanning (high precision for small to medium objects), and photogrammetry (uses photographs, ideal for organic shapes and cultural heritage). Each suits different applications.
Can 3D printed parts be as strong as traditionally manufactured parts?
Yes, with the right materials and processes. Metal 3D printing (DMLS, SLM) produces parts with properties comparable to forged or cast metal. Engineering plastics like nylon and PEEK offer high strength. However, part orientation and print settings affect strength—design accordingly.
What are the main challenges in using 3D scanning for 3D printing?
Key challenges include: data processing complexity (cleaning point clouds, repairing meshes), accuracy limitations (scanner precision, reflective/dark surfaces), equipment cost (professional scanners $5,000–100,000+), and file size (high-resolution scans require powerful computers).
How accurate is 3D scanning?
Accuracy varies by technology. Structured light scanners achieve ±0.02–0.05 mm. Short-range laser scanners achieve ±0.05–1 mm. Long-range laser scanners achieve ±2 mm at 100 meters. Photogrammetry accuracy ranges from 0.1–1 mm, depending on camera quality and processing.
Can I scan and print a broken part?
Yes. This is a common application. Scan the broken part, including any intact sections. Use the scan to create a digital model—either repairing the broken geometry or capturing a complete donor part. Then print the replacement. This workflow is widely used for obsolete parts, classic car restoration, and on-demand spare parts.
Contact Yigu Technology for Custom Manufacturing
Yigu Technology specializes in non-standard plastic and metal custom manufacturing, combining 3D scanning and 3D printing to deliver complete solutions. Whether you need reverse engineering, custom-fit products, or replacement parts, our engineering team handles scanning, processing, and printing. Contact us today to discuss your project.