From DIY camera sliders to functional prototypes and custom gear, 3D printing offers engineers endless opportunities to design, test, and innovate. This guide explores the best projects to enhance your skills and tackle real engineering challenges.
Introduction
In the dynamic field of engineering, 3D printing has emerged as a revolutionary technology. It transforms how products are designed, prototyped, and manufactured. With 3D printing, engineers can bring intricate ideas to life, break free from traditional manufacturing constraints, and accelerate development cycles.
Whether you're a seasoned professional exploring new applications or a budding engineer seeking hands-on experience, 3D printing projects offer unique opportunities. They enhance your skills, deepen your understanding of design principles, and open new avenues in this exciting realm.
This guide explores a variety of 3D printing projects tailored for engineers. Each project teaches specific skills—from mechanical design to material selection—while delivering functional, practical results.
Why Should Engineers Invest Time in 3D Printing Projects?
What skills do 3D printing projects develop?
Design thinking: Moving from concept to physical object requires thinking through every detail—clearances, tolerances, assembly sequences, and material behavior.
CAD proficiency: Regular practice with real projects builds fluency in computer-aided design (CAD) software faster than tutorials alone.
Material understanding: Different projects require different materials. You learn firsthand how PLA, PETG, ABS, and others behave under various conditions.
Problem-solving: When prints fail—and they will—you diagnose causes and find solutions. This troubleshooting mindset transfers directly to engineering practice.
Manufacturing awareness: Understanding how parts are made informs better design decisions, even when you're not the one printing.
How do projects bridge theory and practice?
Engineering theory teaches principles: stress analysis, material properties, tolerance stacks. But applying them to real objects reveals nuances textbooks don't capture.
A 3D printed bracket teaches more about design for manufacturing than any lecture. When your first version breaks, you understand why fillets matter. When parts don't fit, you appreciate tolerance allocation.
Projects make abstract concepts tangible—and memorable.
What Are the Best 3D Printing Projects for Engineers?
DIY Camera Slider: Learning Mechanical Design
A DIY camera slider is an excellent project for engineers interested in mechanical design and motion systems. It provides smooth, linear motion for cameras, enabling professional tracking shots in photography and videography.
What you'll design:
- Base: The foundation that supports everything
- Rails: Guide tracks ensuring smooth motion (T-shaped cross-section works well)
- Carriage: Moves along rails, holding the camera
- Mounting brackets: Connect camera to carriage
- Drive mechanism: Optional—manual or motorized
Key engineering concepts:
- Motion transfer: How force moves the carriage smoothly
- Friction reduction: Bearings or bushings minimize resistance
- Load-bearing capacity: Structure must support camera weight
- Stiffness-to-weight ratio: Rigid enough without excess material
- Tolerance design: Rails must be parallel; carriage must fit without binding
Materials: PLA or PETG work well—easy to print with good strength. For higher loads, consider ABS or nylon.
Assembly: After printing, add hardware—screws, nuts, bolts—and optional bearings. Mount camera and test.
What you'll learn: This project teaches mechanical design principles you'll use throughout your engineering career—motion, friction, load distribution, and assembly considerations.
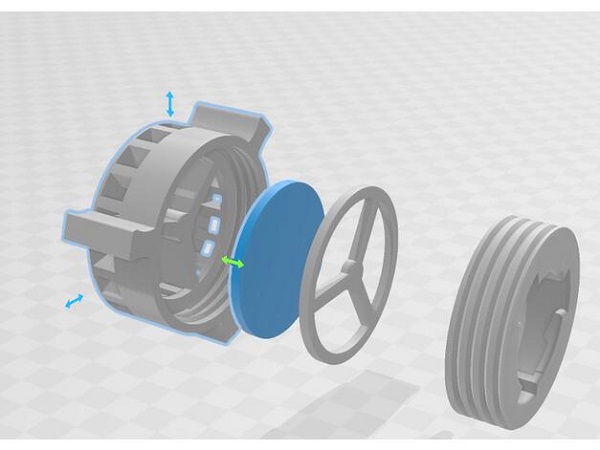
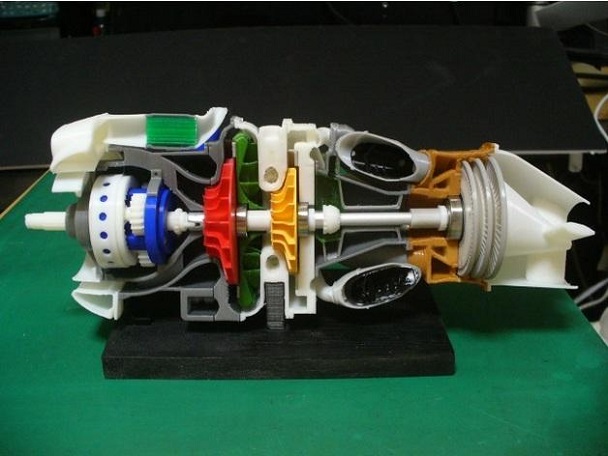
Engineering Models: Visualizing Complex Structures
Engineering models are invaluable for understanding complex structures. They let you visualize how parts fit together, identify design flaws, and optimize designs before committing to expensive manufacturing.
The process:
- CAD design: Create detailed 3D model using software like SolidWorks, Fusion 360, or Onshape. Define all dimensions, shapes, and internal structures accurately.
- File preparation: Convert to STL format that printers understand. Check for errors—non-manifold geometry, inverted normals, missing surfaces.
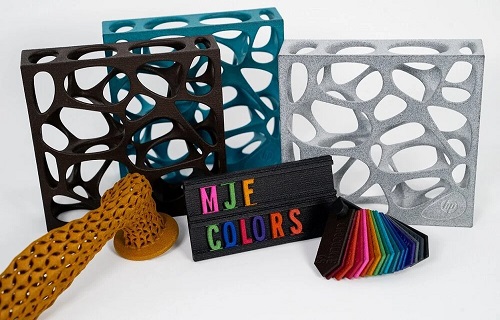
- Printing: Choose technology based on requirements:
- FDM: Fast, economical, good for large models
- SLA: High detail, smooth finish for intricate parts
- SLS: Strong, functional models without supports
- Post-processing: Remove supports, sand, paint as needed.
Real-world example: Designing an aircraft engine component? A 3D printed model helps study airflow through complex passages. Engineers can test multiple iterations quickly, improving efficiency before metal cutting begins.
Applications:
- Assembly verification: Check how components interact
- Flow visualization: Study fluid or air paths
- Ergonomics testing: Evaluate human interfaces
- Presentation models: Communicate designs to stakeholders
- Educational tools: Teach complex mechanisms
What you'll learn: Translating digital designs to physical objects reveals gaps in your modeling. You develop an eye for manufacturability and learn to design for real-world constraints.
Custom Camera Gear: Meeting Specific Needs
Custom camera gear projects center on specific user requirements. Photographers often need accessories that don't exist commercially—or exist at prohibitive cost. 3D printing fills this gap perfectly.
Example projects:
Custom lens hood: Measure your camera lens diameter. Design a hood with:
- Perfect fit for your specific lens
- Anti-glare ridges inside
- Collapsible structure for storage
- Unique shape matching your style
Camera grip: Ergonomically designed for your hand:
- Contoured to your grip
- Textured surface for non-slip hold
- Battery compartment access
- Tripod mount integration
Lens cap holder: Keep caps organized:
- Attaches to camera strap
- Holds multiple cap sizes
- Quick-release design
Filter adapter: Use filters with non-standard lenses:
- Precise thread matching
- Light-tight design
- Secure locking mechanism
Why 3D printing excels here:
- One-off production: Traditional manufacturing costs prohibit single custom pieces
- Complex geometries: Organic shapes, undercuts, internal features
- Rapid iteration: Try designs, get feedback, improve
- Material variety: Rigid for structural parts, flexible for grips
What you'll learn: This project teaches design for specific users—understanding requirements, translating needs to features, and iterating based on feedback. These user-centered design skills apply across all engineering disciplines.
Functional Prototypes: Testing Before Production
Functional prototypes are perhaps the most valuable engineering application of 3D printing. They let you test designs under real conditions before committing to tooling and production.
Examples:
Mechanical linkages: Print working hinges, linkages, and mechanisms. Test motion, clearance, and strength.
Enclosures: Verify component fit, access to ports, assembly sequence. Catch interference issues early.
Brackets and mounts: Test strength, stiffness, and installation before metal fabrication.
Fluidic components: Print manifolds and channels to verify flow patterns.
Key considerations:
- Material selection: Choose properties matching intended production material where possible
- Scale: Full-size prototypes reveal issues scaled models miss
- Testing protocol: Define what "success" means before printing
- Iteration planning: Expect multiple versions—each teaches something
Real-world example: A startup designing a new drone printed motor mounts to test vibration characteristics. First version revealed resonance at certain speeds. Second version added stiffening ribs. Third version integrated flexible damping features. All before cutting metal molds.
What you'll learn: Prototyping teaches the design-test-iterate cycle central to engineering practice. You learn to fail fast, learn cheaply, and converge on optimal designs efficiently.
Jigs and Fixtures: Improving Manufacturing
Jigs and fixtures are tools that guide or hold parts during manufacturing. They're ideal 3D printing projects because they're often custom, low-volume, and require quick turnaround.
Examples:
Drill guides: Ensure holes are precisely located and perpendicular.
Assembly fixtures: Hold components in correct alignment during assembly.
Soldering jigs: Position PCBs and components for accurate soldering.
Inspection gauges: Quickly verify part dimensions meet specifications.
Benefits of 3D printed tooling:
- Speed: Design today, print overnight, use tomorrow
- Cost: Fraction of machined metal fixtures
- Iteration: Improve designs based on shop floor feedback
- Ergonomics: Optimize for user comfort and efficiency
What you'll learn: Designing for manufacturing tools teaches practical production constraints. You understand why operators need certain features—and how good tooling improves quality and throughput.
What Materials Should You Choose for Engineering Projects?
Common materials compared
| Material | Strength | Flexibility | Heat Resistance | Ease of Printing | Best For |
|---|---|---|---|---|---|
| PLA | Moderate | Low | Low (60°C) | Very easy | Prototypes, concept models, low-stress parts |
| PETG | High | Moderate | Moderate (80°C) | Easy | Functional parts, outdoor use, mechanical components |
| ABS | High | Moderate | High (90°C) | Difficult | Heat-exposed parts, automotive, durable components |
| Nylon | Very high | High | High | Difficult | Gears, bearings, high-wear parts |
| TPU | Moderate | Very high | Moderate | Moderate | Flexible parts, gaskets, shock absorption |
| Polycarbonate | Very high | Moderate | Very high (110°C+) | Very difficult | High-strength, high-heat applications |
Material selection guidelines
For mechanical strength: PETG, ABS, or nylon
For heat exposure: ABS, polycarbonate, or high-temp resins
For flexibility: TPU or other flexible filaments
For detail and finish: SLA resins
For outdoor use: PETG or ASA (UV resistant)
For food contact: PETG (with appropriate sealing)
When to consider metals
For production parts requiring maximum strength, consider metal 3D printing:
- Aluminum: Lightweight, good strength, corrosion resistant
- Titanium: Exceptional strength-to-weight, biocompatible
- Stainless steel: Strong, durable, corrosion resistant
- Inconel: High-temperature performance
Metal printing costs more but delivers production-ready parts with properties matching wrought materials.
How Do You Ensure Print Accuracy for Engineering Projects?
Design phase considerations
Start with proper CAD: Use high-resolution modeling. Avoid errors like:
- Non-manifold geometry
- Self-intersecting surfaces
- Missing faces
- Incorrect normals
Design for tolerances: 3D printers aren't perfect. Allow clearance where parts must move or assemble. Typical FDM tolerances: ±0.2-0.5mm. SLA: ±0.1-0.2mm.
Consider orientation: How you orient affects:
- Surface finish (top vs. sides)
- Strength (layer orientation relative to stress)
- Support requirements
- Dimensional accuracy
Add features for assembly:
- Chamfers help parts start together
- Clearance holes for fasteners
- Alignment pins for accurate positioning
- Test coupons for verifying settings
Printer settings that matter
Layer height: Smaller layers (0.1-0.2mm) improve accuracy and surface finish but increase time. For functional parts, balance detail with practicality.
Printing speed: Too fast causes vibrations affecting accuracy. Optimize for your printer—typically 40-60 mm/s for detailed work.
Temperature: Correct extrusion temperature ensures consistent flow. Too cold: under-extrusion. Too hot: stringing, oozing, dimensional errors.
Cooling: Proper cooling affects dimensional stability. Too little: warping. Too much: poor layer adhesion.
Calibration: Regularly calibrate:
- Extruder steps/mm
- Flow rate
- Bed leveling
- Temperature readings
Post-processing for improved accuracy
Support removal: Careful removal prevents damage. Flush cutters work well. Sand support nubs smooth.
Sanding: Progress through grits (200→400→600→1000) for smooth finish. Wet sanding reduces heat and dust.
Machining: Critical features can be machined after printing. Drill holes, tap threads, mill surfaces to final tolerances.
Heat treatment: Annealing (for some materials) relieves internal stresses and improves dimensional stability.
Yigu Technology's View
As a non-standard plastic and metal products custom supplier, Yigu Technology sees immense potential in 3D printing for custom-made production. The technology allows creation of highly customized products that precisely meet clients' unique requirements. This reduces waste and shortens production cycles—especially beneficial for small-batch and one-off projects.
However, challenges remain. The limited range of printable materials restricts application scope. The relatively high cost of 3D printing, especially for large-scale production, is a hurdle. Ensuring consistent quality across prints can be difficult.
Looking ahead, we believe continuous development—new materials, more efficient processes, better quality control—will make 3D printing even more significant in custom manufacturing. It will enable production of more complex and high-performance non-standard products, further meeting diverse market needs.
Conclusion
3D printing projects offer engineers unparalleled opportunities to learn, create, and innovate. From DIY camera sliders teaching mechanical design to functional prototypes validating concepts, each project builds skills that transfer directly to professional practice.
Key takeaways:
- Projects develop design thinking, CAD proficiency, material understanding, and problem-solving
- Camera sliders teach motion, friction, and load-bearing principles
- Engineering models visualize complex structures and reveal design flaws
- Custom gear demonstrates user-centered design and rapid iteration
- Functional prototypes enable testing before production investment
- Jigs and fixtures improve manufacturing efficiency
- Material selection depends on project requirements—strength, heat, flexibility, cost
- Accuracy requires attention at every stage: design, printing, post-processing
Whether you're a student building your portfolio or a professional expanding your capabilities, 3D printing projects deliver practical knowledge you'll use throughout your engineering career.
FAQ
Q1: What are the most suitable 3D printing materials for engineering projects?
A: PLA is popular for ease of printing and good surface finish, but has lower strength and heat resistance. ABS offers higher strength and heat resistance for functional prototypes. PETG combines strength with printability for mechanical parts. Nylon excels for gears and wear-resistant components. For high-performance applications, metal materials like aluminum, titanium, and stainless steel are used where strength and durability are critical.
Q2: How to ensure the accuracy of 3D printed parts?
A: Start with proper CAD design—avoid errors and model correctly. Use appropriate printer settings: smaller layer height (0.1-0.2mm) for better accuracy, optimized speed to avoid vibrations, correct temperature for consistent flow. Calibrate your printer regularly. Post-process with careful support removal, sanding, and—if needed—machining critical features.
Q3: Can 3D printing be used for mass production in engineering?
A: Currently, 3D printing has limitations for mass production. Speed is slower than injection molding or CNC machining. Cost per unit can be high, especially with expensive materials. Quality consistency across large batches is challenging. However, for small-batch production (under 1,000 units) and customized parts, 3D printing is highly advantageous—no tooling costs, rapid iteration, design flexibility. As technology improves, viability for mass production will increase.
Q4: What CAD software should engineers learn for 3D printing?
A: Popular options include SolidWorks (industry standard for mechanical design), Fusion 360 (powerful, free for hobbyists/students), Onshape (cloud-based, collaborative), and FreeCAD (open-source). Choose based on your industry, budget, and learning style. The specific software matters less than understanding modeling principles.
Q5: How do I choose between FDM, SLA, and SLS for engineering projects?
A: FDM: Best for large parts, functional prototypes, economical. Good strength but visible layer lines. SLA: Best for high detail, smooth surfaces, intricate features. Resin parts can be brittle. SLS: Best for complex geometries, no supports, excellent mechanical properties. Most expensive equipment. Choose based on your requirements for detail, strength, and budget.
Q6: What's the most important skill for engineers using 3D printing?
A: Design for additive manufacturing (DfAM)—understanding how to design specifically for layer-by-layer fabrication. This includes orientation optimization, support minimization, wall thickness considerations, and leveraging geometric freedom that traditional manufacturing doesn't allow. DfAM turns "can we print this?" into "how can we design this better because we're printing it?"
Q7: How do I get started with 3D printing as an engineer?
A: Start with accessible projects using FDM printers and PLA. Learn CAD by modeling simple objects. Print them, observe results, iterate. Progress to functional parts requiring specific material properties. Join online communities for troubleshooting and inspiration. Consider professional services for projects beyond your equipment's capabilities.
Contact Yigu Technology for Custom Manufacturing
Ready to take your engineering projects to the next level with professional 3D printing services? At Yigu Technology, we combine deep expertise with state-of-the-art additive manufacturing capabilities. Whether you need functional prototypes, custom camera gear, engineering models, or production parts, our team delivers precision results tailored to your specifications. Contact us today for a consultation—let's turn your engineering designs into reality.