Ever wondered how video game characters move so naturally or how robots in movies twist and turn? The secret is articulated 3D models. This guide explains what they are, how they work, and how you can create and use them—whether for animation, product design, or manufacturing.
Introduction
When you see a character raise their arm in a game or a mechanical arm bend in a product demo, you're watching an articulated 3D model in action. Simply put, these are digital objects made of connected parts that move relative to each other using joints—just like your own skeleton at your elbows and knees. Unlike static 3D models that can't move, articulated models are built for animation and interaction.
I've spent over a decade working with 3D modeling and manufacturing at Yigu Technology, helping clients bring moving designs to life. Whether you're a game developer, an engineer, or just curious about how this works, this guide walks you through everything you need to know—from basic components to real-world applications and tool selection.
What Exactly Makes Up an Articulated 3D Model?
Before diving into creation, you need to understand the building blocks. Every articulated model has three essential parts.
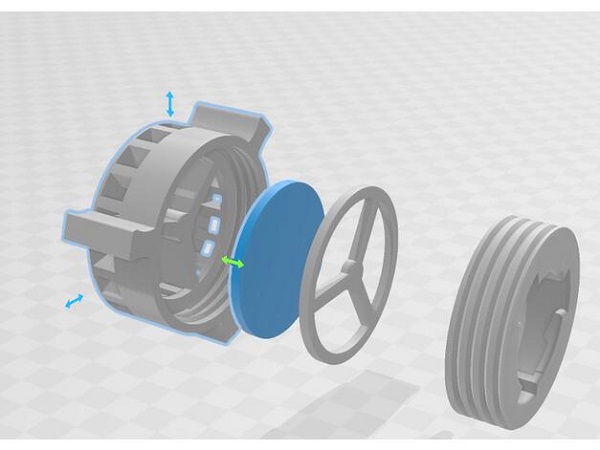
Rigid Bodies: The Solid Parts
Rigid bodies are the non-bending pieces of your model. Think of them as the bones. For a human character, these include the upper arm, forearm, thigh, and calf. For a robot, they're the torso, arm segments, and hand parts.
These bodies don't deform or bend themselves. Their movement comes entirely from the joints connecting them. A common mistake beginners make? Making rigid bodies too complex. Keep each moving part as a separate, simple object. For a chair with moving legs, each leg should be its own rigid body—not attached to the seat.
Joints: The Connectors That Enable Movement
Joints are what make articulation possible. They connect rigid bodies and determine how those bodies can move. Different joints allow different types of movement.
| Joint Type | Movement Allowed | Real-World Example |
|---|---|---|
| Revolute (Hinge) | Rotation around one axis | Elbow joint, door hinge |
| Prismatic (Slider) | Linear movement along one axis | Drawer slide, piston |
| Spherical (Ball-and-Socket) | Rotation around multiple axes | Shoulder joint, hip joint |
| Universal | Rotation around two perpendicular axes | Car steering linkage |
| Fixed | No movement | Welded connection |
Last year, a client asked us to model a robotic arm for a factory automation project. We used revolute joints for the elbow (so it only bends one way) and spherical joints for the shoulder (so it could move in multiple directions). Getting the joint types right made all the difference in how realistically the arm moved.
Rigging: The Control System
Rigging is the process of adding controls to your articulated model so it can be animated. Think of it as adding strings to a puppet. The rig includes joints, control handles, and constraints that let animators move the model efficiently.
Without rigging, even a perfectly designed model is useless for animation. In a recent project, we created a dog character with:
- Spherical joints at the hips for multi-directional leg movement
- Revolute joints at the knees so they only bent forward
- A chain of small joints in the tail for smooth wagging
The rig let us set movement limits too—like preventing the elbow from bending backward, which would look wrong.
How Do You Create an Articulated 3D Model?
Creating your own articulated model isn't as hard as it sounds. Here's a step-by-step process I've used with clients ranging from students to engineering firms.
Step 1: Define What Your Model Needs to Do
Start by asking: What will this model actually do? The answer determines how many parts and joints you need.
Example: Let's say you want a simple robotic arm that picks up objects. You'll need:
- A fixed base
- A lower arm segment
- An upper arm segment
- A gripping claw
- Joints at the shoulder (to lift), elbow (to bend), and claw (to open/close)
Skipping this planning step leads to overcomplicated models with unnecessary joints that just make animation harder.
Step 2: Model Each Rigid Body Separately
Use 3D software like Blender, Fusion 360, or Maya to create each rigid body as its own object. For our robotic arm:
- Create a rectangular base
- Make a cylinder for the lower arm
- Make a smaller cylinder for the upper arm
- Create two small pieces for the claw
Pro tip: Don't add details like textures or small features yet. Focus on basic shapes and sizes. You can add surface details later after testing the movement.
Step 3: Add Joints and Set Movement Limits
Now connect your rigid bodies with joints. In Blender (which is free and great for beginners):
- Select the base and lower arm, then add a spherical joint at their connection point. Set it to rotate up/down and left/right only—no twisting.
- Connect lower and upper arm with a revolute joint. Limit its rotation to 0–90 degrees so it bends like a real arm.
- Add a prismatic joint to the claw pieces so they slide toward and away from each other.
Step 4: Rig the Model for Easy Animation
Add controls that make animating simple:
- Create small control objects (like circles) near each joint
- Link each control to its corresponding joint
- Test the movement by dragging controls
For our robotic arm, we added a control circle at the elbow. Dragging it bent the arm. Another control at the claw opened and closed the gripper.
Step 5: Test Everything and Refine
Run a simple animation test. In our robotic arm example, we tested picking up a small cube. During testing, we noticed the claw wasn't gripping tightly enough. The fix? Adjusting the prismatic joint's range so the claw pieces slid closer together.
Testing saves headaches later. Always move your model through its full range of motion before calling it done.
Where Are Articulated 3D Models Used?
Articulated models show up everywhere—not just in entertainment. Here are the most common applications with real data.
Video Games and Films
Almost every character you see in games and movies is an articulated 3D model. According to the Entertainment Software Association, over 90% of top-selling games use articulated models for characters and interactive objects.
In The Legend of Zelda: Tears of the Kingdom, the character Link has more than 50 joints in his model. Each joint lets him move realistically—knees bend when he jumps, arms swing for balance, and his head turns to look at objects. These details make games feel alive.
Manufacturing and Robotics
Manufacturers use articulated models to design and test machinery before building physical versions. A McKinsey study found this approach cuts development time by 30–40% and reduces costs by up to 25%.
Tesla provides a great example. Before building new factory robots, their engineers create detailed articulated 3D models. They test how robot arms move around car frames, adjust joint limits to prevent collisions, and simulate years of wear—all without wasting materials on physical prototypes.
Healthcare and Medical Training
Hospitals and medical schools use articulated models to teach anatomy and explain procedures. A 2023 study in the Journal of Medical Education showed that students using articulated spine models scored 15% higher on anatomy tests than those using textbooks alone.
The American Medical Association also found that 82% of patients understand their conditions better when doctors use 3D models to explain them. For example, an articulated spine model lets a doctor show exactly how a herniated disc affects movement.
Product Design and E-Commerce
Online stores increasingly use articulated 3D models to showcase products. A furniture company might let you click to fold or unfold a chair, rotate it, and see how it fits in a room.
Amazon's 2024 Seller Report found that products with interactive 3D models have a 22% higher conversion rate than those with only photos. Customers buy with more confidence when they can see how a product moves and adjusts.
What Tools Should You Use for Articulated Modeling?
The right tool depends on your budget, skill level, and project needs. Here's how popular options compare.
| Tool | Cost | Best For | Key Features |
|---|---|---|---|
| Blender | Free | Beginners, independent creators, students | Built-in rigging, animation tools, huge community support |
| Autodesk Maya | $1,775/year | Professional animation, film, games | Advanced rigging (including facial), industry standard |
| Fusion 360 | Free for hobbyists; $60/month pro | Manufacturing, robotics, product design | Parametric modeling, movement simulation tools |
| Cinema 4D | $99/month | Motion graphics, product visualization | User-friendly, fast rigging for simple models |
My Recommendation Based on Experience
If you're just starting, use Blender. It's free, has endless tutorials, and handles everything from simple hinges to complex characters. The Blender community is incredibly helpful—search YouTube for "Blender rigging tutorial" and you'll find step-by-step guides for any project.
For manufacturing work, choose Fusion 360. Its simulation tools let you test real-world performance, like how much weight a robotic arm can lift before failing.
For film-quality animation, Maya is the industry standard. Studios like Pixar and Disney use it for a reason—though the learning curve is steeper and the price is high.
How Do You Choose the Right Approach for Your Project?
Different projects need different approaches. Here's how to match your needs to the right method.
For Simple Mechanical Models
If you're designing a foldable chair or a simple robot:
- Use Fusion 360 or Blender
- Focus on getting joint limits right
- Test movement thoroughly before adding details
- Consider 3D printing a small physical version to verify motion
For Character Animation
If you're creating a character for a game or film:
- Start with Blender or Maya
- Spend time on rigging—good controls save huge time later
- Test facial expressions if your character needs them
- Get feedback on movement from others
For Manufacturing and Testing
If you're prototyping a mechanical part:
- Use Fusion 360 for its simulation capabilities
- Model exact dimensions from the start
- Simulate forces and wear before building anything
- Create multiple versions to compare performance
What Common Mistakes Should You Avoid?
After years of helping clients, I've seen the same issues come up again and again.
Making Rigid Bodies Too Complex
Keep each moving part simple. Complex shapes with lots of details make rigging much harder. Add surface details after you've confirmed the movement works correctly.
Choosing the Wrong Joint Type
Using a hinge joint where you need a ball joint limits movement unnaturally. Refer back to the joint table earlier in this guide. Match the joint type to how you want the part to actually move.
Forgetting Movement Limits
Without limits, joints can move in unrealistic ways—like an elbow bending backward. Always set minimum and maximum rotation angles that match real-world constraints.
Skipping the Testing Phase
Rushing to add textures and colors before testing movement guarantees problems. Test the full range of motion first. Fix movement issues before adding any surface details.
Conclusion
Articulated 3D models power everything from video game characters to factory robots. They consist of rigid bodies connected by joints, with rigging providing control for animation. Creating them involves five steps: defining purpose, modeling parts, adding joints, rigging controls, and testing thoroughly.
These models matter because they bring digital objects to life. In gaming, they create immersive experiences. In manufacturing, they speed development and cut costs. In healthcare, they improve education and patient understanding. In e-commerce, they boost sales by showing products clearly.
The tools you need are more accessible than ever. Free options like Blender handle most projects, while professional tools like Fusion 360 and Maya offer advanced capabilities for specialized work.
Whether you're animating a character, designing a robot, or showcasing a product, articulated 3D models give you the power to show not just how something looks—but how it actually moves and works.
Frequently Asked Questions
What's the difference between an articulated 3D model and a rigged 3D model?
An articulated model refers to the structure itself—rigid bodies connected by joints. A rigged model is an articulated model with added controls that make it easy to animate. All rigged models are articulated, but not all articulated models are rigged.
Do I need coding skills to create articulated 3D models?
No. Most 3D software lets you create articulated models using visual tools—dragging, clicking, and setting parameters. Coding is only needed for advanced features like making a model respond to real-time sensor data.
Can I use articulated models in virtual reality?
Yes. Articulated models are essential for VR because they let users interact with objects naturally. In a VR training simulation, an articulated engine model lets mechanics move parts with their hands.
How long does it take to create an articulated model?
It varies widely by complexity. A simple model like a foldable chair takes 1–2 hours. A human character with facial expressions can take 10–20 hours for modeling, plus another 5–20 hours for rigging.
Where can I find pre-made articulated models?
Websites like TurboSquid, CGTrader, and Sketchfab offer thousands of pre-made models. Prices range from $10 for simple ones to $500+ for professional, game-ready models. Always check the license—some are for personal use only.
What's the best software for beginners?
Start with Blender. It's free, has a huge community, and offers complete tools for modeling, rigging, and animation. Thousands of free tutorials make learning manageable.
Contact Yigu Technology for Custom Manufacturing
Need help bringing an articulated 3D model to life? At Yigu Technology, we combine advanced 3D modeling expertise with precision manufacturing capabilities. Whether you need a prototype robotic arm, a custom product with moving parts, or manufacturing support for production runs, our team delivers professional results. [Contact us today] to discuss your project—we'll help you choose the right approach, materials, and manufacturing process for your specific needs.