Want to 3D print a dragon that actually moves? This guide walks you through everything you need to know—from choosing the right flexible materials to designing movable joints and printing settings that work.
Introduction
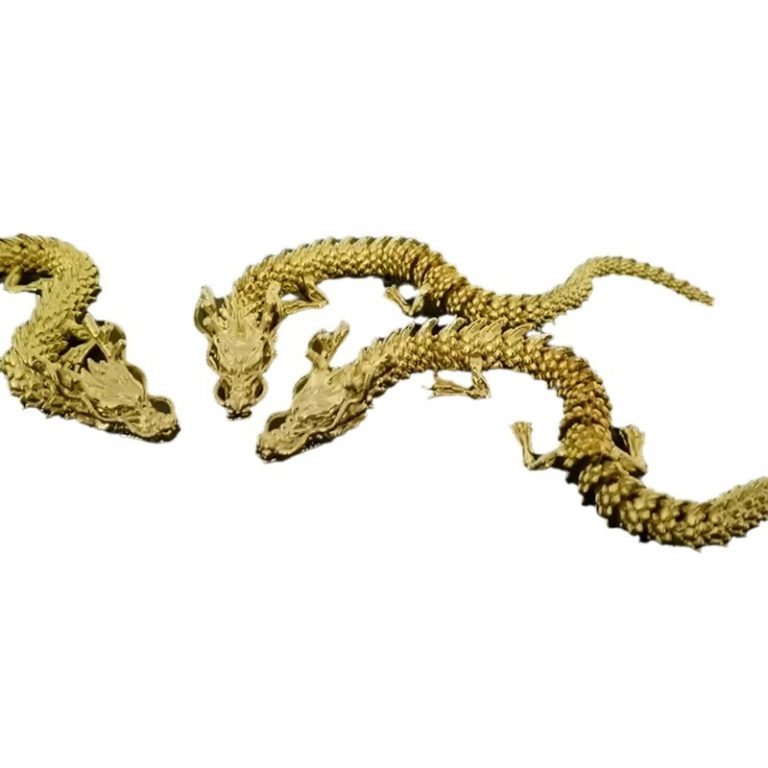
There's something magical about holding a 3D-printed dragon that bends, twists, and moves. Unlike rigid plastic figures, flexible 3D printed models bring characters to life. They can wrap around your hand, flap their wings, or curl their tails—all thanks to clever design and the right materials.
I've spent years at Yigu Technology working with flexible filaments and helping creators bring their visions to life. A flexible dragon isn't just a fun project—it teaches you principles that apply to soft robotics, medical devices, and functional prototypes.
In this guide, I'll walk you through the entire process: designing for flexibility, choosing materials, printer settings that work, and post-processing that preserves movement. Whether you're a beginner or experienced maker, you'll learn how to create a dragon that's both beautiful and bendable.
What Makes a 3D Printed Model Flexible?
Before diving into dragon design, let's understand the basics.
The Two Paths to Flexibility
There are two ways to make a 3D printed model flexible:
1. Material flexibility – Using filaments that are inherently bendable, like TPU or NinjaFlex. The material itself stretches and compresses.
2. Structural flexibility – Designing joints and hinges into rigid materials. Think of articulated models where parts move around fixed pivot points.
For a dragon that moves naturally, you'll likely use both approaches. The body might use flexible material for subtle bending, while wings and legs use designed joints for articulation.
Why Flexible Models Matter
Flexible 3D printing isn't just for toys. The same principles apply to:
- Soft robotics – Grippers that handle delicate objects
- Medical devices – Custom prosthetics with flexible components
- Wearables – Custom-fit items that conform to the body
- Functional prototypes – Parts that need to bend in use
A dragon project teaches you skills you can apply across all these areas.
How Do You Design a Dragon for Flexibility?
Good design is the foundation of a successful flexible print.
Software Options for Dragon Design
You'll need 3D modeling software that can handle organic shapes and precise joint design.
| Software | Best For | Cost | Learning Curve |
|---|---|---|---|
| Blender | Organic shapes, detailed sculpting | Free | Steep but well-documented |
| Fusion 360 | Mechanical joints, precise design | Free for hobbyists | Moderate |
| ZBrush | Ultra-detailed organic modeling | Expensive | Steep |
| Tinkercad | Simple designs, beginners | Free | Very gentle |
| Meshmixer | Combining parts, preparing for print | Free | Moderate |
My recommendation: Start with Blender for organic dragon shapes and Fusion 360 if you need precise mechanical joints. Both are free and have huge communities for support.
Key Design Principles for Flexibility
1. Plan Your Movement
Decide what should move:
- Tail (curling side to side)
- Neck (bending up and down)
- Legs (posing at hips and knees)
- Wings (folding against body)
- Jaw (opening and closing)
Each moving part needs a different design approach.
2. Design Joints for Articulation
For parts that need to pose and hold position:
Ball and socket joints work well for limbs. Design a sphere on one part that fits into a matching cup on another. The socket should slightly compress to hold position.
Hinge joints work for wings and jaws. A simple pin through overlapping loops creates rotation around one axis.
Living hinges (thin sections of flexible material) work for parts that bend but don't need discrete positions.
3. Consider Print Orientation
How you orient the model on the printer affects flexibility:
- Layer lines create weak points—align them to avoid stress on joints
- Living hinges should print with layers perpendicular to the bend direction
- Test small samples before committing to a full print
4. Test Clearance and Fit
Joints need the right amount of clearance:
- Too tight → parts fuse together or won't move
- Too loose → floppy, unstable movement
Start with 0.2-0.3mm clearance for most joints and adjust based on your printer's capabilities.
Example: Dragon Tail Design
A flexible dragon tail might use:
- Segmented vertebrae – Each segment connects to the next with ball joints
- Flexible core – A continuous TPU spine with rigid scales attached
- Living hinge – Thin sections that bend along the whole length
Each approach creates different movement. Segmented tails pose in specific positions. Continuous cores create smooth, flowing curves.
What Materials Work Best for Flexible Dragons?
Material choice determines how your dragon moves and lasts.
Common Flexible Filaments
| Material | Flexibility | Durability | Print Difficulty | Best For |
|---|---|---|---|---|
| TPU | High | Excellent | Moderate | Main body, joints, moving parts |
| TPE | Very high | Good | Challenging | Soft textures, squishy parts |
| NinjaFlex | Extreme | Excellent | Moderate | High-stress joints, continuous flexing |
| Flexible ABS | Low | Very good | Easy | Rigid parts with some give |
| PLA (with living hinges) | None (structural) | Good | Easy | Rigid parts with designed joints |
Detailed Material Guide
TPU (Thermoplastic Polyurethane)
The workhorse of flexible printing. Available in different hardness levels (measured in Shore A). Softer TPU (80-85A) bends easily. Harder TPU (95A) feels more like stiff rubber.
Pros: Good layer adhesion, durable, wide temperature range
Cons: Can be stringy, needs slower speeds
Best for: Main dragon body, limbs, continuous parts
TPE (Thermoplastic Elastomer)
Softer and more rubbery than TPU. Feels almost like silicone.
Pros: Very flexible, soft texture
Cons: Harder to print, can jam in Bowden tubes
Best for: Soft details, parts that need squish
NinjaFlex
A specific brand of TPU known for extreme flexibility. It stretches significantly before breaking.
Pros: Extremely flexible, very durable
Cons: Requires direct-drive extruder, slow print speeds
Best for: Joints that will flex thousands of times
Flexible ABS
ABS with additives that add some flexibility while maintaining strength.
Pros: Stronger than other flexibles, easier to print
Cons: Less flexible, requires heated bed, ventilation
Best for: Structural parts that need some give
How to Choose for Your Dragon
Consider these factors:
- Movement required: Continuous bending needs TPU or NinjaFlex. Posing needs stiffer materials with joints.
- Detail level: Soft materials won't hold sharp details as well as rigid ones.
- Printing capability: Do you have a direct-drive extruder? Flexible filaments struggle in Bowden setups.
- Post-processing: Will you paint? Some materials accept paint better than others.
My recommendation for first dragons: Start with TPU (95A) for the main body and joints. It's forgiving to print and holds details reasonably well. As you gain experience, experiment with softer materials.
How Do You Print with Flexible Filaments?
Flexible materials need different settings than rigid plastics.
Printer Setup Considerations
Extruder type matters most:
- Direct-drive extruders work best—the filament path is short and controlled
- Bowden setups can work but need careful tuning—long tubes let filament buckle
If you have a Bowden printer, consider:
- Using stiffer flexible filaments (harder TPU)
- Printing slower
- Ensuring Bowden tube is clean and low-friction
Key Printer Settings
| Setting | Recommended Range | Notes |
|---|---|---|
| Nozzle Temperature | 210-240°C (for TPU) | Higher than rigid filaments |
| Bed Temperature | 50-80°C | Improves first layer adhesion |
| Print Speed | 20-40 mm/s | Slower prevents buckling |
| Retraction | Minimal or none | Can cause jams with flexibles |
| Cooling | Low or off | Overcooling reduces layer adhesion |
| Layer Height | 0.2mm or higher | Thinner layers can cause issues |
| Flow Rate | 100-105% | Slight over-extrusion helps bonding |
Step-by-Step Printing Process
Step 1: Prepare Your Model
Export your dragon design as STL from your modeling software. Check for errors—non-manifold geometry, inverted normals, or holes in the mesh.
Step 2: Slice with Proper Settings
Use slicing software like Cura, PrusaSlicer, or Simplify3D. Create a custom profile for your flexible filament:
- Select the right material profile (or create one)
- Adjust temperature for your specific filament brand
- Slow down speeds—especially for first layer
- Turn off retraction or set very low values
Step 3: Level Your Bed
Flexible filaments need perfect first layer adhesion. A poorly leveled bed leads to peeling and failed prints. Level while hot—thermal expansion matters.
Step 4: Print a Test
Before committing to a full dragon, print a small test piece:
- A small cube to check adhesion and layer bonding
- A simple joint to test clearance and movement
- A thin wall to check flexibility
Step 5: Monitor First Layers
The first few layers are critical. Watch for:
- Good squish (lines slightly flattened)
- No peeling at corners
- Consistent extrusion
Step 6: Print the Dragon
Once your test succeeds, start the full print. Flexible prints take longer than rigid ones—patience pays off.
Step 7: Remove and Inspect
After printing, carefully remove the dragon from the bed. Check joints—do they move freely? If not, they may need post-processing.
What Post-Processing Enhances Flexibility?
Printed parts often need work to achieve ideal movement.
Cleaning Joints
If joints are too tight:
- Gently work them back and forth to break in
- Use a small file or sandpaper on contact surfaces
- Apply a tiny amount of lubricant (dry PTFE spray works well)
If joints are fused:
- Carefully cut with a sharp blade
- Separate while material is warm (heat gun or hair dryer)
Annealing for Better Flexibility
Annealing—heating the print and cooling slowly—can relieve internal stresses and improve flexibility.
For TPU:
- Heat oven to 100°C (check your material's specs—don't exceed)
- Place print on non-stick surface
- Heat for 2-3 hours
- Turn off oven and let cool completely inside
This process allows polymer chains to relax, often making the part more flexible and durable.
Surface Finishing
Flexible prints have unique finishing requirements:
Sanding:
- Use fine grit (400+) to avoid tearing
- Wet sanding reduces heat and friction
- Be gentle—flexible materials sand differently than rigid
Priming:
- Use primers designed for flexible substrates
- Apply thin coats—thick coats crack when flexed
- Test on a scrap piece first
Painting:
- Acrylic enamel paints formulated for plastics work well
- Flexible paints designed for automotive trim are ideal
- Apply multiple thin coats, allowing each to dry
- Test flexibility after painting—some paints stiffen the surface
Sealing:
- Use clear sealants compatible with flexible materials
- Test on scrap—some sealants remain flexible, others become brittle
- Apply thin coats to maintain movement
Mechanical Conditioning
Some flexible prints improve with use:
- Gently flex joints multiple times
- Stretch and compress where appropriate
- This aligns polymer chains and can increase flexibility over time
What Are Common Problems and Solutions?
Learn from others' mistakes.
Problem: Poor Layer Adhesion
Symptoms: Layers separate when flexed, cracks appear
Solutions:
- Increase nozzle temperature
- Slow down print speed
- Reduce cooling fan
- Increase flow slightly
Problem: Stringing and Oozing
Symptoms: Thin strings between parts, messy details
Solutions:
- Reduce temperature slightly
- Enable coasting or wipe settings
- Adjust retraction (some, but not too much)
- Dry filament—moisture causes stringing
Problem: First Layer Won't Stick
Symptoms: Corners lift, print detaches
Solutions:
- Level bed carefully
- Use adhesion aids (glue stick, hairspray, painter's tape)
- Increase first layer height and width
- Slow first layer speed (10-15 mm/s)
Problem: Filament Buckling in Extruder
Symptoms: Clicking, under-extrusion, failed prints
Solutions:
- Reduce print speed
- Ensure filament path is straight and short
- Clean extruder gear—flexible material can leave residue
- Consider direct-drive upgrade for Bowden printers
Problem: Joints Too Tight
Symptoms: Parts won't move, force may break them
Solutions:
- Adjust clearance in design (add 0.1-0.2mm)
- Sand joint surfaces
- Warm parts slightly while moving
Problem: Joints Too Loose
Symptoms: Floppy movement, won't hold position
Solutions:
- Redesign with less clearance
- Add friction features (small bumps inside socket)
- Use stiffer material
What Advanced Techniques Create Better Dragons?
Once you master basics, try these.
Multi-Material Printing
If your printer supports multiple materials:
- Print rigid parts (scales, claws) in PLA
- Print flexible parts (body, joints) in TPU
- Combine in one print for optimal properties
Embedded Components
Design pockets for:
- Magnets – so wings can attach/detach
- LEDs – for glowing eyes
- Wires – for poseable armature inside
Print-in-Place Joints
Design joints that print assembled:
- Ball joints with clearances that allow movement after printing
- Hinges with captured pins
- Requires precise design and well-tuned printer
Custom Flex Profiles
In advanced slicing software, you can:
- Vary infill density in different areas
- Create solid shells with sparse infill cores
- Adjust settings per part in multi-part prints
What Can You Learn from a Dragon Project?
A flexible dragon teaches skills you can use everywhere.
Skills You'll Develop
- Design for additive manufacturing – Understanding how orientation and geometry affect prints
- Material science – How different polymers behave
- Mechanical design – Joints, clearances, tolerances
- Process optimization – Tuning settings for best results
- Post-processing – Finishing techniques for flexible parts
Applications Beyond Dragons
The same principles apply to:
- Custom grips for tools and controllers
- Soft robotic grippers for delicate objects
- Medical models with flexible tissue simulation
- Wearable devices that conform to the body
- Prototypes of products with moving parts
Conclusion
Creating a flexible dragon model with 3D printing is one of the most rewarding projects in additive manufacturing. It combines artistic design with mechanical engineering, material science, and precise process control.
The key takeaways:
- Design matters – Plan movement, design appropriate joints, test clearances
- Material choice is critical – TPU works for most applications, NinjaFlex for extreme flex
- Printer settings need adjustment – Slower speeds, higher temperatures, minimal retraction
- Post-processing enhances results – Annealing, cleaning joints, careful finishing
- Troubleshooting is normal – Each print teaches you something
At Yigu Technology, we've seen creators at all levels succeed with flexible printing. The learning curve is real, but the satisfaction of holding a moving, bendable dragon you designed and printed yourself is worth every challenge.
Start with a simple design. Test with small samples. Learn from failures. And don't be afraid to experiment—that's where the magic happens.
Frequently Asked Questions
What are the best 3D printing materials for creating flexible dragon models?
TPU is the best all-around choice—good flexibility, durable, and prints reasonably well. For extreme flexibility, NinjaFlex. For a softer feel, TPE. For parts that need more strength with some give, flexible ABS. Choose based on your specific requirements and printer capabilities.
How do I optimize my 3D printer settings for printing flexible materials?
Use higher nozzle temperatures (210-240°C for TPU), heated bed (50-80°C), slower print speeds (20-40 mm/s), minimal or no retraction, and low cooling. Ensure your extruder can handle flexible filaments—direct-drive works best.
Can I paint a flexible dragon model, and what type of paint should I use?
Yes, you can paint flexible models. Use paints formulated for flexible substrates—acrylic enamel paints or specialized flexible paints work well. Apply primer designed for flexible materials first. Test on scrap to ensure the paint remains flexible when dry. Apply thin coats and seal with a flexible clear coat.
Why won't my flexible print stick to the bed?
Common causes: bed not level, temperature too low, or first layer too fast. Level your bed carefully, increase bed temperature, slow first layer to 10-15 mm/s, and consider adhesion aids like glue stick or painter's tape.
How do I design joints that move after printing?
Include appropriate clearance—typically 0.2-0.3mm between moving parts. Ball and socket joints work well for limbs. Hinge joints for wings and jaws. Test with small samples before committing to full print.
My flexible filament keeps jamming. What's wrong?
Most common issues: printing too fast, retraction too high, or Bowden tube causing buckling. Slow down, reduce or eliminate retraction, and ensure filament path is as straight as possible. Direct-drive extruders handle flexibles much better than Bowden.
Can I combine rigid and flexible materials in one print?
Yes, if your printer supports multiple materials or you're willing to pause and swap filaments. Design interfaces that bond well between materials. Test compatibility—some combinations don't adhere well.
How long does a flexible dragon take to print?
Varies by size and complexity. A small dragon (10-15cm) might take 8-12 hours. Larger, detailed models can take 24-48 hours or more. Flexible materials print slower than rigid, so plan accordingly.
Contact Yigu Technology for Custom Manufacturing
Ready to bring your flexible dragon—or any custom project—to life? At Yigu Technology, we combine years of 3D printing expertise with advanced capabilities in flexible materials. Whether you need help designing for flexibility, selecting the right material, or producing your creation at scale, our team delivers professional results. [Contact us today] to discuss your project—we'll help you make something amazing.