Introduction
You have a great idea. You want to hold it in your hands. Blender is the tool to bring that idea to life—digitally. But taking a Blender model to a 3D printer is not always straightforward. What looks perfect on screen can print as a mess.
Blender is a powerful, free 3D modeling suite. It can create stunning models. But it was not designed specifically for 3D printing. To get a successful print, you need to prepare your model properly.
In this guide, we will walk through the entire process. You will learn how to set up Blender for printing, check your model for errors, and export it correctly. By the end, you will have a model ready to print.
Why Use Blender for 3D Printing?
The Power of Open Source
Blender is free. It is also incredibly powerful. Professional artists use it for film, games, and visual effects. Hobbyists use it for personal projects. For 3D printing, Blender offers:
- Complete modeling tools – Sculpt, model, and edit with precision
- Free – No licensing costs
- Large community – Thousands of tutorials and add-ons
- Customizable – Add plugins for 3D printing-specific features
Key fact: Blender has over 1 million active users worldwide. Its 3D printing tools have matured significantly in recent versions.
How Do You Set Up Blender for 3D Printing?
Use Real-World Units
Blender defaults to unitless measurements. A cube might be 2 units wide. But what is a unit? For 3D printing, we need real-world dimensions.
Steps to set units:
- Go to the Scene Properties panel (the cube icon)
- Find the Units section
- Change System from None to Metric
- Set Length to Millimeters
Now your measurements are in millimeters. This matches how most 3D printers work.
Real-world example: You want to print a figurine 50 mm tall. With metric units set, you model it to 50 mm. When exported, it prints at exactly 50 mm.
Create a Boundary Reference
Your printer has a maximum build volume. Exceed it, and your print fails. Creating a visual reference helps you stay within limits.
Steps to create a boundary cube:
- Add a cube (Shift + A > Mesh > Cube)
- Scale it to match your printer’s build volume
- For a Prusa i3: 250 x 210 x 210 mm
- For a Creality Ender 3: 220 x 220 x 250 mm
- Set the cube to Wireframe display
- Change its color to something bright (red or blue)
Place this cube at the origin. Now you can see if your model fits.
What Modeling Practices Ensure Printability?
Design for the Process
3D printing is not the same as digital modeling. What looks good on screen may not print well.
| Digital Modeling | 3D Printing |
|---|---|
| Can have infinitely thin walls | Needs minimum thickness (0.8–1.0 mm) |
| Can have floating parts | Needs supports or physical connections |
| Can have internal faces | Must be a single, closed mesh |
| Scale is arbitrary | Scale must match real-world units |
Minimum Wall Thickness
Plastic parts need thickness. A wall that looks fine on screen may be too thin to print. As a rule:
- FDM prints – Minimum 0.8–1.0 mm for strength
- Resin prints – Minimum 0.5–0.8 mm
- Metal prints – Minimum 0.3–0.5 mm
Real-world example: A designer modeled a vase with 0.2 mm thick walls. It looked elegant on screen. When printed, the walls collapsed. After thickening to 1.0 mm, the vase printed perfectly.
Avoid Floating Parts
Any part of your model not connected to the main body needs supports. Supports add material and post-processing work.
Better approach: Design the model to be self-supporting. Add bridges or connect overhangs to the main body where possible.
What Tools Help Prepare Your Model?
Enable the 3D Print Toolbox
Blender has a built-in add-on specifically for 3D printing. It is called 3D Print Toolbox.
Steps to enable it:
- Go to Edit > Preferences
- Select Add-ons
- Search for "3D Print Toolbox"
- Check the box to enable it
The toolbox appears in the sidebar (press N to toggle sidebar).
What the Toolbox Does
| Function | What It Checks |
|---|---|
| Non-Manifold | Detects holes, open edges, and internal faces |
| Overhang | Highlights areas that need supports |
| Thickness | Checks if walls are thick enough |
| Volume | Calculates material volume for cost estimation |
| Area | Measures surface area |
Key fact: Non-manifold geometry is the most common reason for print failures. A non-manifold edge connects to more than two faces, creating ambiguity for slicing software.
How Do You Check and Fix Your Model?
Step 1: Check for Non-Manifold Geometry
Non-manifold geometry means your mesh is not a sealed, solid object. This is the number one cause of printing errors.
To check:
- Select your model
- Open the 3D Print Toolbox
- Click Check All
- Look for "Non-Manifold" in the results
If non-manifold geometry is found, the affected edges will highlight in orange.
Step 2: Fix Manifold Issues
Common fixes:
| Issue | Solution |
|---|---|
| Holes | Use Fill Holes (Edit Mode > Select edges > Alt + F) |
| Internal faces | Delete them (Edit Mode > Select > Delete) |
| Overlapping geometry | Use Merge by Distance (Edit Mode > Mesh > Clean Up > Merge by Distance) |
| Inverted normals | Recalculate Normals (Edit Mode > Mesh > Normals > Recalculate Outside) |
Real-world example: A user imported an STL from a game file. The model had internal faces and open edges. After running Merge by Distance and Recalculate Normals, the model became manifold and printed successfully.
Step 3: Check Normals Direction
Normals define which side of a face is the outside. For 3D printing, all normals must point outward.
To check:
- Enter Edit Mode (Tab)
- Open the Viewport Overlays dropdown
- Enable Face Orientation
Blue faces indicate outward normals. Red faces are inward and need flipping.
To flip:
- Select red faces
- Press Alt + N > Flip
Step 4: Check Thickness
Thin walls cause weak prints or complete failure.
To check:
- Select your model
- In the 3D Print Toolbox, click Thickness
- Set a minimum thickness (e.g., 1.0 mm)
- The tool highlights areas below the threshold
To fix: Use the Solidify modifier to add thickness to thin areas.
How Do You Export for 3D Printing?
Choose the Right Format
The most common export format is STL. It is supported by every slicer.
Steps to export:
- Select your model
- Go to File > Export > STL
- Check Selection Only (so you export only the model, not the boundary cube)
- Set Scale to 1000 if using meters, or 1.0 if using millimeters
- Click Export STL
Alternative formats:
- OBJ – Good for color information
- 3MF – Newer format, includes more data than STL
Avoid Common Export Mistakes
| Mistake | Consequence |
|---|---|
| Exporting with boundary cube | Extra object in slicer |
| Wrong scale | Model prints too small or large |
| Not applying modifiers | Modifiers like Solidify not included in export |
Tip: Before exporting, apply all modifiers (Modifier panel > Apply). This ensures the export matches what you see on screen.
How Do You Prepare the Model in a Slicer?
Import and Scale
Import your STL into your slicer (Cura, PrusaSlicer, etc.). Check the dimensions. If they are off, the scale was wrong during export.
Fix: Use the slicer’s scale tool to adjust to the correct size.
Orientation Matters
How you orient the model affects:
- Strength – Layer lines create weak points. Orient so stress is across layers, not along them.
- Supports – Orient to minimize overhangs.
- Surface finish – Top surfaces are smoother than supported surfaces.
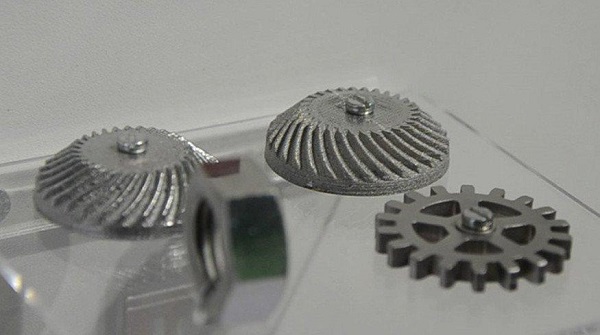
Real-world example: A gear printed flat had strong teeth but weak center. Printed on its side, the gear was weaker overall. The optimal orientation was 45 degrees, balancing strength in all directions.
Generate Supports
If your model has overhangs beyond 45 degrees, you need supports. Most slicers generate them automatically. Review the support placement and adjust if needed.
Yigu Technology’s View
At Yigu Technology, we prepare Blender models for 3D printing daily. We have learned that careful preparation separates success from failure.
Case Study: Complex Sculpture
A client sent a Blender model of an organic sculpture. The model looked beautiful on screen but had non-manifold geometry throughout. We used the 3D Print Toolbox to identify the issues. After two hours of cleanup—filling holes, merging vertices, and recalculating normals—the model was watertight. The sculpture printed perfectly.
Case Study: Mechanical Part
A client designed a custom bracket in Blender. The walls were 0.3 mm thick—too thin for FDM printing. We applied the Solidify modifier to thicken the walls to 1.2 mm. The bracket printed with full strength and passed load tests.
Our Approach
We treat every model as unique. We check:
- Units – Are they set correctly?
- Manifold – Is the mesh watertight?
- Normals – Do they all face outward?
- Thickness – Are walls thick enough?
- Volume – Does the model fit the printer?
These checks take minutes but save hours of failed prints.
Conclusion
Creating a 3D print Blender model requires more than artistic skill. It requires technical preparation. Set your units to millimeters. Create a boundary reference. Use the 3D Print Toolbox to check for errors. Fix non-manifold geometry. Ensure normals face outward. Apply modifiers before exporting.
These steps seem tedious. But they are essential. A model that passes these checks will print successfully. A model that does not will waste time, material, and frustration.
With practice, these checks become second nature. And your prints will look exactly as you imagined.
FAQ
What should I do if the model size is incorrect after importing into the 3D printer?
Check the unit settings. In Blender, ensure you are using Metric with Millimeters. When exporting, ensure the export scale is set correctly. If the model still imports at the wrong size, use the slicer’s scale tool to adjust. Multiply the scale factor by 1000 if the model is 1000 times too small—this indicates the export used meters instead of millimeters.
How can I tell if my Blender model is suitable for 3D printing?
Use the 3D Print Toolbox add-on. Click Check All. It will report:
- Non-Manifold – Holes or open edges
- Overhang – Areas needing supports
- Thickness – Walls below minimum
- Volume – Material estimate
Also check Face Orientation to ensure all normals point outward. If all checks pass, the model is ready for export.
Why does the 3D printed object have gaps or rough surfaces?
Gaps often come from non-manifold geometry. Holes in the mesh translate to holes in the print. Rough surfaces can come from:
- Incorrect normals – Flipped faces cause slicing errors
- Thin walls – Walls below minimum thickness print inconsistently
- Print settings – Temperature, speed, or layer height issues
Check the model in Blender first. If the model is clean, review your slicer settings.
Contact Yigu Technology for Custom Manufacturing
Need help preparing Blender models for 3D printing? Yigu Technology offers professional modeling, cleanup, and printing services. Our engineers ensure your models are print-ready and meet your specifications.
Contact us today to discuss your project. From cleanup to full production, we deliver quality results.