Introduction
Every great product begins as an idea. But between concept and market lies a critical journey—prototype product development. This process transforms abstract concepts into tangible models that can be tested, validated, and refined. For startups, a compelling prototype can be the difference between securing funding or being overlooked. For established companies, it enables innovation and maintains competitive advantage. At Yigu Technology, we have guided countless clients through this journey. This article outlines the key steps, common challenges, and proven strategies to ensure your prototype development process runs smoothly.
Why Does Prototype Development Matter?
Prototype development is the bridge between concept and market-ready product.
For startups:
- A working prototype is often required to secure investment. According to CB Insights, around 70% of funded startups had a working prototype at their initial investment pitch.
- Tangible demonstrations reduce perceived risk for investors.
For established companies:
- Enables testing of new features before mass production
- Maintains competitive advantage through innovation
- Validates design decisions before costly tooling
Example: Before launching each new iPhone, Apple invests heavily in prototype development—testing camera technology, battery life improvements, and user interface changes. This ensures the final product meets customer expectations.
What Are the Key Steps?
Step 1: Requirement Gathering and Analysis
This foundational phase determines what the product must achieve.
Activities:
- Surveys and interviews: Gather insights from potential users
- Market research: Understand competitors and market gaps
- Feasibility analysis: Assess technical and cost viability
- Requirement prioritization: Separate must-haves from nice-to-haves
Example: Developing a fitness tracking device. Surveys reveal users want heart rate monitoring, sleep tracking, and step counting. Interviews with trainers highlight the need for workout-specific tracking. A requirement for body fat percentage measurement might be deprioritized due to technical complexity.
Key insight: According to McKinsey, projects that spend sufficient time on requirement gathering are 50% more likely to meet their goals and deadlines.
Step 2: Concept Generation and Design
With requirements clear, creativity takes center stage.
Activities:
- Brainstorming sessions: Generate ideas across engineering, design, and marketing
- Competitor analysis: Identify gaps in existing products
- Concept sketching: Visualize initial design directions
- Design considerations: Balance functionality, user experience, and cost
Example: For a fitness tracker, brainstorming might yield ideas like a color-changing band based on activity level or an integrated virtual coach. Competitor analysis might reveal that most trackers lack seamless integration with popular fitness apps—creating a market opportunity.
Design priorities:
- Functionality: All promised features must work accurately
- User experience: Intuitive interface; easy to use
- Cost: Materials and processes must be cost-effective without sacrificing quality
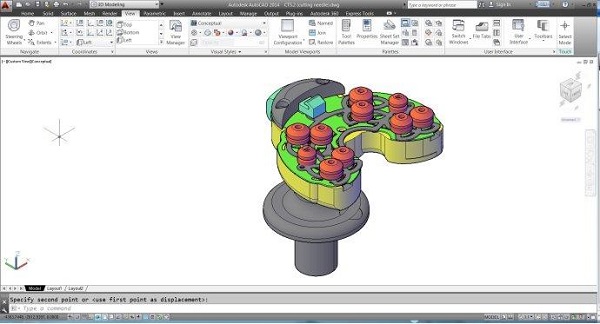
Step 3: Material and Manufacturing Process Selection
The right materials and processes directly impact performance, durability, and cost.
| Material/Process | Considerations |
|---|---|
| Silicone band | Water-resistant, comfortable—essential for fitness tracker |
| Waterproof coating | Protects electronic components from sweat and moisture |
| Sapphire crystal vs. tempered glass | Sapphire offers better scratch resistance but higher cost |
| 3D printing | Rapid production, complex geometries—ideal for early prototypes |
| Injection molding | High-volume production, consistent quality—higher initial setup cost |
Manufacturing process comparison:
| Process | Advantages | Limitations |
|---|---|---|
| 3D printing | Rapid, complex geometries, low setup for small batches | High per-unit cost for large volumes, limited material options |
| Injection molding | High-volume, consistent quality, wide material range | High initial tooling cost |
| CNC machining | High precision, versatile materials | Slow for complex shapes, high cost for small batches |
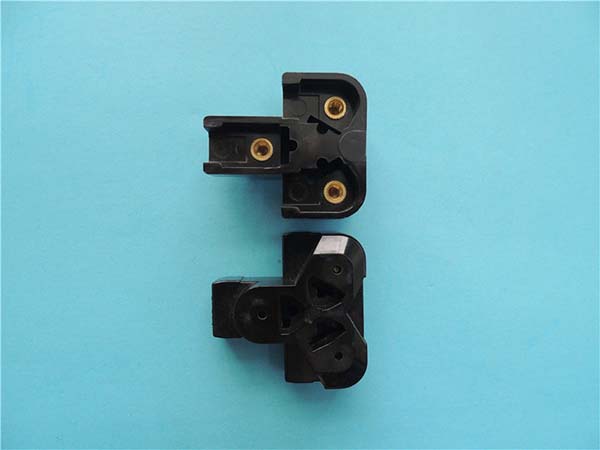
Step 4: Building the Prototype
This is where the physical model comes to life through cross-functional collaboration.
Team roles:
- Mechanical engineers: Physical structure, housing, moving parts
- Electrical engineers: Circuit boards, sensors, power supply
- Software developers: Code for data tracking, analysis, communication
- Industrial designers: Aesthetics, user-friendliness, comfort
Key to success: Effective communication and collaboration. Regular meetings ensure issues are addressed quickly. If sensors are not providing accurate data, software developers must communicate immediately so electrical engineers can make modifications.
Step 5: Testing and Validation
Testing reveals what works and what needs improvement.
Types of tests:
- Functionality testing: Do all features work as intended? (Step counter accuracy, heart rate monitoring)
- Performance testing: How does the product perform under different conditions? (Battery life, high-intensity workout tracking)
- User testing: Real users evaluate usability, comfort, and missing features
Iteration based on results:
- If the interface is confusing → software developers simplify it
- If battery life is too short → electrical engineers optimize power consumption
Critical insight: According to the Standish Group, over 60% of software projects that skipped or inadequately performed testing faced significant issues during launch—leading to costly rework and brand damage.
What Are Common Challenges?
| Challenge | Impact | Solution |
|---|---|---|
| Technical glitches | Delays, rework | Early testing, iterative refinement |
| Budget constraints | Scope reduction | Prioritize must-have features; use cost-effective prototyping methods |
| Changing requirements | Scope creep, delays | Freeze requirements after initial phase; manage changes through formal process |
| Poor team communication | Misalignment, rework | Regular cross-functional meetings; clear documentation |
| Inadequate testing | Post-launch failures | Comprehensive test plan; user testing before finalization |
What Strategies Ensure Smooth Development?
Start with Clear Requirements
Invest time upfront. A well-defined requirements document aligns the entire team and prevents costly changes later.
Prioritize Iteration
Do not expect the first prototype to be perfect. Plan for multiple cycles. Each iteration improves the design based on real feedback.
Use the Right Tools for the Stage
| Stage | Recommended Approach |
|---|---|
| Early concept | FDM 3D printing—low cost, fast |
| Design refinement | SLA or SLS—better detail, functional testing |
| Final validation | CNC machining or prototype tooling—production-grade materials |
Maintain Cross-Functional Communication
Regular meetings ensure engineers, designers, and developers stay aligned. Use project management tools to track progress and issues.
Test Early, Test Often
Do not wait until the prototype is "perfect" to test. Test rough versions to catch major issues early. User testing should begin as soon as a functional model exists.
Document Everything
Keep records of requirements, design decisions, test results, and iterations. Documentation prevents repeating mistakes and supports future development.
What Can We Learn from Success Stories?
Smartwatch Development
A consumer electronics company developing a new smartwatch used iterative prototyping:
- Iteration 1: 3D-printed casings for ergonomic testing
- Iteration 2: Functional prototypes with basic electronics
- Iteration 3: Refined design with production-grade materials
- User testing: Real users evaluated comfort, interface, and features
Result: The final product met user expectations and launched successfully with minimal post-launch issues.
Electric Vehicle Component
An automotive startup developing an EV battery enclosure faced tight timelines and cost constraints.
- Challenge: Validating thermal performance and structural integrity
- Approach: Used SLS 3D printing for rapid iteration of cooling channel designs
- Testing: Thermal simulation and physical testing identified optimal design
- Result: Reduced development time by 40% and avoided costly design changes in production
Yigu Technology's Perspective
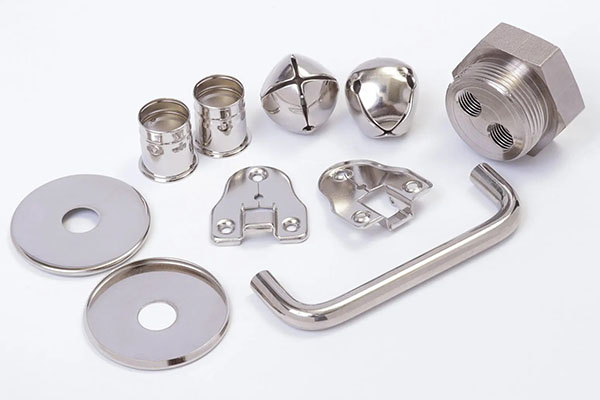
As a custom manufacturer of plastic and metal parts, Yigu Technology supports clients through every stage of prototype development.
What we have learned:
- Start with requirements, not assumptions: The most successful projects invest time upfront to define what success looks like.
- Plan for iteration: The first prototype is rarely the last. Budget for multiple cycles.
- Match materials to testing objectives: Use low-cost materials for early concepts; switch to production-grade for final validation.
- Communicate early, communicate often: Cross-functional collaboration prevents misalignment and costly rework.
- Test with real users: Feedback from actual users reveals issues that internal testing misses.
We view prototype development as a partnership. Our goal is to help clients navigate challenges and turn concepts into successful products.
Conclusion
Smooth prototype product development requires careful planning, disciplined execution, and continuous refinement. The key steps are clear:
- Gather and analyze requirements—the foundation for everything
- Generate concepts and design—balancing functionality, user experience, and cost
- Select materials and processes—matching properties to requirements
- Build collaboratively—cross-functional teamwork
- Test and validate—identifying issues before production
Challenges will arise—technical glitches, budget constraints, changing requirements. But with clear requirements, iterative development, cross-functional communication, and early testing, you can navigate these obstacles.
A well-developed prototype is more than a proof of concept. It is a tool for attracting investors, gathering user feedback, and ultimately bringing a successful product to market. By following these principles, you can ensure your prototype development process runs smoothly and sets the stage for success.
Frequently Asked Questions
What is the most important step in prototype product development?
Requirement gathering and analysis. Projects that invest sufficient time upfront are 50% more likely to meet goals and deadlines. Clear requirements align the team, prevent scope creep, and reduce costly changes later.
How many prototype iterations are typically needed?
It varies. Simple products may require 2–3 iterations. Complex products with tight tolerances or user testing may require 5–10. Plan for multiple cycles in your timeline and budget.
How can I reduce prototype development costs?
Use low-cost methods (FDM) for early concepts. Prioritize must-have features. Use simulation to test virtually before building physically. Work with experienced partners who provide DFM feedback to avoid costly design flaws.
What is the biggest cause of prototype development delays?
Poorly defined requirements, inadequate testing, and lack of cross-functional communication. These lead to late-stage changes, rework, and misalignment. Addressing these early prevents delays.
When should I involve users in testing?
As early as possible. Even rough prototypes can reveal usability issues. User feedback early in the process is cheaper and more effective than late-stage changes. Test early, test often.
Contact Yigu Technology for Custom Manufacturing
At Yigu Technology, we specialize in prototype product development and custom manufacturing. Our capabilities include 3D printing (FDM, SLA, SLS), CNC machining, and prototype tooling. We serve startups, medical device companies, automotive suppliers, and consumer goods manufacturers.
If you are developing a new product and want to ensure a smooth prototype development process, contact our engineering team. Let us help you navigate the journey from concept to reality.