
Die Casting
What Is Aluminum Alloy Die Casting Machining and How to Master It?
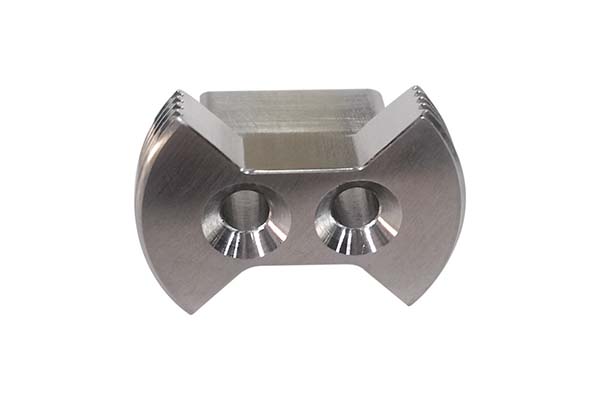
Aluminum alloy die casting machining parts are everywhere—from the engine bracket in your car to the housing of your smartphone. They combine the lightweight strength of aluminum with the precision of machining. But turning molten metal into a finished part that meets tight tolerances is not simple. You need the right alloy, a well-designed mold, controlled casting parameters, and precise machining.
Key takeaways
- The alloy you choose determines castability, machinability, and final performance.
- A well-designed mold minimizes machining requirements and ensures consistent parts.
- High-pressure die casting (HPDC) turns molten aluminum into castings. Wrong parameters create defects that ruin machining.
- Defects in the casting mean more work (and cost) in machining. Fix them at the source.
How Do You Choose the Right Aluminum Alloy for Die Casting and Machining?
The alloy you choose determines castability, machinability, and final performance.
| Alloy | Key Properties | Best Applications |
|---|---|---|
| A380 | High strength, excellent castability, good machinability | Automotive brackets, power tools |
| ADC12 | Low cost, high fluidity, smooth surface finish | Electronic housings, small components |
| AlSi10Mg | High fatigue resistance, good weldability, heat-treatable | Structural parts, drone frames |
Critical Alloy Characteristics to Consider
Liquidus and solidus temperatures: For A380, liquidus is ~610°C and solidus ~565°C. Control these temperatures during melting to avoid incomplete filling.
Shrinkage ratio: Aluminum shrinks 1.5–2% during solidification. Account for this in mold design—otherwise, parts come out undersized.
Thermal conductivity: High conductivity (e.g., 120 W/m·K for ADC12) helps with cooling but requires faster machining to prevent heat-related distortion.
Corrosion resistance: AlSi10Mg resists corrosion better than ADC12. Choose it for parts exposed to moisture (outdoor equipment, marine applications).
Castability index: Aim for an index of 8–10 (10 = best). A380 has a 9/10 index, making it ideal for complex shapes.
How Do You Design a Mold That Works for Machining?
A well-designed mold minimizes machining requirements and ensures consistent parts.
Critical Mold Design Elements
Mold cavity insert design: Use interchangeable inserts for multi-variant parts. Saves time when switching between designs.
Draft angle optimization: Add 1–3° draft to all vertical surfaces. Too little causes sticking; too much requires extra machining to reach dimensions.
Runner and gate layout: Position gates to fill the cavity evenly. Edge gates for flat parts, pinpoint gates for small features. Avoid long runners—they let metal cool before filling.
Cooling channel configuration: Space channels 20–30 mm apart and 10–15 mm from the cavity. Uniform cooling reduces warpage—a major machining headache.
Vacuum venting: Use vents 0.2–0.3 mm wide and vacuum (≤50 mbar) to remove air. Cuts porosity 60% and reduces machining time spent on filling defects.
Shot sleeve sizing: Match sleeve diameter to part weight. For parts under 2 kg, use 50 mm diameter. Oversized sleeves waste material and increase cycle time.
Mold flow simulation: Run simulations (SolidWorks Flow Simulation, MAGMA) to test filling. Fix issues like air traps before building the mold.
What Machine Parameters Produce Consistent Castings?
High-pressure die casting (HPDC) turns molten aluminum into castings. Wrong parameters create defects that ruin machining.
| Parameter | Target Range (A380) | Why It Matters |
|---|---|---|
| Clamping force tonnage | 200–500 tons per 1 kg part | Prevents mold opening during injection—avoids flash that needs extra machining |
| Injection speed profile | 2–5 m/s (fast shot) | Fills cavity before aluminum solidifies—critical for thin-wall parts |
| Intensification pressure | 80–120 MPa | Packs metal tightly to reduce porosity—improves machining surface quality |
| Biscuit thickness control | 15–25 mm | Uniform biscuit ensures consistent pressure |
| Cycle time | 30–60 seconds | Balances cooling (prevents warpage) and productivity |
Pro Tips
- Use die spray release agent sparingly. Too much leaves residue that gums up machining tools.
- Apply plunger tip lubrication every 5–10 cycles. Reduces wear and ensures smooth metal flow.
How Do You Control Defects Before Machining?
Defects in the casting mean more work (and cost) in machining. Fix them at the source.
| Defect | Cause | Fix |
|---|---|---|
| Porosity | Trapped air during solidification | Use vacuum venting; increase intensification pressure |
| Gas holes | Moisture in alloy or mold | Dry alloy at 200–250°C; use mold sealant |
| Cold shut | Molten metal streams don’t fuse | Increase injection speed; raise mold temperature to 180–220°C |
| Hot tearing | Uneven cooling causes stress | Optimize cooling channels; use directional solidification (cool from thick to thin areas) |
Other Key Steps
Microstructure refinement: Add 0.01–0.05% titanium to the alloy. Produces fine grains that are easier to machine.
Eutectic silicon modification: Use strontium (Sr) to modify silicon particles. Improves ductility and reduces tool wear during machining.
What Machining Strategy Works Best for Aluminum Castings?
Machining aluminum castings requires a strategy that accounts for their unique properties—softness, potential porosity, and thermal conductivity.
Core Machining Principles
Datum surface planning: Choose a flat, stable surface (like the base of a housing) as the primary datum. Machine this first—it becomes the reference for all other cuts.
Minimum stock allowance: Leave only 0.5–1.0 mm of stock for machining. Too much wastes time; too little risks hitting porosity.
Distortion compensation: If the casting warps after cooling, adjust the tool path. Remove more material from the warped side to bring it back to spec.
Roughing vs. finishing passes:
- Roughing: High feed rates (1000–1500 mm/min) to remove stock quickly. Use carbide tools (WC-Co grade) for durability.
- Finishing: Slow feed rates (200–500 mm/min) to achieve tight tolerances. Use sharp tools for smooth surfaces.
Coolant choice: For most aluminum alloys, flood coolant works best—prevents heat buildup. For hard-to-reach areas, use MQL (Minimum Quantity Lubrication) —reduces waste and keeps chips clean.
How Do You Keep Parts Stable During CNC Machining?
Aluminum is soft and prone to movement during machining. Good fixture design prevents this.
Key Fixture and CNC Tips
5-axis machining center: Ideal for complex parts (curved automotive components). Machines multiple sides in one setup, reducing error from repositioning.
Custom hydraulic fixture: Uses hydraulic pressure to clamp parts evenly. Perfect for thin-wall parts—avoids distortion.
Clamping force distribution: Apply 20–30% of the part’s yield strength (e.g., 60–90 MPa for A380). Too much force bends the part.
Vibration damping pads: Place under the fixture. Reduces chatter that causes rough surfaces.
Probing and in-cycle gauging: Use a CNC probe to measure parts mid-machining. Adjust tool paths if dimensions drift—cuts scrap 30%.
Zero-point pallet system: Swap parts quickly (under 2 minutes) between setups. Ideal for small batches.
Quick-change jaws: Change jaws in 5–10 minutes for different part sizes. Saves time in low-volume production.
How Do You Verify Dimensional and Geometric Accuracy?
Precision is non-negotiable. Inspection verifies your parts meet specs.
| Tool/Metric | Purpose | Target for Aluminum Parts |
|---|---|---|
| CT scanning inspection | Finds internal defects (small pores); checks dimensions | Detect pores ≤0.1 mm; dimension accuracy ±0.05 mm |
| CMM aluminum fixturing | Measures complex geometries (3D profiles) | Repeatability ±0.005 mm |
| GD&T callouts | Defines geometric requirements (flatness, perpendicularity) | Follow ASME Y14.5—e.g., flatness ≤0.1 mm per 100 mm |
| Capability index Cpk | Measures process consistency | Cpk ≥ 1.33 (capable process) |
Statistical process control (SPC): Track dimensions over time on control charts. If values drift toward tolerance limits, adjust machining parameters immediately.
What Surface Finishes and Treatments Are Available?
Final finishing protects the part and enhances appearance.
| Process | Purpose | Best For |
|---|---|---|
| De-gating and de-burring | Removes gate marks and sharp edges | All parts—prevents injury, improves fit |
| Shot blasting (aluminum oxide media) | Creates uniform matte finish | Parts needing non-reflective surface (camera housings) |
| Vibratory tumbling (ceramic media) | Polishes small parts | Screws, connectors |
| Anodizing Type II and III | Adds protective oxide layer (Type II: 5–20 μm; Type III: 25–100 μm) | Type II: cosmetic; Type III: high-wear (handles, gears) |
| Powder coating | Durable colored coating; test adhesion with cross-hatch | Outdoor parts—resists UV, moisture |
| E-coat | Full coverage even in crevices | Complex parts (automotive frames) |
How to write a spec that gets priced correctly
A drawing is a contract. If it leaves a number open, the shop fills that number in with its own default. The default is rarely the one you had in mind. Put these five lines on every RFQ and most of the back-and-forth disappears before it starts.
- 3D model with the parting line marked
- Alloy grade and the standard it meets
- Wall thickness and draft on every face
- Machining allowance on the faces that will be cut
- Pressure tightness or porosity class
The point is not paperwork. Each line removes a decision the shop would otherwise make for you. A complete RFQ comes back priced. An incomplete one comes back guessed.
What actually drives the price
Buyers usually push on material because it is the line they can see. In practice the material is rarely the biggest number on a quote. These five lines decide most of it:
- die steel and cavity count
- part weight and wall section
- draft and slide count
- porosity requirement
- machining allowance
Ask for the quote split by line. A supplier who cannot break it down is guessing, and you will pay for the guess. The line you can usually renegotiate is the tolerance band, not the raw material.
Problems you will meet, and the fix
Every process has a failure mode it prefers. The same four show up again and again on this kind of work, and none of them are mysteries once you know what to look for.
- Cold shuts where two flow fronts meet
- Porosity that shows up only after machining
- Soldering on a hot spot in the die
- Shrinkage voids in a heavy section
Catch the fault on the first part, not the hundredth. A first-article check costs an hour. A bad batch costs the whole order. Write the check into the purchase order so nobody has to remember it.
What to check on the first article
The first article is the cheapest inspection you will ever buy. Use it properly and the rest of the run becomes boring, which is exactly what you want.
- Every dimension on the drawing, with the measured value written beside it.
- The material certificate, matched to the heat or lot number on the parts.
- The finish against the sample you approved, under the same light.
- Fit against the mating part, assembled rather than measured.
- Packaging, because parts that arrive damaged were never in tolerance.
Check in this order: datums, then mating features, then cosmetic faces. If the datums are wrong, every number after them is noise. Keep the report on file. When a problem shows up in month six, that document is the only thing that tells you what changed.
How to compare two quotes fairly
Two numbers are not comparable unless the scope matches. Line them up before you decide, because a low number with three gaps is not a low number.
Same drawing, same material, same finish, same inspection. Anything else is a different job wearing the same part number. Then look at what each quote leaves out. Freight, packaging, certificates and tooling are the usual gaps.
Ask each supplier to state their assumptions in writing. The one who does is usually the one who has run the process before.
Scaling from one part to a batch
The first part teaches you the process. The hundredth teaches you the process cost.
Watch three things as volume grows: setup amortisation, tool wear, and how much hand work the finish still needs. If the unit price barely moves between ten and a hundred, the cost sits in material or in hand work, not in setup. Ask which, because only one of them is negotiable.
Lead time behaves the same way. A one-off is scheduled around other jobs. A repeat order is scheduled around your forecast. Give the shop a forecast and the lead time gets shorter, not longer.
How to read a supplier's quote
A quote is a short document with a long shadow. Four things in it decide whether the job runs smoothly, and only one of them is the price.
- The scope line. It should name the process, the material and the finish, not just the part.
- The tolerance basis. General tolerance or the drawing, and which standard it follows.
- The exclusions. Tooling, freight, certificates and inspection are the usual omissions.
- The validity date. Material prices move, and an open-ended quote is a promise nobody can keep.
Read the exclusions before you read the total. A quote that leaves out tooling is not cheaper. It is a quote for a different job.
FAQ About Aluminum Alloy Die Casting Machining Parts
Why is H13 tool steel preferred for aluminum die casting molds?
H13 steel has high heat resistance (withstands 500–600°C) and wear resistance—critical for aluminum die casting, where molds face repeated high temperatures. It also machines well, making it easy to create complex cavity inserts.
How do I choose between flood coolant and MQL for machining aluminum castings?
Use flood coolant for large parts or high-volume runs—it cools the tool and flushes chips effectively. MQL is better for small, complex parts (hard-to-reach areas) or eco-friendly operations, using just 5–50 mL/h of lubricant vs. liters of flood coolant.
What is the best way to reduce porosity before machining?
Combine three steps:
- Vacuum venting during casting removes air
- Increase intensification pressure to pack metal tightly
- Dry the alloy at 200–250°C to remove moisture
These steps cut porosity 60–70%, reducing machining time spent on filling defects.
How much stock should I leave for machining?
0.5–1.0 mm is ideal. Less than 0.5 mm risks hitting porosity. More than 1.0 mm wastes time and risks tool deflection on thin walls.
What surface finish can I expect after machining?
With proper finishing passes, Ra 0.8–1.6 μm is achievable. For comparison:
- Ra 0.8 μm = cosmetic surface, ready for anodizing
- Ra 1.6 μm = good for most functional surfaces
- Ra 3.2 μm = acceptable for hidden surfaces
Aluminum alloy die casting machining parts require mastery of every step:
- Choose the right alloy: A380 for strength/castability, ADC12 for cost/fluidity, AlSi10Mg for fatigue resistance
- Design the mold well: H13 steel, 1–3° draft, uniform cooling, vacuum venting
- Control casting parameters: 80–120 MPa pressure, 2–5 m/s injection, 30–60 second cycles
- Fix defects at the source: Vacuum venting, proper drying, directional cooling
- Machine strategically: 0.5–1.0 mm stock, rough then finish, flood coolant
- Hold parts securely: 5-axis setups, hydraulic fixtures, zero-point pallets
- Inspect thoroughly: CMM, CT scanning, SPC charts
- Finish appropriately: Anodize, coat, or polish as needed
Get each step right, and you produce parts that meet tight tolerances, look good, and perform reliably—batch after batch.
Our solution for Aluminum Alloy Die Casting Machining
YiguProto runs die casting in house, from a single prototype to a production batch. We quote the process, the material and the finish as separate lines, so you can see where the money goes instead of arguing with one number.
Send a STEP file or a drawing and you get a DFM report in one to two business days. It flags the features that add cost and the features that will not hold tolerance on the process you picked.
Every order ships with an inspection report on the features you call out. If a part misses, we make it again. Ready to price a part? Start with a free quote and DFM review, or read more about our die casting. You can also talk to an engineer before you commit to a drawing.
FAQ about Aluminum Alloy Die Casting Machining
What tolerance can you hold on Aluminum Alloy Die Casting Machining?
The working default is ±0.1 mm on cast features, ±0.05 mm after machining. Tighter than that the process changes and so does the price, because every step tighter adds inspection time. Call out only the faces that mate with something else and leave the rest on the general tolerance.
What material should I specify?
Specify by standard, not by trade name. A trade name can change under you between two orders; a standard number cannot. Then add the one property that actually decides the part, whether that is strength, heat resistance or chemical exposure.
How long does a first article take?
Usually a few business days once the drawing is frozen, and longer if tooling is involved. The date we give you is the date we confirm in writing, not the date we hope for.
What files do you need in order to quote?
A STEP file plus a PDF drawing that carries the same revision letter. The model carries the geometry and the drawing carries the intent. When the two disagree, the shop picks one, and it is never the one you meant.
Is there a minimum order quantity?
No hard minimum. One part is fine. What changes with volume is which costs dominate, so a single unit is priced mostly on setup and a thousand units are priced mostly on cycle time and material.
How much does Aluminum Alloy Die Casting Machining cost?
Price comes from five lines: material, machine or tool time, setup, finishing and inspection. The material itself is usually the smallest of them. Send a drawing and we will split the quote so you can see which line is doing the damage.
The short version
Aluminum Alloy Die Casting Machining rewards the buyer who reads the data sheet and the drawing together. Pick the option for the property that matters, not for the price per kilo.
Tighten only what mates. Test a sample before the run. Then let the process do the rest.