
Rapid Prototyping
Why Are Plastic Instrument Prototype Models Essential for Precision Manufacturing?
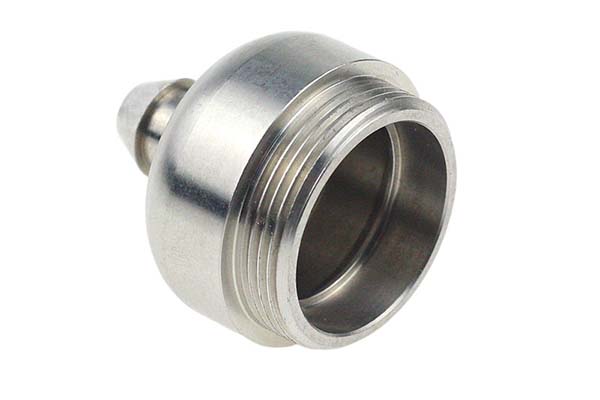
In the world of instrumentation manufacturing, getting your design right before mass production isn’t just about saving money—it’s about ensuring accuracy, reliability, and performance. Plastic instrument prototype models give your team a powerful way to test how parts will function in real-world conditions, without the massive investment of production tooling.
Why Are Plastic Materials Ideal for Instrument Prototypes?
Balancing Performance and Cost
Plastic materials offer a unique combination of properties that make them perfect for instrument prototyping. They’re easy to shape, cost-effective, and can meet the diverse needs of different instruments—from precision lab equipment to rugged industrial controls.
A leading industrial instrument manufacturer recently proved this with a high-temperature process control instrument. They created PC plastic prototypes and exposed them to a continuous 110°C environment for 1,000 hours. The prototypes showed no deformation, no cracking, and no loss of dimensional stability. This early testing confirmed their design’s reliability and saved the company an estimated $150,000 in potential rework costs for mass-produced housings.
Getting Accurate Performance Data
Different instruments need different plastic properties. Only prototyping with the right material gives you accurate data on:
- Dimensional stability: Will the part hold precise measurements over time?
- Temperature resistance: Does the material soften or warp near heat sources?
- Impact strength: Can it survive drops or vibrations in the field?
- Optical clarity: Will display windows remain clear and distortion-free?
How Do You Choose the Right Plastic for Instrument Prototypes?
Matching Material to Application
Different instrument parts face different challenges. Here’s a detailed look at the most common choices:
| Material | Key Properties | Instrument Applications | Temperature Range | Processing Difficulty | Typical Cost per Part* |
|---|---|---|---|---|---|
| ABS | Good transparency, easy to process, moderate impact resistance | Instrument shells, control panels, enclosures | -20°C to 80°C | Low | $15-$40 |
| PC | High impact resistance, excellent heat resistance, stable dimensions | High-temperature housings, sensor covers, protective enclosures | -40°C to 120°C | Moderate | $20-$50 |
| PMMA | High transparency (92% light transmission), good weather resistance, easy to color | Display windows, optical components, lens covers | -30°C to 70°C | Low | $15-$45 |
| PU | Good elasticity, wear resistant, suitable for small-batch mold production | Interface seals, soft-touch buttons, gaskets | -50°C to 80°C | Moderate | $25-$60 |
*Small batch quantities under 50 parts
ABS for General Purpose Enclosures
ABS is the workhorse of instrument prototyping. It’s easy to machine, takes paint well, and offers good impact resistance for most indoor applications. A pressure gauge manufacturer used ABS prototypes to test new housing designs. The prototypes machined quickly—3 days from CAD to finished part—and survived drop tests from 1 meter without cracking. This fast turnaround let them iterate through three design improvements in just two weeks.
PC for High-Temperature and High-Impact Applications
When instruments face harsh conditions, PC delivers. A sensor company needed to test housings for an industrial monitor that would sit near hot machinery. They chose PC for its heat deflection temperature of 135°C and impact strength 10 times higher than ABS. The prototypes survived 1,000 hours at 110°C with no warping, proving the design was production-ready.
PMMA for Optical Clarity
When you need to see through the part, PMMA is the clear choice. A laboratory instrument maker needed to test a new display window that required precise optical properties. PMMA prototypes delivered 92% light transmission with zero distortion—exactly matching the optical clarity needed for accurate readings. The prototypes also resisted yellowing during UV exposure testing, confirming long-term durability.
PU for Flexible Components
For parts that need to flex and seal, PU offers the right combination of elasticity and durability. A flow meter manufacturer used PU prototypes to test interface seals that had to maintain a tight seal while absorbing vibration. The prototypes showed excellent compression set after 10,000 compression cycles—proving they’d last for years in the field.
What Questions Should You Ask Before Selecting Material?
Where Will the Instrument Live?
Start by mapping the operating environment. Factory floor with high heat? Choose PC. Clean lab with optical requirements? PMMA works best. Outdoor installation with temperature swings? Consider weather-resistant grades.
What Mechanical Stresses Will It Face?
List all forces the part might encounter. Vibration from nearby machinery? You need impact-resistant material. Frequent handling? Surface hardness matters. Component mounting? Dimensional stability is critical.
What Regulatory Standards Apply?
Instruments often face industry-specific requirements. Medical devices need biocompatibility. Industrial equipment needs flame retardancy. Food processing instruments need chemical resistance. Your prototype material should match the final production material’s certifications so your tests are valid.
How Are Precision Instrument Prototypes Actually Made?
Step 1: Start with Smart Material Selection
Choosing the right material isn’t just about the final part—it affects the whole prototyping process. A small instrument startup once learned this the hard way. They needed a housing for a high-temperature instrument and chose PMMA instead of PC. When they tested the prototype at 90°C, the PMMA deformed and warped, ruining the test. They had to start over with PC, causing a 3-week delay. Always match the material to the instrument’s actual working conditions from day one.
Step 2: Get Your Design Files Right
CAD file verification: Every great prototype starts with accurate 3D files in formats like STEP or IGES. These files are your blueprint. A sensor instrument manufacturer once provided incomplete CAD files missing critical hole positions. The resulting prototype couldn’t mount the sensors properly—wasting time and money. Double-checking files upfront would have caught this.
Gypsum sample validation: Before cutting any plastic, create a gypsum model to confirm basic shape and dimensions. This quick step catches errors early. A precision meter manufacturer uses gypsum samples to verify operation panel curves, holding tolerances to 0.1mm for perfect fit with internal components.
Step 3: CNC Machining Delivers Precision
Programming the cut: Engineers use software like Mastercam to create machining programs with precise parameters for cutting speed and feed rate. The CNC machine follows these paths, removing excess material to leave the exact part shape. Modern machines achieve surface finishes as smooth as Ra 1.6μm—critical for instrument parts that must fit precisely. When machining internal grooves for instrument housings, CNC ensures uniform width and smooth walls, avoiding assembly problems from size deviations.
Multi-axis advantages: Complex instrument parts often need 5-axis CNC machining. This technology cuts parts in a single setup, eliminating errors from repositioning. A smart instrument brand cut prototype production time from 5 days to just 2 by switching to 5-axis machines for curved sensor brackets and multi-cavity housings.
Step 4: Post-Treatment Adds Durability and Polish
Deburring matters: Even tiny burrs can cause problems in precision instruments. A small burr on a sensor housing could interfere with accurate readings. Skilled technicians use 400-grit sandpaper and deburring knives to smooth all edges. For intricate internal features, specialized tools reach where hands cannot.
Surface treatments: Some applications need extra attention. An industrial control manufacturer adds anti-static coating to control panel prototypes, reducing static interference with sensitive circuits by 35%. Other common treatments include:
- Painting: Anti-corrosion or anti-static coatings for harsh environments
- Silk screen printing: Permanent labels for buttons, functions, and parameters
- Electroplating: Metal layers for wear resistance or conductivity on contact parts
Step 5: Testing Validates Real-World Performance
Assembly fit checks: Bring all prototype parts together with electronic components and metal accessories. Check whether mounting holes align, whether circuit boards install smoothly, and whether there are gaps or tight spots. This step catches fit issues before they become production problems.
Functional testing simulates field use: Instrument prototypes must prove themselves under real conditions:
- Structural stability: Apply vibration and impact forces simulating transportation and use—check for deformation or loosening
- Mechanical properties: Measure tensile strength (ABS prototypes typically show 30-40 MPa) to confirm long-term durability
- Environmental adaptability: Cycle from -30°C to 80°C while monitoring performance. A temperature sensor prototype maintained measurement error within acceptable limits throughout testing—proving its environmental stability
Step 6: Protect Your Investment
Professional packaging: Quality prototypes deserve quality shipping. Foam inserts, bubble film, and hard boxes prevent damage during transit. An instrument R&D company once received a prototype with a cracked shell from simple packaging—delaying their design verification by weeks. Don’t make that mistake.
On-time delivery matters: Instrument projects run on tight schedules tied to product launches and trade shows. Most prototypes deliver in 2-3 weeks. If delays happen—like material shortages or complex machining requirements—communicate immediately. Your team can adjust plans rather than wait in the dark.
What Standards Should Instrument Prototype Suppliers Meet?
Critical Certifications
Instrument prototyping requires attention to precision and quality. Your supplier should demonstrate:
- ISO 9001 quality systems that ensure consistency
- Experience with precision tolerances (±0.05mm or better)
- Understanding of industry-specific requirements (medical, industrial, laboratory)
- Clean working environments for optical and precision components
These capabilities prove the supplier understands the special requirements of instrumentation. Without them, you risk prototypes that don’t reflect real production constraints.
Testing Capabilities Matter
Ask potential suppliers about their in-house testing. Can they run temperature cycles? Measure surface finish? Perform dimensional inspections with CMM equipment? Suppliers who do their own testing catch problems faster and deliver better parts.
How to write a spec that gets priced correctly
A drawing is a contract. If it leaves a number open, the shop fills that number in with its own default. The default is rarely the one you had in mind. Put these five lines on every RFQ and most of the back-and-forth disappears before it starts.
- A model you are willing to freeze for the build
- The question the prototype must answer
- Process and material that can answer it
- Tolerance on the features under test
- How many iterations you have budgeted
The point is not paperwork. Each line removes a decision the shop would otherwise make for you. A complete RFQ comes back priced. An incomplete one comes back guessed.
What actually drives the price
Buyers usually push on material because it is the line they can see. In practice the material is rarely the biggest number on a quote. These five lines decide most of it:
- process choice
- part size and feature count
- material
- finish and fit checks
- number of iterations
Ask for the quote split by line. A supplier who cannot break it down is guessing, and you will pay for the guess. The line you can usually renegotiate is the tolerance band, not the raw material.
Problems you will meet, and the fix
Every process has a failure mode it prefers. The same four show up again and again on this kind of work, and none of them are mysteries once you know what to look for.
- A prototype that is too good and hides a production problem
- A prototype that is too rough to test the real question
- Material chosen for speed rather than for the test
- No measurement plan, so the result is an opinion
Catch the fault on the first part, not the hundredth. A first-article check costs an hour. A bad batch costs the whole order. Write the check into the purchase order so nobody has to remember it.
What to check on the first article
The first article is the cheapest inspection you will ever buy. Use it properly and the rest of the run becomes boring, which is exactly what you want.
- Every dimension on the drawing, with the measured value written beside it.
- The material certificate, matched to the heat or lot number on the parts.
- The finish against the sample you approved, under the same light.
- Fit against the mating part, assembled rather than measured.
- Packaging, because parts that arrive damaged were never in tolerance.
Check in this order: datums, then mating features, then cosmetic faces. If the datums are wrong, every number after them is noise. Keep the report on file. When a problem shows up in month six, that document is the only thing that tells you what changed.
How to compare two quotes fairly
Two numbers are not comparable unless the scope matches. Line them up before you decide, because a low number with three gaps is not a low number.
Same drawing, same material, same finish, same inspection. Anything else is a different job wearing the same part number. Then look at what each quote leaves out. Freight, packaging, certificates and tooling are the usual gaps.
Ask each supplier to state their assumptions in writing. The one who does is usually the one who has run the process before.
Scaling from one part to a batch
The first part teaches you the process. The hundredth teaches you the process cost.
Watch three things as volume grows: setup amortisation, tool wear, and how much hand work the finish still needs. If the unit price barely moves between ten and a hundred, the cost sits in material or in hand work, not in setup. Ask which, because only one of them is negotiable.
Lead time behaves the same way. A one-off is scheduled around other jobs. A repeat order is scheduled around your forecast. Give the shop a forecast and the lead time gets shorter, not longer.
How Much Can Prototyping Really Save?
The Numbers Tell the Story
Industry data shows that instrument prototyping reduces development costs by 30-45% compared to going straight to production. These savings come from:
- Catching design flaws before cutting expensive production tooling
- Validating material choices without buying full production quantities
- Testing assembly methods to optimize manufacturing efficiency
- Avoiding field failures that trigger expensive recalls and reputation damage
A Real Cost Example
Consider a company developing new laboratory analytical instruments. They spent $7,500 on PC prototypes to test complex housing designs. Testing revealed that wall thickness in one area was insufficient for the internal pressure requirements. They adjusted the design, made new prototypes for $3,200, and validated the fix. Total prototyping cost: $10,700.
If they’d gone straight to production, they would have spent $95,000 on injection molds before discovering the problem. Fixing it then would mean scrapping and recutting molds—a $95,000 loss plus 4-6 months of delay. The prototyping approach saved them over $84,000 and kept their project on schedule for a critical industry trade show.
Our solution for Plastic Instrument Prototype Models Essential
YiguProto runs rapid prototyping in house, from a single prototype to a production batch. We quote the process, the material and the finish as separate lines, so you can see where the money goes instead of arguing with one number.
Send a STEP file or a drawing and you get a DFM report in one to two business days. It flags the features that add cost and the features that will not hold tolerance on the process you picked.
Every order ships with an inspection report on the features you call out. If a part misses, we make it again. Ready to price a part? Start with a free quote and DFM review, or read more about our rapid prototyping. You can also talk to an engineer before you commit to a drawing.
FAQ about Plastic Instrument Prototype Models Essential
What material should I specify?
Specify by standard, not by trade name. A trade name can change under you between two orders; a standard number cannot. Then add the one property that actually decides the part, whether that is strength, heat resistance or chemical exposure.
Is there a minimum order quantity?
No hard minimum. One part is fine. What changes with volume is which costs dominate, so a single unit is priced mostly on setup and a thousand units are priced mostly on cycle time and material.
What should I check before approving the parts?
Datums first, then the features that mate, then the cosmetic faces. Ask for a dimensional report, a material certificate and a finish sample. A part can be inside every tolerance and still not fit, so assemble one before you sign.
What files do you need in order to quote?
A STEP file plus a PDF drawing that carries the same revision letter. The model carries the geometry and the drawing carries the intent. When the two disagree, the shop picks one, and it is never the one you meant.
What is the lead time for Plastic Instrument Prototype Models Essential?
Expect 3 to 7 business days for a first article. Tooling, material stock and the finishing queue all move that number, so we confirm the date in writing before the run starts rather than after.
How long does a first article take?
Usually a few business days once the drawing is frozen, and longer if tooling is involved. The date we give you is the date we confirm in writing, not the date we hope for.
The short version
Plastic Instrument Prototype Models Essential rewards the buyer who reads the data sheet and the drawing together. Pick the option for the property that matters, not for the price per kilo.
Tighten only what mates. Test a sample before the run. Then let the process do the rest.