
Sheet Metal
How to Polish Sheet Metal Prototypes? A Step-by-Step Guide
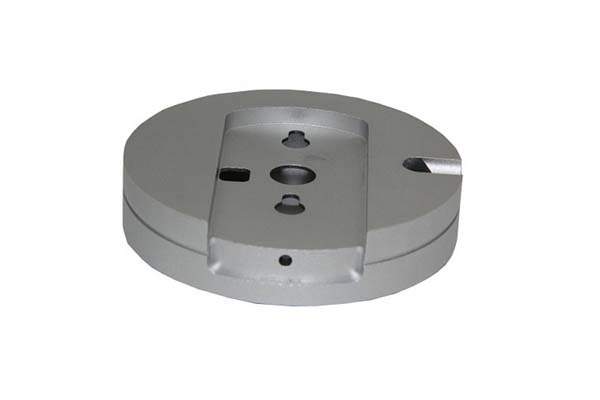
Polishing sheet metal fabrication prototypes does more than improve appearance. It removes sharp burrs that could cut someone during testing. It smooths rough edges that might catch on other parts. It reveals surface defects you’d miss on unpolished metal. And yes—it makes your prototype look professional when showing investors or clients.
What Tools Do You Need Before Starting?
Essential hand tools
Gather everything before you start. Stopping mid-process to find supplies breaks your rhythm and can lead to rushed work.
Basic tool kit:
- Sandpaper in multiple grits (80 to 2000)
- Sandpaper backing blocks for even pressure
- Lint-free cloths for cleaning
- Neutral detergent and warm water
- Compressed air or air blower
- 10x magnifying glass for inspection
- Digital caliper for thickness checks
Power tools that save time
Hand sanding works, but power tools cut polishing time by 50–70%. For production prototypes, they’re worth the investment.
| Tool | Best For | Speed Range | Caution |
|---|---|---|---|
| Electric orbital sander | Large flat surfaces | 4,000–12,000 RPM | Can leave swirl marks |
| Pneumatic die grinder | Tight corners, complex shapes | 15,000–25,000 RPM | Needs air compressor |
| Belt sander | Thick material, heavy stock removal | 500–2,000 SFPM | Too aggressive for thin sheets |
Safety gear is non-negotiable
Metal dust is sharp. It gets in your eyes and lungs. Protect yourself.
Required protection:
- Safety glasses with side shields
- Cut-resistant gloves (metal edges are sharp)
- Dust mask or respirator (N95 minimum)
- Long sleeves to protect arms
A shop supervisor once skipped safety glasses for “just one quick pass.” A metal sliver hit his eye. Three days in the hospital. Don’t learn this lesson the hard way.
How Do You Choose the Right Sandpaper Grit?
The grit progression rule
Always move from coarse to fine. Never jump more than double the grit number. Going from 80 to 400 skips too much—you’ll never remove the deep scratches.
Standard progression:
- 80–120 grit: Remove burrs, weld marks, deep scratches
- 240–400 grit: Smooth out coarse scratches
- 600–1000 grit: Create clean, professional surface
- 1200–2000 grit: Achieve mirror finish
What surface finish each grit delivers
Different grits leave measurable surface roughness. Know what you need before you start.
| Grit Range | Surface Roughness (Ra) | Appearance |
|---|---|---|
| 80–120 | 5–10 μm | Matte, visible scratches |
| 240–400 | 2–5 μm | Smooth matte |
| 600–1000 | 0.8–2 μm | Semi-gloss |
| 1200–2000 | 0.2–0.8 μm | Mirror-like |
Real example: Aluminum prototype
A medical device company needed polished aluminum handles for a surgical tool prototype. They started with 120-grit to remove CNC tool marks. Then 320-grit to smooth the surface. Finished with 800-grit for a satin appearance. Total time: 45 minutes per handle. The polished surface passed sterilization testing without trapping contaminants.
Which Grinding Tools Work Best for Different Parts?
Flat surfaces need orbital sanders
Electric orbital sanders cover large areas quickly. Use them for panels, enclosures, and flat brackets.
Technique tips:
- Keep the sander flat—tilting creates gouges
- Move in straight lines, not circles
- Overlap each pass by 50% for even coverage
- Start at low speed (4,000 RPM) to avoid gouging
Complex shapes need die grinders
Pneumatic die grinders get into corners, holes, and curves that orbital sanders can’t reach.
Setup advice:
- Use smaller backing pads (1–2 inches) for tight spaces
- Match speed to material—aluminum needs slower speeds than steel
- Keep the tool moving—stopping in one spot creates flat spots
A aerospace contractor polishes titanium brackets with intricate cutouts. They use die grinders with 2-inch sanding discs to reach every internal feature. Each bracket takes 20 minutes but meets NASA’s strict surface requirements.
When to use belt sanders
Belt sanders remove material fast. Use them only for heavy stock removal on thick material (3mm or more). Never use them on thin sheets—they’ll stretch or tear the metal.
What Techniques Prevent Common Polishing Mistakes?
Always sand in one direction
Sand parallel to the grain or in consistent straight lines. Circular sanding leaves swirl marks that show through final finishes.
Why direction matters:
- Straight scratches are easier to remove with next grit
- Swirl marks require aggressive sanding to eliminate
- Consistent direction creates uniform appearance
Control your pressure carefully
Too much pressure dents the metal. Too little pressure takes forever. Find the sweet spot.
Pressure guidelines by material:
- Aluminum: 8–12 Newtons (light pressure)
- Steel: 12–15 Newtons (moderate pressure)
- Copper: 5–10 Newtons (very light pressure)
- Near edges: Reduce pressure by 50%
What’s a Newton feel like? Pressing a small bag of sugar into the surface equals about 10 Newtons. Practice on scrap until you develop feel.
Take breaks to avoid fatigue
After 20–30 minutes of continuous sanding, your hands tire. Pressure becomes uneven. Quality drops.
Break schedule:
- 5-minute break every 30 minutes
- Shake out hands to prevent cramping
- Inspect progress during breaks
How Do You Check Progress During Polishing?
Visual inspection methods
Your eyes lie. What looks smooth often hides scratches. Use tools to verify.
Inspection steps:
- Wipe surface clean of dust
- Use 10x magnifying glass at low angle
- Look for reflective scratches—they catch light differently
- Mark remaining defects with grease pencil for rework
Tactile inspection
Your fingers detect roughness your eyes miss. But be careful—sharp edges cut.
Feel technique:
- Wear thin gloves
- Run fingertips gently across surface
- Feel for catches or bumps
- Check edges for remaining burrs
Dimensional checks
Polishing removes material. Measure to ensure you haven’t gone too thin.
Critical measurements:
- Thickness at multiple points
- Hole diameters (polishing can enlarge holes)
- Edge radii (sharp corners may round)
A solar panel frame manufacturer found their polished aluminum frames were 0.1mm thinner than spec. The polishing step was removing too much material. They adjusted pressure and saved $50,000 yearly in scrap.
How Do You Clean Between Polishing Stages?
Why cleaning matters
Residual grit from coarse sandpaper contaminates fine sandpaper. One stray 80-grit particle under 1000-grit paper creates deep scratches that ruin hours of work.
Cleaning procedure
Between each grit change:
- Blow surface with compressed air (hold nozzle 6–12 inches away)
- Wipe with lint-free cloth dampened with mild detergent
- Rinse with clean water
- Dry immediately with fresh cloth
- Check for embedded grit under magnification
Final cleaning after polishing
Step-by-step:
- Compressed air to remove bulk dust
- Wash with warm water + neutral detergent
- Rinse thoroughly
- Dry completely—standing water causes rust
- Final wipe with clean, dry cloth
Never use paper towels. They leave lint that sticks to cleaned surfaces.
What Protection Does a Polished Prototype Need?
Why protection matters
Polished metal is vulnerable. You’ve removed the natural oxide layer. Bare metal reacts with air and moisture.
Without protection:
- Steel rusts in hours
- Aluminum oxidizes (dulls surface)
- Copper tarnishes (dark spots)
Protection options compared
| Coating | Application | Drying Time | Durability | Best For |
|---|---|---|---|---|
| Clear acrylic spray | Rattle can | 24 hours full cure | 6+ months | Most metals |
| UV-curable clear coat | Spray + UV lamp | 15 minutes | 12+ months | Quick turnaround |
| Anti-rust oil | Wipe on | 2 hours absorption | 1–3 months | Steel only |
| Wax | Hand apply | 1 hour buff | 1–2 months | Display models |
Application tips
For spray coatings:
- Work in clean, dust-free area
- Apply thin, even coats—thick coats run
- Hold can 8–12 inches from surface
- Apply 2–3 light coats rather than one heavy coat
For oil or wax:
- Apply with lint-free cloth
- Buff to even film
- Remove excess before it hardens
A robotics startup displayed polished aluminum prototypes at a trade show. They applied clear acrylic spray beforehand. After three days of handling, the prototypes still looked new. Competitors’ unprotected prototypes showed fingerprints and minor scratches.
Polishing sheet metal prototypes transforms rough machined parts into professional, functional samples. Start with the right tools—sandpaper in progressive grits, power tools for efficiency, and safety gear for protection. Choose your starting grit based on material and initial surface condition. Sand in one direction with controlled pressure. Clean thoroughly between stages to prevent contamination. Inspect with magnification and touch to catch hidden defects. Finally, apply protective coating to preserve your work. Following these steps consistently delivers prototypes that look good, function correctly, and impress everyone who sees them.
How to write a spec that gets priced correctly
A drawing is a contract. If it leaves a number open, the shop fills that number in with its own default. The default is rarely the one you had in mind. Put these five lines on every RFQ and most of the back-and-forth disappears before it starts.
- Flat pattern or STEP file plus a dimensioned drawing
- Material grade and thickness with the standard number
- Bend radii, K-factor and the direction of the grain
- Finish, masking and which faces stay bare
- Quantity and the assembly sequence
The point is not paperwork. Each line removes a decision the shop would otherwise make for you. A complete RFQ comes back priced. An incomplete one comes back guessed.
What actually drives the price
Buyers usually push on material because it is the line they can see. In practice the material is rarely the biggest number on a quote. These five lines decide most of it:
- blank size and nesting efficiency
- number of bends and weld joints
- material grade and thickness
- finish and masking
- batch quantity
Ask for the quote split by line. A supplier who cannot break it down is guessing, and you will pay for the guess. The line you can usually renegotiate is the tolerance band, not the raw material.
Problems you will meet, and the fix
Every process has a failure mode it prefers. The same four show up again and again on this kind of work, and none of them are mysteries once you know what to look for.
- Stretching at a bend that is tighter than the material allows
- Hole distortion when a hole sits too close to a bend line
- Weld draw on a visible face
- Springback that pulls a formed angle out of tolerance
Catch the fault on the first part, not the hundredth. A first-article check costs an hour. A bad batch costs the whole order. Write the check into the purchase order so nobody has to remember it.
What to check on the first article
The first article is the cheapest inspection you will ever buy. Use it properly and the rest of the run becomes boring, which is exactly what you want.
- Every dimension on the drawing, with the measured value written beside it.
- The material certificate, matched to the heat or lot number on the parts.
- The finish against the sample you approved, under the same light.
- Fit against the mating part, assembled rather than measured.
- Packaging, because parts that arrive damaged were never in tolerance.
Check in this order: datums, then mating features, then cosmetic faces. If the datums are wrong, every number after them is noise. Keep the report on file. When a problem shows up in month six, that document is the only thing that tells you what changed.
How to compare two quotes fairly
Two numbers are not comparable unless the scope matches. Line them up before you decide, because a low number with three gaps is not a low number.
Same drawing, same material, same finish, same inspection. Anything else is a different job wearing the same part number. Then look at what each quote leaves out. Freight, packaging, certificates and tooling are the usual gaps.
Ask each supplier to state their assumptions in writing. The one who does is usually the one who has run the process before.
Scaling from one part to a batch
The first part teaches you the process. The hundredth teaches you the process cost.
Watch three things as volume grows: setup amortisation, tool wear, and how much hand work the finish still needs. If the unit price barely moves between ten and a hundred, the cost sits in material or in hand work, not in setup. Ask which, because only one of them is negotiable.
Lead time behaves the same way. A one-off is scheduled around other jobs. A repeat order is scheduled around your forecast. Give the shop a forecast and the lead time gets shorter, not longer.
FAQ About Polishing Sheet Metal Prototypes
Do aluminum and steel need different polishing approaches?
Yes. Aluminum is softer, so start with finer grit (120 vs 80 for steel) and use lighter pressure (8–12N vs 12–15N). Aluminum also loads sandpaper faster—change paper more frequently. Steel needs anti-rust coating after polishing; aluminum only needs clear coat for appearance.
My prototype still has scratches after fine sanding. What now?
Go back to intermediate grit (600–800) and resand with light pressure. If scratches remain, you may have jumped grits too fast. Always progress through each grit thoroughly before moving finer. For stubborn scratches, try metal polishing compound with a soft cloth buffing wheel.
Can I skip polishing for internal test prototypes?
No—unpolished prototypes have burrs that affect testing. A rough edge might scratch mating parts, giving false test results. Burrs can also break off during testing, contaminating assemblies. At minimum, remove burrs with 400-grit to ensure accurate functionality testing.
How do I polish parts with deep laser engraving?
Mask the engraved area with tape before polishing. Polish the surrounding surface, then remove tape and carefully polish engraved area by hand with fine grit (1000+) to avoid removing detail. An aerospace parts manufacturer uses this method to polish around serial numbers and part markings.
What’s the fastest way to polish many identical prototypes?
Create a fixture that holds multiple parts. Use orbital sanders with consistent pressure. Document the exact grit progression and time per step. A consumer electronics company polishes 200 phone cases per day using fixtures and documented procedures—each case takes 12 minutes total.
Does polishing weaken thin sheet metal?
Polishing removes material, so yes—excessive polishing reduces thickness. Measure starting thickness and monitor during process. For sheets under 1mm, limit total material removal to 0.05mm maximum. Use contactless measurement to verify final thickness.
Can I polish curved or formed prototypes the same way?
Yes, but technique changes. Use flexible backing pads that conform to curves. Hand sanding with foam blocks works better than rigid tools. For complex curves, flap wheels or surface conditioning discs follow contours without flat spots.
Our solution for Polish Sheet Metal Prototypes
YiguProto runs sheet metal fabrication in house, from a single prototype to a production batch. We quote the process, the material and the finish as separate lines, so you can see where the money goes instead of arguing with one number.
Send a STEP file or a drawing and you get a DFM report in one to two business days. It flags the features that add cost and the features that will not hold tolerance on the process you picked.
Every order ships with an inspection report on the features you call out. If a part misses, we make it again. Ready to price a part? Start with a free quote and DFM review, or read more about our sheet metal fabrication. You can also talk to an engineer before you commit to a drawing.
FAQ about Polish Sheet Metal Prototypes
What tolerance can you hold on Polish Sheet Metal Prototypes?
The working default is ±0.2 mm on formed features, ±0.1 mm on laser-cut holes. Tighter than that the process changes and so does the price, because every step tighter adds inspection time. Call out only the faces that mate with something else and leave the rest on the general tolerance.
What is the lead time for Polish Sheet Metal Prototypes?
Expect 3 to 7 business days after drawing release. Tooling, material stock and the finishing queue all move that number, so we confirm the date in writing before the run starts rather than after.
What files do you need in order to quote?
A STEP file plus a PDF drawing that carries the same revision letter. The model carries the geometry and the drawing carries the intent. When the two disagree, the shop picks one, and it is never the one you meant.
What is Polish Sheet Metal Prototypes used for?
Polish Sheet Metal Prototypes turns up wherever the part has to do a real job at a predictable cost: brackets, housings, fixtures, covers and the fittings that hold them together. The honest test is whether the properties match the load and the environment, not whether the material is fashionable.
How long does a first article take?
Usually a few business days once the drawing is frozen, and longer if tooling is involved. The date we give you is the date we confirm in writing, not the date we hope for.
What should I check before approving the parts?
Datums first, then the features that mate, then the cosmetic faces. Ask for a dimensional report, a material certificate and a finish sample. A part can be inside every tolerance and still not fit, so assemble one before you sign.
The short version
Polish Sheet Metal Prototypes rewards the buyer who reads the data sheet and the drawing together. Pick the option for the property that matters, not for the price per kilo.
Tighten only what mates. Test a sample before the run. Then let the process do the rest.