
Sheet Metal
What Is Sheet Metal Prototype Non-Standard Parts Processing? A Complete Guide
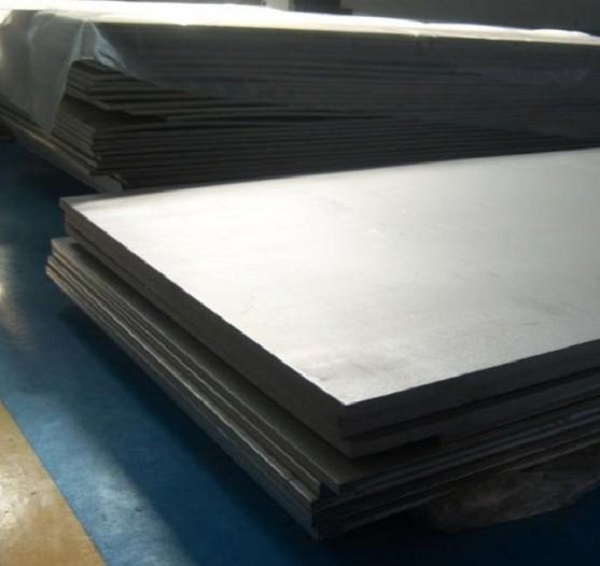
Product development moves fast. You have a unique design idea. You need to test it quickly. You cannot wait months for standard parts that do not quite fit your vision. Sheet metal prototype non-standard parts processing solves this problem. These are custom-made components tailored to your specific requirements.
What Are Sheet Metal Prototype Non-Standard Parts?
The Basic Definition
Sheet metal prototype non-standard parts are custom components made through sheet metal processing. They do not follow universal size or specification standards. Instead, they are crafted to meet a customer’s unique requirements.
These parts typically serve three main purposes:
Single-piece production creates one-of-a-kind prototypes. A new medical device might need a custom housing for initial testing. Only one exists, and it must work perfectly.
Low-volume production runs from 10 to 50 units. Beta testing of industrial machinery often needs this quantity. Enough parts for multiple test sites, but not full production volumes.
Special scenarios include replacement parts for outdated equipment. When a machine is twenty years old and parts are no longer available, custom fabrication saves the day.
How They Differ From Standard Parts
| Feature | Non-Standard Parts | Standard Parts |
|---|---|---|
| Design Basis | Customer’s specific requirements | Pre-defined industry standards |
| Production Volume | Low—single pieces to small batches | High—mass production |
| Purpose | Design validation, testing, customization | Routine assembly, general use |
| Lead Time | Flexible, faster for small batches | Fixed, longer for mass production |
| Cost per Unit | Higher due to customization | Lower from economies of scale |
Why Would You Need Non-Standard Sheet Metal Parts?
Your Design Is Unique
Standard parts exist for common applications. They work for brackets, enclosures, and frames that thousands of others have built before. But your design is different. It has specific curves, holes in particular places, or dimensions that match no catalog. Non-standard processing creates exactly what you designed.
You Need to Test Before Committing
Mass production tooling costs thousands of dollars. Committing to that expense without testing is risky. A custom prototype lets you validate the design first. You find the flaws when fixing them costs hundreds, not thousands.
Old Equipment Needs New Parts
Machines from twenty years ago often have no available spare parts. Manufacturers stop supporting them. Custom fabrication recreates the parts you need, keeping valuable equipment running.
Low Volumes Don’t Justify Mass Production
Standard parts require high volumes to be economical. If you need only fifty units, mass production lines are not interested. Custom processing handles low volumes efficiently.
How Does Sheet Metal Prototype Non-Standard Parts Processing Work?
Step 1: Design Phase—Lay the Foundation
The design phase determines everything that follows. Get this right and the rest flows smoothly. Get it wrong and problems compound.
3D modeling comes first. Use CAD software like SolidWorks or AutoCAD to create a detailed 3D model. This model must capture every requirement—dimensions, hole locations, curves, and features. Nothing is too small to include.
Design review follows immediately. A cross-functional team of designers and engineers examines the model for two critical factors.
Manufacturability asks: Can we produce this with our tools? Is that 90-degree bend feasible with standard press brakes? Will that tight radius cause cracking?
Functionality asks: Will the part perform as intended? Will this custom bracket hold the required weight? Does that hinge move through its full range?
Real example: A medical device company designed a custom housing with a 0.5mm radius corner. The design review caught that standard tooling could not achieve this radius. Changing to 1mm radius before production saved weeks of delay and thousands in special tooling costs.
Step 2: Material Selection and Pretreatment
Material choice determines strength, corrosion resistance, weight, and cost. Choose carefully based on your part’s end use.
Stainless steel works for parts exposed to moisture. Food processing equipment components benefit from its corrosion resistance. Medical devices use it for cleanability.
Aluminum is lightweight and cost-effective. Aerospace and automotive prototypes often choose aluminum. It forms easily and weighs one-third of steel.
Copper excels at electrical conductivity. Custom wiring brackets and electrical components use copper where conductivity matters most.
Material pretreatment prepares the sheet metal for processing:
Deburring removes sharp edges from cut sheets. This prevents injury during handling and ensures smooth assembly later.
Cleaning wipes off oil, dust, or rust. Clean surfaces improve adhesion during later surface treatment steps.
Step 3: Cutting and Shaping
This step transforms flat raw material into the basic shape of your prototype.
CNC cutting provides precision for complex shapes. Laser cutting handles intricate contours with accuracy of ±0.1mm. Small holes and complex patterns come out exactly as designed. Punching works faster for simple shapes like square or circular holes in low-volume production.
Bending and forming uses a CNC press brake. The machine bends the cut sheet to your desired angles. A 45-degree bend for a box corner. A 90-degree bend for a bracket leg. Computer control ensures consistent bends across all parts.
Example: An automotive prototype needed curved brackets for a new engine design. Laser cutting created the complex outline. CNC press braking formed the precise 30-degree bend required. The parts matched the CAD model within 0.2mm.
Step 4: Welding and Assembly
If your prototype has multiple parts, welding and assembly come next.
Welding joins components together. MIG welding works well for aluminum. TIG welding handles stainless steel with precision. The goal is strong, seamless joints that look good and perform reliably.
Assembly fits welded parts together according to the design. This may involve adding screws, nuts, or hinges. For prototypes that need disassembly during testing, choose methods that allow parts to come apart easily.
Real example: A furniture designer created a custom chair frame with four separate pieces. Welding joined them into a single strong structure. The prototype held a 150kg load during testing, proving the design ready for production.
Step 5: Surface Treatment
Surface treatment protects your part and makes it look professional.
Sanding and polishing smooth weld lines and cut edges. A consumer product prototype like a kitchen appliance might need a mirror-like polish. Industrial parts may only need rough smoothing.
Painting or plating adds a protective layer. Epoxy paint provides color and corrosion resistance. Chrome plating adds shine for decorative parts. Zinc plating prevents rust on steel components exposed to weather.
Step 6: Quality Inspection
No prototype ships without thorough inspection.
Dimensional check verifies that the part matches your 3D model. Calipers measure key dimensions. Coordinate measuring machines provide detailed accuracy reports. If the design calls for 100mm length, the final part should be within ±0.5mm.
Functional testing proves the part works in real conditions. A custom hinge should open and close smoothly 1,000 times without failing. A bracket prototype should hold its intended load for 24 hours without bending.
Case study: A robotics company ordered custom sensor mounts. Dimensional checks confirmed all holes aligned perfectly. Functional testing showed the mounts held sensors securely during high-speed robot movements. The prototypes passed and moved to production.
What Are the Advantages of Custom Sheet Metal Prototypes?
Faster Design Validation
Standard parts require you to adapt your design to what exists. Custom prototypes adapt to your design. You test your actual idea, not a compromise. This validation happens in weeks, not months.
Reduced Risk
Finding flaws in prototypes saves money. A weak weld discovered during testing costs hundreds to fix. Discovering that same flaw after mass production costs thousands in rework and scrapped inventory. Custom prototyping finds problems when fixing them is cheap.
Tailored Exactly to Your Needs
Standard parts offer standard performance. Custom parts deliver exactly what you need. Heat resistance for furnace components. Light weight for drone frames. Conductivity for electrical applications. The part works exactly as required because you specified exactly what you needed.
Flexibility in Volumes
Need one part? Custom processing handles it. Need fifty parts? Also handles it. Production scales to your needs without requiring minimum order quantities that exceed your budget.
How to write a spec that gets priced correctly
A drawing is a contract. If it leaves a number open, the shop fills that number in with its own default. The default is rarely the one you had in mind. Put these five lines on every RFQ and most of the back-and-forth disappears before it starts.
- Flat pattern or STEP file plus a dimensioned drawing
- Material grade and thickness with the standard number
- Bend radii, K-factor and the direction of the grain
- Finish, masking and which faces stay bare
- Quantity and the assembly sequence
The point is not paperwork. Each line removes a decision the shop would otherwise make for you. A complete RFQ comes back priced. An incomplete one comes back guessed.
What actually drives the price
Buyers usually push on material because it is the line they can see. In practice the material is rarely the biggest number on a quote. These five lines decide most of it:
- blank size and nesting efficiency
- number of bends and weld joints
- material grade and thickness
- finish and masking
- batch quantity
Ask for the quote split by line. A supplier who cannot break it down is guessing, and you will pay for the guess. The line you can usually renegotiate is the tolerance band, not the raw material.
Problems you will meet, and the fix
Every process has a failure mode it prefers. The same four show up again and again on this kind of work, and none of them are mysteries once you know what to look for.
- Stretching at a bend that is tighter than the material allows
- Hole distortion when a hole sits too close to a bend line
- Weld draw on a visible face
- Springback that pulls a formed angle out of tolerance
Catch the fault on the first part, not the hundredth. A first-article check costs an hour. A bad batch costs the whole order. Write the check into the purchase order so nobody has to remember it.
What to check on the first article
The first article is the cheapest inspection you will ever buy. Use it properly and the rest of the run becomes boring, which is exactly what you want.
- Every dimension on the drawing, with the measured value written beside it.
- The material certificate, matched to the heat or lot number on the parts.
- The finish against the sample you approved, under the same light.
- Fit against the mating part, assembled rather than measured.
- Packaging, because parts that arrive damaged were never in tolerance.
Check in this order: datums, then mating features, then cosmetic faces. If the datums are wrong, every number after them is noise. Keep the report on file. When a problem shows up in month six, that document is the only thing that tells you what changed.
How to compare two quotes fairly
Two numbers are not comparable unless the scope matches. Line them up before you decide, because a low number with three gaps is not a low number.
Same drawing, same material, same finish, same inspection. Anything else is a different job wearing the same part number. Then look at what each quote leaves out. Freight, packaging, certificates and tooling are the usual gaps.
Ask each supplier to state their assumptions in writing. The one who does is usually the one who has run the process before.
Scaling from one part to a batch
The first part teaches you the process. The hundredth teaches you the process cost.
Watch three things as volume grows: setup amortisation, tool wear, and how much hand work the finish still needs. If the unit price barely moves between ten and a hundred, the cost sits in material or in hand work, not in setup. Ask which, because only one of them is negotiable.
Lead time behaves the same way. A one-off is scheduled around other jobs. A repeat order is scheduled around your forecast. Give the shop a forecast and the lead time gets shorter, not longer.
How to read a supplier's quote
A quote is a short document with a long shadow. Four things in it decide whether the job runs smoothly, and only one of them is the price.
- The scope line. It should name the process, the material and the finish, not just the part.
- The tolerance basis. General tolerance or the drawing, and which standard it follows.
- The exclusions. Tooling, freight, certificates and inspection are the usual omissions.
- The validity date. Material prices move, and an open-ended quote is a promise nobody can keep.
Read the exclusions before you read the total. A quote that leaves out tooling is not cheaper. It is a quote for a different job.
What Challenges Come With Non-Standard Parts?
Higher Per-Unit Cost
Custom work costs more per piece than mass-produced standards. Setup time, programming, and individual attention all add expense. For low volumes, this is acceptable. For high volumes, the economics shift toward standard production.
Longer Lead Time for First Part
The first custom part takes time to design, program, and produce. Subsequent parts go faster once the process is established. Planning ahead accommodates this initial lead time.
Requires Clear Specifications
Custom fabrication needs clear instructions. Vague requirements produce uncertain results. Detailed drawings, material specifications, and tolerance requirements ensure the part meets your expectations.
Sheet metal prototype non-standard parts processing creates custom components tailored to specific needs. Unlike standard parts that require design compromises, custom prototypes match your exact requirements.
The process follows six clear steps. Design lays the foundation with 3D modeling and review. Material selection chooses the right building block. Cutting and shaping create the basic form. Welding and assembly combine components. Surface treatment protects and beautifies. Quality inspection ensures everything works.
Benefits include faster design validation, reduced risk, exact tailoring to needs, and volume flexibility. Challenges include higher per-unit costs and the need for clear specifications. For low-volume applications, prototyping, and special scenarios, custom fabrication delivers value that standard parts cannot match.
Whether you need one prototype for testing or fifty units for beta launch, custom sheet metal processing turns your ideas into functional parts.
Our solution for Sheet Metal Prototype Non-Standard Parts
YiguProto runs sheet metal fabrication in house, from a single prototype to a production batch. We quote the process, the material and the finish as separate lines, so you can see where the money goes instead of arguing with one number.
Send a STEP file or a drawing and you get a DFM report in one to two business days. It flags the features that add cost and the features that will not hold tolerance on the process you picked.
Every order ships with an inspection report on the features you call out. If a part misses, we make it again. Ready to price a part? Start with a free quote and DFM review, or read more about our sheet metal fabrication. You can also talk to an engineer before you commit to a drawing.
FAQ about Sheet Metal Prototype Non-Standard Parts
How do I compare two quotes fairly?
Match the scope first: same drawing, same material, same finish, same inspection. Then read the exclusions. Freight, tooling and certificates are the usual gaps, and a low number with three gaps is not a low number.
What should I check before approving the parts?
Datums first, then the features that mate, then the cosmetic faces. Ask for a dimensional report, a material certificate and a finish sample. A part can be inside every tolerance and still not fit, so assemble one before you sign.
Can Sheet Metal Prototype Non-Standard Parts be made in small quantities?
Yes, and small quantities are where a good supplier earns the next order. Setup dominates the price at low volume, so the cheapest route is usually the one with the fewest operations, not the cheapest material.
What tolerance can you hold on Sheet Metal Prototype Non-Standard Parts?
The working default is ±0.2 mm on formed features, ±0.1 mm on laser-cut holes. Tighter than that the process changes and so does the price, because every step tighter adds inspection time. Call out only the faces that mate with something else and leave the rest on the general tolerance.
Is there a minimum order quantity?
No hard minimum. One part is fine. What changes with volume is which costs dominate, so a single unit is priced mostly on setup and a thousand units are priced mostly on cycle time and material.
How long does a first article take?
Usually a few business days once the drawing is frozen, and longer if tooling is involved. The date we give you is the date we confirm in writing, not the date we hope for.
The short version
Sheet Metal Prototype Non-Standard Parts rewards the buyer who reads the data sheet and the drawing together. Pick the option for the property that matters, not for the price per kilo.
Tighten only what mates. Test a sample before the run. Then let the process do the rest.