
Die Casting
What Are Key Precautions for Die-Casting Processing of Aluminum Parts?
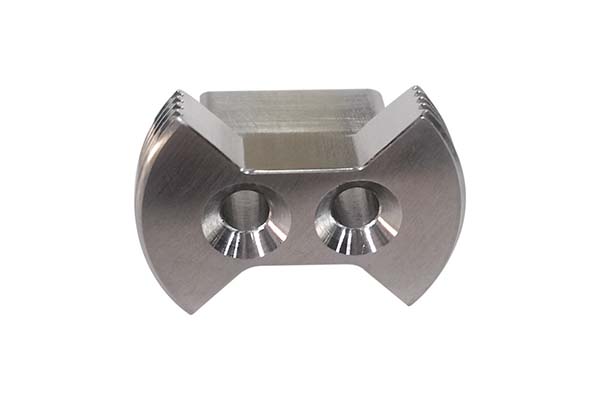
Aluminum die casting produces lightweight, strong parts for cars, electronics, and aircraft. But getting good parts consistently takes more than just pouring metal into a mold. Small mistakes in material choice, mold design, or process settings create defects like porosity, cracks, or incomplete filling. A single oversight can scrap thousands of parts. So what exactly must you watch for at each stage?
How Do You Choose the Right Aluminum Alloy?
Match alloy properties to part function
Different aluminum alloys serve different purposes. Pick the wrong one and your part fails early. Here is how common alloys compare:
| Alloy | Key Properties | Best Applications | Critical Precautions |
|---|---|---|---|
| ADC12 | Good castability, moderate strength (310MPa) | Engine housings, gearboxes, general parts | Avoid below -10°C—high silicon causes brittleness in cold |
| A360 | High toughness, impact resistant (10% elongation) | Wheels, suspension parts, load-bearing | Keep under 150°C—heat destroys toughness |
| A356 | Heat resistant to 250°C, good corrosion resistance | Exhaust manifolds, EV motor cases | Higher magnesium (0.2-0.4%) helps heat resistance but wears tools faster |
| AlSi17CuMg | Very hard (420MPa), wear resistant | Hydraulic valve cores, precision gears | Control iron strictly—keep under 0.8% to avoid brittle compounds |
Test before committing
Never assume an alloy works just from datasheets. For parts needing both heat resistance and toughness, run small batches first. An EV battery frame might seem right for A356, but you may need to adjust copper content. Test 50-100 samples and verify real performance before full production.
Watch for alloy interactions
Some alloys react badly with certain mold materials or release agents. High-silicon alloys like ADC12 can erode mold steel faster than low-silicon options. Check compatibility with your tooling before selecting.
What Mold Design Precautions Prevent Problems?
Compensate for shrinkage correctly
Aluminum shrinks 1.6-1.8% as it cools. Ignore this and parts come out undersized. Apply these rules:
- For most parts, make mold cavities 1.6-1.8% larger than final part dimensions
- For ribs and bosses, add 0.2mm extra thickness to prevent shrinkage thinning
- For thin walls under 2mm, reduce compensation to 1.2-1.4% to avoid overfilling
Design gates and runners for smooth flow
Poor gate design causes undercasting and porosity. Follow these guidelines:
Main runner size: Make it 15-20% larger than the gate sleeve entrance. If the sleeve is 20mm², runners need 23-24mm².
Gate thickness: Set at 40-60% of part wall thickness. For a 5mm thick part, gates should be 2-3mm. Too thin and metal freezes early. Too thick and you waste material.
Plan exhaust to remove air
Trapped air creates porosity. For deep cavities over 50mm, use three-stage exhaust—main groove plus auxiliary needles plus vacuum valve. Total exhaust area should be at least one-third of gate area. If your gate is 30mm², exhaust needs 10mm² minimum.
Position ejector pins carefully
Wrong pin placement deforms parts. For general parts, space pins at 8mm or less. For thin walls under 1.5mm, go down to 5mm spacing. A 100mm square thin cover needs at least 9 pins in a 3×3 grid.
Calculate ejection force as part weight (kg) × 8-10 safety factor. This ensures pins are strong enough without damaging the part.
What Process Settings Demand Close Attention?
Control temperatures precisely
Temperature swings create defects fast. Hold these ranges:
| Temperature Type | Control Range | Special Case Adjustments |
|---|---|---|
| Aluminum liquid | 670-720°C | Thin walls under 2mm: use 700-720°C for better flow |
| Thick walls over 10mm: use 670-690°C to reduce shrinkage | ||
| Mold preheat | 180-250°C | Large parts over 5kg: go to 280°C |
| Never start below 150°C—cold molds cause undercasting |
Set injection parameters right
Injection speed controls how metal fills the cavity. Run at 0.5-1.2 meters per second. For complex parts with thin grooves, use stepped speeds—start at 0.5, increase to 0.8, then 1.0 m/s. This prevents splashing while filling details.
Pressurization build-up time matters too. Standard parts need 3-8 seconds of pressure after filling. Load-bearing parts like suspension brackets need 10 seconds to fully compact.
Consider special processes for demanding parts
Vacuum die casting pulls air from the cavity before injection. When vacuum exceeds 90kPa, porosity drops below 1%. Use this for pressure-tight parts like hydraulic cylinders.
Oxygenated die casting injects pure oxygen into the cavity. Oxygen reacts with aluminum to form fine oxides instead of air bubbles, reducing inclusions by 70%. Perfect for smartphone frames needing perfect surfaces.
Manage cooling and holding times
Holding time keeps pressure on solidifying metal to feed shrinkage. Standard is 10-25 seconds. For every 1mm of gate thickness, add 2 seconds. A 5mm gate needs 18-20 seconds.
Cooling time before ejection runs 8-20 seconds. For thick sections, use cooling inserts—copper with water channels—to cut cooling time by 30% while maintaining quality.
How Do You Prevent Common Defects?
Undercasting fixes
Parts missing material usually come from gates too small or metal too cold. Expand gate area by 20%. Raise aluminum temperature 10-15°C. Check that injection speed isn’t too slow for thin sections.
Flash control
Flash means metal escaping the mold cavity. Usually from low clamping force or worn parting surfaces. Increase clamping force to 85% of machine rating. Grind and repair worn surfaces. Check that mold isn’t overfilling.
Shrinkage solutions
Internal voids happen when feeding channels can’t supply enough metal during solidification. Add open risers with necks 1.5 times gate thickness. Extend holding time by 3-5 seconds. Ensure thick sections have adequate feeding paths.
Porosity prevention
Air holes come from poor exhaust or moisture in metal. Add exhaust plugs at locations where air traps. Dry raw materials at 120-150°C for 4-6 hours before melting. Consider vacuum assist for critical parts.
Crack elimination
Cracks start at sharp corners under stress or from uneven cooling. Increase fillet radii to 3mm minimum. Add cooling channels near corners to balance temperature. Slow cooling rates in problem areas.
| Defect | Primary Causes | Quick Fixes |
|---|---|---|
| Undercasting | Small gates, cold metal | Enlarge gates 20%, raise temp 10-15°C |
| Flash | Low clamp force, worn mold | Increase force to 85%, repair surfaces |
| Shrinkage | Poor feeding, short hold time | Add risers, extend hold 3-5 seconds |
| Porosity | Bad exhaust, wet metal | Add exhaust plugs, dry materials |
| Cracks | Sharp corners, uneven cooling | Increase radii to R3, balance cooling |
What Post-Treatment Steps Ensure Quality?
Machining precautions
CNC work after casting needs care. Leave 0.3-0.5mm allowance per side for machining. For complex curves, allow 0.8mm. Use PCD (polycrystalline diamond) inserts—they last 3-5 times longer than carbide for aluminum.
Surface treatment considerations
Micro-arc oxidation builds a hard ceramic coating. Aim for 15-25μm thickness. For corrosion-resistant parts, this should pass 2000+ hours salt spray testing.
Composite coatings like nickel-phosphorus with PTFE reduce friction by 40% for sliding parts. Apply double layers for best wear resistance.
Defect repair when needed
For non-critical parts, small defects can be fixed. Argon arc welding works if current stays under 90A and interlayer temperature below 150°C. This prevents thermal cracks.
For tiny pores under 0.1mm, metal penetrant impregnation seals them. Use low-viscosity sealants that soak deep into the metal.
Inspection must be thorough
Dimensional checks on critical features need CMM (coordinate measuring machine) accuracy within ±0.15mm.
Tensile tests for structural parts must hit 320MPa minimum strength and 2% elongation.
Leak testing with helium mass spectrometry should show less than 1×10⁻⁶ mbar·L/s for pressure-containing parts like EV cooling plates.
X-ray inspection should meet ASTM E446 Level B for internal soundness—no significant porosity or inclusions.
How to write a spec that gets priced correctly
A drawing is a contract. If it leaves a number open, the shop fills that number in with its own default. The default is rarely the one you had in mind. Put these five lines on every RFQ and most of the back-and-forth disappears before it starts.
- 3D model with the parting line marked
- Alloy grade and the standard it meets
- Wall thickness and draft on every face
- Machining allowance on the faces that will be cut
- Pressure tightness or porosity class
The point is not paperwork. Each line removes a decision the shop would otherwise make for you. A complete RFQ comes back priced. An incomplete one comes back guessed.
What actually drives the price
Buyers usually push on material because it is the line they can see. In practice the material is rarely the biggest number on a quote. These five lines decide most of it:
- die steel and cavity count
- part weight and wall section
- draft and slide count
- porosity requirement
- machining allowance
Ask for the quote split by line. A supplier who cannot break it down is guessing, and you will pay for the guess. The line you can usually renegotiate is the tolerance band, not the raw material.
Problems you will meet, and the fix
Every process has a failure mode it prefers. The same four show up again and again on this kind of work, and none of them are mysteries once you know what to look for.
- Cold shuts where two flow fronts meet
- Porosity that shows up only after machining
- Soldering on a hot spot in the die
- Shrinkage voids in a heavy section
Catch the fault on the first part, not the hundredth. A first-article check costs an hour. A bad batch costs the whole order. Write the check into the purchase order so nobody has to remember it.
What to check on the first article
The first article is the cheapest inspection you will ever buy. Use it properly and the rest of the run becomes boring, which is exactly what you want.
- Every dimension on the drawing, with the measured value written beside it.
- The material certificate, matched to the heat or lot number on the parts.
- The finish against the sample you approved, under the same light.
- Fit against the mating part, assembled rather than measured.
- Packaging, because parts that arrive damaged were never in tolerance.
Check in this order: datums, then mating features, then cosmetic faces. If the datums are wrong, every number after them is noise. Keep the report on file. When a problem shows up in month six, that document is the only thing that tells you what changed.
How to compare two quotes fairly
Two numbers are not comparable unless the scope matches. Line them up before you decide, because a low number with three gaps is not a low number.
Same drawing, same material, same finish, same inspection. Anything else is a different job wearing the same part number. Then look at what each quote leaves out. Freight, packaging, certificates and tooling are the usual gaps.
Ask each supplier to state their assumptions in writing. The one who does is usually the one who has run the process before.
Scaling from one part to a batch
The first part teaches you the process. The hundredth teaches you the process cost.
Watch three things as volume grows: setup amortisation, tool wear, and how much hand work the finish still needs. If the unit price barely moves between ten and a hundred, the cost sits in material or in hand work, not in setup. Ask which, because only one of them is negotiable.
Lead time behaves the same way. A one-off is scheduled around other jobs. A repeat order is scheduled around your forecast. Give the shop a forecast and the lead time gets shorter, not longer.
How to read a supplier's quote
A quote is a short document with a long shadow. Four things in it decide whether the job runs smoothly, and only one of them is the price.
- The scope line. It should name the process, the material and the finish, not just the part.
- The tolerance basis. General tolerance or the drawing, and which standard it follows.
- The exclusions. Tooling, freight, certificates and inspection are the usual omissions.
- The validity date. Material prices move, and an open-ended quote is a promise nobody can keep.
Read the exclusions before you read the total. A quote that leaves out tooling is not cheaper. It is a quote for a different job.
What to send with the first order
The first order sets the pattern for every order after it. Send a complete package once and the shop files it, and the second order takes a fraction of the time.
- A STEP or native model plus a PDF drawing carrying the same revision letter.
- The material callout by standard number, not by trade name.
- The finish and the exact faces it applies to.
- Any test the part must pass: fit, seal, drop, salt spray, dielectric.
- A contact who can answer a question inside one working day.
Then write down what was agreed. An email that confirms the material, the finish and the date is worth more than a longer purchase order that leaves them open.
Industry Experience: What Actually Causes Problems
I have watched dozens of aluminum die casting lines struggle with defects. The pattern is always the same. Problems trace back to early decisions—alloy selection, mold design, or process setup—not random bad luck.
One automotive supplier kept getting cracks in suspension brackets. Every investigation pointed to process. But the real cause was a 0.2mm sharp corner in the mold design. Nobody caught it in review. Changing the radius to 3mm eliminated cracks entirely.
An electronics manufacturer fought porosity in smartphone frames for months. They tried higher pressure, better exhaust, vacuum assist. Nothing worked consistently. Finally they traced it to moisture in recycled scrap. Drying material before melting cut defects by 80%.
The lesson? Check fundamentals first. Look at design, material, and basic settings before chasing exotic solutions. Most defects come from simple causes.
Aluminum die casting rewards attention to detail at every stage. Start with alloy selection matched to part function—don’t guess, test. Design molds with proper shrinkage compensation, gate sizing, and exhaust. Control process parameters within tight ranges—temperature, speed, pressure, and timing all matter. Watch for common defects and know how to fix each one. Finish with appropriate post-treatment and thorough inspection. Following these precautions consistently pushes yield rates above 98% while keeping defects below 2%. That is the difference between struggling with scrap and running profitable production.
Our solution for Key Precautions
YiguProto runs die casting in house, from a single prototype to a production batch. We quote the process, the material and the finish as separate lines, so you can see where the money goes instead of arguing with one number.
Send a STEP file or a drawing and you get a DFM report in one to two business days. It flags the features that add cost and the features that will not hold tolerance on the process you picked.
Every order ships with an inspection report on the features you call out. If a part misses, we make it again. Ready to price a part? Start with a free quote and DFM review, or read more about our die casting. You can also talk to an engineer before you commit to a drawing.
FAQ about Key Precautions
What files do you need in order to quote?
A STEP file plus a PDF drawing that carries the same revision letter. The model carries the geometry and the drawing carries the intent. When the two disagree, the shop picks one, and it is never the one you meant.
Does the process work for prototypes as well as production?
Yes, and that is usually the point. Running the prototype on the production process removes a whole class of surprises, because the part you test is made the same way as the part you sell.
How much does Key Precautions cost?
Price comes from five lines: material, machine or tool time, setup, finishing and inspection. The material itself is usually the smallest of them. Send a drawing and we will split the quote so you can see which line is doing the damage.
What tolerance can you hold on Key Precautions?
The working default is ±0.1 mm on cast features, ±0.05 mm after machining. Tighter than that the process changes and so does the price, because every step tighter adds inspection time. Call out only the faces that mate with something else and leave the rest on the general tolerance.
Can Key Precautions be made in small quantities?
Yes, and small quantities are where a good supplier earns the next order. Setup dominates the price at low volume, so the cheapest route is usually the one with the fewest operations, not the cheapest material.
How long does a first article take?
Usually a few business days once the drawing is frozen, and longer if tooling is involved. The date we give you is the date we confirm in writing, not the date we hope for.
The short version
Key Precautions rewards the buyer who reads the data sheet and the drawing together. Pick the option for the property that matters, not for the price per kilo.
Tighten only what mates. Test a sample before the run. Then let the process do the rest.