
Rapid Prototyping
What Is Prototype Assembly, and How to Do It Well for Product Success?
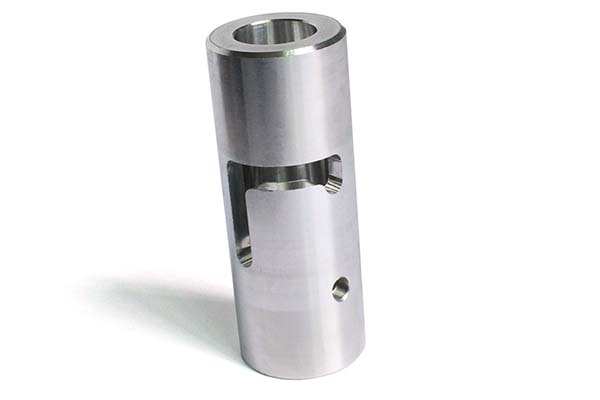
Prototype assembly is the process of joining individual prototype parts into a complete, working model. It is the moment when your design stops being a collection of separate components and becomes a product you can test, show, and evaluate.
Key takeaways
- Every assembly step serves a specific purpose. Knowing these goals keeps your effort focused.
- Following a structured process prevents mistakes and ensures consistent results.
- Choosing the right tools and connection methods depends on your parts and goals.
- Small mistakes during assembly can ruin a prototype or invalidate test results.
What Are the Core Goals of Prototype Assembly?
Every assembly step serves a specific purpose. Knowing these goals keeps your effort focused.
Verify Assembly Feasibility
The first goal is simple: confirm that parts fit together as designed. No forcing, no misalignment, no excessive gaps.
- What to check: Do screw holes line up? Do snap features engage without breaking? Do mating surfaces meet flush?
- Real example: A client assembled a 3D-printed drone frame and discovered the arms sat 2mm higher than the central body. The CAD model showed a perfect fit, but warping during printing caused the error. Assembly revealed the problem before mold cutting.
Validate Functional Performance
Once assembled, the prototype must work as intended. Moving parts should move. Load-bearing parts should hold weight. Integrated features like sensors or lights should function.
- What to test: Hinge rotation, gear meshing, button actuation, electrical continuity.
- Real example: A mechanical prototype of a folding chair included a locking hinge. During assembly testing, the hinge clicked into place but released under light load. The design needed a stronger detent mechanism.
Assess Aesthetic Consistency
For products where appearance matters, assembly reveals visual flaws. Part alignment, surface finish consistency, and glue residue all affect the final look.
- What to evaluate: Do visible seams line up? Is the color uniform across parts? Are there glue marks or scratches?
- Real example: A decorative horse ornament assembled from 3D-printed parts showed a gap between the saddle and body. The gap caught light and looked like a defect. Sanding the mating surfaces fixed the issue before producing final samples.
Identify Design Iteration Needs
Assembly uncovers flaws that drive design improvements. Better to find them now than after tooling.
- What to look for: Parts that crack under assembly stress, connections that feel loose, features that are hard to access.
- Real example: A horse ornament’s leg detached when lifted. The original design relied on glue alone. Adding a small screw through the leg into the body made the connection secure.
What Is the Step-by-Step Prototype Assembly Workflow?
Following a structured process prevents mistakes and ensures consistent results.
Pre-Assembly Preparation
Do not skip preparation. Clean parts and check them before you start.
Part Cleaning: Remove dust, oil, and support material. For 3D-printed parts, wipe with isopropyl alcohol. Use compressed air at 30 to 50 PSI to blow out small holes and crevices. Sand rough edges with 400-grit sandpaper, then progress to 800 and 1200 grit for smooth mating surfaces.
Part Inspection: Check every part for defects. Look for cracks, warping, or dimensional errors. Measure critical features with calipers. A hole that should be 3mm but measures 2.8mm will cause assembly failure.
Tool and Material Preparation: Gather everything you need before starting. Screwdrivers, tweezers, clamps, glue, screws, and any fixtures. Having tools ready keeps your focus on the assembly.
Core Assembly Sequence
Build in a logical order. Start with the main structure, then add secondary parts, and finish with details.
Step 1: Assemble the main structure. Begin with the largest, most stable part. This becomes your base. For a horse ornament, join the body halves first. Ensure alignment so the spine is straight.
Step 2: Add structural secondary parts. Attach components that support the main structure. For the horse, mount the legs. Insert dowels into pre-drilled holes and apply a small amount of glue. Check that the horse stands level without wobbling.
Step 3: Install functional components. Add parts that move or operate. For the horse, attach the tail hinge. Screw one side to the tail and the other to the body. Test that the tail swings freely through its designed range.
Step 4: Attach decorative parts. Add non-structural elements that enhance appearance. Glue the saddle to the horse’s back. Align the bridle with the head. Wipe away any excess glue immediately.
Post-Assembly Inspection and Testing
Never assume assembly succeeded. Verify with tests.
Fit check: Inspect gaps visually. Use feeler gauges for precise measurement. Gaps should not exceed 0.2mm on visible seams. No parts should require force to stay in place.
Stability test: Place free-standing prototypes on a flat surface. Check for wobble. The prototype should stand without leaning more than one degree.
Functional test: Operate all moving parts. Hinges should swing, gears should turn, buttons should click. If the prototype has electronics, test lights, sensors, or displays.
Durability test: Apply light stress to connections. Gently pull parts that might detach. Apply 5 to 10 Newtons of force, equivalent to a light human touch. No parts should crack, deform, or separate.
What Tools and Materials Do You Need?
Choosing the right tools and connection methods depends on your parts and goals.
Tool Selection Guide
| Tool Category | Examples | Best For |
|---|---|---|
| Assembly tools | Screwdrivers (Phillips #00 to #2, flathead 1-3mm), tweezers, wrenches, calipers | Securing screws, handling small parts, measuring gaps |
| Finishing tools | Sandpaper (400-2000 grit), files, cotton swabs | Smoothing edges, cleaning glue residue |
| Fixturing tools | Clamps, vises, alignment jigs | Holding parts steady during glue curing or screw tightening |
Connection Material Selection
| Connection Method | Best For | Strength | Disassembly? |
|---|---|---|---|
| Cyanoacrylate glue (super glue) | 3D-printed plastics, small non-structural parts | Medium (2-5 kg force) | No (permanent) |
| Epoxy resin | Metal-plastic combinations, load-bearing parts | High (10-15 kg force) | No (permanent) |
| Screws (self-tapping, M1.6 to M4) | Parts needing disassembly, structural connections | High (adjustable) | Yes |
| Snap fits | 3D-printed plastic parts, low-load components | Low to medium (1-3 kg force) | Yes |
Practical tip: For prototypes you may modify later, use screws or snap fits. For permanent assemblies where strength matters, use epoxy. For quick fixes where appearance is secondary, super glue works.
What Precautions Prevent Assembly Failures?
Small mistakes during assembly can ruin a prototype or invalidate test results.
Handle Parts Gently
Delicate features break easily. Use tweezers for small parts like thin tails or tiny ears. Apply pressure only at thick sections. For metal parts, avoid dropping. Even small impacts can cause micro-cracks in cast aluminum or machined components.
Ensure Precise Alignment
Test fit before applying glue or tightening screws. Dry-fit parts to check alignment. If a part does not fit, sand small areas rather than forcing it. Forcing cracks 3D-printed parts.
Use alignment tools when needed. An angle ruler confirms that a head sits at 90 degrees to the body. A center punch marks alignment points for circular parts.
Apply Connection Materials Correctly
For glue, apply a thin even layer. One to two millimeters is enough. Excess glue oozes out and ruins appearance. Use a toothpick to apply glue precisely in small gaps.
For screws, use a torque screwdriver on small sizes. M1.6 to M3 screws in plastic should not exceed 0.5 Newton-meters of torque. Over-tightening strips threads and cracks parts.
Document the Process
Take photos at each step. Capture part alignment, glue application, and final assembly. If something fails later, photos help diagnose the cause.
Record measurements. Note gap sizes, screw torque, and glue drying time. This data helps replicate successful assemblies or troubleshoot failures in future iterations.
How to write a spec that gets priced correctly
A drawing is a contract. If it leaves a number open, the shop fills that number in with its own default. The default is rarely the one you had in mind. Put these five lines on every RFQ and most of the back-and-forth disappears before it starts.
- A model you are willing to freeze for the build
- The question the prototype must answer
- Process and material that can answer it
- Tolerance on the features under test
- How many iterations you have budgeted
The point is not paperwork. Each line removes a decision the shop would otherwise make for you. A complete RFQ comes back priced. An incomplete one comes back guessed.
What actually drives the price
Buyers usually push on material because it is the line they can see. In practice the material is rarely the biggest number on a quote. These five lines decide most of it:
- process choice
- part size and feature count
- material
- finish and fit checks
- number of iterations
Ask for the quote split by line. A supplier who cannot break it down is guessing, and you will pay for the guess. The line you can usually renegotiate is the tolerance band, not the raw material.
Problems you will meet, and the fix
Every process has a failure mode it prefers. The same four show up again and again on this kind of work, and none of them are mysteries once you know what to look for.
- A prototype that is too good and hides a production problem
- A prototype that is too rough to test the real question
- Material chosen for speed rather than for the test
- No measurement plan, so the result is an opinion
Catch the fault on the first part, not the hundredth. A first-article check costs an hour. A bad batch costs the whole order. Write the check into the purchase order so nobody has to remember it.
What to check on the first article
The first article is the cheapest inspection you will ever buy. Use it properly and the rest of the run becomes boring, which is exactly what you want.
- Every dimension on the drawing, with the measured value written beside it.
- The material certificate, matched to the heat or lot number on the parts.
- The finish against the sample you approved, under the same light.
- Fit against the mating part, assembled rather than measured.
- Packaging, because parts that arrive damaged were never in tolerance.
Check in this order: datums, then mating features, then cosmetic faces. If the datums are wrong, every number after them is noise. Keep the report on file. When a problem shows up in month six, that document is the only thing that tells you what changed.
How to compare two quotes fairly
Two numbers are not comparable unless the scope matches. Line them up before you decide, because a low number with three gaps is not a low number.
Same drawing, same material, same finish, same inspection. Anything else is a different job wearing the same part number. Then look at what each quote leaves out. Freight, packaging, certificates and tooling are the usual gaps.
Ask each supplier to state their assumptions in writing. The one who does is usually the one who has run the process before.
Scaling from one part to a batch
The first part teaches you the process. The hundredth teaches you the process cost.
Watch three things as volume grows: setup amortisation, tool wear, and how much hand work the finish still needs. If the unit price barely moves between ten and a hundred, the cost sits in material or in hand work, not in setup. Ask which, because only one of them is negotiable.
Lead time behaves the same way. A one-off is scheduled around other jobs. A repeat order is scheduled around your forecast. Give the shop a forecast and the lead time gets shorter, not longer.
How to read a supplier's quote
A quote is a short document with a long shadow. Four things in it decide whether the job runs smoothly, and only one of them is the price.
- The scope line. It should name the process, the material and the finish, not just the part.
- The tolerance basis. General tolerance or the drawing, and which standard it follows.
- The exclusions. Tooling, freight, certificates and inspection are the usual omissions.
- The validity date. Material prices move, and an open-ended quote is a promise nobody can keep.
Read the exclusions before you read the total. A quote that leaves out tooling is not cheaper. It is a quote for a different job.
What to send with the first order
The first order sets the pattern for every order after it. Send a complete package once and the shop files it, and the second order takes a fraction of the time.
- A STEP or native model plus a PDF drawing carrying the same revision letter.
- The material callout by standard number, not by trade name.
- The finish and the exact faces it applies to.
- Any test the part must pass: fit, seal, drop, salt spray, dielectric.
- A contact who can answer a question inside one working day.
Then write down what was agreed. An email that confirms the material, the finish and the date is worth more than a longer purchase order that leaves them open.
What Are Typical Application Scenarios?
Prototype assembly applies across industries. The goals shift based on what you are building.
Consumer Goods and Decorative Prototypes
Examples include 3D-printed figurines, toy cars, and decorative ornaments.
Key focus is aesthetic alignment. Parts must fit with minimal visible seams. Glue must not leave residue. Moving parts like wheels or tails should function smoothly.
Common challenge: 3D-printed parts have layer lines that affect fit. Sanding mating surfaces solves this but takes time.
Mechanical and Industrial Prototypes
Examples include automotive brackets, drone frames, and small machinery.
Key focus is load-bearing strength and assembly feasibility. Parts must hold weight and align with production components like motors or bearings.
Common challenge: Joining metal and plastic parts. Different thermal expansion rates can cause gaps after temperature changes. Testing reveals whether this matters for your application.
Electronics Prototypes
Examples include smartphone casings with integrated sensors or LED-lit displays.
Key focus is securing delicate components without damage. Wires must route through small channels without kinking. Sensors must mount in precise locations.
Common challenge: Testing functionality after assembly. A light that works on the bench may fail after the case is assembled if wires get pinched.
Prototype assembly is where your design proves itself. It reveals fit issues, functional flaws, and aesthetic problems that no CAD model or individual part inspection can show. A structured workflow—prepare, assemble in sequence, inspect, and test—ensures you catch these issues early. Choose tools and connection methods that match your parts and goals. Handle components gently, align them precisely, and document what you learn. Whether you are assembling a decorative horse ornament or a complex industrial mechanism, doing assembly well saves time, improves testing, and builds confidence before you commit to mass production tools.
Our solution for Prototype Assembly
YiguProto runs rapid prototyping in house, from a single prototype to a production batch. We quote the process, the material and the finish as separate lines, so you can see where the money goes instead of arguing with one number.
Send a STEP file or a drawing and you get a DFM report in one to two business days. It flags the features that add cost and the features that will not hold tolerance on the process you picked.
Every order ships with an inspection report on the features you call out. If a part misses, we make it again. Ready to price a part? Start with a free quote and DFM review, or read more about our rapid prototyping. You can also talk to an engineer before you commit to a drawing.
FAQ about Prototype Assembly
What material should I specify?
Specify by standard, not by trade name. A trade name can change under you between two orders; a standard number cannot. Then add the one property that actually decides the part, whether that is strength, heat resistance or chemical exposure.
Can Prototype Assembly be made in small quantities?
Yes, and small quantities are where a good supplier earns the next order. Setup dominates the price at low volume, so the cheapest route is usually the one with the fewest operations, not the cheapest material.
What should I check before approving the parts?
Datums first, then the features that mate, then the cosmetic faces. Ask for a dimensional report, a material certificate and a finish sample. A part can be inside every tolerance and still not fit, so assemble one before you sign.
What is Prototype Assembly used for?
Prototype Assembly turns up wherever the part has to do a real job at a predictable cost: brackets, housings, fixtures, covers and the fittings that hold them together. The honest test is whether the properties match the load and the environment, not whether the material is fashionable.
What happens if a part is out of specification?
We measure it against the same drawing you approved and, if it misses, we make it again. What matters is that the report exists, because a disagreement without data is just an opinion.
How much does Prototype Assembly cost?
Price comes from five lines: material, machine or tool time, setup, finishing and inspection. The material itself is usually the smallest of them. Send a drawing and we will split the quote so you can see which line is doing the damage.
The short version
Prototype Assembly rewards the buyer who reads the data sheet and the drawing together. Pick the option for the property that matters, not for the price per kilo.
Tighten only what mates. Test a sample before the run. Then let the process do the rest.