
Die Casting
What Is Simple Die Casting and How to Implement It Successfully?
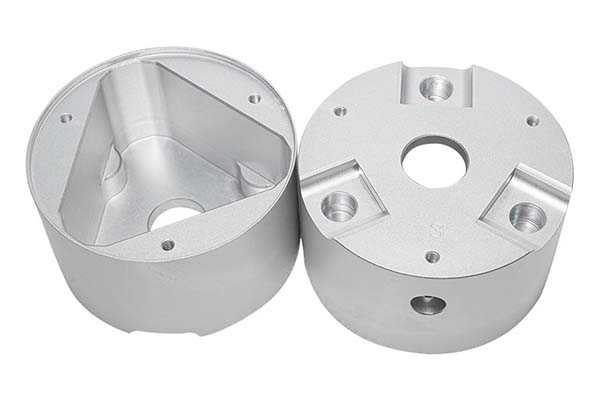
Simple die casting is metal forming stripped down to its essentials. It uses gravity to fill molds and light manual pressure to improve quality—no million-dollar machines, no complex hydraulics. This makes it perfect for small workshops, prototype development, educational projects, and emergency repairs.
What Exactly Is Simple Die Casting?
Basic definition
Simple die casting is a low-cost metal-forming process that fills mold cavities with molten metal using gravity, then applies manual or light mechanical pressure to reduce porosity and improve dimensional stability. It strips away industrial complexity—no hydraulic systems, no cooling circuits, no automated feeding.
The goal isn’t mass production. It’s rapid validation: creating functional parts to test designs, repair equipment, or demonstrate casting principles at a fraction of industrial cost.
How it differs from industrial die casting
| Characteristic | Simple Die Casting | Industrial Die Casting |
|---|---|---|
| Pressure source | Manual/light mechanical (5-50 kN) | Hydraulic (100-50,000 kN) |
| Equipment cost | $500-$5,000 | $500,000-$5 million |
| Setup time | 1-2 hours | 1-3 months |
| Tolerance | IT12-IT14 (±0.5-1.0mm) | IT8-IT11 (±0.05-0.2mm) |
| Surface finish | Ra 6.3-12.5 μm | Ra 1.6-3.2 μm |
| Batch size | 1-100 parts | 10,000+ parts |
What Materials and Tools Do You Need?
Metal alloys that work
Zinc alloys like ZAMAK 3 are easiest—melting point 380-385°C, low defect risk. Aluminum alloys like ADC12 work well at 570-620°C but need more care. For educational demos, Wood’s metal melts at just 70°C —safe for beginners.
Avoid high-melt metals like cast iron or steel. They require industrial furnaces you won’t have.
Recycled aluminum works for practice. Clean it thoroughly—remove paint and plastic. Soda cans are free material but melt them outside; the coatings burn off with smoke.
Mold materials
Steel plates at least 20mm thick (A36 or 45# steel) are standard. Cast iron holds heat better and expands less. Machine cavities with wire cutting to achieve Ra ≤6.3 μm for easy demolding.
Drill 2-3mm exhaust holes at the cavity’s highest point. This single step prevents most porosity.
Essential tools
Melting: Small electric furnace at 500-1000W or coke-fired crucible. Propane torches heat unevenly—avoid them.
Pressurization: Modified screw jack at 5-10 kN capacity or lever press. Torque wrench helps apply even pressure.
Safety: Heat-resistant gloves, face shield, dry powder fire extinguisher. Hot metal demands respect.
Auxiliaries: Release agent—graphite powder mixed with machine oil at 1:3 ratio. Wire brushes for cleaning. Acetone for degreasing.
How Do You Prepare the Mold?
Step 1: Thorough cleaning
Scrub the cavity with a wire brush to remove oxide scales. Then wipe with acetone to eliminate oil stains. Even trace oil burns during casting, creating porosity.
Step 2: Preheating
Heat the mold to 150-200°C using a propane torch and temperature gun. Cold molds cause rapid solidification, leading to shrinkage and underfilling.
Step 3: Release agent application
Spray or brush a thin layer of release agent at 0.1-0.2mm thick. Let it dry for 2-3 minutes. This barrier prevents metal from sticking to the mold.
| Preparation Step | Key Action | Why It Matters |
|---|---|---|
| Cleaning | Wire brush + acetone | Removes oxides and oil |
| Preheating | 150-200°C | Prevents premature solidification |
| Release agent | 0.1-0.2mm thin layer | Prevents sticking |
How Do You Melt and Pour?
Temperature control
Zinc alloys: Heat to 400-420°C. Look for bright, clear liquid with no dark oxides.
Aluminum alloys: Heat to 720-760°C. Liquid turns bright silver. Stir with steel rod to remove floating impurities.
Use a digital thermometer. Overheating increases oxides. Underheating causes poor fluidity.
Pouring technique
Tilt the crucible and pour slowly along the mold’s side wall —not directly into the cavity. This avoids splashing that traps air and protects any cores.
Stop when metal reaches the overflow groove, leaving 1-2mm space for shrinkage. Overfilling creates flash that’s hard to trim.
How Do You Apply Pressure and Cool?
Timing matters
Apply pressure immediately after pouring —within 5-10 seconds. Delays let metal start solidifying, making pressure ineffective.
Pressure amount
Use a screw jack to apply 5-10 kN of force. For small parts under 100g, 5 kN is enough. For larger parts under 500g, use 10 kN.
Maintain pressure for 5-10 minutes. This compresses air gaps and ensures complete cavity filling.
Cooling
Let the part cool under pressure until mold surface temperature drops below 100°C —touchable with gloves. Sudden pressure release causes internal cracks.
How Do You Demold and Finish?
Demolding
Tap the mold’s back with a soft hammer —brass or rubber—to loosen the part. If it sticks, insert a plastic wedge (not metal) into the parting line and gently pry.
Trimming
Cut off the gate with a hacksaw or angle grinder. File sharp edges with 120# sandpaper.
Smoothing
Sand the part progressively: 120# → 240# → 400# sandpaper. This reduces roughness from Ra 12.5 μm to Ra 6.3 μm.
For decorative parts, apply metal polish like Brasso for shine.
Stress relief (optional)
Heat small aluminum parts to 200-250°C for 30 minutes, then cool naturally. This eliminates internal stress from uneven cooling.
What Problems Occur and How Do You Fix Them?
Porosity (honeycomb holes)
Causes: Poor exhaust, fast pouring, cold mold.
Solutions: Ream exhaust holes with 2.5mm drill bit. Slow pouring to 0.1-0.2 L/min using small ladle. Increase mold preheat by 30-50°C.
Undercasting (incomplete filling)
Causes: Metal too cold, no overflow groove, narrow gate.
Solutions: Raise melt temperature by 20-30°C. Add 5mm-wide overflow groove at mold’s highest point. Widen gate from 3mm to 5mm with file.
Mold sticking
Causes: Insufficient release agent, uncleaned mold, demolded too early.
Solutions: Apply second thin release agent layer. Scrub cavity with wire brush and acetone. Extend cooling by 2-3 minutes until mold below 80°C.
Dimensional deviation
Causes: Mold thermal expansion, no shrinkage allowance, uneven pressure.
Solutions: Switch to cast iron mold—lower thermal expansion. Add 1.5-2% shrinkage allowance to cavity design. Use torque wrench for even pressure at 20 N·m.
| Problem | Cause | Fix |
|---|---|---|
| Porosity | Poor exhaust, fast pour | Ream holes, slow pour, hotter mold |
| Undercasting | Cold metal, no overflow | Higher temp, add groove, widen gate |
| Sticking | No release agent, early demold | More agent, clean, cool longer |
| Wrong size | Thermal expansion, no allowance | Cast iron mold, add 1.5-2% |
Where Does Simple Die Casting Work Best?
Prototype development
Small teams need functional prototypes fast. Simple die casting delivers in hours, not weeks.
A startup needed an aluminum motor housing prototype. They cut a cavity in 20mm steel plate for $300. Used recycled ADC12 aluminum costing $20. First prototype ready in 3 hours. They found a 2mm misalignment, fixed the mold, and made a revised version the same day.
Cost vs 3D printing at $500 per prototype? Saved 90%.
Educational demonstrations
Schools use simple die casting to teach metal solidification. Students see casting happen, not just read about it.
Use Wood’s metal that melts at 70°C in hot water. Plastic molds keep it safe. Students pour, apply pressure, and watch solidification—learning about shrinkage, exhaust, and release agents firsthand. Studies show 80% better understanding vs textbook learning.
Emergency maintenance
When equipment breaks in remote areas, simple die casting repairs it fast.
A farm tractor’s brass bearing housing wore out. They made a sand mold on-site with sand, water, and clay—cost $5. Melted old brass fittings costing $15. Repaired housing installed in 4 hours. Tractor back same day. Industrial repair would take 3 days and cost over $1,000.
Artistic casting
Artists create unique sculptures with simple die casting and lost-wax techniques.
Carve a wax sculpture. Make sand mold around it. Melt bronze or copper in small furnace. Pour, apply light pressure, break mold. One artist made 5 limited-edition copper bowls this way. Each sold for $500. Total material cost under $100.
What Does It Cost?
For a 100-part run of small aluminum brackets at 50g each:
| Cost Category | Details | Total | Per Part |
|---|---|---|---|
| Materials | Recycled ADC12: $2/kg × 5kg | $10 | $0.10 |
| Mold | Steel plate + wire cutting | $200 | $2.00 |
| Tools | Furnace rental $20/day | $20 | $0.20 |
| Labor | 8 hours at $25/hour | $200 | $2.00 |
| Total | $430 | $4.30 |
Efficiency takeaways
Speed: 100 parts take 1-2 days. Industrial die casting takes 1-2 hours but months of setup.
Scalability: Not for runs over 500 parts. Mold wears. Manual labor gets expensive.
Cost vs alternatives: Cheaper than 3D printing at $10-20 per part. Cheaper than industrial die casting with $50,000+ dies. More expensive than mass production at $0.50-1 per part.
How to write a spec that gets priced correctly
A drawing is a contract. If it leaves a number open, the shop fills that number in with its own default. The default is rarely the one you had in mind. Put these five lines on every RFQ and most of the back-and-forth disappears before it starts.
- 3D model with the parting line marked
- Alloy grade and the standard it meets
- Wall thickness and draft on every face
- Machining allowance on the faces that will be cut
- Pressure tightness or porosity class
The point is not paperwork. Each line removes a decision the shop would otherwise make for you. A complete RFQ comes back priced. An incomplete one comes back guessed.
What actually drives the price
Buyers usually push on material because it is the line they can see. In practice the material is rarely the biggest number on a quote. These five lines decide most of it:
- die steel and cavity count
- part weight and wall section
- draft and slide count
- porosity requirement
- machining allowance
Ask for the quote split by line. A supplier who cannot break it down is guessing, and you will pay for the guess. The line you can usually renegotiate is the tolerance band, not the raw material.
Problems you will meet, and the fix
Every process has a failure mode it prefers. The same four show up again and again on this kind of work, and none of them are mysteries once you know what to look for.
- Cold shuts where two flow fronts meet
- Porosity that shows up only after machining
- Soldering on a hot spot in the die
- Shrinkage voids in a heavy section
Catch the fault on the first part, not the hundredth. A first-article check costs an hour. A bad batch costs the whole order. Write the check into the purchase order so nobody has to remember it.
What to check on the first article
The first article is the cheapest inspection you will ever buy. Use it properly and the rest of the run becomes boring, which is exactly what you want.
- Every dimension on the drawing, with the measured value written beside it.
- The material certificate, matched to the heat or lot number on the parts.
- The finish against the sample you approved, under the same light.
- Fit against the mating part, assembled rather than measured.
- Packaging, because parts that arrive damaged were never in tolerance.
Check in this order: datums, then mating features, then cosmetic faces. If the datums are wrong, every number after them is noise. Keep the report on file. When a problem shows up in month six, that document is the only thing that tells you what changed.
How to compare two quotes fairly
Two numbers are not comparable unless the scope matches. Line them up before you decide, because a low number with three gaps is not a low number.
Same drawing, same material, same finish, same inspection. Anything else is a different job wearing the same part number. Then look at what each quote leaves out. Freight, packaging, certificates and tooling are the usual gaps.
Ask each supplier to state their assumptions in writing. The one who does is usually the one who has run the process before.
Scaling from one part to a batch
The first part teaches you the process. The hundredth teaches you the process cost.
Watch three things as volume grows: setup amortisation, tool wear, and how much hand work the finish still needs. If the unit price barely moves between ten and a hundred, the cost sits in material or in hand work, not in setup. Ask which, because only one of them is negotiable.
Lead time behaves the same way. A one-off is scheduled around other jobs. A repeat order is scheduled around your forecast. Give the shop a forecast and the lead time gets shorter, not longer.
How to read a supplier's quote
A quote is a short document with a long shadow. Four things in it decide whether the job runs smoothly, and only one of them is the price.
- The scope line. It should name the process, the material and the finish, not just the part.
- The tolerance basis. General tolerance or the drawing, and which standard it follows.
- The exclusions. Tooling, freight, certificates and inspection are the usual omissions.
- The validity date. Material prices move, and an open-ended quote is a promise nobody can keep.
Read the exclusions before you read the total. A quote that leaves out tooling is not cheaper. It is a quote for a different job.
Industry Experience: Making It Work
A product designer needed 50 aluminum brackets for a crowdfunding campaign prototype. Industrial die casting would cost $50,000 in tooling. Simple die casting with a steel plate mold cost $400. Parts looked good enough for photos and function testing. Campaign funded, they moved to industrial tooling.
A vocational school wanted students to experience casting but had no budget. They built a simple setup with a $200 furnace, scrap aluminum, and hand-cut molds. Students made parts, saw defects, fixed parameters—learned more than any textbook could teach.
A farmer in rural India repaired a broken irrigation pump impeller using simple die casting. Melted scrap aluminum in a clay furnace, poured into a sand mold made from local materials. Pump ran for two more seasons.
Simple die casting is metal forming made accessible. It uses gravity filling and light manual pressure to create functional parts without industrial equipment. Materials cost pennies. Setup takes hours, not months. It excels at prototypes, education, emergency repairs, and artistic work. Quality won’t match industrial processes—tolerances are looser, surfaces rougher, cycles slower. But for small batches where speed and cost matter more than perfection, simple die casting is irreplaceable. With proper preparation, careful temperature control, and systematic troubleshooting, you can produce usable parts on your first try.
Our solution for Simple Die Casting
YiguProto runs die casting in house, from a single prototype to a production batch. We quote the process, the material and the finish as separate lines, so you can see where the money goes instead of arguing with one number.
Send a STEP file or a drawing and you get a DFM report in one to two business days. It flags the features that add cost and the features that will not hold tolerance on the process you picked.
Every order ships with an inspection report on the features you call out. If a part misses, we make it again. Ready to price a part? Start with a free quote and DFM review, or read more about our die casting. You can also talk to an engineer before you commit to a drawing.
FAQ about Simple Die Casting
What tolerance can you hold on Simple Die Casting?
The working default is ±0.1 mm on cast features, ±0.05 mm after machining. Tighter than that the process changes and so does the price, because every step tighter adds inspection time. Call out only the faces that mate with something else and leave the rest on the general tolerance.
What is the lead time for Simple Die Casting?
Expect 20 to 30 business days including die build. Tooling, material stock and the finishing queue all move that number, so we confirm the date in writing before the run starts rather than after.
How much does Simple Die Casting cost?
Price comes from five lines: material, machine or tool time, setup, finishing and inspection. The material itself is usually the smallest of them. Send a drawing and we will split the quote so you can see which line is doing the damage.
What is Simple Die Casting used for?
Simple Die Casting turns up wherever the part has to do a real job at a predictable cost: brackets, housings, fixtures, covers and the fittings that hold them together. The honest test is whether the properties match the load and the environment, not whether the material is fashionable.
Does the process work for prototypes as well as production?
Yes, and that is usually the point. Running the prototype on the production process removes a whole class of surprises, because the part you test is made the same way as the part you sell.
How do I compare two quotes fairly?
Match the scope first: same drawing, same material, same finish, same inspection. Then read the exclusions. Freight, tooling and certificates are the usual gaps, and a low number with three gaps is not a low number.
The short version
Simple Die Casting rewards the buyer who reads the data sheet and the drawing together. Pick the option for the property that matters, not for the price per kilo.
Tighten only what mates. Test a sample before the run. Then let the process do the rest.