
Rapid Prototyping
Why Are ABS Exhibition Car Prototypes Critical for Successful Product Launches?
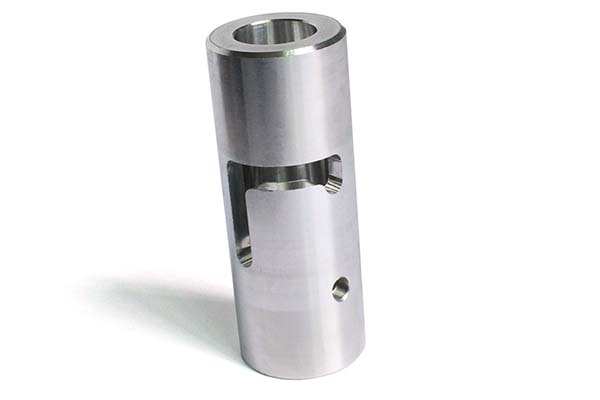
If you’re in the automotive, electronics, or consumer goods industry, you know exactly how critical ABS exhibition car prototypes are for showcasing new designs at trade shows or validating functions before committing to mass production. These prototypes aren’t just display pieces—they’re powerful tools that generate buzz, attract investors, and gather valuable market feedback.
Why Does ABS Stand Out for Exhibition Car Prototypes?
Understanding the Material Advantage
Choosing the right material is absolutely the first step to a successful exhibition prototype. ABS plastic is the top choice for most exhibition car models, and there are solid engineering reasons why.
A European automotive startup recently learned this firsthand. They needed a prototype of a new electric vehicle dashboard to display at the prestigious Geneva Motor Show. After evaluating options, they chose ABS because it could accurately mimic the final product’s texture and withstand the show’s 2-week run with constant handling by visitors. They applied professional spray painting and silk-screening, and the finished prototype looked identical to the mass-produced version. In post-show surveys, 80 percent of visitors thought they were looking at the actual production car. That’s the power of well-executed ABS prototyping.
Material Comparison for Exhibition Prototypes
| Material | Key Properties | Best For Exhibition Prototypes | Cost Range (Per kg) |
|---|---|---|---|
| ABS | High toughness, impact resistance, easy to machine, takes paint beautifully | Most exhibition car parts—interior and exterior components, dashboards, body panels | $2.5–$4.0 |
| PC | High heat resistance, transparency, very strong | Prototypes needing heat resistance like engine components or transparent parts | $3.8–$5.5 |
| PMMA | Excellent transparency (92%), scratch-resistant | Clear parts like display windows, headlight covers, instrument lenses | $4.2–$6.0 |
| POM | Low friction, high rigidity, dimensionally stable | Moving parts like door hinges, gear shifters, functional mechanisms | $5.0–$7.2 |
Why ABS Wins for Most Applications
Cost-effectiveness: ABS is significantly cheaper than alternatives while delivering excellent performance. For a typical exhibition prototype weighing a few kilograms, material cost savings of 30 to 40 percent compared to PC or PMMA add up quickly.
Machinability: ABS cuts smoothly on CNC equipment, achieving fine details and smooth surfaces with less tool wear than many alternatives. This means faster machining times and lower overall costs.
Finish quality: ABS accepts paints, coatings, and textures exceptionally well. You can achieve virtually any appearance—from high-gloss automotive finishes to soft-touch matte surfaces—that convincingly mimics production parts.
Impact resistance: Exhibition prototypes get handled. A lot. Visitors touch, press, and sometimes accidentally drop things. ABS’s toughness ensures your prototype survives the show intact.
How Do You Create a Flawless 3D Design?
From Concepts to Error-Free Plans
A precise, detailed design prevents costly rework later. This phase deserves your full attention because every hour invested here saves many hours in machining and post-processing.
3D model creation: Use professional software like SolidWorks or Catia to detail every single part of your prototype—from the overall shape down to internal mechanisms and mounting points. A Chinese electronics company designing a car infotainment prototype used SolidWorks to achieve 0.1mm precision on button placements, ensuring the final machined model matched their production intent exactly.
Design analysis: Don’t just model—simulate. Use tools like ANSYS to analyze stress points and potential deformation under load. A U.S. auto parts maker discovered through simulation that their prototype’s door panel would crack under 5kg of pressure. By adjusting the design and thickening the panel by 1mm before any machining started, they saved an estimated $3,000 in rework costs and kept their project on schedule.
Key tip: Include all mounting features, fastener locations, and assembly interfaces in your model. Prototypes that look right but don’t assemble correctly waste everyone’s time.
What Does the Prototyping Process Actually Look Like?
Step 1: CAM Programming – Turning Designs into Machine Code
Your 3D model needs to become code that CNC machines can understand. CAM programming using tools like Mastercam or SolidCam creates precise toolpaths that guide cutting tools through the material.
A Japanese manufacturer used Mastercam to generate toolpaths for a complex EV chassis prototype with multiple curved surfaces and internal cavities. The software’s optimization features reduced their total machining time by 20 percent compared to manual programming approaches—a significant saving on a complex part.
Step 2: Program Testing – Avoid Costful Collisions
Never, ever skip program testing. Use simulation tools like Vericut to verify toolpaths before any material is cut. A German workshop once skipped this step and their CNC machine crashed into a fixture, causing $10,000 in damage and losing 2 weeks of production time. Program testing takes 1 to 2 hours but prevents losses that can derail entire projects.
Step 3: CNC Machining – Cutting ABS to Precise Shape
Choose the right machine for your part complexity:
- 3-axis machines work well for simple parts like flat panels or basic housings. Accuracy of ±0.02mm is typical.
- 4-axis machines add rotational capability for parts needing features on multiple sides.
- 5-axis machines excel at complex, curved shapes like full car bodies or ergonomic dashboards. Accuracy reaches ±0.01mm or better.
For a small exhibition model around 30cm long, a 3-axis machine might suffice. For a larger prototype like a 1-meter chassis with compound curves, a 5-axis machine is the right choice.
Step 4: Post-Processing – Making It Exhibition-Ready
This is where good prototypes become great ones.
Surface treatment: Remove sharp edges through deburring, then apply finishes that match your vision. Options include:
- Spray painting: Match production colors exactly. A Korean brand applied matte black paint to their prototype, and 90 percent of trade show visitors thought it was the real car.
- UV coating: Add scratch resistance for high-traffic shows.
- Texture application: Simulate production surface finishes.
Assembly and testing: Put all parts together and verify everything works. A Canadian company tested their prototype’s LED display 100 times before a major show and discovered 2 faulty wiring connections that would have failed during presentations. Finding and fixing these issues before the show saved them from an embarrassing demonstration failure.
How Do You Ensure Quality Control Throughout the Process?
Meeting Standards and Avoiding Defects
To guarantee your prototype is truly exhibition-ready, implement systematic quality checks.
Full monitoring at every stage: Set inspection checkpoints after machining, after post-processing, and after assembly. Use precision measurement tools like Coordinate Measuring Machines (CMM) to verify critical dimensions. A Mexican factory implements random sampling, checking 10 percent of all parts. This approach caught 3 defective pieces out of 50 in their last production quarter—parts that would have caused problems at shows.
Follow established certifications: Adhere to standards like ISO 9001. This ensures complete traceability—if a part fails, you can track exactly which batch it came from and when it was made. For exhibitions like the Detroit Auto Show, ISO 9001 compliance is essentially non-negotiable for serious exhibitors.
Common defects to watch for:
- Surface scratches or tool marks that catch light wrong
- Dimensional errors that prevent proper assembly
- Paint imperfections like orange peel or color mismatch
- Loose components or poor fit between parts
How to write a spec that gets priced correctly
A drawing is a contract. If it leaves a number open, the shop fills that number in with its own default. The default is rarely the one you had in mind. Put these five lines on every RFQ and most of the back-and-forth disappears before it starts.
- A model you are willing to freeze for the build
- The question the prototype must answer
- Process and material that can answer it
- Tolerance on the features under test
- How many iterations you have budgeted
The point is not paperwork. Each line removes a decision the shop would otherwise make for you. A complete RFQ comes back priced. An incomplete one comes back guessed.
What actually drives the price
Buyers usually push on material because it is the line they can see. In practice the material is rarely the biggest number on a quote. These five lines decide most of it:
- process choice
- part size and feature count
- material
- finish and fit checks
- number of iterations
Ask for the quote split by line. A supplier who cannot break it down is guessing, and you will pay for the guess. The line you can usually renegotiate is the tolerance band, not the raw material.
Problems you will meet, and the fix
Every process has a failure mode it prefers. The same four show up again and again on this kind of work, and none of them are mysteries once you know what to look for.
- A prototype that is too good and hides a production problem
- A prototype that is too rough to test the real question
- Material chosen for speed rather than for the test
- No measurement plan, so the result is an opinion
Catch the fault on the first part, not the hundredth. A first-article check costs an hour. A bad batch costs the whole order. Write the check into the purchase order so nobody has to remember it.
What to check on the first article
The first article is the cheapest inspection you will ever buy. Use it properly and the rest of the run becomes boring, which is exactly what you want.
- Every dimension on the drawing, with the measured value written beside it.
- The material certificate, matched to the heat or lot number on the parts.
- The finish against the sample you approved, under the same light.
- Fit against the mating part, assembled rather than measured.
- Packaging, because parts that arrive damaged were never in tolerance.
Check in this order: datums, then mating features, then cosmetic faces. If the datums are wrong, every number after them is noise. Keep the report on file. When a problem shows up in month six, that document is the only thing that tells you what changed.
How to compare two quotes fairly
Two numbers are not comparable unless the scope matches. Line them up before you decide, because a low number with three gaps is not a low number.
Same drawing, same material, same finish, same inspection. Anything else is a different job wearing the same part number. Then look at what each quote leaves out. Freight, packaging, certificates and tooling are the usual gaps.
Ask each supplier to state their assumptions in writing. The one who does is usually the one who has run the process before.
Scaling from one part to a batch
The first part teaches you the process. The hundredth teaches you the process cost.
Watch three things as volume grows: setup amortisation, tool wear, and how much hand work the finish still needs. If the unit price barely moves between ten and a hundred, the cost sits in material or in hand work, not in setup. Ask which, because only one of them is negotiable.
Lead time behaves the same way. A one-off is scheduled around other jobs. A repeat order is scheduled around your forecast. Give the shop a forecast and the lead time gets shorter, not longer.
How to read a supplier's quote
A quote is a short document with a long shadow. Four things in it decide whether the job runs smoothly, and only one of them is the price.
- The scope line. It should name the process, the material and the finish, not just the part.
- The tolerance basis. General tolerance or the drawing, and which standard it follows.
- The exclusions. Tooling, freight, certificates and inspection are the usual omissions.
- The validity date. Material prices move, and an open-ended quote is a promise nobody can keep.
Read the exclusions before you read the total. A quote that leaves out tooling is not cheaper. It is a quote for a different job.
What to send with the first order
The first order sets the pattern for every order after it. Send a complete package once and the shop files it, and the second order takes a fraction of the time.
- A STEP or native model plus a PDF drawing carrying the same revision letter.
- The material callout by standard number, not by trade name.
- The finish and the exact faces it applies to.
- Any test the part must pass: fit, seal, drop, salt spray, dielectric.
- A contact who can answer a question inside one working day.
Then write down what was agreed. An email that confirms the material, the finish and the date is worth more than a longer purchase order that leaves them open.
When this is the wrong choice
A good supplier tells you when the process does not fit. These are the cases where we say so.
- The volume is so low that setup costs more than the parts are worth.
- The tolerance is tighter than the process can hold without a second operation.
- The geometry cannot be made without a tool feature that will not pay back.
- The material you need is not available in the form the process requires.
- The schedule is shorter than the tooling or setup time, and nobody has said so yet.
None of these are refusals. They are reasons to look at a different route, and the earlier that conversation happens the cheaper it is. The most expensive mistake in manufacturing is a process chosen before the question was understood.
What Real-World Results Can You Expect?
The Business Impact of Quality Prototypes
A well-executed ABS exhibition car prototype isn’t just a display piece—it’s a business development tool. Consider this real example:
An electric vehicle startup came to us needing a prototype that would help them secure funding. They had a great design but needed something physical to show investors at a major industry trade show. We worked with them to create a full-scale ABS prototype with custom paint, functional doors, and detailed interior features.
At the show, their prototype drew crowds. Investors could touch it, open doors, and see the design vision brought to life. The result? They secured $2 million in investment directly attributable to the prototype’s impact. A quality prototype didn’t just display their design—it helped close deals.
Cost and Timeline Expectations
| Prototype Complexity | Typical Timeline | Cost Range (Material + Machining) |
|---|---|---|
| Small, simple part (20cm door panel) | 3–5 days | $500–$1,500 |
| Medium complexity (dashboard assembly) | 5–7 days | $2,000–$5,000 |
| Large, complex (1m chassis, full assembly) | 7–10 days | $5,000–$15,000+ |
Our solution for ABS Exhibition Car Prototypes Critical
YiguProto runs rapid prototyping in house, from a single prototype to a production batch. We quote the process, the material and the finish as separate lines, so you can see where the money goes instead of arguing with one number.
Send a STEP file or a drawing and you get a DFM report in one to two business days. It flags the features that add cost and the features that will not hold tolerance on the process you picked.
Every order ships with an inspection report on the features you call out. If a part misses, we make it again. Ready to price a part? Start with a free quote and DFM review, or read more about our rapid prototyping. You can also talk to an engineer before you commit to a drawing.
FAQ about ABS Exhibition Car Prototypes Critical
What is the lead time for ABS Exhibition Car Prototypes Critical?
Expect 3 to 7 business days for a first article. Tooling, material stock and the finishing queue all move that number, so we confirm the date in writing before the run starts rather than after.
What files do you need in order to quote?
A STEP file plus a PDF drawing that carries the same revision letter. The model carries the geometry and the drawing carries the intent. When the two disagree, the shop picks one, and it is never the one you meant.
What tolerance can you hold on ABS Exhibition Car Prototypes Critical?
The working default is ±0.1 mm on most processes, tighter after machining. Tighter than that the process changes and so does the price, because every step tighter adds inspection time. Call out only the faces that mate with something else and leave the rest on the general tolerance.
What happens if a part is out of specification?
We measure it against the same drawing you approved and, if it misses, we make it again. What matters is that the report exists, because a disagreement without data is just an opinion.
What is ABS Exhibition Car Prototypes Critical used for?
ABS Exhibition Car Prototypes Critical turns up wherever the part has to do a real job at a predictable cost: brackets, housings, fixtures, covers and the fittings that hold them together. The honest test is whether the properties match the load and the environment, not whether the material is fashionable.
Does the process work for prototypes as well as production?
Yes, and that is usually the point. Running the prototype on the production process removes a whole class of surprises, because the part you test is made the same way as the part you sell.
The short version
ABS Exhibition Car Prototypes Critical rewards the buyer who reads the data sheet and the drawing together. Pick the option for the property that matters, not for the price per kilo.
Tighten only what mates. Test a sample before the run. Then let the process do the rest.