
Surface Treatment
Does Oil Spraying Really Improve Prototype Quality and Performance?
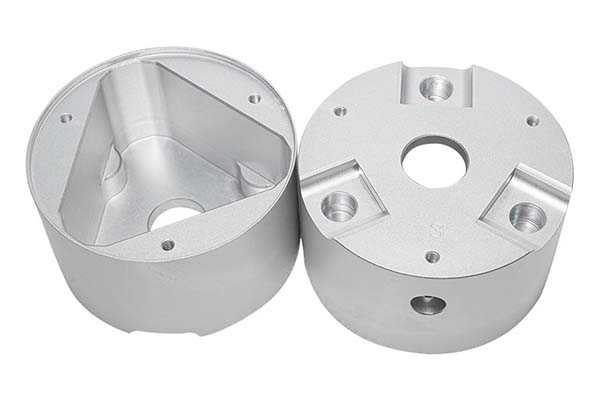
If you’ve ever held a prototype that felt cheap or looked unfinished, you understand why surface treatment matters. Oil spraying—a specialized spray painting process for prototypes—stands as one of the most effective ways to transform rough, imperfect models into professional-looking representations of final products. But does it actually improve both appearance and function? The short answer is yes.
What Exactly Is Oil Spraying in Prototype Development?
The Basic Process Explained
Oil spraying uses compressed air equipment to apply a fine mist of specialized coating onto prototype surfaces. Unlike brushing or dipping, this method creates an extremely thin, uniform layer that follows every curve and corner of your part.
The process works through atomization—breaking liquid paint into tiny droplets that travel through air and adhere to the surface. When these droplets land, they merge into a continuous film that hides imperfections while adding protective properties.
Where Oil Spraying Fits in Post-Treatment
Most prototypes need some form of finishing after manufacturing. 3D printed parts show visible layer lines. CNC machined components may have tool marks. Cast prototypes sometimes contain tiny surface pores. Oil spraying addresses all these issues in one step.
Think of it as the bridge between raw manufacturing and finished product. It takes what comes out of your printer or machine and turns it into something you’d proudly show investors or use in user testing.
How Does Oil Spraying Hide Surface Flaws Effectively?
Covering Common Manufacturing Imperfections
Every prototype manufacturing method leaves its signature marks. SLA printed parts exhibit obvious layer lines. FDM prototypes show visible extrusion patterns. Machined metals may carry fine scratches from cutting tools.
Oil spraying creates a uniform coating that fills these minor imperfections. The liquid levels itself across the surface, smoothing out microscopic valleys and hiding the evidence of how the part was made.
Real example: A medical device company recently brought us an SLA prototype with clearly visible layer lines. After oil spraying with a matte finish, the same part looked injection-molded. Test participants couldn’t tell it was a prototype during user studies.
Creating Visual Consistency Across Components
When your prototype consists of multiple parts made through different methods, achieving consistent appearance becomes challenging. One component might come from an SLS printer while another is CNC machined. Their surface textures naturally differ.
Oil spraying eliminates these variations. The coating creates identical surface appearance across all components, regardless of how each was manufactured. This consistency matters tremendously when:
- Presenting to clients who expect uniform quality
- Conducting focus groups where appearance influences feedback
- Photographing prototypes for marketing materials
What Finish Options Does Oil Spraying Provide?
Exploring Surface Texture Possibilities
The versatility of oil spraying truly shines in the range of achievable finishes:
| Finish Type | Visual Characteristics | Typical Applications |
|---|---|---|
| Matte | Low reflection, soft appearance | Consumer electronics, medical devices |
| Semi-Gloss | Moderate sheen, professional look | Automotive interiors, appliance prototypes |
| High-Gloss | Mirror-like reflection, deep color | Cosmetic packaging, display models |
| Textured | Tactile surface pattern | Grips, tool handles, non-slip surfaces |
| Soft-Touch | Rubber-like feel | Wearables, remote controls, grips |
| Metallic | Simulated metal appearance | Automotive trim, luxury goods |
| Transparent | Clear or tinted coating | Lens prototypes, display windows |
This variety means your prototype can accurately represent production intent even when using different base materials. A nylon SLS part can look like brushed aluminum. An ABS model can feel like soft-touch rubber.
Matching Precise Color Requirements
Color accuracy often determines whether a prototype passes client review. Oil spraying enables exact matching to:
- Corporate brand color standards
- Pantone or RAL specifications
- Custom shades for A/B testing
- Multi-color schemes for complex products
Case in point: A consumer electronics client needed prototypes matching their specific brand blue across twenty different part configurations. Oil spraying achieved consistent color across all samples, allowing accurate color evaluation before tooling investment.
Can Oil Spraying Actually Make Prototypes Stronger?
Increasing Surface Hardness
Many spray coatings contain additives that significantly increase surface hardness. This matters because common prototype materials—especially photopolymer resins and standard plastics—scratch easily during handling.
A properly applied coating can increase surface hardness by 20-50% depending on the formulation. This improvement:
- Reduces visible wear from repeated handling
- Protects against incidental contact during testing
- Maintains appearance through multiple design reviews
- Extends useful life for reference samples
Adding Friction and Wear Resistance
Beyond hardness, oil spraying creates a protective barrier that resists abrasion. This proves particularly valuable for prototypes that undergo functional testing involving:
- Moving parts that slide against each other
- Grips or handles experiencing repeated contact
- Surfaces exposed to cleaning agents or mild chemicals
- Components tested for insertion and removal cycles
The coating sacrifices itself protectively, wearing gradually while preserving the underlying structure. This means your prototype continues providing valid test data long after an uncoated part would have failed.
How Does Oil Spraying Protect Material Integrity?
Shielding Against Environmental Damage
Certain prototype materials degrade when exposed to common environmental factors. UV light yellows many plastics. Humidity affects porous materials. Oils from handling can stain unfinished surfaces.
Oil spraying applies a protective barrier that shields against these threats:
- UV-resistant coatings prevent color fading and embrittlement
- Moisture barriers protect hygroscopic materials
- Chemical resistance prevents staining from normal handling
- Oxidation barriers protect metal prototypes
Preserving Structural Integrity Through Testing
When prototypes undergo functional testing, the base material faces stresses that can lead to premature failure. Oil spraying helps maintain structural integrity by:
- Distributing contact forces across the coating layer
- Preventing surface cracks from propagating
- Protecting against minor impacts during handling
- Maintaining dimensional stability in varying conditions
This protection ensures your test results reflect design performance rather than material limitations. You’re evaluating the design, not watching a prototype fall apart from surface degradation.
What Makes Air Compression Oil Spraying the Preferred Method?
Understanding the Application Technique
Professional prototype shops typically use air compression spraying for its precision and consistency. Here’s how it works:
Compressed air flows through the spray gun at high velocity, creating a vacuum that draws coating material from a reservoir. The liquid meets the airstream at the nozzle tip, where it atomizes into microscopic droplets. These droplets travel to the prototype surface, where they merge into an even film.
Key parameters technicians control include:
- Air pressure (affecting droplet size and velocity)
- Fluid flow rate (determining coating thickness)
- Spray distance (influencing coverage pattern)
- Gun movement speed (ensuring uniform application)
Why This Method Delivers Superior Results
The air compression approach offers distinct advantages over simpler methods:
Exceptional uniformity on complex geometries—the mist reaches recesses and corners that brushes cannot access. Precise thickness control typically achieves 10-50 micron coatings with minimal variation. Material efficiency reduces waste compared to overspray-heavy methods. Consistent quality between operators ensures reproducible results batch after batch.
How Do You Handle Difficult Materials?
Overcoming Poor Adhesion Challenges
Some materials resist coating adhesion by nature. Polypropylene (PP), nylon, and certain engineering plastics have low surface energy that causes paint to peel or rub off easily.
Professional shops address this through:
- Adhesion-promoting primers formulated for difficult substrates
- Surface preparation including cleaning and light abrasion
- Controlled application with optimal distance and pressure
- Multiple thin layers rather than one thick coat
While adhesion may never match paint-friendly materials, these techniques produce functional, attractive finishes on challenging substrates.
Matching Coatings to Material Properties
Different base materials benefit from coating formulations matched to their characteristics:
| Base Material | Recommended Coating Type | Key Consideration |
|---|---|---|
| Flexible elastomers | Flexible coating with elastic properties | Must bend without cracking |
| Heat-exposed parts | High-temperature resistant coating | Maintains integrity under heat |
| Chemical-exposed prototypes | Chemical-resistant formulation | Withstands testing fluids |
| Electronic enclosures | Conductive coating options | Provides EMI shielding when needed |
| Optical components | Transparent optical-grade coating | Maintains light transmission |
This material-specific approach ensures the coating enhances rather than compromises prototype functionality.
Does Oil Spraying Affect Dimensional Accuracy?
Understanding Coating Thickness Impact
The coatings applied through oil spraying typically measure 10-50 microns thick—about the width of a human hair. For most applications, this thickness doesn’t affect fit or function.
However, when prototypes have:
- Tight tolerance mating surfaces
- Precision-fit components
- Threaded connections
- Snap-fit features
Designers can account for coating thickness in their CAD models. Adding 0.05-0.1mm clearance where needed ensures assembled parts fit properly after finishing.
Balancing Protection Against Precision
The protection oil spraying provides usually outweighs minimal dimensional changes. A coated prototype that functions slightly differently but survives testing provides more value than an uncoated part that fails early.
For applications where every micron matters, technicians can:
- Mask critical surfaces to keep them coating-free
- Apply thinner coatings (down to 5-10 microns)
- Use specialized low-build formulations
- Post-machine critical features after coating
How to write a spec that gets priced correctly
A drawing is a contract. If it leaves a number open, the shop fills that number in with its own default. The default is rarely the one you had in mind. Put these five lines on every RFQ and most of the back-and-forth disappears before it starts.
- The finish by its standard, not by a colour name
- Which faces are cosmetic and which are functional
- Masking: threads, bores, electrical contacts
- Colour target and the light it will be judged under
- Any salt spray or adhesion test required
The point is not paperwork. Each line removes a decision the shop would otherwise make for you. A complete RFQ comes back priced. An incomplete one comes back guessed.
What actually drives the price
Buyers usually push on material because it is the line they can see. In practice the material is rarely the biggest number on a quote. These five lines decide most of it:
- finish type and specification
- surface area
- masking complexity
- colour matching
- rework risk
Ask for the quote split by line. A supplier who cannot break it down is guessing, and you will pay for the guess. The line you can usually renegotiate is the tolerance band, not the raw material.
Problems you will meet, and the fix
Every process has a failure mode it prefers. The same four show up again and again on this kind of work, and none of them are mysteries once you know what to look for.
- Colour drift between two anodising lots
- Threads that no longer gauge after plating
- Poor adhesion on a surface that was not prepped
- Orange peel on a coat that was sprayed too dry
Catch the fault on the first part, not the hundredth. A first-article check costs an hour. A bad batch costs the whole order. Write the check into the purchase order so nobody has to remember it.
What to check on the first article
The first article is the cheapest inspection you will ever buy. Use it properly and the rest of the run becomes boring, which is exactly what you want.
- Every dimension on the drawing, with the measured value written beside it.
- The material certificate, matched to the heat or lot number on the parts.
- The finish against the sample you approved, under the same light.
- Fit against the mating part, assembled rather than measured.
- Packaging, because parts that arrive damaged were never in tolerance.
Check in this order: datums, then mating features, then cosmetic faces. If the datums are wrong, every number after them is noise. Keep the report on file. When a problem shows up in month six, that document is the only thing that tells you what changed.
How to compare two quotes fairly
Two numbers are not comparable unless the scope matches. Line them up before you decide, because a low number with three gaps is not a low number.
Same drawing, same material, same finish, same inspection. Anything else is a different job wearing the same part number. Then look at what each quote leaves out. Freight, packaging, certificates and tooling are the usual gaps.
Ask each supplier to state their assumptions in writing. The one who does is usually the one who has run the process before.
Scaling from one part to a batch
The first part teaches you the process. The hundredth teaches you the process cost.
Watch three things as volume grows: setup amortisation, tool wear, and how much hand work the finish still needs. If the unit price barely moves between ten and a hundred, the cost sits in material or in hand work, not in setup. Ask which, because only one of them is negotiable.
Lead time behaves the same way. A one-off is scheduled around other jobs. A repeat order is scheduled around your forecast. Give the shop a forecast and the lead time gets shorter, not longer.
How to read a supplier's quote
A quote is a short document with a long shadow. Four things in it decide whether the job runs smoothly, and only one of them is the price.
- The scope line. It should name the process, the material and the finish, not just the part.
- The tolerance basis. General tolerance or the drawing, and which standard it follows.
- The exclusions. Tooling, freight, certificates and inspection are the usual omissions.
- The validity date. Material prices move, and an open-ended quote is a promise nobody can keep.
Read the exclusions before you read the total. A quote that leaves out tooling is not cheaper. It is a quote for a different job.
What Results Can You Expect From Professional Oil Spraying?
Quality Benchmarks and Standards
Professional prototype finishing achieves measurable quality indicators:
- Uniform gloss within 5% variation across surfaces
- No orange peel or surface texture irregularities
- Complete coverage with no missed spots or drips
- Proper adhesion passing cross-hatch tape testing
- Color accuracy within Delta-E tolerances
Real-World Performance Expectations
With proper application and curing, oil-sprayed finishes typically:
- Survive dozens of handling cycles without visible wear
- Maintain appearance through entire product development phases
- Resist cleaning with mild solvents when needed
- Provide consistent reference for color and finish decisions
Oil spraying delivers tangible benefits that go far beyond simple aesthetics. It hides manufacturing imperfections, creates consistent professional appearance, and provides extensive finish options that accurately represent production intent. Beyond appearance, it adds functional value through increased surface hardness, wear resistance, and environmental protection that preserves material integrity through rigorous testing. The air compression method offers precise control and consistent results, while material-specific approaches address even challenging substrates. For any prototype destined for presentation, testing, or evaluation, oil spraying transforms raw parts into finished representations that support better design decisions and more confident product development.
Our solution for Oil Spraying
YiguProto runs surface finishing in house, from a single prototype to a production batch. We quote the process, the material and the finish as separate lines, so you can see where the money goes instead of arguing with one number.
Send a STEP file or a drawing and you get a DFM report in one to two business days. It flags the features that add cost and the features that will not hold tolerance on the process you picked.
Every order ships with an inspection report on the features you call out. If a part misses, we make it again. Ready to price a part? Start with a free quote and DFM review, or read more about our surface finishing. You can also talk to an engineer before you commit to a drawing.
FAQ about Oil Spraying
Is there a minimum order quantity?
No hard minimum. One part is fine. What changes with volume is which costs dominate, so a single unit is priced mostly on setup and a thousand units are priced mostly on cycle time and material.
What is Oil Spraying used for?
Oil Spraying turns up wherever the part has to do a real job at a predictable cost: brackets, housings, fixtures, covers and the fittings that hold them together. The honest test is whether the properties match the load and the environment, not whether the material is fashionable.
What happens if a part is out of specification?
We measure it against the same drawing you approved and, if it misses, we make it again. What matters is that the report exists, because a disagreement without data is just an opinion.
What should I check before approving the parts?
Datums first, then the features that mate, then the cosmetic faces. Ask for a dimensional report, a material certificate and a finish sample. A part can be inside every tolerance and still not fit, so assemble one before you sign.
How much does Oil Spraying cost?
Price comes from five lines: material, machine or tool time, setup, finishing and inspection. The material itself is usually the smallest of them. Send a drawing and we will split the quote so you can see which line is doing the damage.
What tolerance can you hold on Oil Spraying?
The working default is ±0.02 mm build-up on plated features, none on anodised ones. Tighter than that the process changes and so does the price, because every step tighter adds inspection time. Call out only the faces that mate with something else and leave the rest on the general tolerance.
The short version
Oil Spraying rewards the buyer who reads the data sheet and the drawing together. Pick the option for the property that matters, not for the price per kilo.
Tighten only what mates. Test a sample before the run. Then let the process do the rest.