
Die Casting
What Is an Aluminum Alloy Die-Casting Prototype and How to Produce It Fast?
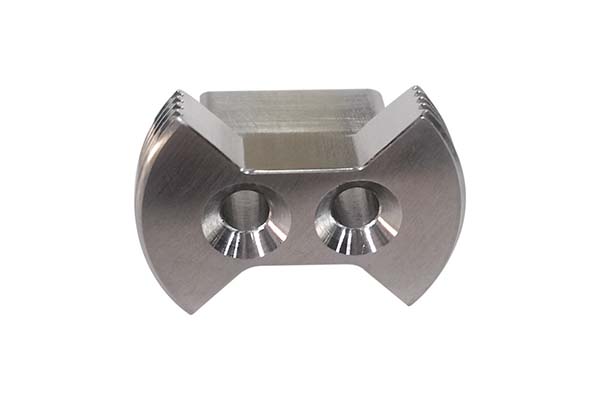
Aluminum alloy die-casting prototypes are the workhorses of product development. They let teams test designs, validate functions, and fix flaws before committing to expensive mass production tooling. But prototype projects face unique pressures: tight deadlines, small budgets, and the need for high quality to make testing meaningful. Traditional high-volume approaches don’t work.
Key takeaways
- Choosing the right aluminum alloy and melting it properly ensures your prototype performs like the final product—even in small batches.
- High-pressure die-casting for prototypes needs precise parameters. Wrong settings lead to defects like cold shuts or porosity that ruin prototypes.
- Prototypes often need minor machining and finishing to look and function like final parts. Keep this step fast to meet deadlines.
- The final step is testing. You need to confirm the prototype meets performance goals before moving to mass production.
How Do You Implement Rapid Tooling for Prototype Die-Casting?
Tooling is the biggest bottleneck in prototype die-casting. Rapid tooling solutions let you build molds fast while staying within budget—key for getting prototypes in hand quickly.
Rapid tooling options: Soft vs. hard
| Tooling Type | Key Features | Lead Time | Cost vs Traditional | Ideal For |
|---|---|---|---|---|
| Soft-tooling | Uses epoxy or aluminum; easy to modify | 1-2 weeks | 30-50% lower | Initial design validation—1-50 prototypes |
| Hard-tooling | 3D-printed H13 inserts + standard mold bases | 2-3 weeks | 60-70% lower | Prototypes needing durability—50-200 pieces |
Pro tips for rapid tooling success
Add conformal cooling channels: 3D-print channels that follow the mold’s shape. This cuts cooling time by 40% and reduces prototype warpage.
Use an insert exchange strategy: Swap 3D-printed inserts for different prototype versions—like a housing with two different port sizes—without rebuilding the entire mold.
Apply PVD surface coating to H13 inserts. Physical Vapor Deposition boosts wear resistance, letting the mold last for more prototype runs.
Calculate a cost-per-shot model: A soft tool costing $1,500 that makes 50 prototypes has a $30 cost per shot —far cheaper than traditional hard tooling at $100+ per shot for small runs.
Aim for lead-time compression: Use rapid tooling to cut mold delivery time from 6-8 weeks traditional to 1-3 weeks —critical for meeting tight development schedules.
| Tooling Type | Lead Time | Cost per Shot (50 pcs) |
|---|---|---|
| Soft-tooling | 1-2 weeks | $30 |
| Hard-tooling with inserts | 2-3 weeks | $45 |
| Traditional hard tooling | 6-8 weeks | $100+ |
How Do You Select Alloys and Melt Efficiently for Prototypes?
Choosing the right aluminum alloy and melting it properly ensures your prototype performs like the final product—even in small batches.
Alloy quick-selection guide
Start with these popular prototype alloys, then tweak as needed:
A380: Great all-around choice—excellent castability and machinability. Use rapid A380 modification—add small amounts of silicon or copper—to adjust strength for your prototype.
ADC12: Low-cost option with smooth surface finish. Ideal for cosmetic prototypes like electronic housings.
Small-scale melting tips for prototypes
Use a 30 kg crucible furnace: Perfect for small prototype batches—avoids wasting large amounts of alloy.
Test alloy composition fast with handheld LIBS analysis: Laser-Induced Breakdown Spectroscopy takes 10 seconds to check elements—ensures your alloy matches specs.
Add grain refiner like titanium-boron at 0.1-0.2%: Makes alloy grains finer, improving prototype strength and machinability.
Use strontium modification: Add 0.01-0.02% strontium to reduce silicon particle size—prevents brittle spots in the prototype.
Drop in degassing tablets like hexachloroethane: Removes air bubbles from molten alloy—cuts porosity in prototypes by 50%.
Do a density index test: Measure the prototype’s density compared to pure aluminum to check for hidden pores. Aim for a density index of ≥98%.
| Alloy | Key Properties | Best For |
|---|---|---|
| A380 | Excellent castability, machinability | General prototypes, strength testing |
| ADC12 | Low cost, smooth finish | Cosmetic prototypes, housings |
How Do You Master Thin-Wall and Net-Shape Prototyping?
Prototypes often have thin walls for lightweighting or complex shapes. Net-shape prototyping lets you cast parts that need little to no machining, saving time and money.
Key tips for thin-wall prototyping at 0.5mm
Maintain a flow length ratio of flow length ÷ wall thickness ≤ 100: For a 0.5mm wall, keep flow length under 50mm—prevents alloy from cooling before filling the mold.
Use cavity vacuum assist at ≤ 50 mbar: Removes air from the mold, helping molten aluminum fill thin walls completely.
Add overflow groove placement: Position small grooves at the end of thin walls—catches excess metal and air, ensuring full filling.
Target micro-porosity of ≤2%: Use X-ray CT scans to check. Too much porosity weakens thin walls.
Net-shape success
Net-shape prototyping means casting parts as close to the final design as possible. For a sensor housing with small mounting holes, cast the holes using small steel pins in the mold instead of drilling later. This cuts machining time by 30-40%.
Validate net-shape parts with X-ray CT qualification —ensures all features—even hidden ones—are present and accurate.
For parts that hold fluids like a small pump, set a leak-test specification —no leakage at 50 kPa for 5 minutes —to confirm functionality.
| Parameter | Target | Benefit |
|---|---|---|
| Flow length ratio | ≤100 | Prevents premature solidification |
| Vacuum level | ≤50 mbar | Complete thin-wall filling |
| Micro-porosity | ≤2% | Adequate strength |
| Leak test | 50 kPa, 5 min | Functional sealing |
What Low-Volume High-Pressure Parameters Ensure Consistency?
High-pressure die-casting for prototypes needs precise parameters. Wrong settings lead to defects like cold shuts or porosity that ruin prototypes.
Critical HPDC parameters for low-volume prototypes
| Parameter | Target Range (A380) | Why It Matters |
|---|---|---|
| Slow-shot to fast-shot switch | When mold is 70-80% full | Slow shot fills runner smoothly; fast shot fills cavity before aluminum solidifies |
| Plunger acceleration curve | 5-10 m/s² | Prevents turbulence that causes porosity while filling fast enough for thin walls |
| Intensification delay | 0.1-0.3 seconds | Gives aluminum time to fill cavity before applying high pressure—avoids cold shuts |
| Die temperature mapping | 180-220°C uniform | Even cooling reduces warpage—critical for prototypes needing tight tolerances |
| Cycle energy signature | Consistent ±5% | Steady energy use means consistent casting quality—track with machine control system |
Other must-dos
Use local squeeze pin: Add small pins that press on thick areas—like a boss on a housing—during solidification. Reduces shrinkage pores.
Do shot trace validation: Save data—pressure, temperature—for each prototype shot. If a prototype has a defect, compare its shot trace to good ones to find the issue.
How Do You Perform Rapid Post-Cast Machining and Finishing?
Prototypes often need minor machining and finishing to look and function like final parts. Keep this step fast to meet deadlines.
Rapid machining strategies
Use a one-hit 5-axis route: Machine all sides of the prototype in one setup with no re-clamping. Cuts machining time by 50% compared to 3-axis machining.
Minimize clamping reset: Use fixtures that hold the prototype securely for both roughing and finishing—avoids errors from repositioning.
Try cryogenic CO₂ cooling: Spray liquid CO₂ on the tool during machining—reduces heat, extends tool life, and improves surface finish.
Use diamond-coated cutter: Cuts aluminum smoothly, helping you reach a Ra 0.8μm target—a smooth finish ideal for cosmetic prototypes.
Fast finishing steps
Do a chem-film touch-up: Apply thin chemical conversion coating like chromate to protect prototype from corrosion—dries in 10-15 minutes.
Add laser marking UID: Engrave a QR code or serial number on the prototype—lets you track it during testing, like which prototype failed a strength test.
Skip unnecessary steps: For functional prototypes not cosmetic, skip expensive finishes like anodizing. Focus on what’s needed to test the design.
| Machining Strategy | Time Savings | Finish Achievable |
|---|---|---|
| One-hit 5-axis | 50% | Ra 0.8μm |
| Cryogenic cooling | Extended tool life | Improved surface |
| Diamond-coated cutter | Faster speeds | Ra 0.8μm target |
How Do You Verify Function and Test Mechanical Properties?
The final step is testing. You need to confirm the prototype meets performance goals before moving to mass production.
Key tests for aluminum die-casting prototypes
| Test | Purpose | Target for Prototypes |
|---|---|---|
| ASTM B557 specimen test | Measures tensile strength and elongation | Match 80% of final product’s strength—200 MPa for A380 prototypes vs 250 MPa production |
| Micro-hardness mapping | Checks hardness across prototype—near walls vs thick areas | Uniform hardness ±5 HV—ensures consistent performance |
| Fatigue S-N curve | Tests how prototype holds up under repeated stress—hinge opening/closing | Withstand 10,000+ cycles without failure |
| Salt-spray corrosion | Checks rust resistance for outdoor or wet-use prototypes | No red rust after 48 hours per ASTM B117 |
| Pressure burst test | Validates strength for fluid-carrying prototypes like tubes | Withstand 1.5× intended working pressure—750 kPa if working pressure is 500 kPa |
| CT scan porosity % | Measures total porosity | ≤2%—too much porosity weakens prototype |
| Cyclic thermal shock | Tests performance in temperature changes— -40°C to 85°C | No cracks after 100 cycles |
Pro tip
Prioritize tests based on the prototype’s use. A car engine part prototype needs thermal shock and pressure tests. A phone case prototype focuses on impact and cosmetic tests.
How to write a spec that gets priced correctly
A drawing is a contract. If it leaves a number open, the shop fills that number in with its own default. The default is rarely the one you had in mind. Put these five lines on every RFQ and most of the back-and-forth disappears before it starts.
- 3D model with the parting line marked
- Alloy grade and the standard it meets
- Wall thickness and draft on every face
- Machining allowance on the faces that will be cut
- Pressure tightness or porosity class
The point is not paperwork. Each line removes a decision the shop would otherwise make for you. A complete RFQ comes back priced. An incomplete one comes back guessed.
What actually drives the price
Buyers usually push on material because it is the line they can see. In practice the material is rarely the biggest number on a quote. These five lines decide most of it:
- die steel and cavity count
- part weight and wall section
- draft and slide count
- porosity requirement
- machining allowance
Ask for the quote split by line. A supplier who cannot break it down is guessing, and you will pay for the guess. The line you can usually renegotiate is the tolerance band, not the raw material.
Problems you will meet, and the fix
Every process has a failure mode it prefers. The same four show up again and again on this kind of work, and none of them are mysteries once you know what to look for.
- Cold shuts where two flow fronts meet
- Porosity that shows up only after machining
- Soldering on a hot spot in the die
- Shrinkage voids in a heavy section
Catch the fault on the first part, not the hundredth. A first-article check costs an hour. A bad batch costs the whole order. Write the check into the purchase order so nobody has to remember it.
What to check on the first article
The first article is the cheapest inspection you will ever buy. Use it properly and the rest of the run becomes boring, which is exactly what you want.
- Every dimension on the drawing, with the measured value written beside it.
- The material certificate, matched to the heat or lot number on the parts.
- The finish against the sample you approved, under the same light.
- Fit against the mating part, assembled rather than measured.
- Packaging, because parts that arrive damaged were never in tolerance.
Check in this order: datums, then mating features, then cosmetic faces. If the datums are wrong, every number after them is noise. Keep the report on file. When a problem shows up in month six, that document is the only thing that tells you what changed.
How to compare two quotes fairly
Two numbers are not comparable unless the scope matches. Line them up before you decide, because a low number with three gaps is not a low number.
Same drawing, same material, same finish, same inspection. Anything else is a different job wearing the same part number. Then look at what each quote leaves out. Freight, packaging, certificates and tooling are the usual gaps.
Ask each supplier to state their assumptions in writing. The one who does is usually the one who has run the process before.
Scaling from one part to a batch
The first part teaches you the process. The hundredth teaches you the process cost.
Watch three things as volume grows: setup amortisation, tool wear, and how much hand work the finish still needs. If the unit price barely moves between ten and a hundred, the cost sits in material or in hand work, not in setup. Ask which, because only one of them is negotiable.
Lead time behaves the same way. A one-off is scheduled around other jobs. A repeat order is scheduled around your forecast. Give the shop a forecast and the lead time gets shorter, not longer.
How to read a supplier's quote
A quote is a short document with a long shadow. Four things in it decide whether the job runs smoothly, and only one of them is the price.
- The scope line. It should name the process, the material and the finish, not just the part.
- The tolerance basis. General tolerance or the drawing, and which standard it follows.
- The exclusions. Tooling, freight, certificates and inspection are the usual omissions.
- The validity date. Material prices move, and an open-ended quote is a promise nobody can keep.
Read the exclusions before you read the total. A quote that leaves out tooling is not cheaper. It is a quote for a different job.
Industry Experience: Aluminum Prototypes in Action
An automotive supplier needed 30 A380 bracket prototypes for crash testing. Traditional tooling would take 8 weeks at $25,000. Using soft-tooling with conformal cooling, they had first parts in 10 days at $8,000. Tensile testing showed 210 MPa —meeting 80% of production target. Crash tests validated design.
A consumer electronics company needed 50 phone frame prototypes with 0.6mm walls. Hard-tooling with 3D-printed H13 inserts delivered in 2 weeks. CT scan showed porosity under 1.5%. One-hit 5-axis machining achieved Ra 0.7μm finish. Design validated, production tooling ordered.
A medical device maker needed 20 sensor housing prototypes with zero internal defects. Vacuum assist at 40 mbar ensured complete filling. Shot trace validation caught one shot with pressure drop—rejected before machining. Final parts passed leak test at 50 kPa and thermal shock from -40°C to 85°C.
Aluminum alloy die-casting prototypes require strategies different from high-volume production. Rapid tooling—soft-tooling for 1-50 pieces, hard-tooling with inserts for 50-200 pieces—cuts lead time to 1-3 weeks and cost per shot to $30-45. Alloy selection—A380 for strength, ADC12 for cosmetics—with small-scale melting techniques like grain refining and degassing ensures quality. Thin-wall control with flow length ratio ≤100, vacuum ≤50 mbar, and porosity ≤2% prevents defects. Net-shape design with cast-in features cuts machining by 30-40%. Process parameters—shot switch at 70-80%, intensification delay 0.1-0.3 seconds, die temperature uniform at 180-220°C—keep reject rates low. Rapid machining with one-hit 5-axis and diamond-coated tools achieves Ra 0.8μm finish fast. Functional testing—tensile, fatigue, pressure, thermal shock—proves prototypes work. When executed correctly, aluminum die-casting prototypes deliver high-quality results quickly, enabling confident progression to mass production.
Our solution for Aluminum Alloy Die-Casting Prototype
YiguProto runs die casting in house, from a single prototype to a production batch. We quote the process, the material and the finish as separate lines, so you can see where the money goes instead of arguing with one number.
Send a STEP file or a drawing and you get a DFM report in one to two business days. It flags the features that add cost and the features that will not hold tolerance on the process you picked.
Every order ships with an inspection report on the features you call out. If a part misses, we make it again. Ready to price a part? Start with a free quote and DFM review, or read more about our die casting. You can also talk to an engineer before you commit to a drawing.
FAQ about Aluminum Alloy Die-Casting Prototype
Is there a minimum order quantity?
No hard minimum. One part is fine. What changes with volume is which costs dominate, so a single unit is priced mostly on setup and a thousand units are priced mostly on cycle time and material.
What material should I specify?
Specify by standard, not by trade name. A trade name can change under you between two orders; a standard number cannot. Then add the one property that actually decides the part, whether that is strength, heat resistance or chemical exposure.
What files do you need in order to quote?
A STEP file plus a PDF drawing that carries the same revision letter. The model carries the geometry and the drawing carries the intent. When the two disagree, the shop picks one, and it is never the one you meant.
Can Aluminum Alloy Die-Casting Prototype be made in small quantities?
Yes, and small quantities are where a good supplier earns the next order. Setup dominates the price at low volume, so the cheapest route is usually the one with the fewest operations, not the cheapest material.
What is Aluminum Alloy Die-Casting Prototype used for?
Aluminum Alloy Die-Casting Prototype turns up wherever the part has to do a real job at a predictable cost: brackets, housings, fixtures, covers and the fittings that hold them together. The honest test is whether the properties match the load and the environment, not whether the material is fashionable.
How long does a first article take?
Usually a few business days once the drawing is frozen, and longer if tooling is involved. The date we give you is the date we confirm in writing, not the date we hope for.
The short version
Aluminum Alloy Die-Casting Prototype rewards the buyer who reads the data sheet and the drawing together. Pick the option for the property that matters, not for the price per kilo.
Tighten only what mates. Test a sample before the run. Then let the process do the rest.