
Surface Treatment
Why Is the Anodizing Process the Top Choice for Aluminum Surface Treatment?
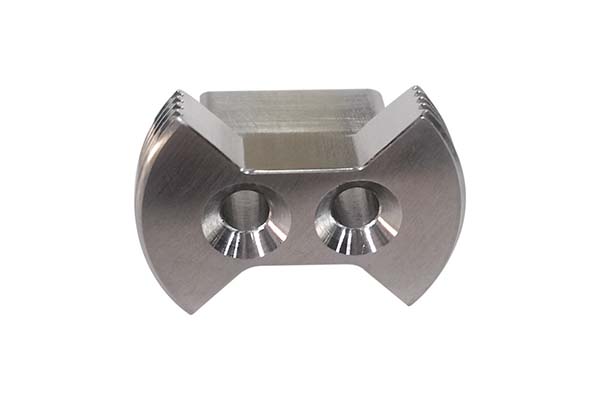
If you design or manufacture aluminum parts—for CNC machining, sheet metal fabrication, or consumer products—you have probably heard about anodizing. This surface treatment does more than just improve appearance. It transforms aluminum, making it significantly more durable, corrosion-resistant, and functional. But how does this process actually work?
Key takeaways
- At its simplest, anodizing is an electrochemical process that converts the aluminum surface into a durable, decorative oxide layer.
- While the science is complex, the actual anodizing process follows a clear, repeatable sequence.
- Anodizing is not a single process. The three main types are classified by the acid used and the properties of the resulting layer.
- Anodizing is primarily for metals that form a stable oxide layer. While aluminum is the star, other materials can be anodized for specific needs.
What Is the Anodizing Process?
At its simplest, anodizing is an electrochemical process that converts the aluminum surface into a durable, decorative oxide layer. Unlike paint, which sits on top of the metal, anodizing builds this layer from the aluminum itself. This means the finish becomes part of the metal, so it will not peel, chip, or flake.
Think of it as controlled rust. But unlike the red, flaky rust on steel, the oxide layer on aluminum (called alumina) is hard, stable, and protective. Here is the basic science: you place the aluminum part in an acidic electrolyte bath, usually sulfuric acid. The aluminum part acts as the anode (positive electrode). A separate metal, like lead or titanium, acts as the cathode (negative electrode). When you pass a direct current (DC) through the solution, oxygen ions are released from the acid. These ions bond with aluminum atoms on the part’s surface, creating that tough aluminum oxide layer. The result is a surface that is highly resistant to wear and corrosion.
How Does the Anodizing Process Work Step by Step?
While the science is complex, the actual anodizing process follows a clear, repeatable sequence. Each stage is critical for achieving a high-quality, uniform finish.
Step 1: Pre-Cleaning the Aluminum Part
This first step is non-negotiable. The aluminum surface must be absolutely clean. Any contamination, such as dirt, oil, grease, or machining residues, will act as a barrier. This prevents the oxide layer from forming evenly, leading to flaws.
- Technicians use mild detergents or solvents to remove surface oils.
- For heavy soiling, a gentle acid bath might be used to etch away stubborn residues.
- The part is then thoroughly rinsed with clean water to remove any cleaning agents.
Step 2: Setting Up the Electrolytic Tank
The cleaned part is then fully submerged in a tank filled with an electrolyte solution. For most common anodizing, this is sulfuric acid. The tank also holds the cathode, which is connected to the negative terminal of the power supply. The aluminum part is carefully fixtured to ensure it stays submerged and maintains a good electrical connection.
Step 3: Applying the Electric Current
A low-voltage DC current is applied. The aluminum part, as the anode, gives up electrons. This triggers the reaction where oxygen ions combine with aluminum atoms to form the porous aluminum oxide layer. The duration of this step directly controls the final thickness.
- Typical voltage is between 12 and 24 volts.
- The part remains in the tank for 20 to 60 minutes, depending on the desired layer thickness.
Step 4: Adding Color (Optional)
Immediately after anodizing, the surface is porous and ready to accept color. This is a key advantage of the process.
- Dye coloring: The part is dipped into a tank of hot dye. The pores absorb the dye like a sponge, allowing for a wide range of vibrant colors.
- Electrolytic coloring: For better UV stability, the part goes into another tank with metal salts. Electricity bonds these salts inside the pores, creating durable, fade-resistant colors, typically in shades of bronze and black.
Step 5: Sealing the Surface
The final and essential step is sealing. This closes the microscopic pores in the oxide layer.
- Sealing locks in the color, preventing fading and leaching.
- It dramatically increases the part’s corrosion resistance.
- The most common method is a hot water bath (near boiling), which hydrates the oxide, causing it to swell and close the pores.
What Are the Main Types of Anodizing?
Anodizing is not a single process. The three main types are classified by the acid used and the properties of the resulting layer. Choosing the right one is critical for your part’s performance and cost.
| Anodizing Type | Electrolyte | Typical Thickness | Key Characteristics | Primary Applications |
|---|---|---|---|---|
| Type I (Chromic Acid) | Chromic acid | 0.0005 – 0.003 inches (very thin) | Minimal dimensional change, good for tight tolerances, lower corrosion resistance. | Aerospace components, parts with intricate details where maintaining precise dimensions is critical. |
| Type II (Sulfuric Acid) | Sulfuric acid | 0.0002 – 0.001 inches (thin to medium) | Excellent balance of corrosion resistance, wear resistance, and colorability. The most common and cost-effective type. | Consumer electronics, architectural parts, automotive trim, CNC machined parts, bicycle frames. |
| Type III (Hard Anodizing) | Sulfuric acid (cold) | 0.001 – 0.004+ inches (thickest) | Extremely hard, dense, and wear-resistant. Provides superior protection in harsh environments. | Industrial machinery components, gears, valves, pistons, military and marine hardware. |
A real-world example: A company producing aluminum laptop cases would choose Type II anodizing. It offers a beautiful, scratch-resistant finish and can be dyed in specific brand colors. However, a manufacturer making aluminum gears for a packaging machine would need Type III hard anodizing. The thick, dense layer is essential to withstand constant friction without wearing out.
Which Materials Are Suitable for Anodizing?
Anodizing is primarily for metals that form a stable oxide layer. While aluminum is the star, other materials can be anodized for specific needs.
- Aluminum: The most common material by far. Its natural oxide layer makes it perfectly suited for anodizing. Almost all aluminum alloys can be anodized, though the final appearance and quality can vary by alloy.
- Titanium: Titanium anodizing is popular in the medical and aerospace industries. The oxide layer is biocompatible and can create different colors without dyes, based on the voltage applied.
- Magnesium: Used for lightweight components in electronics and aerospace, magnesium anodizing provides necessary corrosion protection.
- Other Metals: Niobium, tantalum, and zinc can also be anodized, but this is much less common due to higher material costs and specialized applications.
- Metals You Cannot Anodize: Steel and iron cannot be anodized. They will rust rapidly in the acidic anodizing bath. For these materials, other surface treatments like plating or painting are required.
What Are the Key Benefits of Anodizing?
Why choose anodizing over other finishes? The benefits go far beyond just looks.
- Unbeatable Durability: Because the finish is part of the metal, it will not peel or chip. A hard anodized part can last for decades, even in demanding environments.
- Superior Corrosion and Wear Resistance: The oxide layer is chemically stable and exceptionally hard. It protects against moisture, salt, and industrial chemicals. It also resists scratches and abrasion far better than paint.
- Excellent for Coloring: The porous surface is ideal for bonding with dyes. This allows for consistent, vibrant colors. For critical color matching, manufacturers use standardized systems like RAL codes.
- Electrically Insulative: The aluminum oxide layer is a poor conductor of electricity. This makes anodized parts perfect for applications requiring electrical isolation, such as heat sinks in electronics.
- Improved Lubricity: The surface can hold lubricants, reducing friction. This also prevents “metal galling” or seizing, which can occur when threaded aluminum parts are tightened together.
How Are Colors Applied and Chosen?
The ability to add color is a major reason for anodizing’s popularity. The method you choose depends on the application.
- Organic Dyeing: This method offers the widest range of colors, from bright reds and blues to subtle golds and greens. It is cost-effective but colors may fade over time with prolonged exposure to direct sunlight. It is ideal for indoor products.
- Electrolytic Coloring (2-Step): This process deposits metal oxides inside the pores. It produces colors that are extremely UV-stable, making them perfect for outdoor use. The color palette is generally limited to shades of black, bronze, and champagne.
When selecting a color, you have two main paths:
- Common Names: For non-critical projects, simple names like “clear,” “black,” or “blue” are often sufficient.
- RAL Codes: For precise, repeatable color across different production runs, you must specify a RAL code. For example, specifying RAL 9005 guarantees a jet black color, regardless of which anodizing shop does the work. A furniture maker would use this to ensure all anodized aluminum legs for a product line are an exact match.
The anodizing process is a powerful and versatile surface treatment that significantly enhances the performance and appearance of aluminum parts. By understanding the different types—from the versatile Type II to the ultra-durable Type III—and the options for coloring, you can make an informed decision. It offers a unique combination of durability, aesthetic flexibility, and long-term value that few other finishes can match. Whether you are designing a consumer gadget or an industrial machine, anodizing provides a reliable, high-quality solution that turns good aluminum parts into great ones.
How to write a spec that gets priced correctly
A drawing is a contract. If it leaves a number open, the shop fills that number in with its own default. The default is rarely the one you had in mind. Put these five lines on every RFQ and most of the back-and-forth disappears before it starts.
- The finish by its standard, not by a colour name
- Which faces are cosmetic and which are functional
- Masking: threads, bores, electrical contacts
- Colour target and the light it will be judged under
- Any salt spray or adhesion test required
The point is not paperwork. Each line removes a decision the shop would otherwise make for you. A complete RFQ comes back priced. An incomplete one comes back guessed.
What actually drives the price
Buyers usually push on material because it is the line they can see. In practice the material is rarely the biggest number on a quote. These five lines decide most of it:
- finish type and specification
- surface area
- masking complexity
- colour matching
- rework risk
Ask for the quote split by line. A supplier who cannot break it down is guessing, and you will pay for the guess. The line you can usually renegotiate is the tolerance band, not the raw material.
Problems you will meet, and the fix
Every process has a failure mode it prefers. The same four show up again and again on this kind of work, and none of them are mysteries once you know what to look for.
- Colour drift between two anodising lots
- Threads that no longer gauge after plating
- Poor adhesion on a surface that was not prepped
- Orange peel on a coat that was sprayed too dry
Catch the fault on the first part, not the hundredth. A first-article check costs an hour. A bad batch costs the whole order. Write the check into the purchase order so nobody has to remember it.
What to check on the first article
The first article is the cheapest inspection you will ever buy. Use it properly and the rest of the run becomes boring, which is exactly what you want.
- Every dimension on the drawing, with the measured value written beside it.
- The material certificate, matched to the heat or lot number on the parts.
- The finish against the sample you approved, under the same light.
- Fit against the mating part, assembled rather than measured.
- Packaging, because parts that arrive damaged were never in tolerance.
Check in this order: datums, then mating features, then cosmetic faces. If the datums are wrong, every number after them is noise. Keep the report on file. When a problem shows up in month six, that document is the only thing that tells you what changed.
How to compare two quotes fairly
Two numbers are not comparable unless the scope matches. Line them up before you decide, because a low number with three gaps is not a low number.
Same drawing, same material, same finish, same inspection. Anything else is a different job wearing the same part number. Then look at what each quote leaves out. Freight, packaging, certificates and tooling are the usual gaps.
Ask each supplier to state their assumptions in writing. The one who does is usually the one who has run the process before.
Scaling from one part to a batch
The first part teaches you the process. The hundredth teaches you the process cost.
Watch three things as volume grows: setup amortisation, tool wear, and how much hand work the finish still needs. If the unit price barely moves between ten and a hundred, the cost sits in material or in hand work, not in setup. Ask which, because only one of them is negotiable.
Lead time behaves the same way. A one-off is scheduled around other jobs. A repeat order is scheduled around your forecast. Give the shop a forecast and the lead time gets shorter, not longer.
FAQ: Anodizing Process
1. Can anodized aluminum parts be repaired if the oxide layer is scratched?
Minor, surface-level scratches might be reduced with a very fine, non-abrasive polish. However, because the oxide layer is integral to the metal, deep scratches that penetrate it cannot be repaired. The part would need to be stripped and re-anodized. For parts in high-wear applications, specifying Type III hard anodizing from the start provides the best defense against scratching.
2. Is anodizing more expensive than painting or powder coating?
The initial cost of anodizing is often 10-20% higher than a standard paint job. However, it offers significant long-term savings. Painted surfaces may need recoating every few years, while a properly anodized finish can last for 10 years or more with minimal maintenance. This durability makes anodizing the more economical choice over the life of the product.
3. Can very thin aluminum parts, like 0.5 mm sheet metal, be anodized?
Yes, thin parts can be anodized successfully, but careful selection is key. Type II anodizing, which creates a thinner oxide layer (0.0002-0.001 inches), is the ideal choice. Type III hard anodizing builds a thicker layer and uses a colder bath process, which could potentially warp or distort very thin materials. Many electronics manufacturers successfully use Type II anodizing for thin aluminum frames and enclosures.
Our solution for Anodizing Process
YiguProto runs surface finishing in house, from a single prototype to a production batch. We quote the process, the material and the finish as separate lines, so you can see where the money goes instead of arguing with one number.
Send a STEP file or a drawing and you get a DFM report in one to two business days. It flags the features that add cost and the features that will not hold tolerance on the process you picked.
Every order ships with an inspection report on the features you call out. If a part misses, we make it again. Ready to price a part? Start with a free quote and DFM review, or read more about our surface finishing. You can also talk to an engineer before you commit to a drawing.
FAQ about Anodizing Process
Does the process work for prototypes as well as production?
Yes, and that is usually the point. Running the prototype on the production process removes a whole class of surprises, because the part you test is made the same way as the part you sell.
What material should I specify?
Specify by standard, not by trade name. A trade name can change under you between two orders; a standard number cannot. Then add the one property that actually decides the part, whether that is strength, heat resistance or chemical exposure.
How long does a first article take?
Usually a few business days once the drawing is frozen, and longer if tooling is involved. The date we give you is the date we confirm in writing, not the date we hope for.
What should I check before approving the parts?
Datums first, then the features that mate, then the cosmetic faces. Ask for a dimensional report, a material certificate and a finish sample. A part can be inside every tolerance and still not fit, so assemble one before you sign.
Is there a minimum order quantity?
No hard minimum. One part is fine. What changes with volume is which costs dominate, so a single unit is priced mostly on setup and a thousand units are priced mostly on cycle time and material.
What happens if a part is out of specification?
We measure it against the same drawing you approved and, if it misses, we make it again. What matters is that the report exists, because a disagreement without data is just an opinion.
The short version
Anodizing Process rewards the buyer who reads the data sheet and the drawing together. Pick the option for the property that matters, not for the price per kilo.
Tighten only what mates. Test a sample before the run. Then let the process do the rest.