
Blogs
Food 3D Printing Services

Food 3D Printing Services, explained the way we would explain it across a table: what it is good at, what it costs you, and the details that keep the part out of the scrap bin.
Key takeaways
- Elevate your culinary creations with Food 3D Printing—where additive manufacturing for culinary arts meets endless creativity.
- Food 3D Printing (also known as additive manufacturing for culinary arts) is a revolutionary technology that builds edible creations layer by layer using food-safe materials.
- At our shop, we’ve tailored our Food 3D Printing capabilities to meet the unique needs of culinary professionals and food businesses.
- The materials used in Food 3D Printing are carefully selected for safety, flavor, and printability.
Food 3D Printing Services
Elevate your culinary creations with Food 3D Printing—where additive manufacturing for culinary arts meets endless creativity. At our shop we turn bold flavor and design ideas into edible masterpieces, from custom gourmet dishes to nutrient-packed snacks.
Whether you’re a high-end restaurant chef, a catering service, or a food innovator, our solutions deliver nutritional customization, stunning visual appeal, and consistent quality that redefines what’s possible in modern gastronomy.

Definition: What Is Food 3D Printing?
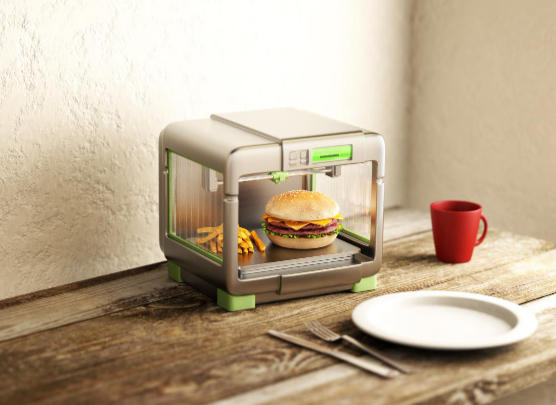
Food 3D Printing (also known as additive manufacturing for culinary arts) is a revolutionary technology that builds edible creations layer by layer using food-safe materials. Unlike traditional cooking methods, which rely on manual shaping and assembly, this process uses digital designs to craft precise, intricate, and customizable food items—blending technology with the art of cooking.
At its core, Food 3D Printing is driven by digital gastronomy—the fusion of digital tools and culinary expertise to create new dining experiences. It enables food fabrication that goes beyond traditional limits, allowing chefs to experiment with shapes, textures, and flavor combinations that were once impossible. From delicate decorative elements on a dessert to personalized nutrient blends, culinary innovation is at the heart of every 3D-printed food creation we produce.
Our Capabilities: Crafting Edible Masterpieces
At our shop, we’ve tailored our Food 3D Printing capabilities to meet the unique needs of culinary professionals and food businesses. Our services balance precision, creativity, and nutrition to bring your culinary vision to life.
| Capability | Key Features | Ideal Use Cases |
| Custom Food Designs | Create unique shapes (e.g., brand logos, intricate patterns) tailored to your theme; 3D models adjustable for portion size | Restaurant signature dishes, event catering (weddings, corporate events) |
| High-Precision Printing | Layer resolution as low as 0.1mm; consistent shaping even for tiny details (e.g., edible flowers, mini sculptures) | Gourmet desserts, decorative toppings for cocktails or main courses |
| Edible Materials | Compatible with 50+ food-safe materials (e.g., chocolate, cheese, purees); strict quality checks for freshness and safety | All food applications—from sweet treats to savory appetizers |
| Nutritional Customization | Adjust nutrient content (e.g., protein, fiber, vitamins) based on dietary needs (e.g., vegan, gluten-free, pediatric diets) | Meal prep services, healthcare facilities (hospitals, senior centers), sports nutrition |
| Creative Culinary Solutions | Collaborative design with our culinary team; test and refine flavor-texture combinations (e.g., crispy outer layers with creamy fillings) | Experimental dining experiences, culinary competitions, food product development |
Materials: Safe, Delicious Building Blocks for 3D-Printed Food
The materials used in Food 3D Printing are carefully selected for safety, flavor, and printability. At our shop we only use food-grade materials that meet global safety standards (e.g., FDA, EU FSSC 22000):
| Material Type | Examples | Key Culinary Benefits | Best For |
| Edible Filaments | Chocolate, cheese, pasta dough, sugar paste | Easy to print; consistent texture; melts or bakes evenly | Desserts (chocolate sculptures), savory snacks (cheese sticks), pasta dishes |
| Food-Grade Resins | Fruit-based resins (strawberry, mango), gelatin-based resins | High detail; vibrant colors; melts in the mouth | Decorative elements (cocktail garnishes), mini desserts (fruit jellies) |
| Purees and Pastes | Vegetable purees (carrot, spinach), nut butters (almond, peanut), fruit pastes (apple, berry) | Rich flavor; nutrient-dense; customizable for diets (e.g., vegan, gluten-free) | Savory appetizers (veggie patties), healthy snacks (nut butter bites), baby food |
| Nutritional Powders | Protein powder, vitamin blends, fiber supplements | Add targeted nutrients without altering flavor; mixes easily with other materials | Sports nutrition (protein bars), healthcare meals (vitamin-fortified purees) |
| Liquid Ingredients | Syrups (maple, chocolate), infused oils (garlic, truffle), fruit juices | Add moisture and flavor; used as binders for dry materials | Glazes for desserts, flavor infusions for savory dishes, edible “inks” for detailing |
Data Insight: In 2024, 65% of our restaurant clients chose chocolate filaments for desserts (due to printability and customer appeal), while 78% of healthcare clients used nutritional powders blended with purees to create fortified meals.
How to write a spec that gets priced correctly
A drawing is a contract. If it leaves a number open, the shop fills that number in with its own default. The default is rarely the one you had in mind. Put these five lines on every RFQ and most of the back-and-forth disappears before it starts.
- A model and a drawing that agree
- Material by standard number
- Tolerance only where it mates
- Finish and the faces it applies to
- Quantity and required date
The point is not paperwork. Each line removes a decision the shop would otherwise make for you. A complete RFQ comes back priced. An incomplete one comes back guessed.
What actually drives the price
Buyers usually push on material because it is the line they can see. In practice the material is rarely the biggest number on a quote. These five lines decide most of it:
- process choice
- material
- tolerance band
- finish
- volume
Ask for the quote split by line. A supplier who cannot break it down is guessing, and you will pay for the guess. The line you can usually renegotiate is the tolerance band, not the raw material.
Problems you will meet, and the fix
Every process has a failure mode it prefers. The same four show up again and again on this kind of work, and none of them are mysteries once you know what to look for.
- A drawing that contradicts the model
- A tolerance with no datum
- A cosmetic callout with no approved sample
- A quote compared against a different scope
Catch the fault on the first part, not the hundredth. A first-article check costs an hour. A bad batch costs the whole order. Write the check into the purchase order so nobody has to remember it.
What to check on the first article
The first article is the cheapest inspection you will ever buy. Use it properly and the rest of the run becomes boring, which is exactly what you want.
- Every dimension on the drawing, with the measured value written beside it.
- The material certificate, matched to the heat or lot number on the parts.
- The finish against the sample you approved, under the same light.
- Fit against the mating part, assembled rather than measured.
- Packaging, because parts that arrive damaged were never in tolerance.
Check in this order: datums, then mating features, then cosmetic faces. If the datums are wrong, every number after them is noise. Keep the report on file. When a problem shows up in month six, that document is the only thing that tells you what changed.
How to compare two quotes fairly
Two numbers are not comparable unless the scope matches. Line them up before you decide, because a low number with three gaps is not a low number.
Same drawing, same material, same finish, same inspection. Anything else is a different job wearing the same part number. Then look at what each quote leaves out. Freight, packaging, certificates and tooling are the usual gaps.
Ask each supplier to state their assumptions in writing. The one who does is usually the one who has run the process before.
Scaling from one part to a batch
The first part teaches you the process. The hundredth teaches you the process cost.
Watch three things as volume grows: setup amortisation, tool wear, and how much hand work the finish still needs. If the unit price barely moves between ten and a hundred, the cost sits in material or in hand work, not in setup. Ask which, because only one of them is negotiable.
Lead time behaves the same way. A one-off is scheduled around other jobs. A repeat order is scheduled around your forecast. Give the shop a forecast and the lead time gets shorter, not longer.
How to read a supplier's quote
A quote is a short document with a long shadow. Four things in it decide whether the job runs smoothly, and only one of them is the price.
- The scope line. It should name the process, the material and the finish, not just the part.
- The tolerance basis. General tolerance or the drawing, and which standard it follows.
- The exclusions. Tooling, freight, certificates and inspection are the usual omissions.
- The validity date. Material prices move, and an open-ended quote is a promise nobody can keep.
Read the exclusions before you read the total. A quote that leaves out tooling is not cheaper. It is a quote for a different job.
What to send with the first order
The first order sets the pattern for every order after it. Send a complete package once and the shop files it, and the second order takes a fraction of the time.
- A STEP or native model plus a PDF drawing carrying the same revision letter.
- The material callout by standard number, not by trade name.
- The finish and the exact faces it applies to.
- Any test the part must pass: fit, seal, drop, salt spray, dielectric.
- A contact who can answer a question inside one working day.
Then write down what was agreed. An email that confirms the material, the finish and the date is worth more than a longer purchase order that leaves them open.
When this is the wrong choice
A good supplier tells you when the process does not fit. These are the cases where we say so.
- The volume is so low that setup costs more than the parts are worth.
- The tolerance is tighter than the process can hold without a second operation.
- The geometry cannot be made without a tool feature that will not pay back.
- The material you need is not available in the form the process requires.
- The schedule is shorter than the tooling or setup time, and nobody has said so yet.
None of these are refusals. They are reasons to look at a different route, and the earlier that conversation happens the cheaper it is. The most expensive mistake in manufacturing is a process chosen before the question was understood.
Planning the ramp from prototype to production
The gap between one good part and a thousand identical ones is a plan, not a machine. Three decisions close it.
First, freeze the design. Every change after tooling starts is a re-cut, and re-cuts are where schedules go. Second, decide the inspection level. A prototype is checked by eye; a production part is checked against a report. Third, agree the change process in writing, including who pays for it.
Write the ramp down as dates and owners, not as intentions. A ramp plan with three names and three dates is worth more than a page of good intentions.
What documentation to expect
Paperwork is not bureaucracy when a part fails at the customer. It is the only record of what was agreed. A normal shipment should carry four documents.
- A dimensional report covering every callout on the drawing.
- A material certificate traceable to the heat or lot number.
- A finish or coating certificate where the specification requires one.
- A packing list that matches the carton labels.
If a supplier cannot produce these on request, they are not running a controlled process. Ask for one sample set before you place the first order and you will know exactly what you are buying.
How to handle a change after the order
Changes happen. What matters is whether the change is priced, scheduled and recorded, or absorbed quietly and discovered later.
Send the change as a new revision, not as a note in an email. Ask for three answers in writing: what it costs, what it does to the date, and what happens to material or tooling already committed. Then decide.
A change without a revision number is a rumour. The shop will build what it has on file, and both sides will be right and unhappy at the same time.
How the work actually runs, step by step
Most buyers see two numbers: a price and a date. Between them sits a sequence that decides both. On manufacturing work it looks like this.
- File review. The model and the drawing are checked against each other. Where they disagree, the shop stops and asks, because guessing is how scrap gets made.
- DFM feedback. The features that add cost and the features that will not hold tolerance are listed. This is the cheapest hour in the whole project.
- Setup or tooling. Fixtures, programs or a tool are built. Everything downstream inherits the quality of this step.
- First article. One part is made and measured against the drawing before anything else runs. Nothing is signed until it passes.
- Production. The run goes ahead with the parameters that produced the approved first article, not with new ones.
- Inspection and packing. The callouts are measured, the certificate is matched, and the parts are packed so they arrive in the condition they left in.
Ask any supplier to walk you through these six steps on your part. The answers tell you more about the shop than the price does.
Case Studies: Success Stories in Food 3D Printing
Our work with restaurants, caterers, and food brands has shown how Food 3D Printing can transform culinary experiences. Below are two standout projects:
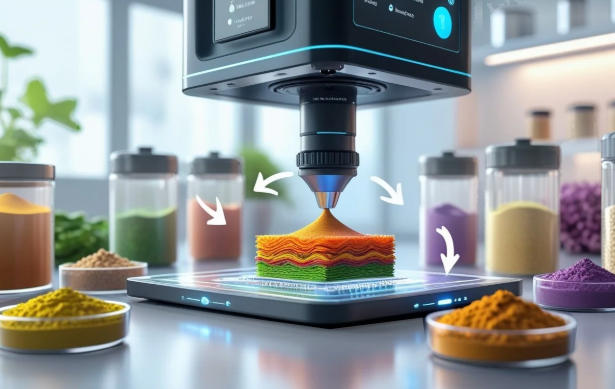
Case Study 1: Luxury Restaurant’s Signature Dessert Series
Client: La Petite Gourmet, a Michelin-recommended restaurant in a major city.
Goal: Create a line of visually stunning desserts that showcase the restaurant’s focus on “art on a plate” and attract food influencers.
Solution: We collaborated with the chef to design 3D-printed chocolate desserts with intricate patterns (e.g., floral lace, geometric shapes). We used high-precision printing (0.1mm layer resolution) and edible food-grade resins for vibrant colors. Each dessert was paired with a complementary sauce and fresh fruit.
Result: The dessert series went viral on social media, with over 100,000 shares. The restaurant saw a 35% increase in reservations, and the chef was invited to showcase the desserts at an international culinary festival.
Case Study 2: Healthcare Meal Service for Senior Citizens
Client: CareMeals, a meal delivery service for senior centers and assisted living facilities.
Goal: Create nutritious, easy-to-eat meals that appeal to seniors (many with chewing or swallowing difficulties) and meet dietary restrictions (e.g., low-sodium, diabetic-friendly).
Solution: We used nutritional customization to add fiber and protein to 3D-printed puree-based meals (e.g., “mashed potato” cakes shaped like stars, “vegetable soup” cubes that dissolve in hot water). We also used soft edible filaments to ensure the food was easy to chew.
Result: Seniors reported a 40% increase in meal satisfaction, and CareMeals expanded their service to 5 more senior centers. The meals also reduced the risk of choking—something the client called a “game-changer” for their business.
Our solution for Food 3D Printing Services
YiguProto runs custom manufacturing in house, from a single prototype to a production batch. We quote the process, the material and the finish as separate lines, so you can see where the money goes instead of arguing with one number.
Send a STEP file or a drawing and you get a DFM report in one to two business days. It flags the features that add cost and the features that will not hold tolerance on the process you picked.
Every order ships with an inspection report on the features you call out. If a part misses, we make it again. Ready to price a part? Start with a free quote and DFM review, or read more about our custom manufacturing. You can also talk to an engineer before you commit to a drawing.
FAQ about Food 3D Printing Services
Is 3D-printed food safe to eat?
Yes! All materials we use are food-grade and meet global safety standards (FDA, EU FSSC 22000). We also follow strict hygiene protocols during printing (e.g., sanitizing printers between uses, storing materials at safe temperatures) to prevent contamination. Every batch of 3D-printed food is tested for safety before delivery.
How long does it take to 3D print a food item?
The timeline depends on the size, complexity, and material. A small decorative element (e.g., a 2cm chocolate flower) takes 5–10 minutes, while a medium-sized main dish (e.g., a 10cm vegetable patty) takes 20–30 minutes. For large orders (e.g., 100 dessert portions for a wedding), we use multiple printers to deliver within 2–3 hours.
Can 3D-printed food accommodate dietary restrictions (e.g., vegan, gluten-free)?
Absolutely! We offer a wide range of edible materials that are vegan, gluten-free, dairy-free, nut-free, and low-sodium. We can also adjust nutrient content (e.g., reduce sugar for diabetic diets) or texture (e.g., softer consistency for those with swallowing difficulties). Just share your dietary needs, and our team will design a solution that fits.
What should I check before approving the parts?
Datums first, then the features that mate, then the cosmetic faces. Ask for a dimensional report, a material certificate and a finish sample. A part can be inside every tolerance and still not fit, so assemble one before you sign.
What is the lead time for Food 3D Printing Services?
Expect 5 to 15 business days depending on process. Tooling, material stock and the finishing queue all move that number, so we confirm the date in writing before the run starts rather than after.
How much does Food 3D Printing Services cost?
Price comes from five lines: material, machine or tool time, setup, finishing and inspection. The material itself is usually the smallest of them. Send a drawing and we will split the quote so you can see which line is doing the damage.
The short version
Food 3D Printing Services rewards the buyer who reads the data sheet and the drawing together. Pick the option for the property that matters, not for the price per kilo.
Tighten only what mates. Test a sample before the run. Then let the process do the rest.