
Sheet Metal
How to Anodize Sheet Metal Fabrication Prototype Models: A Step-by-Step Guide
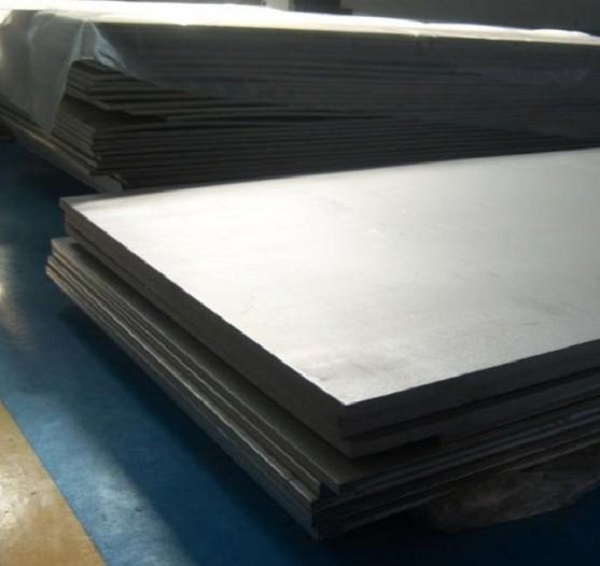
You have built sheet metal prototype models. They look good. They fit together correctly. But something is missing—surface protection. Bare aluminum scratches easily. It corrodes in humid conditions. It lacks the professional appearance that clients expect. Anodizing solves all these problems. This electrochemical process creates a protective oxide film that bonds directly to your metal.
What Is Anodizing for Sheet Metal Prototypes?
The Basic Definition
Anodizing is an electrochemical process that forms a thin, protective oxide film on metal surfaces. It works best with aluminum and its alloys—grades like 6061 and 5052 are ideal candidates.
The film created is not just stuck on top. It bonds directly to the underlying metal. This means it will not peel, chip, or flake like paint does. The oxide becomes part of the metal itself.
Why Anodize Prototypes?
Three main benefits make anodizing valuable for prototype work.
Durability improves dramatically. The oxide film resists scratches, dents, and corrosion. Prototypes destined for harsh testing environments survive longer and provide better data.
Appearance reaches final-product quality. You can dye the film in almost any color. This makes prototypes look like production parts—helpful for client presentations and user testing.
Lifespan extends significantly. Anodized prototypes last two to three times longer than uncoated versions. Fewer remakes mean faster development cycles and lower costs.
Important Limitation
Anodizing works best for aluminum. Steel and copper are not ideal candidates. Their oxide films are less stable and provide minimal protection. For steel prototypes, consider powder coating or galvanizing instead.
How Does the Anodizing Process Work Step by Step?
Step 1: Pre-Treatment—The Most Critical Step
Pre-treatment determines everything that follows. A clean, smooth surface is essential for uniform oxide formation. Skip this step or do it poorly, and your final result will suffer.
Degreasing comes first. Soak your prototype in a mild alkaline cleaner. A 5% sodium hydroxide solution works well. Keep the temperature at 50 to 60 degrees Celsius. Soak for five to ten minutes. This removes oil, grease, and fingerprints completely.
Rinse thoroughly afterward. Use cold deionized water for two to three minutes. This washes away all cleaner residue.
Pickling is optional but helpful. For prototypes with rough surfaces, use dilute nitric acid at 10% to 15% concentration. Soak for one to two minutes. This etches the surface and removes existing oxidation.
Final rinse matters. Rinse again with deionized water to remove any acid residue. The surface is now ready for anodizing.
Real example: A small automotive shop once skipped degreasing on a sheet metal bracket prototype. Oil residue blocked the electrochemical reaction. The anodized film came out patchy—some areas had no film at all. They had to remake the prototype, wasting eight hours of work.
Step 2: Anodizing—Forming the Oxide Film
Now the actual film creation begins. This step requires careful control of several parameters.
Set up the electrolyte. Fill a tank with sulfuric acid at 15% to 20% concentration. This is the most common electrolyte for aluminum anodizing. It is affordable and creates uniform films.
Connect the electrical circuit. Attach your cleaned prototype to the anode—the positive terminal—of your power supply. Use a lead plate as the cathode—the negative terminal. Submerge both in the electrolyte.
Control the key parameters. Three variables matter most:
- Current density: Set at 1 to 2 amps per square decimeter for standard anodizing. For hard anodizing, use 2 to 5 amps per square decimeter.
- Temperature: Keep at 18 to 22 degrees Celsius for standard anodizing. For hard anodizing, use 0 to 10 degrees Celsius. A chiller helps maintain stable temperatures.
- Time: Run for 20 to 60 minutes for standard anodizing. This yields 5 to 20 micrometers of film. Hard anodizing takes 1 to 4 hours and yields 60 to 2500 micrometers.
Monitor the film formation. After the set time, remove your prototype. You will see a matte, porous oxide film on the surface.
| Parameter | Standard Anodizing | Hard Anodizing |
|---|---|---|
| Current Density | 1–2 A/dm² | 2–5 A/dm² |
| Electrolyte Temperature | 18–22°C | 0–10°C |
| Process Time | 20–60 minutes | 1–4 hours |
| Film Thickness | 5–20 μm | 60–2500 μm |
| Best Use Case | Decorative prototypes | High-wear prototypes |
Step 3: Dyeing—Adding Color (Optional)
If your prototype needs specific colors, dyeing happens now. The porous oxide film acts like a sponge, absorbing dye readily.
Prepare the dye bath. Mix a water-based organic dye according to manufacturer instructions. Typical concentrations range from 1% to 5%. Heat the bath to 40 to 60 degrees Celsius.
Immerse your prototype. Submerge the anodized part in the dye bath for 10 to 30 minutes. Longer immersion produces darker colors.
Rinse lightly afterward. Remove the prototype and rinse with cold water for one minute. This removes excess dye from the surface.
Pro tip: The porous film absorbs dye eagerly. If you skip rinsing, excess dye will bleed out later. One electronics company learned this the hard way. Their blue prototype turned purple after two weeks of storage because they forgot the rinse step.
Step 4: Hole Sealing—Locking in the Film
The oxide film from anodizing is naturally porous. Sealing closes these pores. This step boosts corrosion resistance and prevents dye from fading.
Three sealing methods work well.
Hot water sealing is most common. Submerge your prototype in deionized water at 95 to 100 degrees Celsius for 20 to 30 minutes. Heat causes the oxide to expand and seal the pores.
Steam sealing works faster. Expose your prototype to high-pressure steam at 100 to 110 degrees Celsius for 10 to 15 minutes. This method suits small prototypes well.
Sealant sealing handles complex shapes. Apply commercial anodize sealant with a brush or spray. Cure at 60 to 80 degrees Celsius for 15 minutes.
Step 5: Drying—Preventing Water Spots
After sealing, dry your prototype thoroughly to avoid water spots.
Use a clean air compressor to blow off excess water. Then let the part air-dry at room temperature—20 to 25 degrees Celsius—for one to two hours. A low-temperature oven at 40 to 50 degrees Celsius speeds drying to about 30 minutes.
Step 6: Quality Inspection—Verifying Results
Finally, confirm that your anodized prototype meets requirements.
Check film thickness with a coating thickness gauge. Eddy current types work well for aluminum. Your measurement should match target values—5 to 20 micrometers for standard anodizing, 60 or more for hard anodizing.
Test adhesion with a cross-cut test. Make a grid of small cuts in the film. Apply tape and pull firmly. No film should peel off. This indicates good bonding.
Examine color uniformity under natural light. The color should be consistent across all surfaces with no streaks or spots.
Optional corrosion testing adds confidence. Run a salt spray test with 5% salt solution for 24 hours. No rust or discoloration means the film is effective.
What Precautions Prevent Common Mistakes?
Always Use Deionized Water
Tap water contains minerals that leave spots on the oxide film. These spots ruin appearance and can weaken protection. Use deionized water for all rinsing and electrolyte preparation.
Control Electrolyte Temperature Closely
Temperature spikes damage film quality. Above 22 degrees Celsius for standard anodizing, the film becomes thin and weak. Use a chiller to maintain stable temperatures throughout the process.
Wear Proper Safety Gear
Sulfuric acid is corrosive. Wear gloves, goggles, and a lab coat when handling electrolytes. Keep a neutralizing solution—baking soda and water works well—nearby for spill emergencies.
Avoid Over-Anodizing
Leaving prototypes in the electrolyte too long makes the film brittle. Brittle films crack easily. Stick to your planned process times.
Handle Prototypes Gently
The oxide film is hard but can scratch. Use soft gloves when handling anodized parts. Rough handling damages the surface and reduces protection.
Real-World Example: Anodizing Aluminum Phone Frames
A consumer electronics company needed 20 aluminum phone frame prototypes. Material was 6061 aluminum. They wanted a black finish matching their production design.
Here is what they did:
Pre-treatment: Degreased with 5% sodium hydroxide at 50 degrees Celsius for eight minutes. Rinsed with deionized water. Pickled with 12% nitric acid for one minute. Final rinse with deionized water.
Anodizing: Used 18% sulfuric acid electrolyte. Current density at 1.5 amps per square decimeter. Temperature held at 20 degrees Celsius. Process ran 40 minutes. Resulting film thickness was 12 micrometers.
Dyeing: Black organic dye at 3% concentration. Bath temperature at 50 degrees Celsius. Immersion for 20 minutes. Light rinse afterward.
Hole sealing: Hot water sealing at 98 degrees Celsius for 25 minutes. Air-dried completely.
Inspection: Film thickness measured 11.8 micrometers—close to target. Adhesion test passed. Color was uniform across all surfaces. All 20 prototypes met company standards.
How to write a spec that gets priced correctly
A drawing is a contract. If it leaves a number open, the shop fills that number in with its own default. The default is rarely the one you had in mind. Put these five lines on every RFQ and most of the back-and-forth disappears before it starts.
- Flat pattern or STEP file plus a dimensioned drawing
- Material grade and thickness with the standard number
- Bend radii, K-factor and the direction of the grain
- Finish, masking and which faces stay bare
- Quantity and the assembly sequence
The point is not paperwork. Each line removes a decision the shop would otherwise make for you. A complete RFQ comes back priced. An incomplete one comes back guessed.
What actually drives the price
Buyers usually push on material because it is the line they can see. In practice the material is rarely the biggest number on a quote. These five lines decide most of it:
- blank size and nesting efficiency
- number of bends and weld joints
- material grade and thickness
- finish and masking
- batch quantity
Ask for the quote split by line. A supplier who cannot break it down is guessing, and you will pay for the guess. The line you can usually renegotiate is the tolerance band, not the raw material.
Problems you will meet, and the fix
Every process has a failure mode it prefers. The same four show up again and again on this kind of work, and none of them are mysteries once you know what to look for.
- Stretching at a bend that is tighter than the material allows
- Hole distortion when a hole sits too close to a bend line
- Weld draw on a visible face
- Springback that pulls a formed angle out of tolerance
Catch the fault on the first part, not the hundredth. A first-article check costs an hour. A bad batch costs the whole order. Write the check into the purchase order so nobody has to remember it.
What to check on the first article
The first article is the cheapest inspection you will ever buy. Use it properly and the rest of the run becomes boring, which is exactly what you want.
- Every dimension on the drawing, with the measured value written beside it.
- The material certificate, matched to the heat or lot number on the parts.
- The finish against the sample you approved, under the same light.
- Fit against the mating part, assembled rather than measured.
- Packaging, because parts that arrive damaged were never in tolerance.
Check in this order: datums, then mating features, then cosmetic faces. If the datums are wrong, every number after them is noise. Keep the report on file. When a problem shows up in month six, that document is the only thing that tells you what changed.
How to compare two quotes fairly
Two numbers are not comparable unless the scope matches. Line them up before you decide, because a low number with three gaps is not a low number.
Same drawing, same material, same finish, same inspection. Anything else is a different job wearing the same part number. Then look at what each quote leaves out. Freight, packaging, certificates and tooling are the usual gaps.
Ask each supplier to state their assumptions in writing. The one who does is usually the one who has run the process before.
Scaling from one part to a batch
The first part teaches you the process. The hundredth teaches you the process cost.
Watch three things as volume grows: setup amortisation, tool wear, and how much hand work the finish still needs. If the unit price barely moves between ten and a hundred, the cost sits in material or in hand work, not in setup. Ask which, because only one of them is negotiable.
Lead time behaves the same way. A one-off is scheduled around other jobs. A repeat order is scheduled around your forecast. Give the shop a forecast and the lead time gets shorter, not longer.
How to read a supplier's quote
A quote is a short document with a long shadow. Four things in it decide whether the job runs smoothly, and only one of them is the price.
- The scope line. It should name the process, the material and the finish, not just the part.
- The tolerance basis. General tolerance or the drawing, and which standard it follows.
- The exclusions. Tooling, freight, certificates and inspection are the usual omissions.
- The validity date. Material prices move, and an open-ended quote is a promise nobody can keep.
Read the exclusions before you read the total. A quote that leaves out tooling is not cheaper. It is a quote for a different job.
What Problems Occur Without Proper Sealing?
Corrosion Risk
Unsealed anodized film remains porous. Moisture and contaminants penetrate these pores. Over time, corrosion starts underneath the film. The part fails prematurely.
Color Fading
Dye sits in open pores before sealing. Without sealing, dye gradually leaches out. Colors fade unevenly. The prototype loses its professional appearance.
Reduced Wear Resistance
Open pores mean less surface area supporting loads. The film wears faster under friction. Hard anodizing benefits most from proper sealing.
Anodizing sheet metal fabrication prototype models is a straightforward process when done correctly. Six steps lead from raw prototype to finished, protected part.
Pre-treatment cleans and prepares the surface. Anodizing forms the protective oxide film. Dyeing adds color if needed. Hole sealing locks in the film and prevents corrosion. Drying removes moisture without spots. Inspection verifies quality.
Critical parameters require attention throughout. Current density, temperature, and time all affect final results. Deionized water prevents contamination. Safety gear protects the operator.
The payoff is substantial. Anodized prototypes last two to three times longer than uncoated versions. They resist scratches and corrosion. They look like production parts, impressing clients and supporting accurate user testing.
With proper technique, anodizing becomes a reliable tool in your prototype development process.
Our solution for Anodize Sheet Metal Fabrication Prototype
YiguProto runs sheet metal fabrication in house, from a single prototype to a production batch. We quote the process, the material and the finish as separate lines, so you can see where the money goes instead of arguing with one number.
Send a STEP file or a drawing and you get a DFM report in one to two business days. It flags the features that add cost and the features that will not hold tolerance on the process you picked.
Every order ships with an inspection report on the features you call out. If a part misses, we make it again. Ready to price a part? Start with a free quote and DFM review, or read more about our sheet metal fabrication. You can also talk to an engineer before you commit to a drawing.
FAQ about Anodize Sheet Metal Fabrication Prototype
What happens if a part is out of specification?
We measure it against the same drawing you approved and, if it misses, we make it again. What matters is that the report exists, because a disagreement without data is just an opinion.
Can Anodize Sheet Metal Fabrication Prototype be made in small quantities?
Yes, and small quantities are where a good supplier earns the next order. Setup dominates the price at low volume, so the cheapest route is usually the one with the fewest operations, not the cheapest material.
What files do you need in order to quote?
A STEP file plus a PDF drawing that carries the same revision letter. The model carries the geometry and the drawing carries the intent. When the two disagree, the shop picks one, and it is never the one you meant.
What tolerance can you hold on Anodize Sheet Metal Fabrication Prototype?
The working default is ±0.2 mm on formed features, ±0.1 mm on laser-cut holes. Tighter than that the process changes and so does the price, because every step tighter adds inspection time. Call out only the faces that mate with something else and leave the rest on the general tolerance.
Does the process work for prototypes as well as production?
Yes, and that is usually the point. Running the prototype on the production process removes a whole class of surprises, because the part you test is made the same way as the part you sell.
How much does Anodize Sheet Metal Fabrication Prototype cost?
Price comes from five lines: material, machine or tool time, setup, finishing and inspection. The material itself is usually the smallest of them. Send a drawing and we will split the quote so you can see which line is doing the damage.
The short version
Anodize Sheet Metal Fabrication Prototype rewards the buyer who reads the data sheet and the drawing together. Pick the option for the property that matters, not for the price per kilo.
Tighten only what mates. Test a sample before the run. Then let the process do the rest.