
Industry Applications
How to Ensure High-Quality Processing of Lamp Prototypes?
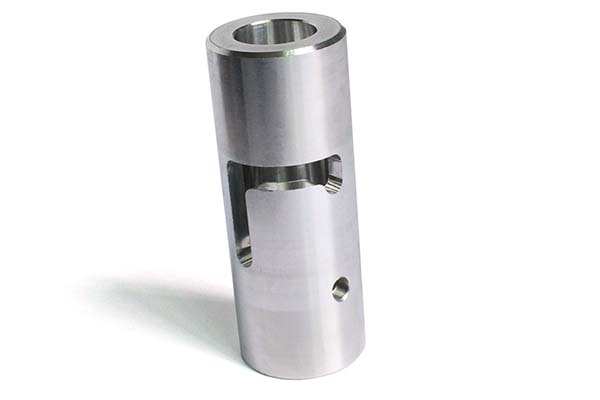
When developing a new lamp design, the processing of lamp prototypes is a critical link that directly determines whether the final product meets design expectations. A well-executed prototype not only verifies functionality and aesthetics but also lays the groundwork for mass production.
Key takeaways
- The choice of processing technology depends on prototype complexity, batch size, and precision requirements.
- Poor structural design can lead to assembly issues, deformation, or functional failures. Focus on these three areas:
- Surface treatment improves the prototype’s appearance and protects it from wear.
- Skipping testing can lead to costly mistakes in mass production. Follow this step-by-step process:
What Material Should You Choose for Your Lamp Prototype?
Material selection is the foundation of prototype quality. Different materials vary in transparency, heat resistance, and processability, directly impacting the prototype’s performance and appearance.
Common Lamp Prototype Materials
| Material | Key Characteristics | Ideal Lamp Applications |
|---|---|---|
| ABS Plastic | Easy to machine, good impact resistance, dyeable | Desk lamps, floor lamps (non-heat-intensive parts) |
| Acrylic (PMMA) | High transparency, excellent gloss, moderate heat resistance | Lampshades, light diffusers |
| PC Plastic | High heat resistance, flame-retardant, strong | LED downlights, high-temperature lamp housings |
| Aluminum Alloy | Lightweight, good thermal conductivity, high strength | LED lamp heat sinks, structural frames |
| Resin | Excellent for complex shapes, customizable transparency | Artistic lamps, prototypes with intricate details |
How to Prioritize Material Properties?
For light-transmitting parts (lampshades, diffusers): Prioritize transparency and gloss. Acrylic is the go-to choice for its optical clarity and ease of polishing.
For heat-generating parts (LED bases, housings): Prioritize thermal conductivity. Aluminum alloy effectively draws heat away from LED chips, extending component life.
For structural parts (frames, brackets): Prioritize strength and impact resistance. ABS and PC plastics offer durability at lower cost than metal.
For artistic or complex shapes: Consider resin for its ability to capture fine details and create custom transparency effects.
Which Processing Technology Matches Your Needs?
The choice of processing technology depends on prototype complexity, batch size, and precision requirements.
Technology Comparison
| Technology | Advantages | Disadvantages | Best For |
|---|---|---|---|
| 3D Printing | Fast for complex shapes, low cost for small batches | Surface may have layering, limited material options | Intricate prototypes (artistic lamp bases), small batches (<10 units) |
| CNC Machining | High precision (±0.01mm), smooth surface, works with hard materials | Slow for complex designs, high cost for small batches | High-precision parts (metal heat sinks), larger batches (>20 units) |
| Silicone Molding | Low cost for multiple copies, consistent quality | Requires a master prototype (3D printed or CNC) | Duplicating prototypes (50+ identical lampshades) |
| Handcrafting | Flexible for unique details, suitable for special materials | Time-consuming, inconsistent quality | Custom touches (hand-sanded resin details, small-scale art lamps) |
Pro Tip: Combine Technologies
For complex components, consider a hybrid approach:
- Use 3D printing to create a master prototype with intricate details
- Then use silicone molding to produce multiple copies efficiently
This balances speed for initial development with cost-effectiveness for multiple iterations.
What Structural Design Issues Should You Avoid?
Poor structural design can lead to assembly issues, deformation, or functional failures. Focus on these three areas:
Assembly Compatibility
Design with assembly methods in mind to ensure components fit securely:
| Assembly Method | Best For | Key Considerations |
|---|---|---|
| Snaps | Plastic parts | Ensure snaps have enough flexibility to avoid breaking |
| Screws | Metal/plastic connections | Use standard sizes (M3, M4) for easy sourcing |
| Glue | Non-load-bearing parts | Choose heat-resistant glue for LED lamps |
Avoid: Tight fits (cause assembly difficulty) or loose fits (lead to instability).
Thin-Wall Treatment
Lampshades and light diffusers often use thin-wall structures. To prevent deformation or cracking:
- Maintain uniform wall thickness (1.5–3mm for plastic; 0.8–2mm for aluminum)
- Add stiffeners (small ribs) to ultra-thin sections (≤1mm) for extra support
- Avoid sharp corners—use radii to reduce stress concentrations
Thermal Design (Critical for LED Lamps)
LED lamps generate heat that can warp prototypes or reduce lifespan. Solutions include:
- Integrate heat dissipation holes (diameter: 2–5mm) in the lamp housing
- Use metal bases (aluminum alloy) to transfer heat away from the LED chip
- Avoid covering heat-generating parts with thick plastic (blocks heat escape)
- Consider heat sinks with fins to increase surface area for cooling
How Can Surface Treatment Enhance Your Lamp Prototype?
Surface treatment improves the prototype’s appearance and protects it from wear.
Common Surface Treatment Methods
| Treatment | Purpose | Key Considerations |
|---|---|---|
| Sanding & Polishing | Remove machining marks (CNC tool marks, 3D print layers) | Use 400–2000 grit sandpaper (coarse to fine); polish acrylic to high gloss with buffing wheel |
| Spraying | Add color or texture (matte, glossy, metallic) | Use UV-resistant paint for outdoor lamps; ensure no bubbles or flow marks |
| Electroplating | Create metallic finish (chrome, nickel) | Suitable for metal parts; avoid plating on plastic (poor adhesion) |
| Silk Screen Printing | Add text or patterns (brand logos, labels) | Use durable inks; test for wear resistance |
Matching Finish to Application
| Lamp Type | Recommended Finish |
|---|---|
| Modern desk lamps | Matte or gloss spray painting |
| Artistic/designer lamps | Polished acrylic or electroplated metal |
| Outdoor lamps | UV-resistant paint + clear protective coat |
| Branded products | Silk screen printing for logos |
What Testing Ensures Prototype Reliability?
Skipping testing can lead to costly mistakes in mass production. Follow this step-by-step process:
Step 1: Functional Validation
Test core lamp functions:
- Lighting: Check if the light turns on/off smoothly; verify brightness (e.g., 500–800 lumens for desk lamps)
- Switches/Dimming: Test switch responsiveness and dimming range (if applicable)
- Heat Dissipation: Run the lamp for 2–4 hours; measure surface temperature (should not exceed 60°C for touchable parts)
Step 2: Visual Inspection
Compare the prototype to design requirements:
- Check color consistency (use a Pantone color chart for reference)
- Inspect for defects: scratches, blemishes, or uneven gaps (gaps should be <0.5mm)
- Verify transparency (for acrylic parts: ensure no cloudiness)
Step 3: Structural Stability
Simulate real-world use to test durability:
- Load-Bearing: Place a small weight (e.g., 500g) on the lamp base—should not tip over
- Shock Resistance: Drop the prototype from 30cm—no cracks or loose parts
- Durability: Open/close the lamp shade 50 times—no damage to hinges
What Are Common Lamp Prototype Problems and Solutions?
Problem 1: Dimensional Deviations
Cause: Insufficient processing accuracy (e.g., CNC toolpath errors) or material shrinkage (common with plastics).
Solutions:
- Optimize CNC toolpaths using high-precision tools
- Reserve 1–2% shrinkage allowance for plastic materials (e.g., ABS shrinks ~1.5%)
Problem 2: Poor Light Transmittance
Cause: Wrong material selection (opaque plastic instead of acrylic) or inadequate polishing (machining marks block light).
Solutions:
- Switch to high-transparency acrylic
- Polish surface with 1500–2000 grit sandpaper followed by buffing wheel
Problem 3: Loose Assembly
Cause: Unreasonable design (snaps too thin) or processing errors (CNC parts too small).
Solutions:
- Adjust design—thicken snaps by 0.2–0.3mm
- Improve machining accuracy—use CNC machine with ±0.005mm precision
Problem 4: Overheating
Cause: Poor thermal design—heat trapped inside housing.
Solutions:
- Add ventilation holes (2–5mm diameter)
- Use aluminum heat sink instead of all-plastic construction
- Ensure LED chips have direct thermal path to metal
High-quality lamp prototype processing requires careful attention to material selection, technology matching, structural design, surface treatment, and thorough testing.
Key takeaways:
- Materials: Match properties to function—acrylic for light transmission, aluminum for heat dissipation
- Technologies: Combine 3D printing for complex shapes with CNC for precision; use silicone molding for multiple copies
- Design: Ensure assembly compatibility, uniform wall thickness, and proper thermal management
- Surface treatment: Enhance appearance and durability with appropriate finishing methods
- Testing: Validate function, appearance, and structural stability before mass production
By following these guidelines, you can avoid common pitfalls, reduce development time, and create lamp prototypes that accurately represent your final product.
How to write a spec that gets priced correctly
A drawing is a contract. If it leaves a number open, the shop fills that number in with its own default. The default is rarely the one you had in mind. Put these five lines on every RFQ and most of the back-and-forth disappears before it starts.
- The application and the environment it runs in
- The standard the part must meet
- Process and material that can meet it
- Inspection and documentation package
- Volume and ramp schedule
The point is not paperwork. Each line removes a decision the shop would otherwise make for you. A complete RFQ comes back priced. An incomplete one comes back guessed.
What actually drives the price
Buyers usually push on material because it is the line they can see. In practice the material is rarely the biggest number on a quote. These five lines decide most of it:
- process selection
- material and certification
- tolerance band
- inspection and documentation
- volume
Ask for the quote split by line. A supplier who cannot break it down is guessing, and you will pay for the guess. The line you can usually renegotiate is the tolerance band, not the raw material.
Problems you will meet, and the fix
Every process has a failure mode it prefers. The same four show up again and again on this kind of work, and none of them are mysteries once you know what to look for.
- A consumer-grade process chosen for an industrial duty
- Documentation that arrives after the parts
- A tolerance tighter than the application needs
- No plan for the second source
Catch the fault on the first part, not the hundredth. A first-article check costs an hour. A bad batch costs the whole order. Write the check into the purchase order so nobody has to remember it.
What to check on the first article
The first article is the cheapest inspection you will ever buy. Use it properly and the rest of the run becomes boring, which is exactly what you want.
- Every dimension on the drawing, with the measured value written beside it.
- The material certificate, matched to the heat or lot number on the parts.
- The finish against the sample you approved, under the same light.
- Fit against the mating part, assembled rather than measured.
- Packaging, because parts that arrive damaged were never in tolerance.
Check in this order: datums, then mating features, then cosmetic faces. If the datums are wrong, every number after them is noise. Keep the report on file. When a problem shows up in month six, that document is the only thing that tells you what changed.
How to compare two quotes fairly
Two numbers are not comparable unless the scope matches. Line them up before you decide, because a low number with three gaps is not a low number.
Same drawing, same material, same finish, same inspection. Anything else is a different job wearing the same part number. Then look at what each quote leaves out. Freight, packaging, certificates and tooling are the usual gaps.
Ask each supplier to state their assumptions in writing. The one who does is usually the one who has run the process before.
Scaling from one part to a batch
The first part teaches you the process. The hundredth teaches you the process cost.
Watch three things as volume grows: setup amortisation, tool wear, and how much hand work the finish still needs. If the unit price barely moves between ten and a hundred, the cost sits in material or in hand work, not in setup. Ask which, because only one of them is negotiable.
Lead time behaves the same way. A one-off is scheduled around other jobs. A repeat order is scheduled around your forecast. Give the shop a forecast and the lead time gets shorter, not longer.
How to read a supplier's quote
A quote is a short document with a long shadow. Four things in it decide whether the job runs smoothly, and only one of them is the price.
- The scope line. It should name the process, the material and the finish, not just the part.
- The tolerance basis. General tolerance or the drawing, and which standard it follows.
- The exclusions. Tooling, freight, certificates and inspection are the usual omissions.
- The validity date. Material prices move, and an open-ended quote is a promise nobody can keep.
Read the exclusions before you read the total. A quote that leaves out tooling is not cheaper. It is a quote for a different job.
What to send with the first order
The first order sets the pattern for every order after it. Send a complete package once and the shop files it, and the second order takes a fraction of the time.
- A STEP or native model plus a PDF drawing carrying the same revision letter.
- The material callout by standard number, not by trade name.
- The finish and the exact faces it applies to.
- Any test the part must pass: fit, seal, drop, salt spray, dielectric.
- A contact who can answer a question inside one working day.
Then write down what was agreed. An email that confirms the material, the finish and the date is worth more than a longer purchase order that leaves them open.
FAQ About Lamp Prototype Processing
Q1: My prototype has dimensional deviations—what causes this?
A1: Dimensional deviations usually stem from two issues: insufficient processing accuracy (e.g., CNC toolpath errors) or material shrinkage (common with plastic). Solutions: Optimize CNC toolpaths (use high-precision tools) and reserve 1–2% shrinkage allowance for plastic materials (e.g., ABS shrinks ~1.5%).
Q2: The lamp shade has poor light transmittance—how to fix it?
A2: Poor transmittance is often due to wrong material selection (e.g., using opaque plastic instead of acrylic) or inadequate polishing (machining marks block light). Fixes: Switch to high-transparency acrylic and polish the surface with 1500–2000 grit sandpaper followed by a buffing wheel.
Q3: Assembled parts are loose—what’s the solution?
A3: Loose parts usually result from unreasonable design (e.g., snaps that are too thin) or processing errors (e.g., CNC parts too small). Solutions: Adjust the design (thicken snaps by 0.2–0.3mm) or improve machining accuracy (use a CNC machine with ±0.005mm precision).
Q4: How do I choose between 3D printing and CNC machining for my lamp prototype?
A4: Choose 3D printing for complex shapes, artistic designs, or small batches (<10 units). Choose **CNC machining** for high-precision parts, metal components, or larger batches (>20 units). For best results, consider combining both.
Q5: What’s the best material for LED lamp prototypes?
A5: For heat dissipation, use aluminum alloy for bases and heat sinks. For housings and diffusers, use PC plastic (high heat resistance) or acrylic (high transparency). Avoid materials with low heat resistance near LED chips.
Q6: How can I prevent my lamp prototype from overheating?
A6: Integrate heat dissipation holes (2–5mm diameter), use metal bases to transfer heat away from LED chips, and avoid covering heat-generating parts with thick plastic. Consider adding a heat sink with fins.
Q7: What surface finish is best for acrylic lampshades?
A7: For maximum transparency, polish acrylic with 1500–2000 grit sandpaper followed by a buffing wheel. For diffused light, a matte finish (achieved by sandblasting or fine sanding) works well.
Our solution for Ensure High-Quality Processing
YiguProto runs contract manufacturing in house, from a single prototype to a production batch. We quote the process, the material and the finish as separate lines, so you can see where the money goes instead of arguing with one number.
Send a STEP file or a drawing and you get a DFM report in one to two business days. It flags the features that add cost and the features that will not hold tolerance on the process you picked.
Every order ships with an inspection report on the features you call out. If a part misses, we make it again. Ready to price a part? Start with a free quote and DFM review, or read more about our contract manufacturing. You can also talk to an engineer before you commit to a drawing.
FAQ about Ensure High-Quality Processing
Can Ensure High-Quality Processing be made in small quantities?
Yes, and small quantities are where a good supplier earns the next order. Setup dominates the price at low volume, so the cheapest route is usually the one with the fewest operations, not the cheapest material.
What is Ensure High-Quality Processing used for?
Ensure High-Quality Processing turns up wherever the part has to do a real job at a predictable cost: brackets, housings, fixtures, covers and the fittings that hold them together. The honest test is whether the properties match the load and the environment, not whether the material is fashionable.
How do I compare two quotes fairly?
Match the scope first: same drawing, same material, same finish, same inspection. Then read the exclusions. Freight, tooling and certificates are the usual gaps, and a low number with three gaps is not a low number.
What files do you need in order to quote?
A STEP file plus a PDF drawing that carries the same revision letter. The model carries the geometry and the drawing carries the intent. When the two disagree, the shop picks one, and it is never the one you meant.
What is the lead time for Ensure High-Quality Processing?
Expect 5 to 20 business days depending on process and volume. Tooling, material stock and the finishing queue all move that number, so we confirm the date in writing before the run starts rather than after.
How much does Ensure High-Quality Processing cost?
Price comes from five lines: material, machine or tool time, setup, finishing and inspection. The material itself is usually the smallest of them. Send a drawing and we will split the quote so you can see which line is doing the damage.
The short version
Ensure High-Quality Processing rewards the buyer who reads the data sheet and the drawing together. Pick the option for the property that matters, not for the price per kilo.
Tighten only what mates. Test a sample before the run. Then let the process do the rest.