
Die Casting
Is Stamping the Same as Die Casting? Key Differences Explained
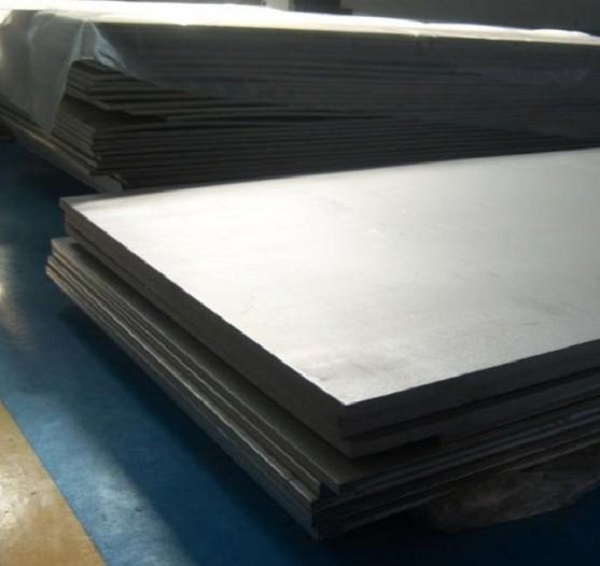
If you work with metal parts manufacturing, you have likely heard the terms stamping and die casting used interchangeably. After all, both processes use molds and apply pressure to shape metal. But here is the truth: these two manufacturing methods are fundamentally different.
Key takeaways
- The most important distinction comes down to one factor: the state of the metal during forming.
- Understanding the step-by-step workflow reveals why these two methods produce such different results.
- The equipment differences reflect the fundamental material states. Stamping presses apply brute force to solid metal.
- Stamping and die casting are not interchangeable processes—they solve different manufacturing challenges.
What Is the Fundamental Difference Between Stamping and Die Casting?
The most important distinction comes down to one factor: the state of the metal during forming. Stamping works with solid metal, while die casting works with liquid metal. This single difference drives everything else—from equipment design to part characteristics.
Stamping: Shaping Solid Metal
Stamping is a cold working process that transforms solid metal sheets into finished shapes using mechanical force. The metal never changes its physical state.
- Material input: Solid metal blanks or coils (steel, aluminum, copper, stainless steel)
- Typical thickness range: 0.1mm to 10mm (for example, 0.5mm aluminum sheets for electronics enclosures)
- Core mechanism: A stamping press applies pressure through a die (punch and die set), causing the solid metal to bend, stretch, or cut through plastic deformation
- Key characteristic: No phase change occurs—the metal remains solid throughout, preserving its original density (typically 99.5% or higher)
Think of stamping like folding a piece of paper. You apply force to change its shape, but the material itself stays the same.
Die Casting: Forming Molten Metal
Die casting is a hot working process that melts metal completely, then injects the liquid into a mold where it solidifies.
- Material input: Molten non-ferrous alloys (aluminum heated to 680–720°C, zinc to 380–420°C, magnesium alloys)
- Core mechanism: High pressure forces liquid metal into a precision-machined die cavity; the metal cools and solidifies, taking the mold’s shape
- Key characteristic: Involves a complete phase change (liquid to solid), requiring careful temperature and flow control to prevent defects
Die casting is similar to making ice cubes—you pour liquid into a tray, let it freeze, and the resulting solid takes the tray’s exact shape.
How Do the Processes Actually Work?
Understanding the step-by-step workflow reveals why these two methods produce such different results.
Stamping Workflow: Simple and Fast
- Blank preparation: Metal sheets are cut into blanks or fed directly from coils
- Die setup: The stamping die (punch and die) is mounted in the press
- Pressure application: The press brings the punch down, forcing the metal into the die cavity
- Ejection: The finished part is pushed out—no cooling required
- Secondary operations: Trimming, bending, or punching may follow
A typical stamping cycle takes 0.5 to 5 seconds for high-volume parts. Beverage cans, for example, run at speeds exceeding 200 parts per minute.
Die Casting Workflow: More Complex and Slower
- Metal melting: Alloys are heated in a furnace to precise temperatures
- Injection: Liquid metal is forced into the die at pressures up to 150MPa
- Cooling and solidification: The metal remains in the die for 5 to 30 seconds depending on wall thickness
- Ejection: The die opens, and ejector pins push out the solidified part
- Trimming: Excess material (runners, flash) is removed
Die casting cycles typically run 15 to 60 seconds per part, with thicker walls requiring longer cooling times.
Equipment Comparison: Different Machines for Different Jobs
| Equipment Factor | Stamping | Die Casting |
|---|---|---|
| Primary machine | Mechanical or hydraulic press | Die casting machine with injection system |
| Clamping force range | 10 to 2000 tons | 50 to 4000 tons |
| Mold temperature control | Not required | Essential (cooling channels, heaters) |
| Mold complexity | Simple two-part design (punch + die) | Complex with runner systems, overflow wells, cooling lines |
| Mold material | Tool steel, carbide for high volume | Heat-resistant H13 steel or similar |
| Auxiliary equipment | Coil feeders, straighteners | Melting furnaces, ladles, sprayers |
The equipment differences reflect the fundamental material states. Stamping presses apply brute force to solid metal. Die casting machines must manage molten metal flow, controlled cooling, and precise timing.
What Types of Parts Can Each Process Make?
Stamping Products: Thin, Flat, and Uniform
Stamping excels at producing parts with:
- Consistent thickness throughout
- Flat or shallow 3D shapes (depth typically less than 5 times material thickness)
- Sharp features like holes, bends, and cuts
- High surface quality suitable for painting or plating
Real-world examples:
- Automotive body panels (doors, hoods, fenders)
- Phone and tablet back covers (0.8–1.2mm aluminum)
- Electrical contacts and terminals
- Appliance enclosures (microwave shells, refrigerator panels)
- Beverage cans and lids
Die Casting Products: Complex 3D Geometry
Die casting shines when parts require:
- Complex internal features (threads, bosses, ribs)
- Variable wall thickness (thick sections for strength, thin sections for weight savings)
- Deep cavities and intricate contours
- Integrated functions (mounting points, heat sinks)
Real-world examples:
- Engine blocks and transmission housings
- EV battery pack enclosures (with cooling channels and mounting bosses)
- Camera and smartphone frames (internal threads, thin walls)
- Power tool housings (impact-resistant, ergonomic shapes)
- LED lighting heat sinks (complex fin structures)
Which Industries Use Stamping vs. Die Casting?
| Industry | Typical Stamping Applications | Typical Die Casting Applications |
|---|---|---|
| Automotive | Body panels, brackets, chassis components | Engine blocks, transmission cases, steering knuckles |
| Consumer electronics | Metal cases, shields, connectors | Device frames, connector housings, heat sinks |
| Aerospace | Skin panels, brackets, clips | Structural components, housings |
| Medical | Instrument trays, cart frames | Device housings, imaging equipment components |
| Industrial equipment | Guards, enclosures, mounting plates | Pump housings, gearboxes, motor frames |
Common Misconceptions: Setting the Record Straight
Myth 1: “Stamping and die casting are interchangeable because both use molds.”
Fact: The purpose of pressure differs completely. In stamping, pressure deforms solid metal to change its shape. In die casting, pressure moves liquid metal through channels to fill a cavity before solidification. The mold designs reflect this—stamping dies focus on guidance and cutting edges, while die casting dies require complex runner systems, overflow wells, and cooling channels to manage molten metal flow.
Myth 2: “Stamping can produce complex 3D parts like die casting.”
Fact: Stamping is limited to parts with uniform wall thickness and shallow depths. For example, you can stamp a simple cup shape (depth up to 5 times material thickness) through multiple drawing operations. But you cannot stamp a part with internal threads, cross holes, or variable thickness ribs—those require die casting. A smartphone mid-frame with its thin walls, internal bosses, and complex cutouts is possible only through die casting.
Myth 3: “Die-cast parts are weaker than stamped parts.”
Fact: Strength depends on design, not process. Stamped parts have dense grain structures ideal for flat load-bearing applications. But die casting allows strategic reinforcement—thick ribs, gussets, and bosses that stamped parts cannot incorporate. Modern die casting techniques like semi-solid casting achieve tensile strengths exceeding 300MPa, comparable to stamped steel. The choice comes down to geometry requirements, not inherent strength limitations.
Myth 4: “Die casting is always more expensive.”
Fact: Cost depends on volume and part complexity. Die casting molds cost more (\$20,000–\$50,000 vs. \$5,000–\$15,000 for stamping dies). But for complex parts requiring multiple stamping operations (progressive dies, secondary forming), the cumulative tooling cost may exceed a single die casting mold. For high volumes (over 100,000 parts), die casting’s longer mold life (50,000–100,000 shots) can make it more economical than stamping with frequent die replacements.
How to Choose Between Stamping and Die Casting
Use this three-step decision framework for your next project.
Step 1: Analyze Part Geometry
Choose stamping if:
- Part thickness is uniform
- Depth is shallow (under 5× material thickness)
- Features are 2D or simple bends
- Examples: flat panels, brackets, covers, clips
Choose die casting if:
- Part has complex 3D features
- Internal threads, bosses, or ribs are required
- Wall thickness varies
- Examples: housings, engine components, structural frames with mounting points
Step 2: Consider Production Volume
| Volume Range | Stamping Viability | Die Casting Viability |
|---|---|---|
| Low (under 1,000 parts) | Excellent (low tooling cost) | Poor (high tooling cost per part) |
| Medium (1,000–10,000 parts) | Good | Marginal (consider if part complexity demands it) |
| High (10,000–100,000 parts) | Good (progressive dies) | Good (tooling amortized) |
| Very high (over 100,000 parts) | Excellent (high-speed presses) | Excellent (multi-cavity molds) |
Step 3: Evaluate Material and Performance Requirements
Material considerations:
- Stamping: Works with ferrous and non-ferrous metals, plus pre-finished materials (pre-painted, plated)
- Die casting: Limited to non-ferrous alloys (aluminum, zinc, magnesium, copper alloys)
Performance requirements:
- Need pressure tightness? Die casting with vacuum assistance achieves porosity below 0.5%
- Need surface finish for plating? Stamping’s dense surface requires minimal preparation
- Need thermal conductivity? Die-cast aluminum offers excellent heat transfer for LED housings
- Need electrical conductivity? Stamped copper or brass provides superior performance
Real-World Case Study: Electric Vehicle Battery Housing
An EV manufacturer needed a battery enclosure that was:
- Lightweight (target under 15kg)
- Waterproof (IP67 rating)
- Structurally rigid (protect cells during vibration)
- Cost-effective for 50,000 units/year
Stamping Approach
- Multiple stamped steel sheets welded together
- Weight: 22kg (too heavy)
- Welding points risked leakage
- Tooling cost: \$45,000 (simpler dies)
- Part cost: Moderate
Die Casting Approach
- Single-piece aluminum die casting
- Weight: 13.5kg (target met)
- Integrated cooling channels and mounting bosses
- IP67 achievable with proper process control
- Tooling cost: \$85,000 (complex mold)
- Part cost: Higher but acceptable
Result: The manufacturer chose die casting despite higher tooling costs because only die casting could meet the weight target and integration requirements. The stamped alternative would have required additional components and assembly steps, ultimately costing more in assembly labor and failing the weight specification.
How to write a spec that gets priced correctly
A drawing is a contract. If it leaves a number open, the shop fills that number in with its own default. The default is rarely the one you had in mind. Put these five lines on every RFQ and most of the back-and-forth disappears before it starts.
- 3D model with the parting line marked
- Alloy grade and the standard it meets
- Wall thickness and draft on every face
- Machining allowance on the faces that will be cut
- Pressure tightness or porosity class
The point is not paperwork. Each line removes a decision the shop would otherwise make for you. A complete RFQ comes back priced. An incomplete one comes back guessed.
What actually drives the price
Buyers usually push on material because it is the line they can see. In practice the material is rarely the biggest number on a quote. These five lines decide most of it:
- die steel and cavity count
- part weight and wall section
- draft and slide count
- porosity requirement
- machining allowance
Ask for the quote split by line. A supplier who cannot break it down is guessing, and you will pay for the guess. The line you can usually renegotiate is the tolerance band, not the raw material.
Problems you will meet, and the fix
Every process has a failure mode it prefers. The same four show up again and again on this kind of work, and none of them are mysteries once you know what to look for.
- Cold shuts where two flow fronts meet
- Porosity that shows up only after machining
- Soldering on a hot spot in the die
- Shrinkage voids in a heavy section
Catch the fault on the first part, not the hundredth. A first-article check costs an hour. A bad batch costs the whole order. Write the check into the purchase order so nobody has to remember it.
What to check on the first article
The first article is the cheapest inspection you will ever buy. Use it properly and the rest of the run becomes boring, which is exactly what you want.
- Every dimension on the drawing, with the measured value written beside it.
- The material certificate, matched to the heat or lot number on the parts.
- The finish against the sample you approved, under the same light.
- Fit against the mating part, assembled rather than measured.
- Packaging, because parts that arrive damaged were never in tolerance.
Check in this order: datums, then mating features, then cosmetic faces. If the datums are wrong, every number after them is noise. Keep the report on file. When a problem shows up in month six, that document is the only thing that tells you what changed.
How to compare two quotes fairly
Two numbers are not comparable unless the scope matches. Line them up before you decide, because a low number with three gaps is not a low number.
Same drawing, same material, same finish, same inspection. Anything else is a different job wearing the same part number. Then look at what each quote leaves out. Freight, packaging, certificates and tooling are the usual gaps.
Ask each supplier to state their assumptions in writing. The one who does is usually the one who has run the process before.
Industry Trends: How Both Processes Are Evolving
Stamping Innovations
- Servo-driven presses enable programmable ram speeds, reducing springback and improving complex part forming
- Advanced high-strength steels (AHSS) allow lighter parts with stamped construction
- In-die sensing and real-time adjustment improve quality and reduce scrap
- Hybrid stamping combines cold forming with localized heating for difficult materials
Die Casting Advances
- Vacuum die casting reduces porosity below 0.5%, enabling heat treatment and welding
- Semi-solid casting (thixomolding) produces parts with near-wrought properties
- Simulation software predicts fill patterns, shrinkage, and porosity before tool cutting
- Large-scale die casting (gigacasting) produces entire vehicle body sections in single parts
Stamping and die casting are not interchangeable processes—they solve different manufacturing challenges. Stamping transforms solid metal sheets into flat or shallow parts with exceptional speed and precision, ideal for panels, brackets, and high-volume components. Die casting creates complex 3D geometries from molten metal, enabling integrated features and variable wall thickness impossible with stamping.
The choice comes down to your part’s geometry, volume requirements, and performance needs. Flat, thin parts with uniform thickness point to stamping. Complex 3D shapes with internal features demand die casting. Understanding these fundamental differences—starting with the state of the metal itself—helps you avoid costly manufacturing mistakes and select the process that delivers the best combination of quality, cost, and performance for your specific application.
How we can help
YiguProto runs die casting in house, from a single prototype to a production batch. We quote the process, the material and the finish as separate lines, so you can see where the money goes instead of arguing with one number.
Send a STEP file or a drawing and you get a DFM report in one to two business days. It flags the features that add cost and the features that will not hold tolerance on the process you picked.
Every order ships with an inspection report on the features you call out. If a part misses, we make it again. Ready to price a part? Start with a free quote and DFM review, or read more about our die casting. You can also talk to an engineer before you commit to a drawing.
Frequently asked questions
How do I compare two quotes fairly?
Match the scope first: same drawing, same material, same finish, same inspection. Then read the exclusions. Freight, tooling and certificates are the usual gaps, and a low number with three gaps is not a low number.
What files do you need in order to quote?
A STEP file plus a PDF drawing that carries the same revision letter. The model carries the geometry and the drawing carries the intent. When the two disagree, the shop picks one, and it is never the one you meant.
What happens if a part is out of specification?
We measure it against the same drawing you approved and, if it misses, we make it again. What matters is that the report exists, because a disagreement without data is just an opinion.
Is there a minimum order quantity?
No hard minimum. One part is fine. What changes with volume is which costs dominate, so a single unit is priced mostly on setup and a thousand units are priced mostly on cycle time and material.
What material should I specify?
Specify by standard, not by trade name. A trade name can change under you between two orders; a standard number cannot. Then add the one property that actually decides the part, whether that is strength, heat resistance or chemical exposure.
How long does a first article take?
Usually a few business days once the drawing is frozen, and longer if tooling is involved. The date we give you is the date we confirm in writing, not the date we hope for.
The short version
Good parts reward the buyer who reads the data sheet and the drawing together. Pick the option for the property that matters, not for the price per kilo.
Tighten only what mates. Test a sample before the run. Then let the process do the rest.