
Metal Stamping
What Factors Determine How Long Your Stamping Dies Will Last?
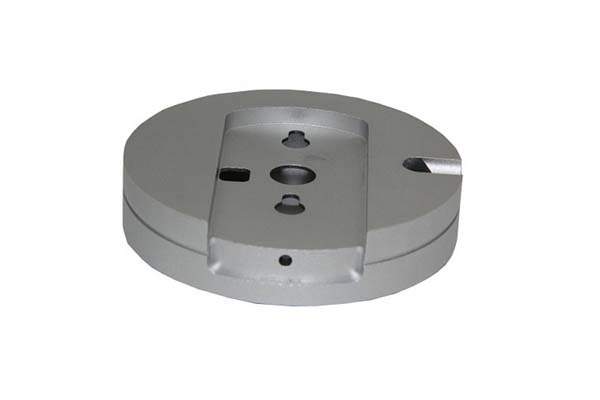
Stamping dies are the backbone of efficient manufacturing. When they work well, production runs smoothly. When they fail, everything stops. But why do some dies last for hundreds of thousands of cycles while others fail prematurely? The answer isn’t simple. Die life depends on a delicate balance of design choices, manufacturing quality, and maintenance practices.
Key takeaways
- The old saying applies perfectly here: you can’t build a strong house on a weak foundation. A well-designed die withstands production rigors.
- Even well-designed, well-manufactured dies require proper care to reach maximum lifespan.
- To truly maximize stamping die life, you need an integrated approach spanning design, manufacturing, usage, and maintenance.
- Stamping die life doesn’t depend on any one thing. It’s the result of a complete system:
What Does “Die Life” Actually Mean?
Before diving into specific factors, let’s define our terms.
Die life is measured by the number of successful production cycles a die completes before needing major repairs or replacement. This can range from:
- Tens of thousands of cycles for simple dies
- Over a million cycles for high-quality, well-maintained precision dies
Why does this matter? A longer die life means:
- Lower production costs (spread tooling investment over more parts)
- More consistent part quality (dies wear gradually, not catastrophically)
- Fewer interruptions in your manufacturing workflow
By optimizing the factors that affect die life, you’re not just extending equipment lifespan—you’re improving your bottom line.
Factor 1: How Does Design Quality Affect Die Longevity?
The old saying applies perfectly here: you can’t build a strong house on a weak foundation. A well-designed die withstands production rigors. Poor design choices lead to premature failure.
Stamping Process Optimization
How you design the stamping sequence directly impacts die durability.
Process complexity matters: Avoid overcomplicating the sequence with unnecessary steps. Each additional process increases mechanical stress on die components.
Key stat: A study by the Metal Forming Research Association found that dies with streamlined processes (3-4 steps vs. 6-8 steps) lasted 35% longer on average.
Material flow management: Design forming dies to ensure uniform material flow. Wrinkling, material accumulation, and uneven stretching create excessive localized stress on die surfaces, accelerating wear.
Deformation force reduction: Select raw materials with good stamping properties. High-strength materials requiring excessive pressure don’t just increase energy costs—they put additional strain on every die component.
Mold Structure Design
A die’s structure must be engineered to handle stamping forces.
Stress distribution: Each structural part should evenly distribute mechanical loads. Concentrated stress points are prime areas for fatigue cracking and premature failure.
Component reinforcement: High-wear areas—cutting edges, forming punches—need appropriate thickness and support structures.
Accessibility for maintenance: While not directly affecting wear, a design allowing easy cleaning and repairs prevents minor issues from becoming major problems.
Material Selection for Die Components
Choosing the right materials for each component is crucial. A one-size-fits-all approach doesn’t work.
| Component Type | Recommended Material | Hardness | Key Property |
|---|---|---|---|
| Cutting edges | AISI D2 tool steel | 60-62 HRC | Wear resistance |
| Forming dies (impact) | S7 tool steel | 54-58 HRC | Toughness |
| Structural components | Pre-hardened steel | 45-50 HRC | Strength |
| Guide components | Bearing-grade steel | 58-60 HRC | Wear resistance |
Match materials to function: High-stress components need superior strength and wear resistance. Less stressed areas can use more economical options.
Cost vs. performance: Premium materials increase upfront costs but often provide better long-term value through extended die life.
Guide Mechanism Accuracy
Precise alignment is essential for minimizing wear and preventing catastrophic failures.
Guidance type: Choose between pillar guides, ball bearings, or slide guides based on process requirements and accuracy needs.
Clearance control: Properly sized clearances reduce friction while maintaining alignment, preventing “die gnawing” —uneven wear from misalignment.
Lubrication integration: Design guide systems to accommodate effective lubrication, reducing metal-to-metal contact and wear.
Factor 2: How Does Manufacturing Quality Impact Die Life?
Even the best designs fail if manufacturing quality is compromised. Every step—from material preparation to final assembly—affects how well the die performs.
Quality of Castings and Forgings
Foundation materials must be free from defects that could lead to failure.
Hidden defects: Porosity, inclusions, and cracks can expand under stamping pressures, causing sudden component failure. Non-destructive testing (ultrasonic inspection) identifies these issues before they become problems.
Key stat: A 2020 industry survey found that 18% of premature die failures traced back to substandard base materials.
Material consistency: Raw materials must meet specified standards for chemical composition and mechanical properties.
Dimensional stability: Castings and forgings should maintain consistent dimensions through machining and heat treatment, preventing fit issues during assembly.
Machining Accuracy
The precision of machining directly impacts die performance.
Surface finish: Smooth surfaces on working components reduce friction, material adhesion, and wear. A surface finish of Ra 0.8μm or better is recommended for high-wear areas.
Dimensional precision: Tight tolerances on critical surfaces ensure proper fit and alignment, minimizing uneven stress distribution.
Edge quality: Sharp, burr-free edges on cutting tools reduce material tearing and extend edge life. Chamfering and honing critical edges can increase their lifespan by up to 40%.
Assembly Accuracy
Even perfectly machined components underperform if assembled incorrectly.
Reference face alignment: All mounting and reference faces must align properly to ensure uniform load distribution.
Fastening torque: Over-tightening or under-tightening fasteners causes distortion or loosening during operation.
Parallelism and perpendicularity: Maintaining these geometric tolerances between mating components prevents binding and uneven wear.
Heat Treatment Processes
Heat treatment transforms raw steel into high-performance tooling. But improper processes ruin even the best materials.
| Heat Treatment Step | Ideal Parameters | Common Issues When Incorrect | Impact on Die Life |
|---|---|---|---|
| Annealing | 800-850°C, slow cool | Incomplete stress relief | 20-30% reduction |
| Hardening | 950-1050°C, quenched | Under-hardening or overheating | 30-50% reduction |
| Tempering | 150-250°C (hardness) or 500-600°C (toughness) | Inadequate time | 25-40% reduction |
| Surface treatments | Nitriding at 500-550°C | Poor adhesion, uneven coverage | 15-25% reduction |
Proper heat treatment achieves the ideal balance of hardness, strength, and toughness. Cutting edges need higher hardness (58-62 HRC) for wear resistance. Structural components benefit from lower hardness (45-50 HRC) for greater toughness.
Factor 3: How Do Usage and Maintenance Affect Die Life?
Even well-designed, well-manufactured dies require proper care to reach maximum lifespan.
Proper Usage Practices
Day-to-day usage significantly affects die longevity.
Load management: Operating within the die’s rated capacity prevents excessive stress. Regularly monitoring press tonnage during production identifies abnormal loads before they cause damage.
Material consistency: Using materials outside specified thickness or hardness range increases wear on cutting and forming surfaces.
Lubrication: Applying the correct type and amount of lubricant reduces friction. A study by the Stamping Technology Institute found that consistent lubrication practices extended die life by an average of 28%.
Cleaning procedures: Removing material debris and lubricant buildup prevents abrasive wear and corrosion.
Preventive Maintenance Programs
A structured maintenance schedule catches issues early.
Regular inspections: Daily checks for wear, cracks, or misalignment prevent minor issues from becoming major failures.
Planned downtime: Scheduling maintenance during planned breaks avoids emergency repairs that often require rushed, temporary fixes.
Component replacement: Replacing high-wear components (punches, dies) before they fail completely prevents damage to other die parts.
Documentation: Keeping records of maintenance activities, wear patterns, and replacement parts helps identify recurring issues and optimize schedules.
Recommended Inspection Frequency
| Production Volume | Daily Check | Comprehensive Inspection |
|---|---|---|
| Low (<1,000 cycles/month) | Visual for damage | Every 50,000 cycles or 6 months |
| Medium (1,000-10,000 cycles/month) | Visual + lubrication check | Every 25,000 cycles or 3 months |
| High (>10,000 cycles/month) | Full visual + spot measurements | Every 10,000 cycles or monthly |
How Can You Implement Comprehensive Quality Management?
To truly maximize stamping die life, you need an integrated approach spanning design, manufacturing, usage, and maintenance.
Key Elements of a Die Life Management Program
Quality control checkpoints at every stage of the die lifecycle:
- Design review: Verify stress distribution, material selection, guide accuracy
- Material certification: Confirm raw materials meet specifications
- In-process inspection: Check machining accuracy, heat treatment results
- Assembly verification: Ensure proper fit and alignment
- Trial run validation: Test under production conditions
- Ongoing monitoring: Track performance, wear patterns, maintenance needs
Training programs for operators and maintenance staff:
- Proper die setup and alignment
- Correct lubrication procedures
- Early warning signs of problems
- Emergency shutdown protocols
Data collection and analysis:
- Track cycles between maintenance
- Document wear patterns and failure modes
- Identify recurring issues by die type or production line
- Use data to optimize maintenance schedules
Cross-functional collaboration:
- Design, manufacturing, and production teams meet regularly
- Address recurring issues at the source
- Share lessons learned across shifts and departments
By viewing die life as a company-wide responsibility rather than just a maintenance concern, manufacturers achieve significant improvements in longevity and production efficiency.
Conclusion: Die Life Is a System, Not a Single Factor
Stamping die life doesn’t depend on any one thing. It’s the result of a complete system:
- Design quality provides the foundation
- Manufacturing quality turns design into durable reality
- Proper usage preserves performance day-to-day
- Preventive maintenance catches issues before they become failures
- Data-driven management continuously improves the entire process
When all these elements work together, dies become long-term assets rather than consumable tools. Production runs smoother. Quality stays consistent. Costs stay under control.
The effort you invest in understanding and optimizing die life pays back many times over—in reduced downtime, lower tooling costs, and better parts.
How to write a spec that gets priced correctly
A drawing is a contract. If it leaves a number open, the shop fills that number in with its own default. The default is rarely the one you had in mind. Put these five lines on every RFQ and most of the back-and-forth disappears before it starts.
- Part drawing with the tolerance stack called out
- Material grade, temper and thickness
- Strip layout or the feed direction you expect
- Surface finish and any coating
- Annual volume and the release schedule
The point is not paperwork. Each line removes a decision the shop would otherwise make for you. A complete RFQ comes back priced. An incomplete one comes back guessed.
What actually drives the price
Buyers usually push on material because it is the line they can see. In practice the material is rarely the biggest number on a quote. These five lines decide most of it:
- tool complexity and station count
- material utilisation in the strip
- press tonnage and cycle rate
- secondary operations
- annual volume
Ask for the quote split by line. A supplier who cannot break it down is guessing, and you will pay for the guess. The line you can usually renegotiate is the tolerance band, not the raw material.
Problems you will meet, and the fix
Every process has a failure mode it prefers. The same four show up again and again on this kind of work, and none of them are mysteries once you know what to look for.
- Burr on the shear edge that grows as the tool wears
- Gallng on a drawn wall after a few thousand strokes
- Punch break-out on thick material
- Part lift and misfeed at high stroke rates
Catch the fault on the first part, not the hundredth. A first-article check costs an hour. A bad batch costs the whole order. Write the check into the purchase order so nobody has to remember it.
What to check on the first article
The first article is the cheapest inspection you will ever buy. Use it properly and the rest of the run becomes boring, which is exactly what you want.
- Every dimension on the drawing, with the measured value written beside it.
- The material certificate, matched to the heat or lot number on the parts.
- The finish against the sample you approved, under the same light.
- Fit against the mating part, assembled rather than measured.
- Packaging, because parts that arrive damaged were never in tolerance.
Check in this order: datums, then mating features, then cosmetic faces. If the datums are wrong, every number after them is noise. Keep the report on file. When a problem shows up in month six, that document is the only thing that tells you what changed.
How to compare two quotes fairly
Two numbers are not comparable unless the scope matches. Line them up before you decide, because a low number with three gaps is not a low number.
Same drawing, same material, same finish, same inspection. Anything else is a different job wearing the same part number. Then look at what each quote leaves out. Freight, packaging, certificates and tooling are the usual gaps.
Ask each supplier to state their assumptions in writing. The one who does is usually the one who has run the process before.
Scaling from one part to a batch
The first part teaches you the process. The hundredth teaches you the process cost.
Watch three things as volume grows: setup amortisation, tool wear, and how much hand work the finish still needs. If the unit price barely moves between ten and a hundred, the cost sits in material or in hand work, not in setup. Ask which, because only one of them is negotiable.
Lead time behaves the same way. A one-off is scheduled around other jobs. A repeat order is scheduled around your forecast. Give the shop a forecast and the lead time gets shorter, not longer.
FAQ: Stamping Die Life
What’s the most critical factor affecting die life?
Design quality forms the foundation. A poorly designed die will fail prematurely regardless of manufacturing quality or maintenance practices. Start with a robust design that optimizes stress distribution, material selection, and guide accuracy.
Can proper maintenance extend a die’s life beyond its design expectations?
Yes, but only to a point. Good maintenance can add 20-30% to a die’s lifespan by preventing avoidable damage. But it cannot overcome fundamental design or material limitations.
How often should stamping dies be inspected?
Daily visual inspections for wear and damage are essential. Comprehensive inspections should occur every 50,000 cycles or monthly (whichever comes first). High-volume production may require more frequent checks.
What’s the best material for cutting edges?
AISI D2 tool steel (60-62 HRC) is ideal for most cutting applications. It offers excellent wear resistance and maintains sharp edges through high-volume production.
How does lubrication affect die life?
Proper lubrication reduces friction and heat between the die and workpiece. Consistent lubrication practices can extend die life by an average of 28%, according to industry studies.
What causes sudden die failure?
Common causes include:
- Material defects (porosity, inclusions)
- Overloading beyond rated capacity
- Misalignment causing binding
- Fatigue cracking from concentrated stress
- Improper heat treatment creating brittleness
When should I replace die components versus repairing them?
Replace when:
- Wear exceeds 10-15% of original dimension
- Cracks propagate beyond repairable limits
- Repair costs exceed 50-60% of replacement cost
- Multiple failures suggest fundamental design issues
Our solution for Factors Determine How Long
YiguProto runs metal stamping in house, from a single prototype to a production batch. We quote the process, the material and the finish as separate lines, so you can see where the money goes instead of arguing with one number.
Send a STEP file or a drawing and you get a DFM report in one to two business days. It flags the features that add cost and the features that will not hold tolerance on the process you picked.
Every order ships with an inspection report on the features you call out. If a part misses, we make it again. Ready to price a part? Start with a free quote and DFM review, or read more about our metal stamping. You can also talk to an engineer before you commit to a drawing.
FAQ about Factors Determine How Long
What should I check before approving the parts?
Datums first, then the features that mate, then the cosmetic faces. Ask for a dimensional report, a material certificate and a finish sample. A part can be inside every tolerance and still not fit, so assemble one before you sign.
Does the process work for prototypes as well as production?
Yes, and that is usually the point. Running the prototype on the production process removes a whole class of surprises, because the part you test is made the same way as the part you sell.
How long does a first article take?
Usually a few business days once the drawing is frozen, and longer if tooling is involved. The date we give you is the date we confirm in writing, not the date we hope for.
What is Factors Determine How Long used for?
Factors Determine How Long turns up wherever the part has to do a real job at a predictable cost: brackets, housings, fixtures, covers and the fittings that hold them together. The honest test is whether the properties match the load and the environment, not whether the material is fashionable.
Can Factors Determine How Long be made in small quantities?
Yes, and small quantities are where a good supplier earns the next order. Setup dominates the price at low volume, so the cheapest route is usually the one with the fewest operations, not the cheapest material.
How much does Factors Determine How Long cost?
Price comes from five lines: material, machine or tool time, setup, finishing and inspection. The material itself is usually the smallest of them. Send a drawing and we will split the quote so you can see which line is doing the damage.
The short version
Factors Determine How Long rewards the buyer who reads the data sheet and the drawing together. Pick the option for the property that matters, not for the price per kilo.
Tighten only what mates. Test a sample before the run. Then let the process do the rest.