
Rapid Prototyping
How Are Plastic Medical Device Prototypes Made? A Complete Guide
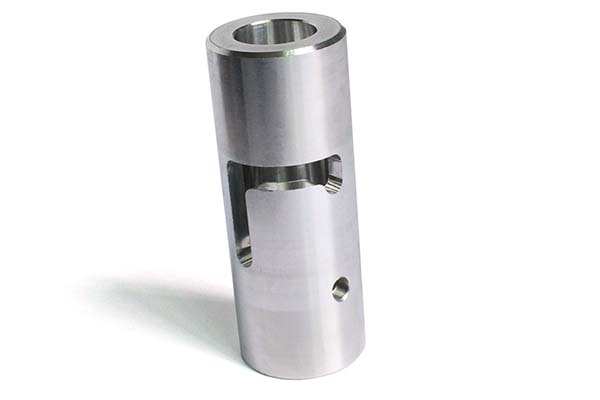
Plastic medical device prototypes serve as the critical testing ground for new healthcare innovations. Before any medical product reaches patients, engineers must prove it’s safe, functional, and compliant with strict regulations. Unlike regular plastic parts, medical prototypes must meet FDA standards, pass biocompatibility tests, and withstand sterilization processes.
Why Medical Prototypes Require Special Handling?
Medical device prototyping isn’t like making parts for consumer electronics. The stakes are higher because patients’ health depends on your product. A crack in a toy robot housing means a child gets disappointed. A crack in a surgical instrument prototype means potential patient contamination.
Three factors make medical prototypes unique:
Regulatory compliance: Your prototype must use materials already approved for medical use. The FDA maintains lists of acceptable plastics, and ISO 10993 standards govern biological safety testing.
Sterilization compatibility: Medical devices get cleaned aggressively. Your prototype must survive autoclave heat (121-134°C), ethylene oxide gas, or gamma radiation without degrading.
Traceability requirements: Every material batch must be documented. If a problem emerges later, you need to trace it back to the exact resin lot used.
A startup learned this when they made a surgical guide prototype from standard 3D printing resin. The material looked fine initially but released toxic byproducts during sterilization. They had to restart development, costing six months and $150,000.
What Materials Work for Medical Prototypes?
Medical-Grade Plastic Comparison
Choosing the right plastic starts with understanding what’s available and approved:
| Material | Key Properties | Best Applications | Biocompatibility | Cost Per kg | Sterilization Methods |
|---|---|---|---|---|---|
| ABS | Impact-resistant, machinable, good finish | Device housings, diagnostic equipment shells | ISO 10993 compliant | (18-)28 | Ethylene oxide, gamma (limited autoclave) |
| PP (Polypropylene) | Chemical-resistant, flexible, lightweight | Syringe bodies, sample containers, tubing connectors | FDA-approved | (15-)25 | Autoclave, ethylene oxide, gamma |
| PMMA (Acrylic) | Optical clarity (92% transmission), scratch-resistant | IV fluid chambers, viewing windows, light guides | ISO 10993 compliant | (22-)32 | Ethylene oxide (avoid heat) |
| PC (Polycarbonate) | Heat-resistant (130°C), transparent option, strong | Sterilizable trays, surgical tool handles, fluid reservoirs | FDA-approved | (25-)35 | Autoclave, ethylene oxide, gamma |
| PEEK | High strength, chemical-resistant, radiolucent | Implantable devices, spinal cages, dental components | FDA implantable grade | (150-)200 | All methods (very stable) |
| Nylon (PA) | Wear-resistant, tough, good fatigue life | Catheter components, insulin pump parts, surgical instruments | ISO 10993 compliant | (35-)45 | Ethylene oxide, gamma (limited autoclave) |
How to Match Materials to Medical Applications
For single-use disposable devices: PP offers the best balance of cost and performance. A blood collection tube prototype made from PP can be gamma-sterilized and costs 60% less than PEEK alternatives.
For reusable surgical instruments: PC withstands repeated autoclave cycles. A laparoscopic tool handle prototype in PC survived 500 autoclave cycles in one test without cracking or discoloring.
For implantable prototypes: PEEK dominates this space. It’s radiolucent (doesn’t show on X-rays), bonds with bone, and has a 40-year clinical history. A spinal cage prototype machined from PEEK passed all mechanical tests at 80% of the weight of titanium.
For transparent fluid paths: PMMA provides clarity needed to spot air bubbles. An IV chamber prototype in PMMA let nurses visually confirm fluid flow during testing.
Real Material Selection Case
A team developing a portable blood glucose monitor needed a housing prototype. They evaluated three options:
- ABS: Easy to machine, ISO 10993 certified, good impact resistance
- PC: Stronger but more expensive and harder to machine
- PP: Cheaper but less rigid for the thin walls required
They chose ABS. The prototype passed drop tests from 1 meter onto concrete without cracking. Surface finish matched their design intent. And the material cost stayed under $30 per prototype—critical for their five test units.
Which Processing Method Fits Your Prototype?
CNC Machining vs. 3D Printing for Medical Parts
| Factor | CNC Machining | 3D Printing (SLA) |
|---|---|---|
| Precision | ±0.01mm achievable | ±0.05mm typical |
| Materials | Full range of medical plastics | Limited to proprietary resins |
| Strength | Solid material properties | Layer bonding weaker than solid material |
| Surface finish | Smooth as-machined | Layer lines need sanding |
| Lead time | 2–4 days | 1–2 days |
| Best for | Functional parts, implants, precision components | Complex geometries, visualization models |
When to Choose CNC Machining
CNC machining works best when your prototype must perform like the final product. For a surgical drill guide, you need ±0.02mm accuracy to position drill holes correctly. A CNC-machined guide from PEEK delivers this precision.
The process works by removing material from solid plastic blocks. There’s no layer bonding to fail under stress. A recent project required a prototype biopsy needle hub with threads that mate perfectly with the needle. CNC machining achieved the thread form exactly, and the hub passed all torque tests.
When 3D Printing Makes Sense
3D printing excels at complex internal geometries. A company developing a new IV connector needed internal channels that split and merge in ways impossible to machine. They printed the prototype in transparent resin to visualize fluid flow. The print took 18 hours versus 4 days for machining attempts.
However, they couldn’t test sterilization on the printed part. The resin degraded under gamma radiation. They eventually machined functional test parts from PP after validating the geometry.
Hybrid Approach Example
A surgical tool prototype needed both complex internal channels (for irrigation) and precision threads (for assembly). The team:
- 3D printed the main body with internal channels (2 days, $180)
- CNC machined the threaded end cap from PEEK (3 days, $220)
- Assembled both parts for testing
This hybrid approach delivered a functional prototype in 5 days versus 7 days for all-CNC, and cost 35% less.
What Post-Processing Do Medical Prototypes Need?
Why Surface Finish Matters for Medical Devices
Medical devices face aggressive cleaning. Rough surfaces trap bacteria. A study showed smooth surfaces (Ra <0.8μm) reduce bacterial adhesion by 90% compared to rough machined surfaces.
Essential post-processing steps:
Deburring and smoothing: Use 400 to 800 grit sandpaper to remove tool marks. For internal channels, flow abrasive compounds through to smooth surfaces you can’t reach.
Medical-grade painting: If your prototype needs color coding (like red for emergency devices), use paints tested for alcohol resistance. Medical staff wipe devices with alcohol wipes constantly. Standard paint blisters within days.
Alcohol paint testing: Spray finished prototypes and expose them to 70% isopropyl alcohol for 3 months minimum. Check weekly for cracking, blistering, or peeling. One prototype failed at 8 weeks—saved from production by this test.
Vacuum Casting for Small Batches
When you need 5-20 identical prototypes, silicone molding (vacuum casting) offers the fastest path:
- Create master part: CNC machine one perfect part from your chosen material
- Make silicone mold: Pour medical-grade silicone around the master
- Cast copies: Inject medical-grade polyurethane into the mold under vacuum
A team needed 10 identical IV connector prototypes for clinical simulation training. The master PP part cost $220 and took 3 days. The silicone mold cost $350 and took 2 days. Each cast copy cost $45 and took 4 hours. Total for 10 units: $1,020 versus $2,200 for CNC machining all ten.
Critical factors for medical vacuum casting:
- Use low-bubble silicone and degas thoroughly before pouring
- Select medical-grade casting resins (ISO 10993 tested)
- Have experienced technicians handle the process—air pockets ruin parts
How Do You Design Molds for Medical Prototypes?
When Mold Design Becomes Necessary
If you need 50+ prototypes or plan to scale to production, you need injection molds. Medical molds differ from standard molds in critical ways.
Steel Selection for Medical Molds
S136H stainless steel (or equivalent) is the medical standard. Why?
- Corrosion resistance: Medical molds see moisture and cleaning chemicals. Regular steel rusts, contaminating parts.
- Polishability: S136H polishes to mirror finishes (Ra <0.05μm). This transfers to prototype surfaces, making them bacteria-resistant.
- Hardness: After heat treatment, it reaches 50-55 HRC—hard enough to maintain precision over thousands of cycles.
Japanese NAR-80 steel offers similar properties and is also widely used for medical applications.
Heat Treatment Requirements
Molds must be heat-treated correctly:
- Quenching: Heat to 1000-1050°C, then cool rapidly. This hardens the steel.
- Tempering: Reheat to 500-550°C to reduce brittleness while maintaining hardness.
Proper heat treatment prevents flash burrs—tiny plastic bits that form at mold seams. In medical devices, flash can break off inside patients. One company recalled 50,000 units due to flash contamination they could have prevented with better mold design.
Critical Mold Design Elements
Gate placement: Position gates away from critical features. For a syringe prototype, the gate should be at the plunger end—not near the needle tip where gate marks could affect sealing.
Cooling channel layout: Space cooling lines evenly (typically 8-12mm apart). Uneven cooling causes warping. A warped medical tray won’t hold instruments securely during sterilization.
Venting: Include 0.02-0.03mm deep vents at mold parting lines. These release trapped air that otherwise creates bubbles in the prototype. Air bubbles in a fluid path prototype could be mistaken for design flaws.
What Environment and Equipment Maintain Sterility?
Workshop Requirements for Medical Prototyping
Medical prototypes need clean production environments. Standard machine shops introduce contamination risks.
Essential workshop features:
- Fully enclosed space with controlled access
- Temperature control: 22-25°C (plastic dimensions change with temperature)
- Humidity control: 40-60% (prevents static that attracts dust)
- Positive air pressure: Forces air out when doors open, keeping contaminants out
- HEPA filtration: Removes 99.97% of particles >0.3μm
A medical prototype shop should also have separate areas for machining, assembly, and packaging to prevent cross-contamination.
The “No Release Agent” Rule
Standard injection molding uses release agents—chemicals sprayed into molds to help parts pop out. Never use release agents for medical prototypes.
Why? Release agents transfer to part surfaces. When the prototype touches patients, these chemicals can cause:
- Skin irritation
- Allergic reactions
- Contamination of sterile fields
Instead, medical molds are highly polished so parts release naturally. For tricky geometries, molds include ejector pins that push parts out mechanically.
Equipment Selection for Medical Prototyping
Injection molding machines: Choose 50-100 ton machines with small screw diameters (18-25mm). These handle the small shot sizes typical for prototypes more precisely than production-sized machines.
Automation: Install robotic part removal so prototypes go from mold to sealed container without human touch. This eliminates the single biggest contamination source—human hands.
Clean assembly stations: Use laminar flow hoods providing ISO Class 5 clean air for any manual assembly. Technicians wear sterile gloves and gowns.
How to write a spec that gets priced correctly
A drawing is a contract. If it leaves a number open, the shop fills that number in with its own default. The default is rarely the one you had in mind. Put these five lines on every RFQ and most of the back-and-forth disappears before it starts.
- A model you are willing to freeze for the build
- The question the prototype must answer
- Process and material that can answer it
- Tolerance on the features under test
- How many iterations you have budgeted
The point is not paperwork. Each line removes a decision the shop would otherwise make for you. A complete RFQ comes back priced. An incomplete one comes back guessed.
What actually drives the price
Buyers usually push on material because it is the line they can see. In practice the material is rarely the biggest number on a quote. These five lines decide most of it:
- process choice
- part size and feature count
- material
- finish and fit checks
- number of iterations
Ask for the quote split by line. A supplier who cannot break it down is guessing, and you will pay for the guess. The line you can usually renegotiate is the tolerance band, not the raw material.
Problems you will meet, and the fix
Every process has a failure mode it prefers. The same four show up again and again on this kind of work, and none of them are mysteries once you know what to look for.
- A prototype that is too good and hides a production problem
- A prototype that is too rough to test the real question
- Material chosen for speed rather than for the test
- No measurement plan, so the result is an opinion
Catch the fault on the first part, not the hundredth. A first-article check costs an hour. A bad batch costs the whole order. Write the check into the purchase order so nobody has to remember it.
How Do You Test Medical Prototypes?
Essential Test Protocol for Medical Devices
| Test Type | What It Verifies | Typical Requirements | Example |
|---|---|---|---|
| Biocompatibility | Material safety with human tissue | ISO 10993 series | Cytotoxicity test: cells must survive contact with material |
| Sterilization validation | Device survives cleaning | No degradation after cycle | Autoclave 20 cycles, check for cracking |
| Chemical resistance | Withstands disinfectants | No change after 3 months | 70% alcohol exposure weekly |
| Mechanical testing | Functional performance | Application-specific | Syringe: 50N plunger force without leakage |
| Cleanability | Bacteria can’t hide | Ra <0.8μm surfaces | Surface roughness measurement |
Real Testing Example
A surgical instrument prototype underwent full testing before clinical trials:
Phase 1: Biocompatibility testing (4 weeks)
- Material extracts exposed to human cells
- 98% cell survival (passes at >70%)
- No skin sensitization in animal models
Phase 2: Sterilization validation (2 weeks)
- 20 autoclave cycles at 134°C
- Dimensional check after each cycle
- Maximum change: 0.02mm (within tolerance)
Phase 3: Functional testing (1 week)
- 500 actuations of moving parts
- Cutting tests on synthetic tissue
- No failures, cutting edge retention within spec
Phase 4: Cleanability verification (3 days)
- Surface roughness measured: Ra 0.6μm
- Bacterial challenge test: 99.9% removal with standard cleaning
The prototype passed all tests, allowing the team to proceed to clinical trials with confidence.
Creating plastic medical device prototypes requires more than just shaping plastic. It demands material compliance with ISO 10993 and FDA standards, processing methods that maintain material properties, post-processing that ensures cleanability, and controlled environments that prevent contamination. Each step builds regulatory compliance into the prototype, not as an afterthought but as a fundamental requirement. The process takes time—typically 3-6 weeks for a fully tested prototype—but this investment prevents the far greater cost of failures during clinical trials or after market launch. By following these guidelines, you create prototypes that not only look and function like final products but also meet the strict safety standards that protect patients.
Our solution for Plastic Medical Device Prototypes
YiguProto runs rapid prototyping in house, from a single prototype to a production batch. We quote the process, the material and the finish as separate lines, so you can see where the money goes instead of arguing with one number.
Send a STEP file or a drawing and you get a DFM report in one to two business days. It flags the features that add cost and the features that will not hold tolerance on the process you picked.
Every order ships with an inspection report on the features you call out. If a part misses, we make it again. Ready to price a part? Start with a free quote and DFM review, or read more about our rapid prototyping. You can also talk to an engineer before you commit to a drawing.
FAQ about Plastic Medical Device Prototypes
What files do you need in order to quote?
A STEP file plus a PDF drawing that carries the same revision letter. The model carries the geometry and the drawing carries the intent. When the two disagree, the shop picks one, and it is never the one you meant.
What tolerance can you hold on Plastic Medical Device Prototypes?
The working default is ±0.1 mm on most processes, tighter after machining. Tighter than that the process changes and so does the price, because every step tighter adds inspection time. Call out only the faces that mate with something else and leave the rest on the general tolerance.
How much does Plastic Medical Device Prototypes cost?
Price comes from five lines: material, machine or tool time, setup, finishing and inspection. The material itself is usually the smallest of them. Send a drawing and we will split the quote so you can see which line is doing the damage.
How do I compare two quotes fairly?
Match the scope first: same drawing, same material, same finish, same inspection. Then read the exclusions. Freight, tooling and certificates are the usual gaps, and a low number with three gaps is not a low number.
What material should I specify?
Specify by standard, not by trade name. A trade name can change under you between two orders; a standard number cannot. Then add the one property that actually decides the part, whether that is strength, heat resistance or chemical exposure.
Does the process work for prototypes as well as production?
Yes, and that is usually the point. Running the prototype on the production process removes a whole class of surprises, because the part you test is made the same way as the part you sell.
The short version
Plastic Medical Device Prototypes rewards the buyer who reads the data sheet and the drawing together. Pick the option for the property that matters, not for the price per kilo.
Tighten only what mates. Test a sample before the run. Then let the process do the rest.