
Rapid Prototyping
Why Is Plastic UAV Prototype Model Machining Critical for Drone Development?
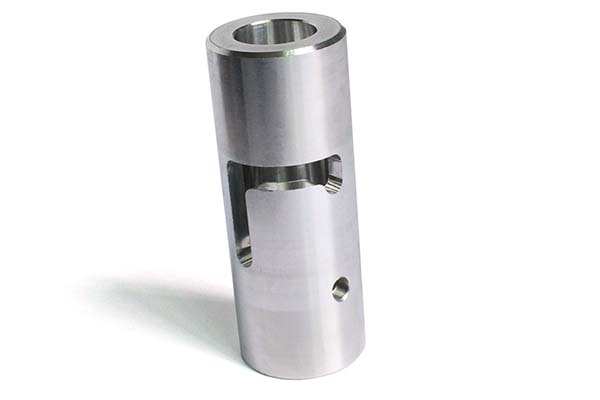
In the fast-growing drone industry, catching design flaws before mass production saves time, money, and reputations. Plastic UAV prototype model machining is a cornerstone of this process—it lets teams test drone structures, validate component fits, and gather real-world performance data at a fraction of the cost of full production tooling.
Key takeaways
- Drones demand materials that balance three critical factors: lightweight design, durability, and weather resistance.
- Choosing the right material is make-or-break for successful prototyping. Focus on these key factors based on your drone’s requirements:
- Creating a reliable plastic UAV prototype model requires strict adherence to precision steps.
- Here are three cases showing how proper prototyping prevented major issues.
What Makes Plastic Materials Ideal for UAV Prototype Machining?
Drones demand materials that balance three critical factors: lightweight design, durability, and weather resistance. Plastics deliver on all these fronts. They are easy to shape into aerodynamic parts like fuselages and propeller guards, resist outdoor elements like rain and UV rays, and keep overall weight low—directly impacting flight time.
Common Plastics for UAV Prototypes and Their Properties
Different drone components need different material characteristics. Here is a detailed breakdown of the most common plastics used in UAV prototyping:
| Material | Key Properties | Best UAV Applications | Temperature Range | Weight (g/cm³) |
|---|---|---|---|---|
| ABS | Easy to machine, good impact resistance, low cost | Drone fuselages, internal component housings, non-structural parts | -20°C to 80°C | 1.05–1.08 |
| PC (Polycarbonate) | High impact resistance, heat resistant, dimensional stability | Propeller guards, outdoor drone shells, camera housings | -40°C to 120°C | 1.20–1.22 |
| PMMA (Acrylic) | High transparency (92%), good weather resistance | Drone camera covers, LED indicator lenses, transparent windows | -30°C to 70°C | 1.18–1.20 |
| PP (Polypropylene) | Lightweight, chemical resistant, low moisture absorption | Drone landing gear, battery compartment covers, fluid-resistant parts | -30°C to 100°C | 0.90–0.91 |
| Nylon | High strength, wear resistant, good heat resistance | Drone motor mounts, structural brackets, hinge points | -40°C to 130°C | 1.13–1.15 |
| POM (Acetal) | Excellent mechanical properties, dimensional stability | Precision drone gears, adjustable arm joints, bearing surfaces | -40°C to 100°C | 1.41–1.43 |
Real-World Material Selection Case
A leading agricultural drone manufacturer needed to test new fuselage shells for durability in hot field conditions. They chose PC plastic prototypes for several reasons:
- Heat resistance: PC maintains structural integrity at 100°C, matching summer field temperatures
- Impact strength: PC can survive repeated hard landings
- Weather resistance: PC resists UV degradation better than many alternatives
The prototypes were exposed to 100°C for 500 hours and survived 30+ drop tests from 2 meters height—no cracks or deformation occurred. This early testing saved the company $140,000 in potential rework costs for mass-produced fuselages that would have failed in the field.
How Do You Match Plastics to Specific UAV Needs?
Choosing the right material is make-or-break for successful prototyping. Focus on these key factors based on your drone’s requirements:
Flight Performance Requirements
For parts where weight is critical—like landing gear or battery covers—choose the lightest material that still provides adequate strength. PP at just 0.90 g/cm³ can save significant weight compared to denser alternatives. A racing drone manufacturer switched from ABS to PP for battery covers and gained an extra 2 minutes of flight time without sacrificing durability.
For high-impact parts like propeller guards that must survive collisions, PC is the clear choice. Its impact resistance is 10 times higher than standard ABS, meaning it absorbs energy without cracking.
Working Environment Considerations
Outdoor drones face sun, rain, and temperature extremes. PC and PP offer excellent weather resistance. Indoor racing drones or toys can use cost-effective ABS, which performs well in controlled environments.
Important lesson: A small drone startup once used ABS instead of PC for an outdoor drone shell. After just 2 months of UV exposure, the ABS became brittle and cracked. The cost of replacing shells under warranty nearly bankrupted their first production run. Always match materials to the operating environment.
Component-Specific Functions
Different parts serve different purposes:
- Motor mounts need strength and heat resistance—nylon is ideal
- Camera covers need optical clarity—PMMA delivers 92% light transmission
- Gears and precision mechanisms need dimensional stability—POM holds tight tolerances
- Structural brackets need stiffness and strength—PC or nylon work well
What Is the Step-by-Step Machining Process?
Creating a reliable plastic UAV prototype model requires strict adherence to precision steps. Here is a proven workflow used by top drone manufacturers.
Step 1: Material Selection – Match Plastics to Your Needs
Begin by matching material properties to your specific application. Create a simple checklist:
- Weight target: How light must this part be?
- Strength requirements: Will it face impacts or just hold components?
- Environmental exposure: Sun? Rain? Temperature extremes?
- Optical needs: Does it need to be transparent?
For a delivery drone project, the team needed a lightweight but strong arm component. They tested three materials—ABS, PC, and a PC-PP blend. The blend was 15% lighter than pure PC and 20% more impact-resistant than pure PP, making it the optimal choice.
Step 2: Data Collection – Ensure Design Accuracy
This step lays the groundwork for a prototype that matches your exact drone design.
3D drawing import: Provide CAD files in standard formats like STEP or IGES. These files are the master blueprint. A racing drone maker once provided incomplete CAD files missing propeller guard dimensions. The resulting prototype could not fit the propellers, causing a 1-week delay while they revised files.
Gypsum sample production: Before machining expensive engineering plastics, create a gypsum sample—a cheap plaster model that confirms shape, curvature, and size. This “test run” catches errors before cutting costly materials.
A delivery drone company uses gypsum samples to verify the curve of PC fuselage prototypes. They ensure 0.1 mm margin of error for optimal flight efficiency. One sample revealed a curvature error that would have increased drag by 15%—fixing it in CAD saved weeks of rework.
Step 3: CNC Machining – Achieve Precision Shaping
CNC machining turns plastic blocks into UAV prototypes with the accuracy drones demand.
Programming and setup: Use CAM software like Mastercam to create cutting paths. The machine removes excess plastic while preserving the exact part shape. Modern CNC achieves surface roughness as low as Ra 1.6μm—smooth enough for aerodynamic surfaces and tight-sealing joints.
For precision parts like motor mounts, CNC machining ensures gear teeth in POM prototypes are perfectly aligned. This prevents flight jitters caused by misfit parts that would show up in vibration testing.
Multi-axis machining technology: For complex parts like curved drone arms, 5-axis CNC machines are essential. This technology:
- Cuts complex shapes in one setup
- Improves precision by 25% compared to 3-axis machines
- Reduces production time by 40%
A survey drone brand used 5-axis machining for a curved arm prototype. Production time dropped from 5 days to 2 days, and the part fit perfectly with the fuselage on the first try.
Step 4: Post-Treatment – Boost Durability and Aerodynamics
Post-treatment ensures your prototype is ready for flight testing.
Deburring: Use 400-grit sandpaper to smooth knife marks and burrs. Even tiny burrs on drone arm edges can increase air resistance, reducing flight efficiency. This step is non-negotiable for aerodynamic parts.
Surface treatment: Apply treatments based on your drone’s use case:
- Painting: Spray anti-UV paint on outdoor prototypes like PC fuselages to prevent fading and brittleness. An agricultural drone company added anti-UV paint to a PC prototype—its lifespan in outdoor tests doubled from 3 months to 6 months.
- Silk screen printing: Add labels like “battery port” or “GPS module” to internal parts for easier assembly and maintenance.
- Electroplating: Plate metal like nickel on POM gears to boost wear resistance. Gears treated this way survived 50,000+ cycles in testing versus 15,000 cycles for untreated parts.
Step 5: Assembly and Testing – Validate Flight Readiness
This step ensures your prototype works as intended in real flight scenarios.
Test assembly: Fit all parts together—plastic components plus electronics like motors, GPS modules, and flight controllers. Check for gaps or misalignments. A delivery drone maker once found a 0.3 mm gap between fuselage halves during assembly. Calculations showed this gap would reduce flight time by 10% due to increased drag. Adjusting the design fixed the issue before production.
Functional testing: Test the prototype under conditions that mimic real flight:
- Structural stability: Subject to 5,000+ vibration cycles simulating flight turbulence—no cracks allowed
- Environmental adaptability: Expose to -20°C to 100°C and 85% humidity—no deformation or water leakage
- Flight performance: Test actual flight time. A PP-based prototype should achieve 95% of the design’s expected 30-minute flight time
Step 6: Packaging and Shipping – Protect Your Prototype
UAV prototypes are valuable—protect them during transport.
Safe packaging: Use custom foam inserts and rigid boxes to prevent scratches or cracks. A supplier once shipped prototypes in thin plastic bags; 15% arrived damaged, delaying a survey drone project by 2 weeks.
Delivery communication: Align with customer timelines. Most plastic UAV prototypes take 2-3 weeks to machine. If delays occur—like material shortages—communicate early so teams can adjust testing schedules.
What Real Problems Does Plastic UAV Prototype Machining Solve?
Here are three cases showing how proper prototyping prevented major issues.
Case 1: The Propeller Guard That Failed Impact Testing
A consumer drone company designed new propeller guards for a foldable drone. Their first PC prototypes looked perfect but failed impact testing—guards cracked after just 5 collisions at 3 m/s. Analysis showed the guard was too thin at the attachment points. They increased thickness by 1.5 mm, machined new prototypes, and retested. The revised guards survived 50+ collisions. Catching this early saved a recall that would have affected 20,000 drones.
Case 2: The Motor Mount That Melted
An industrial drone manufacturer tested nylon motor mount prototypes in high-temperature conditions. After 30 minutes of continuous operation, the mounts softened, allowing the motor to shift. They switched to a glass-filled nylon with higher heat deflection temperature, machined new prototypes, and tested successfully. Finding this before production prevented a failure mode that could have caused crashes.
Case 3: The Fuselage With Excessive Drag
A mapping drone company tested a new PC fuselage design. Flight testing revealed actual flight time was 18% below predictions. Wind tunnel testing showed a curvature issue creating turbulence. They adjusted the CAD model, machined a new prototype, and retested. The revised design met flight time targets. The cost of two prototype rounds was $4,000—far less than the $50,000 cost of modifying production molds.
How to write a spec that gets priced correctly
A drawing is a contract. If it leaves a number open, the shop fills that number in with its own default. The default is rarely the one you had in mind. Put these five lines on every RFQ and most of the back-and-forth disappears before it starts.
- A model you are willing to freeze for the build
- The question the prototype must answer
- Process and material that can answer it
- Tolerance on the features under test
- How many iterations you have budgeted
The point is not paperwork. Each line removes a decision the shop would otherwise make for you. A complete RFQ comes back priced. An incomplete one comes back guessed.
What actually drives the price
Buyers usually push on material because it is the line they can see. In practice the material is rarely the biggest number on a quote. These five lines decide most of it:
- process choice
- part size and feature count
- material
- finish and fit checks
- number of iterations
Ask for the quote split by line. A supplier who cannot break it down is guessing, and you will pay for the guess. The line you can usually renegotiate is the tolerance band, not the raw material.
Problems you will meet, and the fix
Every process has a failure mode it prefers. The same four show up again and again on this kind of work, and none of them are mysteries once you know what to look for.
- A prototype that is too good and hides a production problem
- A prototype that is too rough to test the real question
- Material chosen for speed rather than for the test
- No measurement plan, so the result is an opinion
Catch the fault on the first part, not the hundredth. A first-article check costs an hour. A bad batch costs the whole order. Write the check into the purchase order so nobody has to remember it.
What to check on the first article
The first article is the cheapest inspection you will ever buy. Use it properly and the rest of the run becomes boring, which is exactly what you want.
- Every dimension on the drawing, with the measured value written beside it.
- The material certificate, matched to the heat or lot number on the parts.
- The finish against the sample you approved, under the same light.
- Fit against the mating part, assembled rather than measured.
- Packaging, because parts that arrive damaged were never in tolerance.
Check in this order: datums, then mating features, then cosmetic faces. If the datums are wrong, every number after them is noise. Keep the report on file. When a problem shows up in month six, that document is the only thing that tells you what changed.
How Do You Test UAV Prototypes Effectively?
Testing should match real operating conditions as closely as possible. Here are essential tests with target values:
| Test Type | What It Measures | Typical UAV Requirements |
|---|---|---|
| Impact resistance | Survives collisions and hard landings | 50+ drops from 2 meters without cracks |
| Vibration tolerance | Withstands flight vibrations | 5,000+ cycles at 20–200 Hz |
| Temperature cycling | Handles environmental extremes | -20°C to 100°C, 100 cycles |
| UV resistance | Resists sun damage | 500+ hours UV exposure, no brittleness |
| Flight time validation | Matches aerodynamic predictions | Within 5% of calculated flight time |
Plastic UAV prototype model machining bridges the gap between digital designs and flying drones. By carefully selecting materials—PC for impact resistance, PP for lightweight parts, PMMA for optical clarity, nylon for strength—and following a precise manufacturing process, you can validate designs before committing to expensive production tooling. Real cases show that companies investing in proper prototyping avoid field failures, reduce development time, and create drones that perform as intended. Whether you are designing consumer quadcopters or industrial survey platforms, understanding this process helps you make smarter engineering decisions.
Our solution for Plastic UAV Prototype Model Machining
YiguProto runs rapid prototyping in house, from a single prototype to a production batch. We quote the process, the material and the finish as separate lines, so you can see where the money goes instead of arguing with one number.
Send a STEP file or a drawing and you get a DFM report in one to two business days. It flags the features that add cost and the features that will not hold tolerance on the process you picked.
Every order ships with an inspection report on the features you call out. If a part misses, we make it again. Ready to price a part? Start with a free quote and DFM review, or read more about our rapid prototyping. You can also talk to an engineer before you commit to a drawing.
FAQ about Plastic UAV Prototype Model Machining
What should I check before approving the parts?
Datums first, then the features that mate, then the cosmetic faces. Ask for a dimensional report, a material certificate and a finish sample. A part can be inside every tolerance and still not fit, so assemble one before you sign.
What is Plastic UAV Prototype Model Machining used for?
Plastic UAV Prototype Model Machining turns up wherever the part has to do a real job at a predictable cost: brackets, housings, fixtures, covers and the fittings that hold them together. The honest test is whether the properties match the load and the environment, not whether the material is fashionable.
Is there a minimum order quantity?
No hard minimum. One part is fine. What changes with volume is which costs dominate, so a single unit is priced mostly on setup and a thousand units are priced mostly on cycle time and material.
What files do you need in order to quote?
A STEP file plus a PDF drawing that carries the same revision letter. The model carries the geometry and the drawing carries the intent. When the two disagree, the shop picks one, and it is never the one you meant.
Does the process work for prototypes as well as production?
Yes, and that is usually the point. Running the prototype on the production process removes a whole class of surprises, because the part you test is made the same way as the part you sell.
How long does a first article take?
Usually a few business days once the drawing is frozen, and longer if tooling is involved. The date we give you is the date we confirm in writing, not the date we hope for.
The short version
Plastic UAV Prototype Model Machining rewards the buyer who reads the data sheet and the drawing together. Pick the option for the property that matters, not for the price per kilo.
Tighten only what mates. Test a sample before the run. Then let the process do the rest.