
Sheet Metal
Sheet Metal Prototype Making: Essential Guide for High-Quality Prototyping
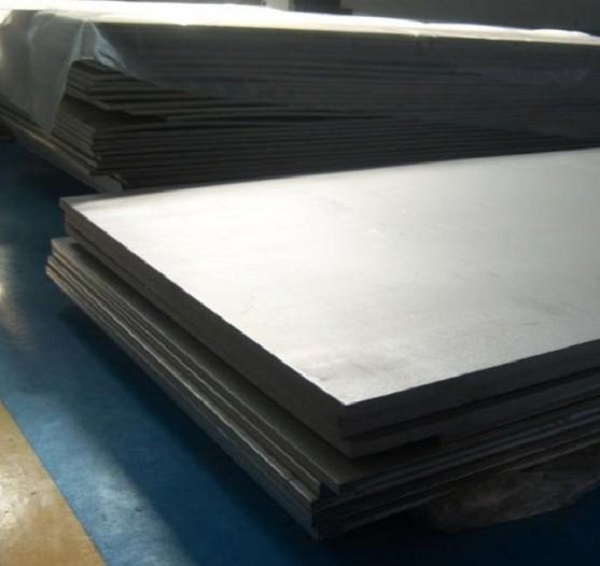
Whether you’re developing a new automotive part, a medical device, or an electronic enclosure, sheet metal prototype making is a vital step to turn design ideas into tangible, testable products. A well-made sheet metal prototype not only verifies if your design works but also helps you spot production challenges early—saving time and money down the line.
Key takeaways
- Choosing the right material is the first (and often most critical) step in sheet metal prototype making.
- Modern sheet metal prototype making relies on advanced tools and smart process choices to ensure accuracy.
- In sheet metal prototype making, even small errors (like a 0.2mm misalignment) can ruin a prototype.
- Sheet metal prototype making isn’t a one-person job—it requires teamwork across departments and with suppliers. Here’s how to collaborate effectively:
1. Material Selection & Application for Sheet Metal Prototypes
Choosing the right material is the first (and often most critical) step in sheet metal prototype making. The material you pick affects the prototype’s strength, appearance, and cost, so it needs to match your end product’s needs. Below’s a breakdown of common materials and their uses:
Common Sheet Metal Materials & Their Properties
| Material | Key Properties | Typical Thickness Range | Industry Applications | Cost (USD/sq.ft) |
| Aluminum Alloy | Lightweight, corrosion-resistant, easy to machine | 0.5mm – 6mm | Aerospace parts, electronic enclosures | \(2.0 – \)5.5 |
| Stainless Steel | High strength, rust-proof, durable | 0.3mm – 10mm | Medical devices, food processing equipment | \(3.5 – \)8.0 |
| Copper | Excellent conductivity, malleable | 0.2mm – 5mm | Electrical components, heat exchangers | \(8.0 – \)15.0 |
Material Treatment Matters
Beyond the base material, surface treatments impact both performance and look. For example:
- Anodizing: Adds a protective layer to aluminum prototypes, making them more scratch-resistant—perfect for outdoor gear prototypes.
- Plating: Zinc or nickel plating boosts corrosion resistance for stainless steel prototypes used in wet environments (like marine parts).
- Spraying: A powder coat finish gives prototypes a smooth, uniform color—ideal for consumer products where appearance matters.
Real-World Example: A medical device startup needed a prototype for a surgical instrument tray. They chose stainless steel for its corrosion resistance (critical for sterilization) and added a matte powder coat to prevent glare in operating rooms. The prototype passed all durability tests, and the design moved to mass production with no major changes.
2. Design & Process Planning for Sheet Metal Prototype Making
Modern sheet metal prototype making relies on advanced tools and smart process choices to ensure accuracy. Here’s how to get your design and planning right:
CAD/CAE/CAM: The Backbone of Modern Prototyping
Gone are the days of hand-drawn designs—CAD/CAE/CAM technologies are now standard for sheet metal prototypes:
- CAD (Computer-Aided Design): Software like SolidWorks or AutoCAD lets you create 3D models of your prototype, so you can visualize every detail (e.g., holes, bends) before cutting metal.
- CAE (Computer-Aided Engineering): Simulates how the prototype will perform under stress. For example, a car door prototype can be tested for impact resistance digitally, avoiding costly physical tests.
- CAM (Computer-Aided Manufacturing): Converts your CAD model into machine-readable code, ensuring the CNC machine cuts the metal exactly as designed.
Choosing the Right Processing Method
Not all sheet metal processes work for every prototype. Here’s when to use each:
- Laser Cutting: Best for precise, complex shapes (e.g., a prototype with intricate holes for sensors). It cuts cleanly and works with thin to medium-thickness metals (up to 20mm for steel).
- CNC Stamping: Great for prototypes that will later be mass-produced. It’s fast for repetitive cuts—like making 50 identical bracket prototypes.
- Bending: Used to create angles or curves (e.g., a prototype for a metal shelf). A CNC press brake can bend metal with ±0.1mm accuracy, ensuring consistency.
Case Study: An automotive supplier needed a prototype for a new hood hinge. They used CAD to design the hinge, CAE to test if it could support the hood’s weight, and CNC stamping to make 10 prototypes quickly. The process took 3 days—half the time of traditional methods.
3. Precision Control & Quality Management
In sheet metal prototype making, even small errors (like a 0.2mm misalignment) can ruin a prototype. Here’s how to keep precision high and quality consistent:
How to Maintain Precision
- Machine Calibration: Regularly calibrate CNC machines and tools. A laser cutter that’s off by 0.1mm can make a prototype that doesn’t fit with other parts.
- Operator Skill: Experienced operators know how to adjust for material quirks. For example, thin stainless steel can warp during cutting—an expert will slow the feed rate to prevent this.
- Real-Time Monitoring: Use sensors to track the machining process. If a tool starts to wear, the sensor alerts the operator before it causes errors.
Building a Quality Management System
A strong quality check process ensures your prototype meets standards:
- Visual Inspection: Check for scratches, dents, or uneven edges—these can affect both look and function.
- Dimensional Measurement: Use tools like calipers or coordinate measuring machines (CMMs) to verify every dimension matches the CAD model.
- Functional Testing: Test if the prototype works as intended. For example, a prototype latch should open and close smoothly 100+ times.
Example: A electronics company made a sheet metal prototype for a router enclosure. During quality checks, they found the holes for cables were 0.5mm too small—too tight for the cables to fit. They adjusted the laser cutter and reworked the prototype, avoiding a costly design flaw in production.
4. Communication & Cooperation for Smooth Prototyping
Sheet metal prototype making isn’t a one-person job—it requires teamwork across departments and with suppliers. Here’s how to collaborate effectively:
Cross-Departmental Collaboration
- Sales & Design: Sales teams know customer needs (e.g., a client might want a lightweight prototype), so they should share this with designers early.
- Engineering & Quality Control: Engineers and QC teams should work together to set quality standards. For example, engineers might specify a 0.1mm tolerance, and QC will check to ensure it’s met.
- Regular Meetings: Weekly check-ins keep everyone on the same page. A 15-minute call can resolve misunderstandings (like a designer forgetting to note a bend angle) before they delay the prototype.
Supplier Management
Your material suppliers and outsourcing partners play a big role too:
- Choose suppliers with a track record of delivering quality sheet metal. Ask for samples to test before placing a large order.
- Share your prototype timeline with suppliers. For example, if you need aluminum sheets in 3 days, make sure they can meet that deadline—delays here hold up the entire process.
Success Story: A startup working on a smart thermostat prototype had issues with delayed material deliveries. They switched to a local supplier who guaranteed 2-day delivery for aluminum sheets. With reliable supplies, their sheet metal prototype making process went from 3 weeks to 10 days.
5. Innovation & Continuous Improvement in Sheet Metal Prototyping
To stay ahead, sheet metal prototype making needs to evolve with new technologies and feedback. Here’s how to keep improving:
Embrace New Technologies
- 3D Scanning: If you’re modifying an existing part, 3D scanning can create a digital model of the old part—saving time on redesign.
- Automated Bending: New CNC press brakes with AI can adjust bending parameters automatically, reducing human error and speeding up production.
Learn from Feedback
- Customer Feedback: If a client says a prototype is too heavy, revisit your material choice (e.g., switch from steel to aluminum).
- Internal Audits: After each prototype project, review what went well and what didn’t. For example, if laser cutting caused delays, consider investing in a faster machine.
How to write a spec that gets priced correctly
A drawing is a contract. If it leaves a number open, the shop fills that number in with its own default. The default is rarely the one you had in mind. Put these five lines on every RFQ and most of the back-and-forth disappears before it starts.
- Flat pattern or STEP file plus a dimensioned drawing
- Material grade and thickness with the standard number
- Bend radii, K-factor and the direction of the grain
- Finish, masking and which faces stay bare
- Quantity and the assembly sequence
The point is not paperwork. Each line removes a decision the shop would otherwise make for you. A complete RFQ comes back priced. An incomplete one comes back guessed.
What actually drives the price
Buyers usually push on material because it is the line they can see. In practice the material is rarely the biggest number on a quote. These five lines decide most of it:
- blank size and nesting efficiency
- number of bends and weld joints
- material grade and thickness
- finish and masking
- batch quantity
Ask for the quote split by line. A supplier who cannot break it down is guessing, and you will pay for the guess. The line you can usually renegotiate is the tolerance band, not the raw material.
Problems you will meet, and the fix
Every process has a failure mode it prefers. The same four show up again and again on this kind of work, and none of them are mysteries once you know what to look for.
- Stretching at a bend that is tighter than the material allows
- Hole distortion when a hole sits too close to a bend line
- Weld draw on a visible face
- Springback that pulls a formed angle out of tolerance
Catch the fault on the first part, not the hundredth. A first-article check costs an hour. A bad batch costs the whole order. Write the check into the purchase order so nobody has to remember it.
What to check on the first article
The first article is the cheapest inspection you will ever buy. Use it properly and the rest of the run becomes boring, which is exactly what you want.
- Every dimension on the drawing, with the measured value written beside it.
- The material certificate, matched to the heat or lot number on the parts.
- The finish against the sample you approved, under the same light.
- Fit against the mating part, assembled rather than measured.
- Packaging, because parts that arrive damaged were never in tolerance.
Check in this order: datums, then mating features, then cosmetic faces. If the datums are wrong, every number after them is noise. Keep the report on file. When a problem shows up in month six, that document is the only thing that tells you what changed.
How to compare two quotes fairly
Two numbers are not comparable unless the scope matches. Line them up before you decide, because a low number with three gaps is not a low number.
Same drawing, same material, same finish, same inspection. Anything else is a different job wearing the same part number. Then look at what each quote leaves out. Freight, packaging, certificates and tooling are the usual gaps.
Ask each supplier to state their assumptions in writing. The one who does is usually the one who has run the process before.
Scaling from one part to a batch
The first part teaches you the process. The hundredth teaches you the process cost.
Watch three things as volume grows: setup amortisation, tool wear, and how much hand work the finish still needs. If the unit price barely moves between ten and a hundred, the cost sits in material or in hand work, not in setup. Ask which, because only one of them is negotiable.
Lead time behaves the same way. A one-off is scheduled around other jobs. A repeat order is scheduled around your forecast. Give the shop a forecast and the lead time gets shorter, not longer.
How to read a supplier's quote
A quote is a short document with a long shadow. Four things in it decide whether the job runs smoothly, and only one of them is the price.
- The scope line. It should name the process, the material and the finish, not just the part.
- The tolerance basis. General tolerance or the drawing, and which standard it follows.
- The exclusions. Tooling, freight, certificates and inspection are the usual omissions.
- The validity date. Material prices move, and an open-ended quote is a promise nobody can keep.
Read the exclusions before you read the total. A quote that leaves out tooling is not cheaper. It is a quote for a different job.
What to send with the first order
The first order sets the pattern for every order after it. Send a complete package once and the shop files it, and the second order takes a fraction of the time.
- A STEP or native model plus a PDF drawing carrying the same revision letter.
- The material callout by standard number, not by trade name.
- The finish and the exact faces it applies to.
- Any test the part must pass: fit, seal, drop, salt spray, dielectric.
- A contact who can answer a question inside one working day.
Then write down what was agreed. An email that confirms the material, the finish and the date is worth more than a longer purchase order that leaves them open.
When this is the wrong choice
A good supplier tells you when the process does not fit. These are the cases where we say so.
- The volume is so low that setup costs more than the parts are worth.
- The tolerance is tighter than the process can hold without a second operation.
- The geometry cannot be made without a tool feature that will not pay back.
- The material you need is not available in the form the process requires.
- The schedule is shorter than the tooling or setup time, and nobody has said so yet.
None of these are refusals. They are reasons to look at a different route, and the earlier that conversation happens the cheaper it is. The most expensive mistake in manufacturing is a process chosen before the question was understood.
FAQ About Sheet Metal Prototype Making
Q1: How long does sheet metal prototype making usually take?
A: It depends on complexity and material. A simple aluminum prototype (like a small enclosure) takes 3–5 days. A complex stainless steel prototype (with multiple bends and cuts) can take 1–2 weeks.
Q2: Can sheet metal prototypes be used for small-batch production?
A: Yes! Many sheet metal processes (like CNC stamping) let you scale from 1 prototype to 100+ units without retooling. This is great for pre-launch tests with real users.
Q3: What’s the average cost of a sheet metal prototype?
A: Costs vary by size, material, and process. A small aluminum prototype (100x150mm) costs \(30–\)80. A large stainless steel prototype (300x400mm) with complex cuts can cost \(150–\)300.
Our solution for Sheet Metal Prototype Making: Essential
YiguProto runs sheet metal fabrication in house, from a single prototype to a production batch. We quote the process, the material and the finish as separate lines, so you can see where the money goes instead of arguing with one number.
Send a STEP file or a drawing and you get a DFM report in one to two business days. It flags the features that add cost and the features that will not hold tolerance on the process you picked.
Every order ships with an inspection report on the features you call out. If a part misses, we make it again. Ready to price a part? Start with a free quote and DFM review, or read more about our sheet metal fabrication. You can also talk to an engineer before you commit to a drawing.
FAQ about Sheet Metal Prototype Making: Essential
What tolerance can you hold on Sheet Metal Prototype Making: Essential?
The working default is ±0.2 mm on formed features, ±0.1 mm on laser-cut holes. Tighter than that the process changes and so does the price, because every step tighter adds inspection time. Call out only the faces that mate with something else and leave the rest on the general tolerance.
How long does a first article take?
Usually a few business days once the drawing is frozen, and longer if tooling is involved. The date we give you is the date we confirm in writing, not the date we hope for.
Can Sheet Metal Prototype Making: Essential be made in small quantities?
Yes, and small quantities are where a good supplier earns the next order. Setup dominates the price at low volume, so the cheapest route is usually the one with the fewest operations, not the cheapest material.
What material should I specify?
Specify by standard, not by trade name. A trade name can change under you between two orders; a standard number cannot. Then add the one property that actually decides the part, whether that is strength, heat resistance or chemical exposure.
Is there a minimum order quantity?
No hard minimum. One part is fine. What changes with volume is which costs dominate, so a single unit is priced mostly on setup and a thousand units are priced mostly on cycle time and material.
Does the process work for prototypes as well as production?
Yes, and that is usually the point. Running the prototype on the production process removes a whole class of surprises, because the part you test is made the same way as the part you sell.
The short version
Sheet Metal Prototype Making: Essential rewards the buyer who reads the data sheet and the drawing together. Pick the option for the property that matters, not for the price per kilo.
Tighten only what mates. Test a sample before the run. Then let the process do the rest.