
Sheet Metal
Do You Really Need Aluminum Extrusion End Caps for Your Project?
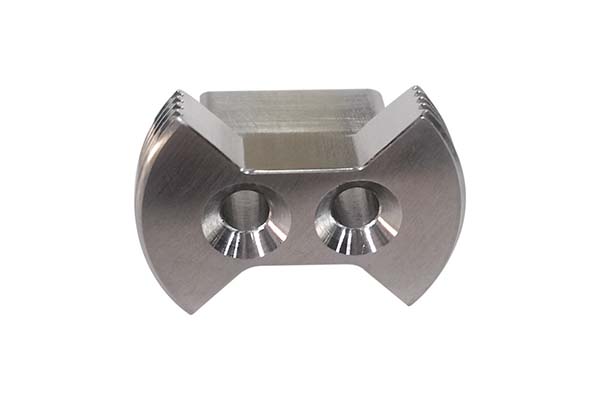
If you’ve worked with aluminum extrusions—whether for a DIY shelf, a 3D printer frame, or an industrial machine—you’ve probably noticed the open ends. Those ends need a simple but essential component: aluminum extrusion end caps. These are protective covers designed to fit over the exposed ends. They do more than just look neat. They seal out dust, debris, and moisture. They prevent sharp edges from causing injuries.
Key takeaways
- At first glance, end caps might seem like a “nice-to-have” accessory. But anyone who’s used extrusions regularly will tell you they’re a “must-have.”
- Not all end caps are the same. They come in different styles, materials, and sizes to match different extrusion types and project needs.
- Installing end caps is easy. You don’t need advanced tools—just a few basic items.
- End caps are low-maintenance, but a little care makes them last longer.
Why Do You Need Aluminum Extrusion End Caps?
At first glance, end caps might seem like a “nice-to-have” accessory. But anyone who’s used extrusions regularly will tell you they’re a “must-have.”
Protect against dust, debris, and moisture
Aluminum extrusions are hollow. Their open ends act like funnels for dust, dirt, and even liquid. If you have a sliding shelf made with 2020 extrusions in a garage, sawdust and dirt will easily get inside over time. This can clog moving parts like T-slot wheels or corrode the inside of the aluminum. End caps seal these openings, keeping the interior clean and dry.
Real example: A friend built a 3D printer with 3030 extrusions but skipped end caps. After six months, filament dust had built up inside the extrusions, causing the Z-axis to jam. Once he added end caps and cleaned out the extrusions, the printer worked perfectly again. That small investment saved him from replacing parts.
Prevent injuries from sharp edges
Cutting aluminum extrusions leaves sharp, jagged edges on the ends. These edges can scratch your hands when you’re assembling or using your project—especially if the extrusions are part of something you touch often, like a workbench or cart. End caps cover these sharp edges, making the project safer.
OSHA recommends covering sharp metal edges in workplaces to reduce injury risks. While this is more critical for industrial settings, it’s just as important for DIY projects in homes or maker spaces.
Improve aesthetics and professionalism
Open extrusion ends look unfinished. Whether you’re building a display case for a store or a bookshelf for your living room, end caps give your project a polished, professional look. They come in colors that match or complement aluminum extrusions—silver, black, white—so they blend in seamlessly.
Add minor structural support
While end caps aren’t designed to be load-bearing, they do add a small amount of rigidity to the ends of extrusions. This is especially helpful for longer extrusions (6 feet or more) that might flex slightly under weight. The end cap reinforces the open end, preventing it from bending or warping over time. A 4040 extrusion used as a table leg will be more stable with an end cap than without.
What Types of Aluminum Extrusion End Caps Are Available?
Not all end caps are the same. They come in different styles, materials, and sizes to match different extrusion types and project needs.
| Type | Material | Key Features | Best For |
|---|---|---|---|
| Push-fit (snap-on) | Plastic (nylon, polypropylene) or rubber | Easy installation (no tools), lightweight, low cost | DIY projects, temporary setups, projects where you might need to remove caps later (3D printers, small shelves) |
| Screw-on | Plastic or metal (aluminum, stainless steel) | Secure fit (won’t fall off), removable and reusable | Industrial projects, outdoor use, projects that move often (tool carts, conveyor systems) |
| Flanged | Plastic or metal | Wider edge covers entire extrusion end including outer rim | Projects wanting extra edge protection or more polished look (display cases, furniture) |
| Custom-molded | Plastic or metal | Designed for non-standard extrusion sizes or shapes (extrusions with unique grooves) | Specialized projects like custom industrial machines or one-of-a-kind DIY builds |
Real-world example: Push-fit vs. screw-on
A local café built custom menu boards using 2020 aluminum extrusions. They initially used push-fit end caps because they were easy to install. After a few weeks, the caps started falling off—some knocked loose by customers, others by vibration from espresso machines. They switched to screw-on end caps, and the problem stopped. The screw-on caps stayed in place even with regular use, and the menu boards still looked clean and professional.
Another hobbyist building a temporary robotics project used push-fit caps. He knew he’d need to take the project apart later to modify it, so easy removal was a priority. For his needs, push-fit was perfect.
How Do You Choose the Right End Caps?
Match size to your extrusion
Aluminum extrusions come in standard sizes: 2020 (20mm x 20mm), 3030 (30mm x 30mm), 4040 (40mm x 40mm), and 6060 (60mm x 60mm). Your end cap must match this size exactly. Too small won’t cover properly. Too big won’t fit at all.
Most manufacturers label end caps by extrusion size (e.g., “2020 Aluminum Extrusion End Cap”). Always check the label. If unsure, measure the outer width and height with a ruler.
Pro tip: When buying online, check the product dimensions (not just the size label). Some brands have slight variations—a “2020” end cap from one brand might be 19.8mm instead of 20mm, which could be too loose.
Consider installation method
Ask yourself:
- Will the project be moved often? (tool cart, portable equipment) → Choose screw-on—they stay in place better.
- Do you need to remove caps later? (for maintenance, modifications) → Push-fit is easier.
- Is the project in a high-vibration area? (near machinery, washing machines) → Screw-on is more stable.
For most permanent, stationary projects (like a bookshelf), either type works—but screw-on is more secure. For temporary or frequently modified projects, push-fit is better.
Choose the right material for your environment
| Material | Pros | Cons | Best Environment |
|---|---|---|---|
| Plastic (nylon/polypropylene) | Lightweight, low cost, multiple colors, won’t rust | Less durable, can crack in extreme cold, may melt in high heat | Indoor use, dry environments, projects where weight/cost matter (3D printers, shelves) |
| Metal (aluminum/stainless steel) | Durable, heat/cold resistant, rust-resistant (stainless), matches aluminum extrusions | Heavier, more expensive, may scratch surfaces | Outdoor use, high-temperature areas (near ovens), industrial settings, projects where durability is key (outdoor furniture, tool carts) |
If you’re building a grill cart with aluminum extrusions (near heat and outdoors), stainless steel end caps are best—they won’t melt or rust. If you’re building a desk organizer indoors, plastic caps work fine and cost less.
Think about aesthetics
End caps come in colors including silver (to match aluminum), black, white, and custom colors.
- Sleek, industrial look: Silver or black
- Clean, modern look: White or light gray
- Bold statement: Custom colors (more expensive, harder to find)
Consider style: flanged or non-flanged. Flanged caps have a wider edge covering the entire extrusion end—great for a more finished look. Non-flanged caps sit inside the extrusion’s edge—better if you want the cap less visible.
Check for special features
Some end caps have extra features useful for specific projects:
- Grommet holes: Let you run wires or cables through the cap (great for electronics projects like 3D printers or robotics)
- Rubber gaskets: Create tighter seal against moisture (perfect for outdoor projects or high-humidity areas like bathrooms)
- Non-slip bottoms: Designed for extrusions used as legs (e.g., table legs) to prevent sliding on smooth surfaces
A DIYer building a smart home control panel used end caps with grommet holes to run wires from inside the extrusion to the panel—keeping wires organized and protected.
How Do You Install Aluminum Extrusion End Caps?
Installing end caps is easy. You don’t need advanced tools—just a few basic items.
What you’ll need
- Aluminum extrusion end caps (matched to your extrusion size and type)
- For screw-on caps: Screwdriver (Phillips or flathead) and screws (usually included)
- For push-fit caps: Optional rubber mallet (to tap into place if needed)
- Clean cloth (to wipe extrusion ends)
- Optional: Fine-grit sandpaper (220+) to smooth any sharp edges
Step 1: Prepare the extrusion end
Clean the extrusion end with a dry cloth to remove dust and debris. If the end has sharp edges (from cutting), lightly sand with fine-grit sandpaper—this makes installation easier and prevents cap damage.
Note: New extrusions may have protective film on ends. Peel this off before installing.
Step 2: Install push-fit end caps
- Align the end cap with the extrusion end. Make sure any notches or grooves on the cap line up with the extrusion’s shape (e.g., T-slots).
- Press the cap firmly onto the end. Use your palms to apply even pressure—you should hear a “snap” when it’s in place.
- If the cap is tight, gently tap with a rubber mallet (don’t use metal hammer—this can crack the cap). Tap around edges to ensure even seating.
- Check that the cap is secure: Give it a light tug. If it doesn’t come off, it’s installed correctly.
Step 3: Install screw-on end caps
- Align the end cap with the extrusion end. Make sure screw holes on the cap line up with holes (if any) on the extrusion. If the extrusion doesn’t have pre-drilled holes, you’ll need to drill them first (see pro tip).
- Place screws into holes on the cap. Use a screwdriver to tighten—turn clockwise until the cap is snug against the extrusion.
- Don’t over-tighten. This can strip holes in the cap or extrusion, making the cap loose. Stop when you feel resistance.
- Check that the cap is secure: Try to wiggle it. If it doesn’t move, it’s installed correctly.
Pro tip: If your extrusion doesn’t have pre-drilled holes for screw-on caps, drill small pilot holes first. Use a drill bit slightly smaller than the screws (e.g., 1/16 inch bit for #4 screws). This prevents aluminum from splitting and makes driving screws easier.
How Do You Maintain End Caps (and When to Replace)?
End caps are low-maintenance, but a little care makes them last longer.
Clean regularly
Wipe caps with a damp cloth every 1–2 months to remove dust, dirt, or stains.
- Plastic caps: Avoid harsh chemicals (bleach, ammonia)—these can discolor or crack plastic.
- Metal caps: Use mild soap and water. If metal caps look dull, polish with soft cloth and aluminum polish (for aluminum caps) or stainless steel polish (for stainless steel caps).
Check for damage
Inspect caps every few months:
- Plastic caps: Look for cracks, chips, or warping. Extreme temperatures can cause plastic to crack—if project is outdoors, check more often.
- Metal caps: Check for rust (especially if not stainless steel) or bent edges. Rust can be removed with wire brush and rust remover, but if heavily rusted, replace.
- Screws (for screw-on caps): Ensure they’re tight. Over time, vibration can loosen screws—tighten with screwdriver if needed.
Replace when necessary
End caps don’t last forever. Replace when:
- The cap is cracked or broken (can no longer seal)
- The cap is loose and won’t stay in place (even after tightening screws)
- The cap is discolored or damaged beyond repair (affects aesthetics)
- Special features (grommet holes, rubber gaskets) are worn out
Replacement is cheap and easy—buy a new set matching your extrusion size and type, and follow installation steps.
How to write a spec that gets priced correctly
A drawing is a contract. If it leaves a number open, the shop fills that number in with its own default. The default is rarely the one you had in mind. Put these five lines on every RFQ and most of the back-and-forth disappears before it starts.
- Flat pattern or STEP file plus a dimensioned drawing
- Material grade and thickness with the standard number
- Bend radii, K-factor and the direction of the grain
- Finish, masking and which faces stay bare
- Quantity and the assembly sequence
The point is not paperwork. Each line removes a decision the shop would otherwise make for you. A complete RFQ comes back priced. An incomplete one comes back guessed.
What actually drives the price
Buyers usually push on material because it is the line they can see. In practice the material is rarely the biggest number on a quote. These five lines decide most of it:
- blank size and nesting efficiency
- number of bends and weld joints
- material grade and thickness
- finish and masking
- batch quantity
Ask for the quote split by line. A supplier who cannot break it down is guessing, and you will pay for the guess. The line you can usually renegotiate is the tolerance band, not the raw material.
Problems you will meet, and the fix
Every process has a failure mode it prefers. The same four show up again and again on this kind of work, and none of them are mysteries once you know what to look for.
- Stretching at a bend that is tighter than the material allows
- Hole distortion when a hole sits too close to a bend line
- Weld draw on a visible face
- Springback that pulls a formed angle out of tolerance
Catch the fault on the first part, not the hundredth. A first-article check costs an hour. A bad batch costs the whole order. Write the check into the purchase order so nobody has to remember it.
Real-World Examples: How End Caps Solve Problems
DIY garage storage system
A homeowner built a garage storage system using 4040 aluminum extrusions for shelves, tool racks, and a sliding cart. Initially, he used no end caps. Within a month, dirt and spider webs built up inside the extrusions. He also kept scratching his arms on sharp ends when reaching for tools. He installed plastic push-fit end caps. Both problems solved: extrusions stayed clean, sharp edges covered, and the system looked more organized. “I wish I’d added them sooner,” he said. “They’re a small detail, but they made the whole project better.”
Industrial conveyor belt
A small manufacturing company uses 6060 aluminum extrusions to build conveyor belts moving small parts outdoors (from warehouse to factory). They needed caps that could withstand rain and extreme temperatures. They chose stainless steel screw-on end caps with rubber gaskets. Stainless steel resists rust, rubber gaskets keep out rain, and screw-on design ensures caps stay in place despite conveyor vibration. After two years of outdoor use, caps still look and work like new—saving the company money on repairs.
RC car track
A group of hobbyists built a large RC car track using 3030 aluminum extrusions for the frame. They used push-fit end caps with non-slip bottoms for extrusions acting as track legs. Non-slip bottoms prevent sliding on garage floor, and push-fit design makes it easy to disassemble for storage. Caps also protect extrusions from dust and debris that would otherwise affect track stability. When transporting to hobby shows, they pop off caps, disassemble extrusions, and pack everything into storage bins—no sharp edges to worry about during transport.
Our solution for Really Need Aluminum Extrusion End
YiguProto runs sheet metal fabrication in house, from a single prototype to a production batch. We quote the process, the material and the finish as separate lines, so you can see where the money goes instead of arguing with one number.
Send a STEP file or a drawing and you get a DFM report in one to two business days. It flags the features that add cost and the features that will not hold tolerance on the process you picked.
Every order ships with an inspection report on the features you call out. If a part misses, we make it again. Ready to price a part? Start with a free quote and DFM review, or read more about our sheet metal fabrication. You can also talk to an engineer before you commit to a drawing.
FAQ about Really Need Aluminum Extrusion End
What is Really Need Aluminum Extrusion End used for?
Really Need Aluminum Extrusion End turns up wherever the part has to do a real job at a predictable cost: brackets, housings, fixtures, covers and the fittings that hold them together. The honest test is whether the properties match the load and the environment, not whether the material is fashionable.
Does the process work for prototypes as well as production?
Yes, and that is usually the point. Running the prototype on the production process removes a whole class of surprises, because the part you test is made the same way as the part you sell.
What is the lead time for Really Need Aluminum Extrusion End?
Expect 3 to 7 business days after drawing release. Tooling, material stock and the finishing queue all move that number, so we confirm the date in writing before the run starts rather than after.
What should I check before approving the parts?
Datums first, then the features that mate, then the cosmetic faces. Ask for a dimensional report, a material certificate and a finish sample. A part can be inside every tolerance and still not fit, so assemble one before you sign.
Can Really Need Aluminum Extrusion End be made in small quantities?
Yes, and small quantities are where a good supplier earns the next order. Setup dominates the price at low volume, so the cheapest route is usually the one with the fewest operations, not the cheapest material.
How do I compare two quotes fairly?
Match the scope first: same drawing, same material, same finish, same inspection. Then read the exclusions. Freight, tooling and certificates are the usual gaps, and a low number with three gaps is not a low number.
The short version
Really Need Aluminum Extrusion End rewards the buyer who reads the data sheet and the drawing together. Pick the option for the property that matters, not for the price per kilo.
Tighten only what mates. Test a sample before the run. Then let the process do the rest.