
Die Casting
What Causes Die Casting Water Patterns and How to Solve Them?
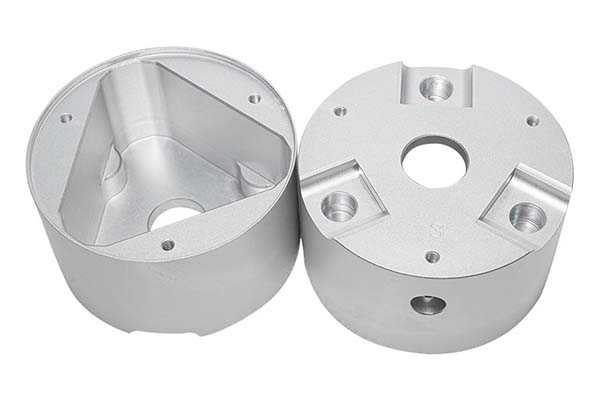
If you work with die casting, you have probably seen water patterns on your parts. These stripe-like marks look like ripples on the casting surface. They ruin the appearance of products and can hide deeper problems. In fact, water patterns often signal issues that reduce mechanical strength and shorten part life. But what causes these defects? And more importantly, how do you fix them?
What Exactly Are Die Casting Water Patterns?
Before solving the problem, you need to recognize it. Die casting water patterns have specific characteristics that set them apart from other surface defects.
Appearance and Identification
Water patterns appear as:
- Stripe-like traces that look like water ripples on a pond
- Usually visible on the surface, but sometimes penetrate deeper
- Can run in different directions depending on metal flow
- Often have a slightly different color or reflectivity than surrounding areas
Why They Matter
These defects are not just cosmetic problems. They affect your parts in two important ways:
| Impact Area | Description |
|---|---|
| Aesthetic quality | Makes parts look low-quality. For visible components (auto trim, electronics housings, consumer goods), this means rejected parts and unhappy customers. |
| Structural integrity | Creates weak points where cracks can start. Reduces load capacity by 10–25% in affected areas. Lowers fatigue life and wear resistance. |
Real-world example: A manufacturer of automotive brackets discovered that parts with visible water patterns failed fatigue testing 40% sooner than defect-free parts. The patterns indicated inconsistent solidification that created internal stress concentrations.
What Causes Die Casting Water Patterns?
Water patterns do not appear by accident. They result from specific problems in metal flow, mold design, process parameters, or operations.
Abnormal Metal Flow
The most common cause is uneven metal flow inside the mold cavity.
When molten metal enters the mold, it should push forward as a single, continuous front. But when multiple streams of metal meet at different temperatures, they solidify at different rates. This asynchronous solidification leaves visible flow lines on the surface.
Think of pouring warm honey into a cold pan. The honey that touches the cold surface first thickens quickly. New honey flowing over it leaves ridges and patterns. The same thing happens with molten metal in a die casting mold.
Unreasonable Mold Design
Your mold design directly controls how metal flows. Poor design choices guarantee water patterns.
Runner design problems:
- Too small cross-section makes metal spray instead of flow
- Too large cross-section lets metal cool before filling the cavity
- Wrong shape creates turbulence instead of smooth flow
Gate positioning issues:
- Gate placed where metal cannot fill evenly
- Some areas fill late and cold
- Temperature differences create visible flow marks
Missing overflow grooves:
- No place for cold metal to go
- Air gets trapped in the cavity
- Turbulent flow leaves patterns
Case study: A die caster producing aluminum housings had 30% scrap rates from water patterns. Analysis showed the runner was 40% too small. Redesigning the runner with proper cross-section dropped scrap to 4% overnight.
Improper Process Parameters
Your machine settings make the difference between good parts and scrap. These parameters matter most:
| Parameter | Problem Setting | What Happens |
|---|---|---|
| Mold temperature | Too low (aluminum <180°C, zinc <150°C) | Metal freezes on contact, leaving flow marks |
| Metal temperature | Too low | Poor fluidity, partial solidification during fill |
| Injection speed | Too fast | Metal splashes and creates turbulence |
| Too slow | Metal cools before filling completely | |
| Injection pressure | Too low | Not enough force to push metal into all areas |
Operating and Mold Maintenance Issues
Even with perfect design and settings, human factors cause water patterns.
Release agent problems:
- Too much release agent on the mold
- Release agent mixes with molten metal
- Thick layer blocks smooth flow
Dirty mold:
- Debris builds up on cavity surface
- Scale from previous cycles
- Old release agent residue
Mold leaks:
- Oil or water seeps into cavity
- Foreign material disrupts metal flow
- Steam creates surface defects
How Can You Solve Die Casting Water Patterns?
Fixing water patterns requires a systematic approach. Target each cause with specific solutions.
Optimize Your Mold Design
Start with the mold—it determines everything that follows.
Improve runner and gate design:
- Increase runner cross-section for steady flow
- Position gates for balanced filling
- Use flow simulation software to test designs before cutting steel
Add overflow systems:
- Place overflow grooves at last-fill locations
- Include air vents to release trapped gas
- Size overflows to capture cold metal
Polish cavity surfaces:
- Smooth surfaces reduce flow resistance
- Target Ra 0.4–0.8μm for critical areas
- Remove tool marks that disrupt flow
Real results: A manufacturer redesigned a complex automotive mold using CAE simulation. The new design eliminated water patterns entirely and reduced cycle time by 12% because metal flowed more efficiently.
Fine-Tune Your Process Parameters
Small adjustments make big differences.
Control mold temperature:
- Set aluminum molds to 180–250°C
- Set zinc molds to 150–200°C
- Use temperature controllers to maintain ±5°C across the mold
- Check for hot spots with infrared cameras
Manage metal temperature:
- Aluminum alloys: 650–720°C at injection
- Zinc alloys: 410–430°C at injection
- Measure frequently—temperature drifts during production
Adjust injection parameters:
- Use multi-stage injection speeds:
- Slow start to avoid splashing
- Fast middle section for complete fill
- Slow end to prevent overflows
- Increase pressure by 5–10% for thin-walled sections
- Test different profiles and document what works
Strengthen Your Process Management
Good habits prevent defects from returning.
Apply release agent correctly:
- Use thin, uniform coats
- Choose quality agents matched to your alloy
- Train operators on proper technique
- Check coverage every 50–100 cycles
Clean molds regularly:
- Clean every 50–100 cycles (more often for complex parts)
- Remove all debris and residue
- Inspect for damage during cleaning
- Document cleaning schedules
Handle existing defects:
- Sandblasting: Removes surface layer, hides shallow patterns
- Polishing: Smooths surface, reduces visibility
- Painting: Covers patterns for cosmetic parts
Case study: A high-volume producer reduced water pattern defects from 15% to 2% through a three-month program of operator training, parameter documentation, and regular mold maintenance. The investment paid back in six weeks through reduced scrap.
What Advanced Solutions Are Available?
Computer Flow Simulation
Modern CAE software lets you see metal flow before building the mold. You can:
- Identify problem areas in the design phase
- Test different runner and gate configurations
- Predict temperature distribution
- Optimize parameters virtually
Cost impact: Simulation adds \$2,000–5,000 to mold development but prevents 20–50% of defects. For a \$100,000 mold, that is money well spent.
Real-Time Process Monitoring
Sensors on your machine provide continuous feedback:
- Mold temperature sensors at multiple points
- Metal temperature monitoring in the shot sleeve
- Injection speed and pressure tracking
- Automatic alerts when parameters drift
When a sensor detects a problem, the system alerts operators immediately. You catch defects before they happen.
Automated Parameter Control
Advanced machines adjust themselves:
- Closed-loop control maintains set parameters
- Adaptive systems learn from good runs
- Recipe storage ensures consistent setups
One manufacturer reduced water pattern defects by 80% after installing closed-loop control on injection speed. The system compensated for variations operators could not see.
How to write a spec that gets priced correctly
A drawing is a contract. If it leaves a number open, the shop fills that number in with its own default. The default is rarely the one you had in mind. Put these five lines on every RFQ and most of the back-and-forth disappears before it starts.
- 3D model with the parting line marked
- Alloy grade and the standard it meets
- Wall thickness and draft on every face
- Machining allowance on the faces that will be cut
- Pressure tightness or porosity class
The point is not paperwork. Each line removes a decision the shop would otherwise make for you. A complete RFQ comes back priced. An incomplete one comes back guessed.
What actually drives the price
Buyers usually push on material because it is the line they can see. In practice the material is rarely the biggest number on a quote. These five lines decide most of it:
- die steel and cavity count
- part weight and wall section
- draft and slide count
- porosity requirement
- machining allowance
Ask for the quote split by line. A supplier who cannot break it down is guessing, and you will pay for the guess. The line you can usually renegotiate is the tolerance band, not the raw material.
Problems you will meet, and the fix
Every process has a failure mode it prefers. The same four show up again and again on this kind of work, and none of them are mysteries once you know what to look for.
- Cold shuts where two flow fronts meet
- Porosity that shows up only after machining
- Soldering on a hot spot in the die
- Shrinkage voids in a heavy section
Catch the fault on the first part, not the hundredth. A first-article check costs an hour. A bad batch costs the whole order. Write the check into the purchase order so nobody has to remember it.
What to check on the first article
The first article is the cheapest inspection you will ever buy. Use it properly and the rest of the run becomes boring, which is exactly what you want.
- Every dimension on the drawing, with the measured value written beside it.
- The material certificate, matched to the heat or lot number on the parts.
- The finish against the sample you approved, under the same light.
- Fit against the mating part, assembled rather than measured.
- Packaging, because parts that arrive damaged were never in tolerance.
Check in this order: datums, then mating features, then cosmetic faces. If the datums are wrong, every number after them is noise. Keep the report on file. When a problem shows up in month six, that document is the only thing that tells you what changed.
How to compare two quotes fairly
Two numbers are not comparable unless the scope matches. Line them up before you decide, because a low number with three gaps is not a low number.
Same drawing, same material, same finish, same inspection. Anything else is a different job wearing the same part number. Then look at what each quote leaves out. Freight, packaging, certificates and tooling are the usual gaps.
Ask each supplier to state their assumptions in writing. The one who does is usually the one who has run the process before.
Scaling from one part to a batch
The first part teaches you the process. The hundredth teaches you the process cost.
Watch three things as volume grows: setup amortisation, tool wear, and how much hand work the finish still needs. If the unit price barely moves between ten and a hundred, the cost sits in material or in hand work, not in setup. Ask which, because only one of them is negotiable.
Lead time behaves the same way. A one-off is scheduled around other jobs. A repeat order is scheduled around your forecast. Give the shop a forecast and the lead time gets shorter, not longer.
How to read a supplier's quote
A quote is a short document with a long shadow. Four things in it decide whether the job runs smoothly, and only one of them is the price.
- The scope line. It should name the process, the material and the finish, not just the part.
- The tolerance basis. General tolerance or the drawing, and which standard it follows.
- The exclusions. Tooling, freight, certificates and inspection are the usual omissions.
- The validity date. Material prices move, and an open-ended quote is a promise nobody can keep.
Read the exclusions before you read the total. A quote that leaves out tooling is not cheaper. It is a quote for a different job.
What to send with the first order
The first order sets the pattern for every order after it. Send a complete package once and the shop files it, and the second order takes a fraction of the time.
- A STEP or native model plus a PDF drawing carrying the same revision letter.
- The material callout by standard number, not by trade name.
- The finish and the exact faces it applies to.
- Any test the part must pass: fit, seal, drop, salt spray, dielectric.
- A contact who can answer a question inside one working day.
Then write down what was agreed. An email that confirms the material, the finish and the date is worth more than a longer purchase order that leaves them open.
FAQ About Die Casting Water Patterns
Can water patterns be completely eliminated?
Yes, in most cases. With proper mold design, correct parameters, and good maintenance, you can produce parts with no visible water patterns. For extremely complex geometries, you may need to combine process optimization with surface finishing.
How do I quickly identify the cause on my production line?
Follow this rapid troubleshooting sequence:
- Check parameters first: Verify mold temperature, metal temperature, injection speed, and pressure against known good settings.
- Inspect the mold: Look for debris, damage, or excessive release agent.
- Look at pattern location:
- Near gate → gate or runner problem
- Evenly distributed → temperature issues
- Random locations → flow turbulence or contamination
Will higher mold temperatures always solve the problem?
No. While low mold temperature causes water patterns, too much heat creates other defects:
- Longer cycle times (reduced productivity)
- More shrinkage and porosity
- Mold distortion and shorter life
- Solder problems with aluminum
Stay within recommended ranges: 180–250°C for aluminum, 150–200°C for zinc.
Can I salvage parts with water patterns?
Yes, through surface treatments:
- Sandblasting for shallow patterns
- Polishing for visible surfaces
- Painting for cosmetic parts
- Machining if patterns are deep and material allows
But fixing defects after casting always costs more than preventing them.
Do different alloys show more water patterns?
Yes. Aluminum alloys with wide freezing ranges (like A380) are more prone to flow patterns than eutectic alloys (like A413). Magnesium flows well but can show patterns at low mold temperatures. Zinc is less sensitive but still requires proper temperature control.
Die casting water patterns are preventable defects. They come from specific causes: abnormal metal flow, poor mold design, incorrect process parameters, or operating mistakes. Fixing them requires a systematic approach—optimize your mold, fine-tune your parameters, and strengthen your process management. Modern tools like flow simulation and real-time monitoring make prevention even easier. The key is treating water patterns not as random defects but as signals telling you exactly what needs adjustment. Listen to those signals, and you will produce better parts with less scrap.
Our solution for Causes Die Casting Water Patterns
YiguProto runs die casting in house, from a single prototype to a production batch. We quote the process, the material and the finish as separate lines, so you can see where the money goes instead of arguing with one number.
Send a STEP file or a drawing and you get a DFM report in one to two business days. It flags the features that add cost and the features that will not hold tolerance on the process you picked.
Every order ships with an inspection report on the features you call out. If a part misses, we make it again. Ready to price a part? Start with a free quote and DFM review, or read more about our die casting. You can also talk to an engineer before you commit to a drawing.
FAQ about Causes Die Casting Water Patterns
What material should I specify?
Specify by standard, not by trade name. A trade name can change under you between two orders; a standard number cannot. Then add the one property that actually decides the part, whether that is strength, heat resistance or chemical exposure.
What files do you need in order to quote?
A STEP file plus a PDF drawing that carries the same revision letter. The model carries the geometry and the drawing carries the intent. When the two disagree, the shop picks one, and it is never the one you meant.
What should I check before approving the parts?
Datums first, then the features that mate, then the cosmetic faces. Ask for a dimensional report, a material certificate and a finish sample. A part can be inside every tolerance and still not fit, so assemble one before you sign.
Can Causes Die Casting Water Patterns be made in small quantities?
Yes, and small quantities are where a good supplier earns the next order. Setup dominates the price at low volume, so the cheapest route is usually the one with the fewest operations, not the cheapest material.
Does the process work for prototypes as well as production?
Yes, and that is usually the point. Running the prototype on the production process removes a whole class of surprises, because the part you test is made the same way as the part you sell.
What tolerance can you hold on Causes Die Casting Water Patterns?
The working default is ±0.1 mm on cast features, ±0.05 mm after machining. Tighter than that the process changes and so does the price, because every step tighter adds inspection time. Call out only the faces that mate with something else and leave the rest on the general tolerance.
The short version
Causes Die Casting Water Patterns rewards the buyer who reads the data sheet and the drawing together. Pick the option for the property that matters, not for the price per kilo.
Tighten only what mates. Test a sample before the run. Then let the process do the rest.