
Die Casting
What Are Die Casting Process Parameters and How to Optimize Them?
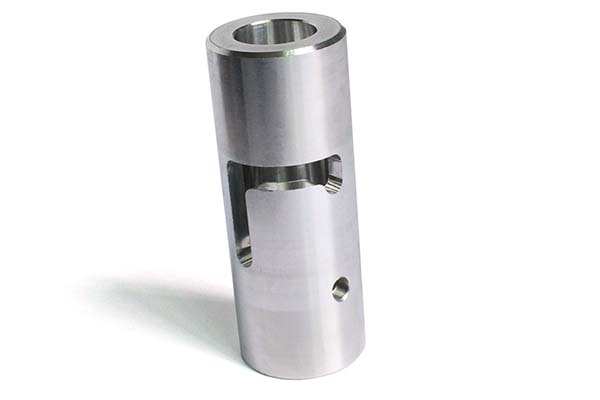
If you work with die casting, you know that small changes in settings can mean the difference between perfect parts and scrap. Die casting process parameters—pressure, speed, time, temperature—are the invisible hands that control quality. Set them wrong, and you get porosity, cold shuts, warping, or cracks. Set them right, and parts come out consistent, cycle after cycle.
Key takeaways
- Pressure pushes molten metal into every corner of the mold. Get it right, and the part fills completely with no voids.
- Speed controls how fast metal enters the mold. Too fast causes turbulence and porosity. Too slow leads to incomplete filling.
- Time parameters manage how long metal stays in the mold—from filling to ejection. Wrong timing causes shrinkage or deformation.
- Temperature controls the thermal balance of the entire system—metal temperature and mold temperature together determine flow and solidification.
Pressure Parameters: The Driving Force for Dense Castings
Pressure pushes molten metal into every corner of the mold. Get it right, and the part fills completely with no voids.
Key Pressure Metrics
| Metric | Definition | What It Does |
|---|---|---|
| Injection force | Force from the machine’s cylinder pushing the punch | Overcomes flow resistance to move metal |
| Injection pressure | Dynamic pressure of metal during injection | Affects flow speed and filling completeness |
| Specific injection pressure | Pressure per unit area on the metal | Directly controls casting density |
The Formula That Matters
Specific pressure (MPa) = Injection force (N) ÷ [π × (Punch diameter (m))² ÷ 4]
This is the number you actually care about—the pressure the metal experiences.
Optimization Rules
For complex or thin-walled parts (under 1.5 mm, like phone casings):
- Use high specific pressure: 50–80 MPa
- This forces metal into tiny features before it freezes
For simple or thick-walled parts (over 5 mm, like brackets):
- Use lower specific pressure: 30–50 MPa
- Prevents mold damage and saves energy
How to adjust: Change injection force or swap the punch. Larger punch diameter = lower specific pressure at the same force.
Speed Parameters: Balancing Fill and Quality
Speed controls how fast metal enters the mold. Too fast causes turbulence and porosity. Too slow leads to incomplete filling.
Injection Speed vs. Inner Gate Velocity
| Speed Type | Definition | Typical Range | Impact |
|---|---|---|---|
| Injection speed | Speed of punch pushing metal in pressure chamber | 0.1–0.8 m/s | Determines overall fill time; affects flow stability |
| Inner gate velocity | Speed of metal entering mold cavity through the gate | 15–50 m/s (aluminum) | Directly affects surface finish, strength, and plasticity |
Optimization Rules
For injection speed:
- If pressure chamber fullness >80%: Use lower speed (0.1–0.3 m/s) to avoid splashing
- If fullness <50%: Use higher speed (0.5–0.8 m/s) to prevent premature solidification
For inner gate velocity:
- Thin walls (<2 mm): Higher velocity (35–50 m/s) to fill quickly
- Thick walls (>4 mm): Lower velocity (15–30 m/s) to reduce turbulence
Real-world example: Aluminum automotive sensor housings (thin-walled, complex) need inner gate velocity of 40–45 m/s. This ensures smooth flow and avoids air entrapment that causes leaks.
Time Parameters: Controlling Solidification
Time parameters manage how long metal stays in the mold—from filling to ejection. Wrong timing causes shrinkage or deformation.
Key Time Metrics for Aluminum
| Time Metric | Definition | Typical Range | Optimization |
|---|---|---|---|
| Filling time | Time to fill entire mold cavity | 0.01–0.1 seconds | Thin walls: 0.01–0.03 s (prevent freezing); Thick walls: 0.05–0.1 s (even fill) |
| Holding time | Time metal solidifies under pressure after filling | 1–2 s (thin); 3–7 s (thick) | Set to 1.2–1.5× solidification time of thickest section—prevents shrinkage |
| Mold retention time | Time from end of holding pressure to ejection | 5–25 seconds | Eject when casting temperature drops to 300–400°C (aluminum). Too early = deformation; too late = high ejection force |
Temperature Parameters: Avoiding Overheating and Undercooling
Temperature controls the thermal balance of the entire system—metal temperature and mold temperature together determine flow and solidification.
Pouring Temperature: Thermal Energy for Flow
Typical range for aluminum: 650–720°C
Core principles:
- Avoid overheating (>720°C): Causes grain coarsening (reduces strength) and increases mold wear
- Avoid undercooling (<650°C): Reduces fluidity, causes incomplete filling and cold shuts
Optimization for special parts:
- Thin-walled/complex (heat sinks): 700–720°C (improves flow)
- Thick-walled (engine brackets): 650–680°C (prevents shrinkage)
Mold Temperature: The Thermal Buffer
Typical range for aluminum: 200–280°C
Control requirements:
- Maintain temperature within ±25°C across the mold
- Uneven temperature causes warping (one side hotter, uneven shrinkage)
Part-specific adjustments:
- Thin-walled/complex: 250–280°C (slows solidification, improves surface finish)
- Thick-walled: 200–230°C (accelerates cooling, reduces cycle time)
Practical tip: Use mold temperature controllers with water or oil circulation. This reduces temperature fluctuations by 40%.
How Do Parameters Interact?
Parameters do not work in isolation. Changing one affects others.
Example: Increasing injection speed (to fill thin walls faster) also increases mold temperature (faster metal flow heats the mold). If you don’t adjust cooling, mold temperature rises, slowing solidification and potentially causing shrinkage.
The synergy principle: Always consider how a change in pressure, speed, time, or temperature will affect the other three. Optimize as a system, not as individual settings.
A 4-Step Parameter Optimization Checklist
Step 1: Analyze Casting Requirements
Define your targets:
- Surface finish? (Ra <3.2 μm?)
- Porosity limit? (under 2%?)
- Dimensional tolerance? (±0.1 mm?)
Note part features: wall thickness, complexity, critical areas.
Step 2: Set Baseline Parameters
Start with typical ranges:
- Aluminum: injection speed 0.3–0.5 m/s, mold temperature 220–250°C
- Adjust based on part type (thin-wall vs. thick-wall)
Step 3: Test and Adjust
Run 50–100 trial castings. Inspect for defects:
| Defect | Likely Cause | Fix |
|---|---|---|
| Porosity | Turbulence or low pressure | Increase specific pressure OR reduce injection speed |
| Cold shuts | Metal too cold | Raise pouring temperature OR mold temperature |
| Warping | Uneven cooling | Stabilize mold temperature (reduce ± fluctuation) |
| Incomplete fill | Pressure too low | Increase specific pressure OR inner gate velocity |
Step 4: Document and Standardize
Record optimized parameters for each part:
- “Aluminum phone casing: specific pressure 65 MPa, inner gate velocity 42 m/s, mold temp 250°C, holding time 2.5 s”
Use these records for future production runs.
Real-World Example: Automotive Sensor Housing
The part: Aluminum alloy sensor housing, wall thickness 1.8 mm, complex internal features. Requirement: zero porosity (must hold pressure), surface finish Ra <3.2 μm.
Initial parameters (guessed):
- Specific pressure: 40 MPa
- Inner gate velocity: 25 m/s
- Mold temperature: 200°C
- Holding time: 2 s
Result: 30% scrap from porosity and incomplete fill.
Optimization process:
- Increased specific pressure to 55 MPa (better filling)
- Raised inner gate velocity to 40 m/s (faster fill, less turbulence)
- Increased mold temperature to 240°C (improved flow)
- Extended holding time to 3.5 s (compensated shrinkage)
Final result: Scrap under 2%. All parts passed pressure test.
How to write a spec that gets priced correctly
A drawing is a contract. If it leaves a number open, the shop fills that number in with its own default. The default is rarely the one you had in mind. Put these five lines on every RFQ and most of the back-and-forth disappears before it starts.
- 3D model with the parting line marked
- Alloy grade and the standard it meets
- Wall thickness and draft on every face
- Machining allowance on the faces that will be cut
- Pressure tightness or porosity class
The point is not paperwork. Each line removes a decision the shop would otherwise make for you. A complete RFQ comes back priced. An incomplete one comes back guessed.
What actually drives the price
Buyers usually push on material because it is the line they can see. In practice the material is rarely the biggest number on a quote. These five lines decide most of it:
- die steel and cavity count
- part weight and wall section
- draft and slide count
- porosity requirement
- machining allowance
Ask for the quote split by line. A supplier who cannot break it down is guessing, and you will pay for the guess. The line you can usually renegotiate is the tolerance band, not the raw material.
Problems you will meet, and the fix
Every process has a failure mode it prefers. The same four show up again and again on this kind of work, and none of them are mysteries once you know what to look for.
- Cold shuts where two flow fronts meet
- Porosity that shows up only after machining
- Soldering on a hot spot in the die
- Shrinkage voids in a heavy section
Catch the fault on the first part, not the hundredth. A first-article check costs an hour. A bad batch costs the whole order. Write the check into the purchase order so nobody has to remember it.
What to check on the first article
The first article is the cheapest inspection you will ever buy. Use it properly and the rest of the run becomes boring, which is exactly what you want.
- Every dimension on the drawing, with the measured value written beside it.
- The material certificate, matched to the heat or lot number on the parts.
- The finish against the sample you approved, under the same light.
- Fit against the mating part, assembled rather than measured.
- Packaging, because parts that arrive damaged were never in tolerance.
Check in this order: datums, then mating features, then cosmetic faces. If the datums are wrong, every number after them is noise. Keep the report on file. When a problem shows up in month six, that document is the only thing that tells you what changed.
How to compare two quotes fairly
Two numbers are not comparable unless the scope matches. Line them up before you decide, because a low number with three gaps is not a low number.
Same drawing, same material, same finish, same inspection. Anything else is a different job wearing the same part number. Then look at what each quote leaves out. Freight, packaging, certificates and tooling are the usual gaps.
Ask each supplier to state their assumptions in writing. The one who does is usually the one who has run the process before.
Scaling from one part to a batch
The first part teaches you the process. The hundredth teaches you the process cost.
Watch three things as volume grows: setup amortisation, tool wear, and how much hand work the finish still needs. If the unit price barely moves between ten and a hundred, the cost sits in material or in hand work, not in setup. Ask which, because only one of them is negotiable.
Lead time behaves the same way. A one-off is scheduled around other jobs. A repeat order is scheduled around your forecast. Give the shop a forecast and the lead time gets shorter, not longer.
How to read a supplier's quote
A quote is a short document with a long shadow. Four things in it decide whether the job runs smoothly, and only one of them is the price.
- The scope line. It should name the process, the material and the finish, not just the part.
- The tolerance basis. General tolerance or the drawing, and which standard it follows.
- The exclusions. Tooling, freight, certificates and inspection are the usual omissions.
- The validity date. Material prices move, and an open-ended quote is a promise nobody can keep.
Read the exclusions before you read the total. A quote that leaves out tooling is not cheaper. It is a quote for a different job.
What to send with the first order
The first order sets the pattern for every order after it. Send a complete package once and the shop files it, and the second order takes a fraction of the time.
- A STEP or native model plus a PDF drawing carrying the same revision letter.
- The material callout by standard number, not by trade name.
- The finish and the exact faces it applies to.
- Any test the part must pass: fit, seal, drop, salt spray, dielectric.
- A contact who can answer a question inside one working day.
Then write down what was agreed. An email that confirms the material, the finish and the date is worth more than a longer purchase order that leaves them open.
When this is the wrong choice
A good supplier tells you when the process does not fit. These are the cases where we say so.
- The volume is so low that setup costs more than the parts are worth.
- The tolerance is tighter than the process can hold without a second operation.
- The geometry cannot be made without a tool feature that will not pay back.
- The material you need is not available in the form the process requires.
- The schedule is shorter than the tooling or setup time, and nobody has said so yet.
None of these are refusals. They are reasons to look at a different route, and the earlier that conversation happens the cheaper it is. The most expensive mistake in manufacturing is a process chosen before the question was understood.
FAQ About Die Casting Process Parameters
If my aluminum casting has incomplete contours, should I increase injection speed or specific pressure first?
First increase specific pressure by 10–15 MPa. Incomplete contours usually mean insufficient force to push metal into tiny cavities. Higher pressure improves filling. If contours still incomplete, then increase inner gate velocity by 5–10 m/s.
Why does my casting have surface cracks even with correct temperature parameters?
Check mold retention time. Cracks often occur when parts are ejected too early (not fully solidified) or too late (overly rigid, stress during ejection). For aluminum, adjust retention time to:
- Thin parts: 5–8 seconds
- Thick parts: 10–15 seconds
Can I use the same pressure and speed for different aluminum alloys?
No. ADC12 has better fluidity than 6061. For ADC12, use:
- Specific pressure: 30–50 MPa (lower)
- Inner gate velocity: 25–40 m/s (lower)
For 6061, use:
- Specific pressure: 40–60 MPa (higher)
- Inner gate velocity: 35–50 m/s (higher)
Adjusting for alloy fluidity prevents turbulence.
How do I know if my mold temperature is uniform?
Use an infrared camera or multiple thermocouples across the mold. Check before starting a production run. Variation over ±15°C across critical areas will cause warping. Adjust cooling channel flow to balance temperatures.
What is the most common parameter mistake?
Focusing on one parameter while ignoring interactions. For example, raising injection speed to fix filling problems, but not adjusting cooling, leading to higher mold temperature and slower solidification. Always treat parameters as a system.
Die casting process parameters are the levers you pull to control quality. Master them, and you can eliminate most defects.
- Pressure (30–80 MPa specific): Drives metal into every cavity. Higher for thin walls, lower for thick.
- Speed (0.1–0.8 m/s injection, 15–50 m/s gate): Balances filling efficiency vs. turbulence. Faster for thin walls, slower for thick.
- Time (0.01–0.1 s fill, 1–7 s hold, 5–25 s retention): Controls solidification. Set hold time to 1.2–1.5× solidification time.
- Temperature (650–720°C metal, 200–280°C mold): Manages thermal balance. Higher for thin/complex, lower for thick/simple.
But parameters do not work alone. They interact. Optimize them as a system, not individually.
Use the 4-step checklist:
- Analyze requirements
- Set baselines
- Test and adjust
- Document and standardize
The difference between 30% scrap and 2% scrap is not luck. It is understanding and controlling your parameters.
Our solution for Die Casting Process Parameters
YiguProto runs die casting in house, from a single prototype to a production batch. We quote the process, the material and the finish as separate lines, so you can see where the money goes instead of arguing with one number.
Send a STEP file or a drawing and you get a DFM report in one to two business days. It flags the features that add cost and the features that will not hold tolerance on the process you picked.
Every order ships with an inspection report on the features you call out. If a part misses, we make it again. Ready to price a part? Start with a free quote and DFM review, or read more about our die casting. You can also talk to an engineer before you commit to a drawing.
FAQ about Die Casting Process Parameters
How do I compare two quotes fairly?
Match the scope first: same drawing, same material, same finish, same inspection. Then read the exclusions. Freight, tooling and certificates are the usual gaps, and a low number with three gaps is not a low number.
What files do you need in order to quote?
A STEP file plus a PDF drawing that carries the same revision letter. The model carries the geometry and the drawing carries the intent. When the two disagree, the shop picks one, and it is never the one you meant.
What tolerance can you hold on Die Casting Process Parameters?
The working default is ±0.1 mm on cast features, ±0.05 mm after machining. Tighter than that the process changes and so does the price, because every step tighter adds inspection time. Call out only the faces that mate with something else and leave the rest on the general tolerance.
What is Die Casting Process Parameters used for?
Die Casting Process Parameters turns up wherever the part has to do a real job at a predictable cost: brackets, housings, fixtures, covers and the fittings that hold them together. The honest test is whether the properties match the load and the environment, not whether the material is fashionable.
Does the process work for prototypes as well as production?
Yes, and that is usually the point. Running the prototype on the production process removes a whole class of surprises, because the part you test is made the same way as the part you sell.
What should I check before approving the parts?
Datums first, then the features that mate, then the cosmetic faces. Ask for a dimensional report, a material certificate and a finish sample. A part can be inside every tolerance and still not fit, so assemble one before you sign.
The short version
Die Casting Process Parameters rewards the buyer who reads the data sheet and the drawing together. Pick the option for the property that matters, not for the price per kilo.
Tighten only what mates. Test a sample before the run. Then let the process do the rest.