
Blogs
Education 3D Printing Services

Education 3D Printing Services, explained the way we would explain it across a table: what it is good at, what it costs you, and the details that keep the part out of the scrap bin.
Key takeaways
- Elevate your classroom with Education 3D Printing from our shop—where STEM Learning meets hands-on innovation.
- At our shop, our Education 3D Printing capabilities are built for the unique needs of classrooms.
- Our Education 3D Printing process is designed to fit seamlessly into classroom workflows—simple enough for teachers to manage, and engaging enough for students to lead.
- Safety and educational value are our top priorities when choosing Education 3D Printing materials.
Education 3D Printing Services
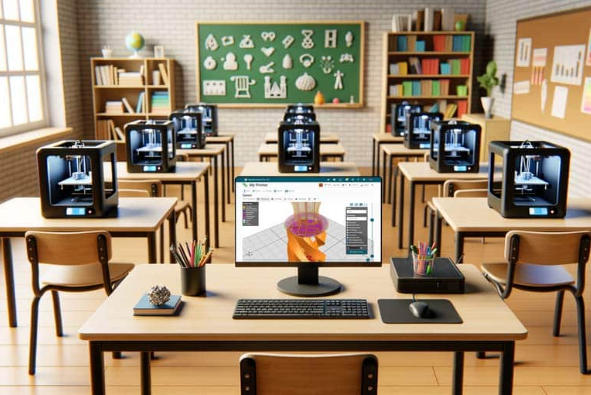
Elevate your classroom with Education 3D Printing from our shop—where STEM Learning meets hands-on innovation. Our classroom-ready systems, curriculum-aligned solutions, and non-toxic materials turn abstract concepts into tangible models, boosting student engagement and creativity.
Whether teaching science, math, or art, we make Additive Manufacturing in Schools accessible, reliable, and tailored to educators’ needs.

Our Capabilities: Empowering Educators and Students
At our shop, our Education 3D Printing capabilities are built for the unique needs of classrooms. We don’t just sell printers—we deliver end-to-end solutions that make it easy for teachers to integrate 3D printing into daily lessons.
Our core strengths include:
- Educational Solutions: Bundles that include printers, non-toxic filaments, and pre-designed lesson plans—no extra shopping required.
- Classroom-Ready Systems: Printers with kid-friendly controls, automatic safety shutoffs, and durable builds (resistant to accidental knocks). Setup takes 20 minutes, and teachers can start printing lessons the same day.
- Curriculum Integration: Lesson plans aligned with national standards (e.g., NGSS for STEM, Common Core for Math). For example, a 5th-grade science lesson on ecosystems includes 3D printable plant and animal models.
- Teacher Training: Free online workshops and in-person sessions (3 hours average) to teach educators how to use printers, design simple models, and troubleshoot common issues. 95% of teachers feel confident after training.
- Student-Centered Learning: Tools that let students lead projects—our easy-to-use design software (for ages 8+) lets kids create their own math manipulatives or engineering prototypes, fostering independence.
| Capability | Our Specification | Industry Average Comparison |
| Classroom-Ready Systems | 20-minute setup, safety shutoffs | 1+ hour setup, no built-in safety features |
| Curriculum Integration | 500+ standards-aligned lesson plans | 50–100 generic lesson plans |
| Teacher Training | Free, 3-hour sessions (online/in-person) | Paid training (100–200 per teacher) |
| Student-Centered Learning | Design software for ages 8+ | Software for ages 12+ only |
| Educational Solutions | All-in-one bundles (printer + filament + lessons) | Separate purchases required |
Process: From Lesson Plan to Student Project
Our Education 3D Printing process is designed to fit seamlessly into classroom workflows—simple enough for teachers to manage, and engaging enough for students to lead. It takes five clear steps:
- Design and Modeling: Teachers use our pre-designed lesson plans (or adapt them) to guide students. Younger students might use our drag-and-drop software to modify existing models (e.g., adding labels to a cell model), while older students can create their own designs (e.g., a bridge prototype).
- Material Selection: Choose safe, classroom-appropriate materials. We recommend PLA for most projects (non-toxic, easy to print) and ABS for durable items like science kits. For art projects, Color-Changing Filaments (which shift color with heat or light) add excitement.
- Printing and Layering: Teachers or students load the filament into the classroom printer. Our printers have a “lesson mode” that prioritizes speed (most models print in 1–3 hours) and quiet operation (so class isn’t disrupted).
- Post-Processing: Students help with simple post-processing—peeling off support structures (our PLA prints rarely need them!) or sanding edges. This teaches responsibility and attention to detail.
- Classroom Integration: The printed items become part of the lesson. Students might dissect a 3D cell model, test a bridge prototype for strength, or use fraction tiles to solve math problems. Many teachers display student projects to celebrate creativity.
| Process Step | Average Time Taken | Student Involvement Tips |
| Design and Modeling | 45 mins–1 hour | Let students vote on model details (e.g., cell model colors) |
| Material Selection | 5–10 minutes | Teach students about material properties (e.g., “Why is PLA safe?”) |
| Printing and Layering | 1–3 hours | Let students take turns monitoring the printer (with teacher supervision) |
| Post-Processing | 10–15 minutes | Assign small groups to sand or decorate models |
| Classroom Integration | 1–2 class periods | Have students present how they used the model to learn |

How to write a spec that gets priced correctly
A drawing is a contract. If it leaves a number open, the shop fills that number in with its own default. The default is rarely the one you had in mind. Put these five lines on every RFQ and most of the back-and-forth disappears before it starts.
- A model and a drawing that agree
- Material by standard number
- Tolerance only where it mates
- Finish and the faces it applies to
- Quantity and required date
The point is not paperwork. Each line removes a decision the shop would otherwise make for you. A complete RFQ comes back priced. An incomplete one comes back guessed.
What actually drives the price
Buyers usually push on material because it is the line they can see. In practice the material is rarely the biggest number on a quote. These five lines decide most of it:
- process choice
- material
- tolerance band
- finish
- volume
Ask for the quote split by line. A supplier who cannot break it down is guessing, and you will pay for the guess. The line you can usually renegotiate is the tolerance band, not the raw material.
Problems you will meet, and the fix
Every process has a failure mode it prefers. The same four show up again and again on this kind of work, and none of them are mysteries once you know what to look for.
- A drawing that contradicts the model
- A tolerance with no datum
- A cosmetic callout with no approved sample
- A quote compared against a different scope
Catch the fault on the first part, not the hundredth. A first-article check costs an hour. A bad batch costs the whole order. Write the check into the purchase order so nobody has to remember it.
What to check on the first article
The first article is the cheapest inspection you will ever buy. Use it properly and the rest of the run becomes boring, which is exactly what you want.
- Every dimension on the drawing, with the measured value written beside it.
- The material certificate, matched to the heat or lot number on the parts.
- The finish against the sample you approved, under the same light.
- Fit against the mating part, assembled rather than measured.
- Packaging, because parts that arrive damaged were never in tolerance.
Check in this order: datums, then mating features, then cosmetic faces. If the datums are wrong, every number after them is noise. Keep the report on file. When a problem shows up in month six, that document is the only thing that tells you what changed.
How to compare two quotes fairly
Two numbers are not comparable unless the scope matches. Line them up before you decide, because a low number with three gaps is not a low number.
Same drawing, same material, same finish, same inspection. Anything else is a different job wearing the same part number. Then look at what each quote leaves out. Freight, packaging, certificates and tooling are the usual gaps.
Ask each supplier to state their assumptions in writing. The one who does is usually the one who has run the process before.
Scaling from one part to a batch
The first part teaches you the process. The hundredth teaches you the process cost.
Watch three things as volume grows: setup amortisation, tool wear, and how much hand work the finish still needs. If the unit price barely moves between ten and a hundred, the cost sits in material or in hand work, not in setup. Ask which, because only one of them is negotiable.
Lead time behaves the same way. A one-off is scheduled around other jobs. A repeat order is scheduled around your forecast. Give the shop a forecast and the lead time gets shorter, not longer.
How to read a supplier's quote
A quote is a short document with a long shadow. Four things in it decide whether the job runs smoothly, and only one of them is the price.
- The scope line. It should name the process, the material and the finish, not just the part.
- The tolerance basis. General tolerance or the drawing, and which standard it follows.
- The exclusions. Tooling, freight, certificates and inspection are the usual omissions.
- The validity date. Material prices move, and an open-ended quote is a promise nobody can keep.
Read the exclusions before you read the total. A quote that leaves out tooling is not cheaper. It is a quote for a different job.
What to send with the first order
The first order sets the pattern for every order after it. Send a complete package once and the shop files it, and the second order takes a fraction of the time.
- A STEP or native model plus a PDF drawing carrying the same revision letter.
- The material callout by standard number, not by trade name.
- The finish and the exact faces it applies to.
- Any test the part must pass: fit, seal, drop, salt spray, dielectric.
- A contact who can answer a question inside one working day.
Then write down what was agreed. An email that confirms the material, the finish and the date is worth more than a longer purchase order that leaves them open.
When this is the wrong choice
A good supplier tells you when the process does not fit. These are the cases where we say so.
- The volume is so low that setup costs more than the parts are worth.
- The tolerance is tighter than the process can hold without a second operation.
- The geometry cannot be made without a tool feature that will not pay back.
- The material you need is not available in the form the process requires.
- The schedule is shorter than the tooling or setup time, and nobody has said so yet.
None of these are refusals. They are reasons to look at a different route, and the earlier that conversation happens the cheaper it is. The most expensive mistake in manufacturing is a process chosen before the question was understood.
Planning the ramp from prototype to production
The gap between one good part and a thousand identical ones is a plan, not a machine. Three decisions close it.
First, freeze the design. Every change after tooling starts is a re-cut, and re-cuts are where schedules go. Second, decide the inspection level. A prototype is checked by eye; a production part is checked against a report. Third, agree the change process in writing, including who pays for it.
Write the ramp down as dates and owners, not as intentions. A ramp plan with three names and three dates is worth more than a page of good intentions.
What documentation to expect
Paperwork is not bureaucracy when a part fails at the customer. It is the only record of what was agreed. A normal shipment should carry four documents.
- A dimensional report covering every callout on the drawing.
- A material certificate traceable to the heat or lot number.
- A finish or coating certificate where the specification requires one.
- A packing list that matches the carton labels.
If a supplier cannot produce these on request, they are not running a controlled process. Ask for one sample set before you place the first order and you will know exactly what you are buying.
How to handle a change after the order
Changes happen. What matters is whether the change is priced, scheduled and recorded, or absorbed quietly and discovered later.
Send the change as a new revision, not as a note in an email. Ask for three answers in writing: what it costs, what it does to the date, and what happens to material or tooling already committed. Then decide.
A change without a revision number is a rumour. The shop will build what it has on file, and both sides will be right and unhappy at the same time.
How the work actually runs, step by step
Most buyers see two numbers: a price and a date. Between them sits a sequence that decides both. On manufacturing work it looks like this.
- File review. The model and the drawing are checked against each other. Where they disagree, the shop stops and asks, because guessing is how scrap gets made.
- DFM feedback. The features that add cost and the features that will not hold tolerance are listed. This is the cheapest hour in the whole project.
- Setup or tooling. Fixtures, programs or a tool are built. Everything downstream inherits the quality of this step.
- First article. One part is made and measured against the drawing before anything else runs. Nothing is signed until it passes.
- Production. The run goes ahead with the parameters that produced the approved first article, not with new ones.
- Inspection and packing. The callouts are measured, the certificate is matched, and the parts are packed so they arrive in the condition they left in.
Ask any supplier to walk you through these six steps on your part. The answers tell you more about the shop than the price does.
Materials: Safe, Engaging Options for Classrooms
Safety and educational value are our top priorities when choosing Education 3D Printing materials. All our filaments are non-toxic, easy to print, and designed to enhance lessons.
| Material Type | Key Properties | Best For | Cost Range (Per kg) |
| PLA (Polylactic Acid) | Non-toxic (plant-based), easy to print, 30+ colors | Most classroom projects: models, manipulatives | 18–32 |
| ABS (Acrylonitrile Butadiene Styrene) | Durable, impact-resistant, heat-resistant | Science kits, engineering prototypes (for repeated use) | 22–36 |
| Educational Kits | Pre-cut filaments + lesson guides | New teachers or younger students (no measuring needed) | 45–60 (kit of 3) |
| Non-Toxic Filaments | BPA-free, low-odor, ASTM-certified | All K-12 projects (safe for young kids) | 20–34 |
| Color-Changing Filaments | Shifts color with heat/light, non-toxic | Art projects, interactive science demos (e.g., “How heat affects materials”) | 28–42 |
For example, a 2nd-grade class learning about shapes would use PLA to print color-coded geometric figures. A high school engineering class building wind turbines might choose ABS for durable blades. Art classes love Color-Changing Filaments—students print sculptures that change color when placed near a window!
Our solution for Education 3D Printing Services
YiguProto runs custom manufacturing in house, from a single prototype to a production batch. We quote the process, the material and the finish as separate lines, so you can see where the money goes instead of arguing with one number.
Send a STEP file or a drawing and you get a DFM report in one to two business days. It flags the features that add cost and the features that will not hold tolerance on the process you picked.
Every order ships with an inspection report on the features you call out. If a part misses, we make it again. Ready to price a part? Start with a free quote and DFM review, or read more about our custom manufacturing. You can also talk to an engineer before you commit to a drawing.
FAQ about Education 3D Printing Services
Do teachers need prior 3D printing experience to use your systems?
No! Our Teacher Training sessions (free for all customers) are designed for beginners. 95% of teachers who complete the 3-hour training say they feel confident using the printer and integrating it into lessons. We also include step-by-step guides and 24/7 support for any questions.
Are your 3D printing materials safe for young children (ages 5–8)?
Absolutely! All our materials are Non-Toxic Filaments—BPA-free, low-odor, and ASTM-certified for use in K-12 classrooms. Our PLA filament is made from corn starch, so it’s even safe if a young child puts a small piece in their mouth (though we always teach safe handling!).
Can your 3D printing solutions fit into a school’s tight budget?
Yes. Our entry-level classroom bundle (printer + filaments + lesson plans) starts at $999—we also offer flexible payment plans (no interest for 12 months) and grants for low-income schools. Plus, our durable printers last 5+ years, so schools get long-term value without repeated purchases.
What happens if a part is out of specification?
We measure it against the same drawing you approved and, if it misses, we make it again. What matters is that the report exists, because a disagreement without data is just an opinion.
How long does a first article take?
Usually a few business days once the drawing is frozen, and longer if tooling is involved. The date we give you is the date we confirm in writing, not the date we hope for.
What files do you need in order to quote?
A STEP file plus a PDF drawing that carries the same revision letter. The model carries the geometry and the drawing carries the intent. When the two disagree, the shop picks one, and it is never the one you meant.
The short version
Education 3D Printing Services rewards the buyer who reads the data sheet and the drawing together. Pick the option for the property that matters, not for the price per kilo.
Tighten only what mates. Test a sample before the run. Then let the process do the rest.