
Rapid Prototyping
Why Is the Machining Process of Prototype Car Models Critical for Automotive Success?
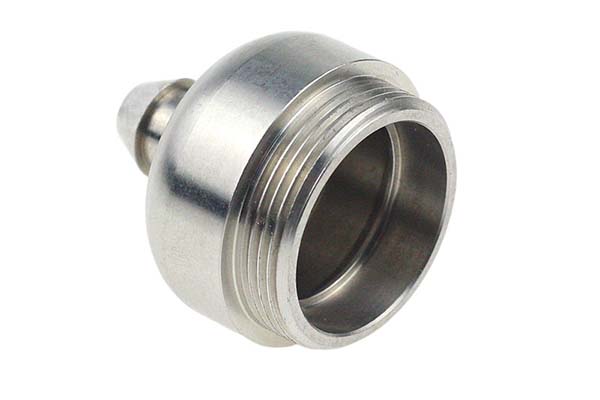
The machining process of prototype car models serves as the essential bridge between a designer’s vision and a real vehicle you can touch and test. It turns digital concepts into physical parts that engineers use to check fit, function, and user experience. This step saves automakers significant time and money by catching design flaws early—before they invest in expensive production tooling.
Key takeaways
- Choosing the right material and preparing it properly is key to a successful machining process of prototype car models.
- The machining process of prototype car models typically uses two main methods: CNC machining for precision and consistency, and 3D printing for speed and complex shapes.
- The machining process of prototype car models does not end with cutting.
- The final step in the machining process of prototype car models is testing.
How Does the Design Phase Shape Prototype Success?
The machining process starts long any cutting happens. A solid design phase determines the prototype’s shape, functionality, and whether it can actually be made. Rushing through design leads to costly rework later.
From Sketches to 3D Models: Capturing Every Detail
First, designers turn rough ideas into precise digital plans. This happens in two stages:
Hand-drawn sketches: Quick drawings to explore basic shapes—like the curve of a new car’s hood or the layout of a center console. These sketches capture the design direction without getting bogged down in details.
3D CAD models: Using software like SolidWorks or AutoCAD, designers create detailed digital models with exact dimensions. A prototype door panel’s CAD model will specify the location of window controls down to ±0.1mm and the panel thickness—typically 1.5–2mm for plastic prototypes.
Why precision matters here: A luxury car brand once missed a 0.3mm error in a CAD model for a dashboard prototype. When machined, the prototype didn’t fit with the steering column. This small mistake delayed testing by 2 weeks and cost $1,200 in rework. Double-checking files upfront would have caught it for free.
Design Review: Catching Problems Before Machining
After completing the 3D model, a cross-functional team reviews it to answer critical questions:
Technical feasibility: Can we machine this with available tools? A complex curved chassis part might need a 5-axis CNC machine. If your shop only has 3-axis capability, the design may need adjustments before you start cutting.
Cost control: Will the material or machining method fit your budget? A titanium prototype is durable but costs 10 times more than ABS plastic. Matching material choice to your testing needs saves money.
User alignment: Does the prototype match what customers actually want? A startup developing an electric car reviewed a prototype battery housing design. Engineers noted that internal ribs meant for strength would be hard to machine with standard tools. They simplified the rib pattern in the CAD model—cutting machining time by 30% and avoiding material waste.
What Goes Into Prototype Model Preparation?
Choosing the right material and preparing it properly is key to a successful machining process of prototype car models. The material must mimic the final car part’s properties while being easy to machine.
Material Selection: Matching Material to Part Function
Different car prototype parts need different materials. Here is a breakdown of common options, their uses, and key properties:
| Material | Key Properties | Best Prototype Uses | Cost (USD/kg) | Machining Difficulty |
|---|---|---|---|---|
| ABS Plastic | Low cost, good impact resistance, easy to shape | Interior parts like dashboards, door panels, trim pieces | (2.50 –)4.00 | 2/10 |
| PC (Polycarbonate) | High transparency, strong, heat-resistant | Headlight covers, instrument cluster lenses | (3.80 –)6.00 | 4/10 |
| PMMA (Acrylic) | Excellent transparency, glossy finish | Window mock-ups, display covers | (4.20 –)7.50 | 3/10 |
| Aluminum Alloy 6061 | Lightweight, corrosion-resistant, strong | Chassis brackets, wheel wells, structural parts | (2.80 –)4.50 | 5/10 |
| Stainless Steel 304 | Durable, rust-proof, high strength | Exterior grilles, trim pieces, reinforcements | (3.80 –)6.50 | 7/10 |
Case study: A car manufacturer needed a prototype for a new headlight cover. They chose PC plastic because its transparency and impact resistance matched the final production part. The prototype machined in 4 hours and passed a drop test from 1.5 meters onto concrete—proving it could withstand real-world use.
Material Pre-Treatment: Ensuring Stability and Quality
Before machining, all materials undergo strict checks and preparation:
Quality inspection: Check materials for cracks, bubbles, or impurities. A sheet of ABS plastic with an internal bubble would create a hole in the prototype. Faulty materials get rejected immediately.
Drying: Plastics like ABS and PC absorb moisture from the air. This moisture causes warping during machining. Shop dry them in an oven at 80–100°C for 2–4 hours to remove moisture completely.
Stress relief: Metals like aluminum and stainless steel have internal stress from manufacturing. If not relieved, this stress causes the prototype to bend after machining. Heating to 150–200°C and cooling slowly prevents this problem.
Data point: Industry studies show that pre-treated materials reduce prototype defects by 45%. Dried ABS plastic prototypes have 30% less warping than undried ones.
Which Machining Methods Work Best for Car Prototypes?
The machining process of prototype car models typically uses two main methods: CNC machining for precision and consistency, and 3D printing for speed and complex shapes.
CNC Machining: Precision for Critical Parts
CNC machining uses computer-controlled tools to cut and shape materials with ultra-high accuracy—down to ±0.005mm. It is perfect for:
Complex shapes: Parts with curves, holes, or internal features like a prototype gearbox housing with multiple cavities.
High-volume prototypes: Making 10 or more identical parts—for example, 20 prototype door handles for testing.
Metal prototypes: Aluminum or stainless steel parts that need strength, like chassis brackets or suspension components.
How it works for car prototypes:
- The CAD model converts to G-code (machine instructions)
- The material clamps to the CNC machine’s worktable
- Tools like end mills and drills cut the material into the prototype shape
Example: A manufacturer used CNC machining to make 50 prototype suspension arms from aluminum alloy 6061. The machine ran 24/7, producing 10 arms per day—each with identical dimensions. The prototypes were tested for strength and fit, and only 2 needed minor adjustments.
3D Printing: Speed for Complex Designs
3D printing builds prototypes layer by layer from a digital model. It is ideal for:
Rapid prototyping: Making a prototype in hours instead of days—like a new center console mock-up in 6 hours.
Complex structures: Parts with internal channels or lattice patterns that CNC machining cannot reach, such as a prototype seat frame with weight-saving holes.
Low-volume prototypes: One to five parts for initial concept testing.
Common 3D printing technologies for car prototypes:
- FDM (Fused Deposition Modeling): Uses plastic filaments (ABS, PC) for low-cost prototypes—great for interior mock-ups
- SLA (Stereolithography): Uses resin for high-detail prototypes with smooth surfaces—perfect for transparent parts like headlight covers
Success story: A startup used FDM 3D printing to make a prototype of a new electric car’s dashboard. They printed 3 versions with different button layouts in just 2 days. By testing each version with users, they chose the most user-friendly design—saving 4 weeks of CNC machining time.
How Does Post-Treatment Finish and Assemble Prototypes?
The machining process of prototype car models does not end with cutting. Post-treatment gives the prototype its final look and ensures it functions properly.
Surface Finishing: Enhancing Aesthetics and Durability
Surface treatments make the prototype look and feel like a real car part. Common methods include:
Sanding: Uses sandpaper from 120 to 400 grit to smooth rough edges. A CNC-machined aluminum prototype’s edges get sanded to remove visible tool marks.
Painting: Applies automotive-grade paint to match the final car’s color. A prototype hood might be painted metallic silver to mimic the production model exactly.
Silk screen printing: Adds logos or labels—like “airbag” labels on a prototype steering wheel or control symbols on buttons.
Electroplating: Coats metal prototypes with a thin layer of chrome or nickel for a shiny, rust-resistant finish. This is common for exterior trim prototypes.
Example: A luxury car brand painted a prototype door panel with the same matte black paint used in production. Users testing the prototype said the finish felt “premium,” confirming the design choice before tooling investment.
Assembly and Adjustment: Ensuring Fit and Function
After surface finishing, prototype parts assemble to check how they work together:
Fit check: Parts join together—like attaching a prototype dashboard to the steering column—to ensure no gaps or misalignments exist. A gap larger than 0.5mm between parts means adjustments are needed.
Movement test: Moving parts like prototype door hinges or seat sliders test for smooth operation. A prototype door should open and close with minimal force—typically 5–10 Newtons.
Common issue and fix: A prototype car’s trunk lid did not close properly because the hinge brackets were 0.3mm too thick. Engineers sanded the brackets to reduce thickness, fixing the issue in 30 minutes instead of remaking parts.
What Validation Testing Ensures Prototype Performance?
The final step in the machining process of prototype car models is testing. This ensures the prototype meets design goals and is ready for further development.
Functional Testing: Checking How the Prototype Works
Functional tests verify that the prototype performs as intended:
Mechanical performance testing: Measures strength, durability, and load capacity. For example, a prototype chassis bracket gets pulled until it bends to find its breaking point.
Durability testing: Repeats movements to simulate long-term use. A prototype door handle might be pulled 10,000 times to ensure it does not break or wear out.
Environmental adaptability testing: Exposes the prototype to extreme conditions. A prototype exterior trim part might test at -40°C (winter conditions) and 80°C (summer heat) to check for warping or cracking.
Data example: A prototype battery housing was tested for water resistance. It submerged in 1 meter of water for 30 minutes. No water leaked inside, meeting the car’s safety standards for electrical components.
User Experience Testing: Getting Feedback from Real People
User experience testing helps improve the prototype’s usability:
Comfort testing: Users sit in a prototype seat to rate comfort—back support, cushion firmness, and overall feel.
Ease of use testing: Users interact with prototype controls like climate control buttons to see how intuitive and easy they are to operate.
Aesthetics testing: Users rate the prototype’s appearance—color, finish, shape—to ensure it appeals to target customers.
Case study: A car manufacturer tested a prototype infotainment system. Users found the touchscreen buttons too small and hard to press accurately. Designers increased button size in the next prototype. This simple change improved user satisfaction by 60% and prevented a costly complaint after launch.
How to write a spec that gets priced correctly
A drawing is a contract. If it leaves a number open, the shop fills that number in with its own default. The default is rarely the one you had in mind. Put these five lines on every RFQ and most of the back-and-forth disappears before it starts.
- A model you are willing to freeze for the build
- The question the prototype must answer
- Process and material that can answer it
- Tolerance on the features under test
- How many iterations you have budgeted
The point is not paperwork. Each line removes a decision the shop would otherwise make for you. A complete RFQ comes back priced. An incomplete one comes back guessed.
What actually drives the price
Buyers usually push on material because it is the line they can see. In practice the material is rarely the biggest number on a quote. These five lines decide most of it:
- process choice
- part size and feature count
- material
- finish and fit checks
- number of iterations
Ask for the quote split by line. A supplier who cannot break it down is guessing, and you will pay for the guess. The line you can usually renegotiate is the tolerance band, not the raw material.
Problems you will meet, and the fix
Every process has a failure mode it prefers. The same four show up again and again on this kind of work, and none of them are mysteries once you know what to look for.
- A prototype that is too good and hides a production problem
- A prototype that is too rough to test the real question
- Material chosen for speed rather than for the test
- No measurement plan, so the result is an opinion
Catch the fault on the first part, not the hundredth. A first-article check costs an hour. A bad batch costs the whole order. Write the check into the purchase order so nobody has to remember it.
What Real Problems Do Car Prototypes Solve?
Here are three cases showing how proper machining prevented major issues.
Case 1: The Dashboard That Did Not Fit
A midsize car manufacturer designed a new dashboard with complex curves. They rushed through design review and sent files directly to machining. The first prototype revealed the dashboard edge hit the steering column—a 0.8mm interference that made installation impossible. Rework cost $3,500 and delayed testing by 10 days. A simple gypsum sample would have caught this for under $200.
Case 2: The Door Handle That Broke
An electric vehicle startup tested prototype door handles made from ABS plastic. During durability testing, handles broke after just 1,500 cycles—far below their 10,000-cycle target. Investigation showed the internal lever was too thin at the pivot point. They increased thickness by 1.2mm, switched to PC plastic for better strength, and retested. The new prototypes survived 15,000 cycles. Catching this early saved a recall that would have affected 5,000 vehicles.
Case 3: The Trim That Faded
A luxury SUV brand tested exterior trim prototypes made from painted aluminum. After 500 hours of UV exposure in testing, the paint faded noticeably. They switched to a different paint formulation with UV inhibitors and retested. The new prototypes showed minimal fading after 2,000 hours. Fixing this before production prevented customer complaints about appearance after one year of ownership.
The machining process of prototype car models transforms digital designs into physical parts that engineers can touch, test, and refine. Starting with careful design and material selection, moving through precision machining, and finishing with thorough post-treatment and validation, each step builds confidence that the final production part will perform as intended. Real cases show that companies investing time in proper prototyping avoid costly fit issues, durability failures, and user complaints. Whether you are developing interior trim, structural brackets, or exterior panels, understanding this process helps you make smarter decisions and bring better vehicles to market faster.
Our solution for Machining Process
YiguProto runs rapid prototyping in house, from a single prototype to a production batch. We quote the process, the material and the finish as separate lines, so you can see where the money goes instead of arguing with one number.
Send a STEP file or a drawing and you get a DFM report in one to two business days. It flags the features that add cost and the features that will not hold tolerance on the process you picked.
Every order ships with an inspection report on the features you call out. If a part misses, we make it again. Ready to price a part? Start with a free quote and DFM review, or read more about our rapid prototyping. You can also talk to an engineer before you commit to a drawing.
FAQ about Machining Process
What files do you need in order to quote?
A STEP file plus a PDF drawing that carries the same revision letter. The model carries the geometry and the drawing carries the intent. When the two disagree, the shop picks one, and it is never the one you meant.
What should I check before approving the parts?
Datums first, then the features that mate, then the cosmetic faces. Ask for a dimensional report, a material certificate and a finish sample. A part can be inside every tolerance and still not fit, so assemble one before you sign.
How do I compare two quotes fairly?
Match the scope first: same drawing, same material, same finish, same inspection. Then read the exclusions. Freight, tooling and certificates are the usual gaps, and a low number with three gaps is not a low number.
What is the lead time for Machining Process?
Expect 3 to 7 business days for a first article. Tooling, material stock and the finishing queue all move that number, so we confirm the date in writing before the run starts rather than after.
What material should I specify?
Specify by standard, not by trade name. A trade name can change under you between two orders; a standard number cannot. Then add the one property that actually decides the part, whether that is strength, heat resistance or chemical exposure.
What happens if a part is out of specification?
We measure it against the same drawing you approved and, if it misses, we make it again. What matters is that the report exists, because a disagreement without data is just an opinion.
The short version
Machining Process rewards the buyer who reads the data sheet and the drawing together. Pick the option for the property that matters, not for the price per kilo.
Tighten only what mates. Test a sample before the run. Then let the process do the rest.