
Rapid Prototyping
How Do You Scale Prototyping for Large Quantities of Precision Parts?
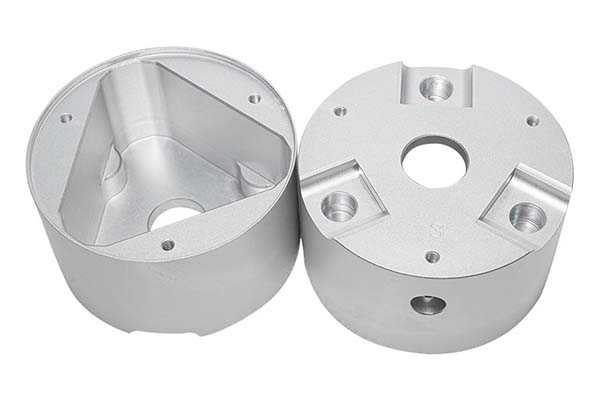
If you’ve ever moved from a successful prototype to full production, you know the challenge: how do you make 1,000 precision parts that are as good as the first one? Large quantities of precision prototype parts present a unique challenge. Unlike one-off prototypes where you can carefully nurse each part through the process, scaling up requires systems. Every part must meet the same tight tolerances.
Why Is Scaling Different from One-Off Prototyping?
The Fundamental Shift
When you make one prototype, you can:
- Watch every cut carefully
- Adjust feeds and speeds as needed
- Inspect thoroughly after each operation
- Rework if something goes wrong
When you scale to large quantities, everything changes:
- You can’t watch every part
- Process must run without constant adjustment
- Inspection becomes statistical
- Rework costs multiply
Real Case: A medical device company made 5 prototype surgical tools with CNC machining. Each one took 4 hours but came out perfect. When they tried to scale to 500 units using the same approach, they quickly realized they’d need 2,000 machine hours—impossible for their timeline. They had to redesign the process for scale.
Key Differences at a Glance
| Factor | One-Off Prototype | Large Quantity Production |
|---|---|---|
| Setup time | Acceptable to be high | Must be minimized |
| Tool wear | Manageable per part | Critical to monitor |
| Inspection | 100% possible | Statistical sampling |
| Process adjustment | Real-time by operator | Programmed, automated |
| Documentation | Basic | Comprehensive traceability |
| Cost per part | Secondary concern | Primary driver |
What Makes Pre-Production Planning Critical for Scale?
The 80/20 Rule in Scaling
Here’s a truth that saves companies millions: 80% of production problems originate in the planning stage. For large quantities, fixing problems after production starts is expensive.
Why pre-production matters more for scale:
- A small error × 1,000 parts = big problem
- Tooling decisions lock in costs for the entire run
- Material choices affect every part
- Process flow determines throughput
Design for Manufacturing (DFM) at Scale
DFM principles become non-negotiable when scaling up:
Simplify Geometry:
- Avoid deep, small-diameter holes (hard to machine consistently)
- Eliminate unnecessary undercuts (require special tooling)
- Replace complex curves with simpler profiles when possible
- Design for standard tool sizes (reduces tool changes)
Standardize Features:
- Use same thread sizes across parts
- Standardize hole diameters
- Consistent corner radii
- Common wall thicknesses
Real Case: An automotive supplier designed a bracket with five different hole sizes. During prototype phase, this was fine. For production of 10,000 units, each hole size required a tool change. Redesigning to three standard hole sizes cut machining time by 22% and saved $15,000 in tooling costs.
Tolerance Strategy for Large Batches
Tolerances drive cost exponentially as they tighten. For large quantities, every 0.01mm matters.
| Tolerance Range | Relative Cost | Best Use |
|---|---|---|
| ±0.1mm | 1x baseline | Non-critical dimensions, clearance holes |
| ±0.05mm | 1.5-2x baseline | General mating surfaces |
| ±0.025mm | 3-4x baseline | Precision fits, bearing surfaces |
| ±0.01mm | 8-10x baseline | Critical features, aerospace/medical |
Rule of Thumb: Loosen every tolerance that doesn’t affect function. For a 1,000-part run, tightening a single dimension from ±0.1mm to ±0.025mm might add $5-10 per part—$5,000-10,000 total cost increase.
How Do You Select Materials for Volume Production?
Material Consistency Requirements
For large quantities, material consistency becomes critical. Batch-to-batch variation that’s acceptable for one prototype can ruin a production run.
Key Material Considerations:
- Supply stability: Can the supplier deliver consistent quality for the entire run?
- Machinability: How does the material affect tool life and cycle time?
- Heat treatment: Does the material require post-processing that adds steps?
- Cost stability: Will material prices fluctuate during your production window?
Material Selection Matrix
| Material | Machinability | Tool Life | Consistency | Cost | Best For |
|---|---|---|---|---|---|
| 6061 Aluminum | Excellent | Very good | Excellent | Low | High-volume, general parts |
| 303 Stainless | Good | Good | Good | Medium | Corrosion-resistant parts |
| 316 Stainless | Fair | Fair | Good | Medium-High | Medical, food contact |
| 12L14 Steel | Excellent | Very good | Excellent | Low | High-volume, non-critical |
| 4140 Steel | Good | Good | Good | Medium | High-strength parts |
| Titanium (Grade 5) | Poor | Poor | Good | Very High | Aerospace, medical implants |
| PEEK | Good | Good | Good | High | High-temp plastic replacements |
Real Case: A robotics company planned 5,000 aluminum parts using 7075 alloy for maximum strength. During pilot production, they found 7075 machined slower and wore tools faster than 6061. Switching to 6061 (still strong enough) reduced cycle time by 35% and tool costs by 50%, saving $28,000 on the run.
Supply Chain Considerations
For large quantities, material availability matters as much as properties:
- Lead times: Can the supplier deliver the entire quantity when needed?
- Minimum orders: Will you have excess material to store?
- Certification: Does the material come with traceability documentation?
- Alternative sources: Is there a backup supplier if the primary fails?
What Process Planning Ensures Smooth Production?
Process Flow Design
For large quantities, how parts move through your shop matters as much as how they’re made.
Process Flow Principles:
- Minimize material handling: Arrange equipment in process order
- Batch intelligently: Group similar parts to reduce setup changes
- Balance operations: Ensure no station creates a bottleneck
- Build in buffers: Allow for minor disruptions without stopping the line
- Standardize work: Document exactly how each operation runs
Equipment Selection for Volume
Not all machines are created equal for high-volume work:
| Machine Type | Best For | Setup Time | Cycle Time | Precision |
|---|---|---|---|---|
| CNC Machining Center | Complex 3D parts | Medium | Medium | High |
| CNC Lathe | Cylindrical parts | Low | Fast | High |
| Swiss-type Lathe | Small, complex | High | Fast | Very High |
| Multi-tasking Machine | Complete parts in one setup | High | Fast | High |
| Transfer Line | Dedicated high-volume | Very High | Very Fast | Medium |
| Rotary Transfer | Medium parts, multiple ops | Medium | Fast | Medium-High |
Real Case: A connector manufacturer needed 50,000 small brass parts annually. They initially quoted CNC lathes at $2.50 per part. Switching to a rotary transfer machine with $80,000 setup cost dropped per-part cost to $0.85 after 20,000 units—saving $82,500 over two years.
Tooling Strategy for Large Batches
Tool wear that’s negligible for 10 parts becomes critical for 1,000.
Tool Management Essentials:
- Tool life tracking: Know exactly how many parts each tool can make
- Preset tooling: Have replacement tools ready to minimize downtime
- Tool coatings: Use appropriate coatings to extend life (TiAlN for abrasive materials, diamond-like carbon for aluminum)
- Tool offsets: Program automatic compensation as tools wear
Data Point: Proper tool management can extend tool life by 30-50% and reduce setup time by 40% in high-volume production.
How Do You Execute Production Efficiently?
Batch Machining Strategies
For large quantities, how you batch work affects both efficiency and quality.
Batch Size Considerations:
- Small batches (50-100): More setups, more flexibility
- Medium batches (100-500): Good balance for most shops
- Large batches (500+): Fewer setups, less flexibility, higher risk if something goes wrong
Batch Sequencing:
- Run similar parts together to minimize tool changes
- Schedule from simple to complex as operators gain confidence
- Build in quality checks between batches
Real-Time Monitoring for Volume
You can’t watch every part, but you can monitor the process:
What to Monitor:
- Spindle load: Detects tool wear before it affects parts
- Temperature: Prevents thermal drift in precision features
- Vibration: Catches chatter before it ruins surface finish
- Cycle time: Flags when operations take longer than expected
- Tool life: Alerts when tools need replacement
Real Case: An aerospace supplier used spindle load monitoring on a run of 2,000 titanium parts. When load increased by 8% on one machine, the system alerted operators. They found a worn tool and replaced it after 180 parts instead of the planned 200. The early replacement saved 22 parts that would have been out of tolerance.
First Article and Pilot Runs
Never jump straight to full production. Use a phased approach:
Phase 1: First Article
- Run 1-5 parts
- Inspect 100% thoroughly
- Verify all features meet specs
- Confirm cycle time estimates
Phase 2: Pilot Run
- Run 50-100 parts (or 5-10% of total)
- Inspect statistically
- Identify process variations
- Adjust as needed
Phase 3: Production Run
- Run remaining quantity
- Monitor trends
- Sample inspect regularly
- Document everything
Data Point: Companies that run pilot phases report 60% fewer quality issues in full production compared to those that jump straight to full runs.
What Quality Control Works for Large Quantities?
Moving from 100% to Statistical Inspection
For large quantities, inspecting every part becomes impractical. You need statistical process control.
Sampling Plans:
- ANSI/ASQ Z1.4: General sampling standard
- ANSI/ASQ Z1.9: Variables sampling (uses measurements, not just pass/fail)
- C=0 plans: Zero-acceptance sampling for critical applications
Sample Size Guidelines:
- Stable processes: Sample 5-10% of parts
- New processes: Sample 20-30% initially, reduce as confidence grows
- Critical features: May need 100% inspection regardless
In-Process vs. Final Inspection
Don’t wait until the end to find problems:
In-Process Checks:
- After each operation for critical features
- First part of each batch
- After tool changes
- At shift changes
Final Inspection:
- Sample according to plan
- Check all features on sampled parts
- Verify documentation complete
- Prepare certificates of compliance
Common Defects in Volume Production
| Defect Type | Typical Cause | Prevention Strategy |
|---|---|---|
| Dimensional drift | Tool wear, temperature | Monitor trends, compensate automatically |
| Surface finish degradation | Tool wear, coolant issues | Regular tool changes, coolant management |
| Burr formation | Tool geometry, feeds | Optimize tool paths, secondary deburring |
| Part-to-part variation | Fixture issues, material variation | Verify fixtures regularly, control material batches |
| Assembly fit problems | Tolerance stack-up | GD&T analysis, functional gauging |
Real Case: A pump manufacturer found that 3% of their 5,000-part run had incorrect bore diameters. Analysis showed the problem started after 200 parts and got progressively worse—classic tool wear. They implemented in-process gauging every 50 parts and caught the next tool change at exactly the right time, reducing defects to 0.2%.
How Do You Manage Post-Production Logistics?
Inventory Management for Large Batches
After production, you need to track what you’ve made:
Inventory Systems:
- Lot tracking: Every part traceable to its production batch
- First-in, first-out: Oldest parts ship first
- Location tracking: Know exactly where each batch is stored
- Quantity verification: Regular cycle counts
Packaging for Volume Shipments
Packaging that works for one prototype fails for 1,000 parts:
Packaging Considerations:
- Protection: Parts shouldn’t touch each other
- Identification: Clear labels on every box
- Quantity: Consistent counts per container
- Handling: Designed for warehouse and shipping
- Documentation: Packing lists, certificates, labels
Real Case: A medical device company shipped 10,000 precision parts in bulk bags. Parts rubbed together during transport, damaging critical surfaces. Switching to partitioned trays added $0.15 per part in packaging but eliminated $1.20 per part in rework.
Documentation and Traceability
For large quantities, documentation becomes a legal requirement in many industries:
Required Documentation:
- Certificates of conformance
- Material test reports
- Inspection records
- Traceability lot numbers
- Shipping documentation
How to write a spec that gets priced correctly
A drawing is a contract. If it leaves a number open, the shop fills that number in with its own default. The default is rarely the one you had in mind. Put these five lines on every RFQ and most of the back-and-forth disappears before it starts.
- A model you are willing to freeze for the build
- The question the prototype must answer
- Process and material that can answer it
- Tolerance on the features under test
- How many iterations you have budgeted
The point is not paperwork. Each line removes a decision the shop would otherwise make for you. A complete RFQ comes back priced. An incomplete one comes back guessed.
What actually drives the price
Buyers usually push on material because it is the line they can see. In practice the material is rarely the biggest number on a quote. These five lines decide most of it:
- process choice
- part size and feature count
- material
- finish and fit checks
- number of iterations
Ask for the quote split by line. A supplier who cannot break it down is guessing, and you will pay for the guess. The line you can usually renegotiate is the tolerance band, not the raw material.
How Do You Optimize Cost in Volume Production?
Understanding Cost Drivers
| Cost Element | Typical % | How to Optimize |
|---|---|---|
| Material | 20-40% | Buy in bulk, reduce scrap, standardize |
| Machine time | 30-50% | Optimize feeds/speeds, reduce setups |
| Labor | 10-20% | Automate where possible, cross-train |
| Tooling | 5-15% | Track tool life, use coatings, optimize paths |
| Quality | 5-10% | Prevent defects, efficient sampling |
| Overhead | 10-20% | Efficient scheduling, reduced WIP |
Cost-Per-Part Curves
Understanding how cost changes with quantity helps you price correctly:
| Quantity | Cost Per Part (Relative) | Notes |
|---|---|---|
| 10 | 10x | Setup dominates |
| 100 | 3x | Setup spread over more parts |
| 1,000 | 1.2x | Approaching optimal |
| 10,000 | 1.0x (baseline) | Full economies of scale |
| 100,000 | 0.8x | Further optimization possible |
Continuous Improvement for Long Runs
If you’re making large quantities, you have time to improve:
Improvement Cycle:
- Track data on every batch
- Identify top causes of variation or delay
- Test improvements on small batches
- Implement successful changes
- Measure results
- Repeat
Real Case: A connector manufacturer tracked cycle times on a 50,000-part run. After 5,000 parts, they identified a bottleneck at a deburring station. By adding a second station and optimizing the process, they reduced overall production time by 18% for the remaining 45,000 parts.
Scaling from a single prototype to large quantities of precision prototype parts requires a fundamental shift in thinking. What worked for one part won’t work for 1,000. Success comes from systematic planning, robust processes, and continuous monitoring.
The key takeaways from this guide:
- Pre-production planning determines 80% of success—invest time here
- Design for manufacturing simplifies geometry and standardizes features
- Material selection must consider consistency and supply, not just properties
- Process flow design minimizes handling and balances operations
- Tool management becomes critical as volumes increase
- Quality control shifts from 100% inspection to statistical methods
- Documentation and traceability protect you and your customers
- Cost optimization requires understanding how each element scales
Remember that scaling is iterative. The first batch of 1,000 won’t be perfect, but each batch teaches you something. Document what you learn, adjust your processes, and keep improving. The goal isn’t perfection on the first try—it’s consistent quality across every part, every batch, every time.
Whether you’re scaling medical devices, automotive components, or consumer products, following this structured approach will help you deliver precision parts at scale that meet your quality goals and your customers’ expectations.
Our solution for Scale Prototyping
YiguProto runs rapid prototyping in house, from a single prototype to a production batch. We quote the process, the material and the finish as separate lines, so you can see where the money goes instead of arguing with one number.
Send a STEP file or a drawing and you get a DFM report in one to two business days. It flags the features that add cost and the features that will not hold tolerance on the process you picked.
Every order ships with an inspection report on the features you call out. If a part misses, we make it again. Ready to price a part? Start with a free quote and DFM review, or read more about our rapid prototyping. You can also talk to an engineer before you commit to a drawing.
FAQ about Scale Prototyping
What material should I specify?
Specify by standard, not by trade name. A trade name can change under you between two orders; a standard number cannot. Then add the one property that actually decides the part, whether that is strength, heat resistance or chemical exposure.
What happens if a part is out of specification?
We measure it against the same drawing you approved and, if it misses, we make it again. What matters is that the report exists, because a disagreement without data is just an opinion.
How long does a first article take?
Usually a few business days once the drawing is frozen, and longer if tooling is involved. The date we give you is the date we confirm in writing, not the date we hope for.
Can Scale Prototyping be made in small quantities?
Yes, and small quantities are where a good supplier earns the next order. Setup dominates the price at low volume, so the cheapest route is usually the one with the fewest operations, not the cheapest material.
Does the process work for prototypes as well as production?
Yes, and that is usually the point. Running the prototype on the production process removes a whole class of surprises, because the part you test is made the same way as the part you sell.
What is Scale Prototyping used for?
Scale Prototyping turns up wherever the part has to do a real job at a predictable cost: brackets, housings, fixtures, covers and the fittings that hold them together. The honest test is whether the properties match the load and the environment, not whether the material is fashionable.
The short version
Scale Prototyping rewards the buyer who reads the data sheet and the drawing together. Pick the option for the property that matters, not for the price per kilo.
Tighten only what mates. Test a sample before the run. Then let the process do the rest.